
Create an Advanced Workflow
Learn how to create an advance workflow with an example.
On this page, you will learn to create an advanced workflow using an example. Visit the Test Workflow page to learn how you can test the workflows from the Bureau Dashboard and using Postman.
Let's build a workflow to verify an individual's age and identity using basic information and either a One-time Password (OTP) or Knowledge-based Authentication (KBA). We will use 4 capabilities to accomplish this:
- EIDV Search
- Initiate OTP
- KBA Combined
- Verify OTP
Note
These capabilities should already be available to you.
Contact our Support Team if they are not, if you want to customize the existing capabilities, or if you want to create other custom capabilities.
Workflow Breakdown
The below figure gives an overview of how the age verification solution works.
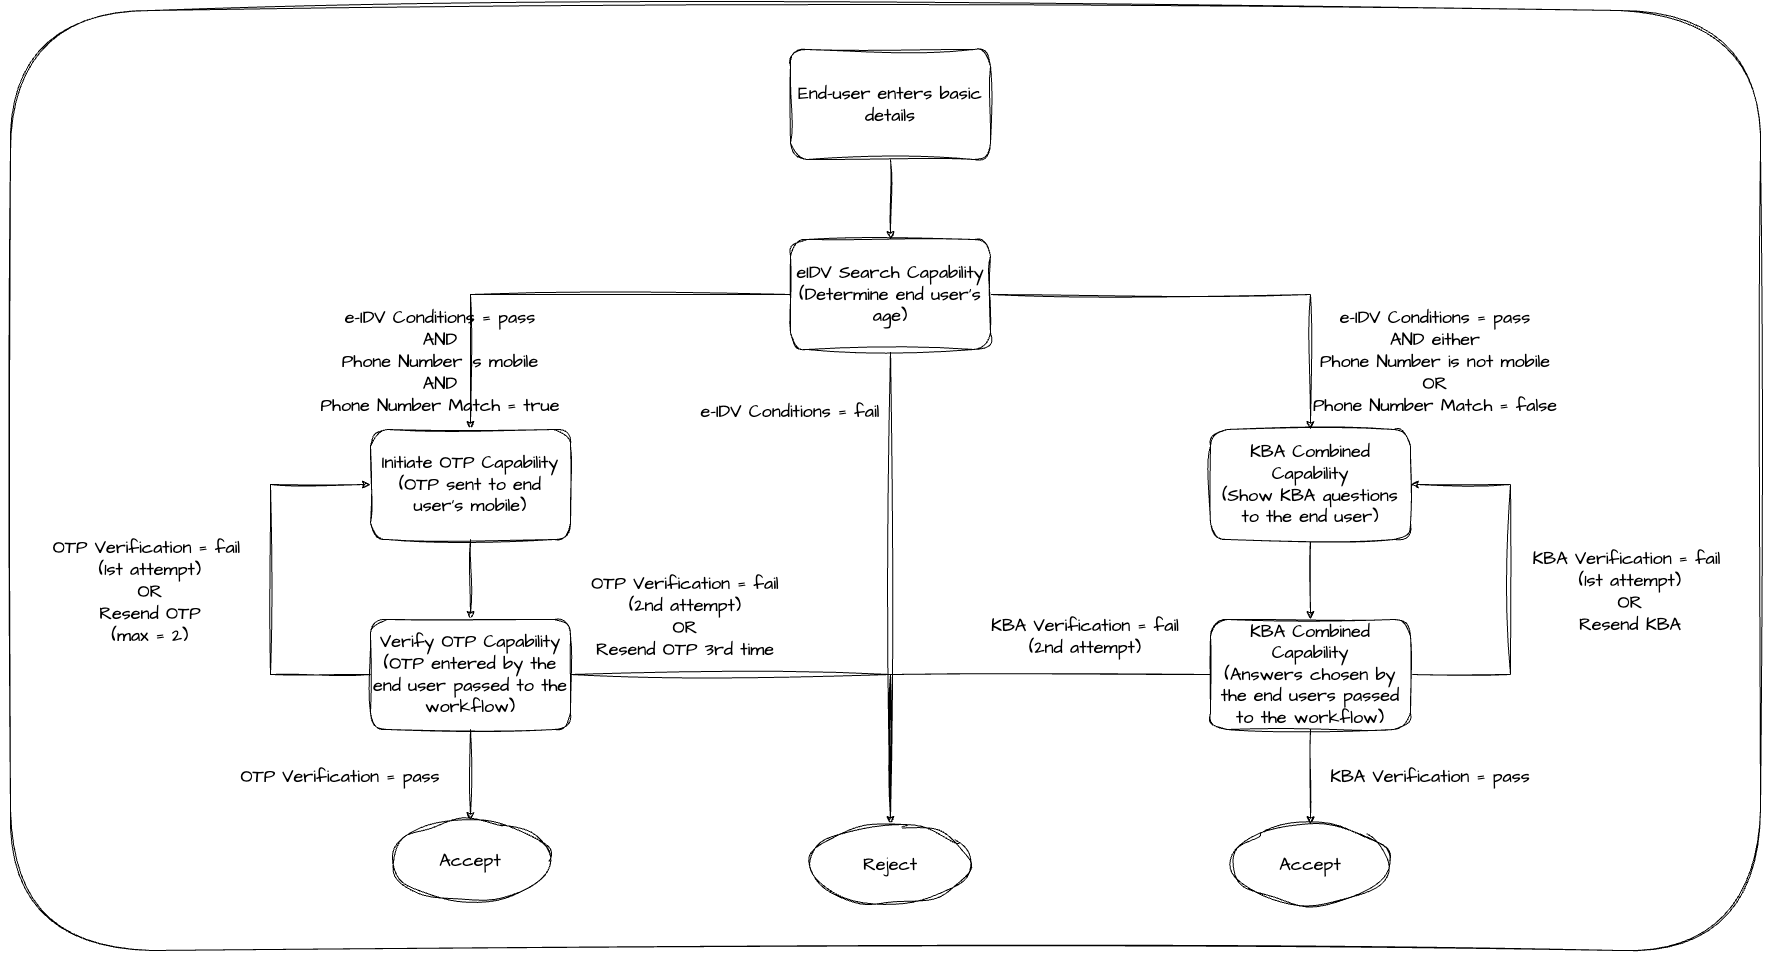
Workflow Breakdown
- User Input: Collect basic information such as the user's name, phone number, address, email, and SSN (optional).
- Age Verification: The EIDV Search capability is used to determine the user's age.
- Identity Verification: This workflow gives you 2 methods to verify a user's identity:
- OTP Verification: Used if the provided phone number is a mobile number and matches the user's phone number in our database.
- Send OTP: The Initiate OTP capability sends an OTP to the user's mobile number.
- Verify OTP: Use the Verify OTP capability to verify the OTP provided by the user.
- KBA Verification: Used if the phone number is not a mobile number or doesn't match the user's information in our database.
- Display KBA Questions: The KBA Combined capability gives you a list of KBA questions. Display these to the user.
- Verify KBA Answers: Verify the answers provided by the user using the KBA Combined capability.
- OTP Verification: Used if the provided phone number is a mobile number and matches the user's phone number in our database.
- Verification Outcome: Based on the pre-defined criteria, the workflow assigns an outcome to each request:
- Accepted: Names match score is above the pre-defined threshold.
- Rejected: Names match score does not meet the match threshold.
- Manual Review: Names have a partial match or other discrepancies requiring human review.
Build the Advance Workflow
Creating a workflow involves three key steps:
- Add capabilities: Select the functionalities needed for the workflow.
- Configure capabilities: Define parameters and settings for each capability.
- Define workflow conditions: Determine the workflow's path using If/Else statements.
Note
This workflow involves complex capabilities, each of which includes predefined end conditions.
No separate end conditions need to be defined for this workflow.
1. Add Capabilities
First, you must select the building blocks for your workflow, known as capabilities. These pre-built modules perform specific functions.
Note
While adding capabilities, keep in mind the overall workflow logic and how each capability contributes to the verification process.
Follow the below steps to add capabilities to a workflow.
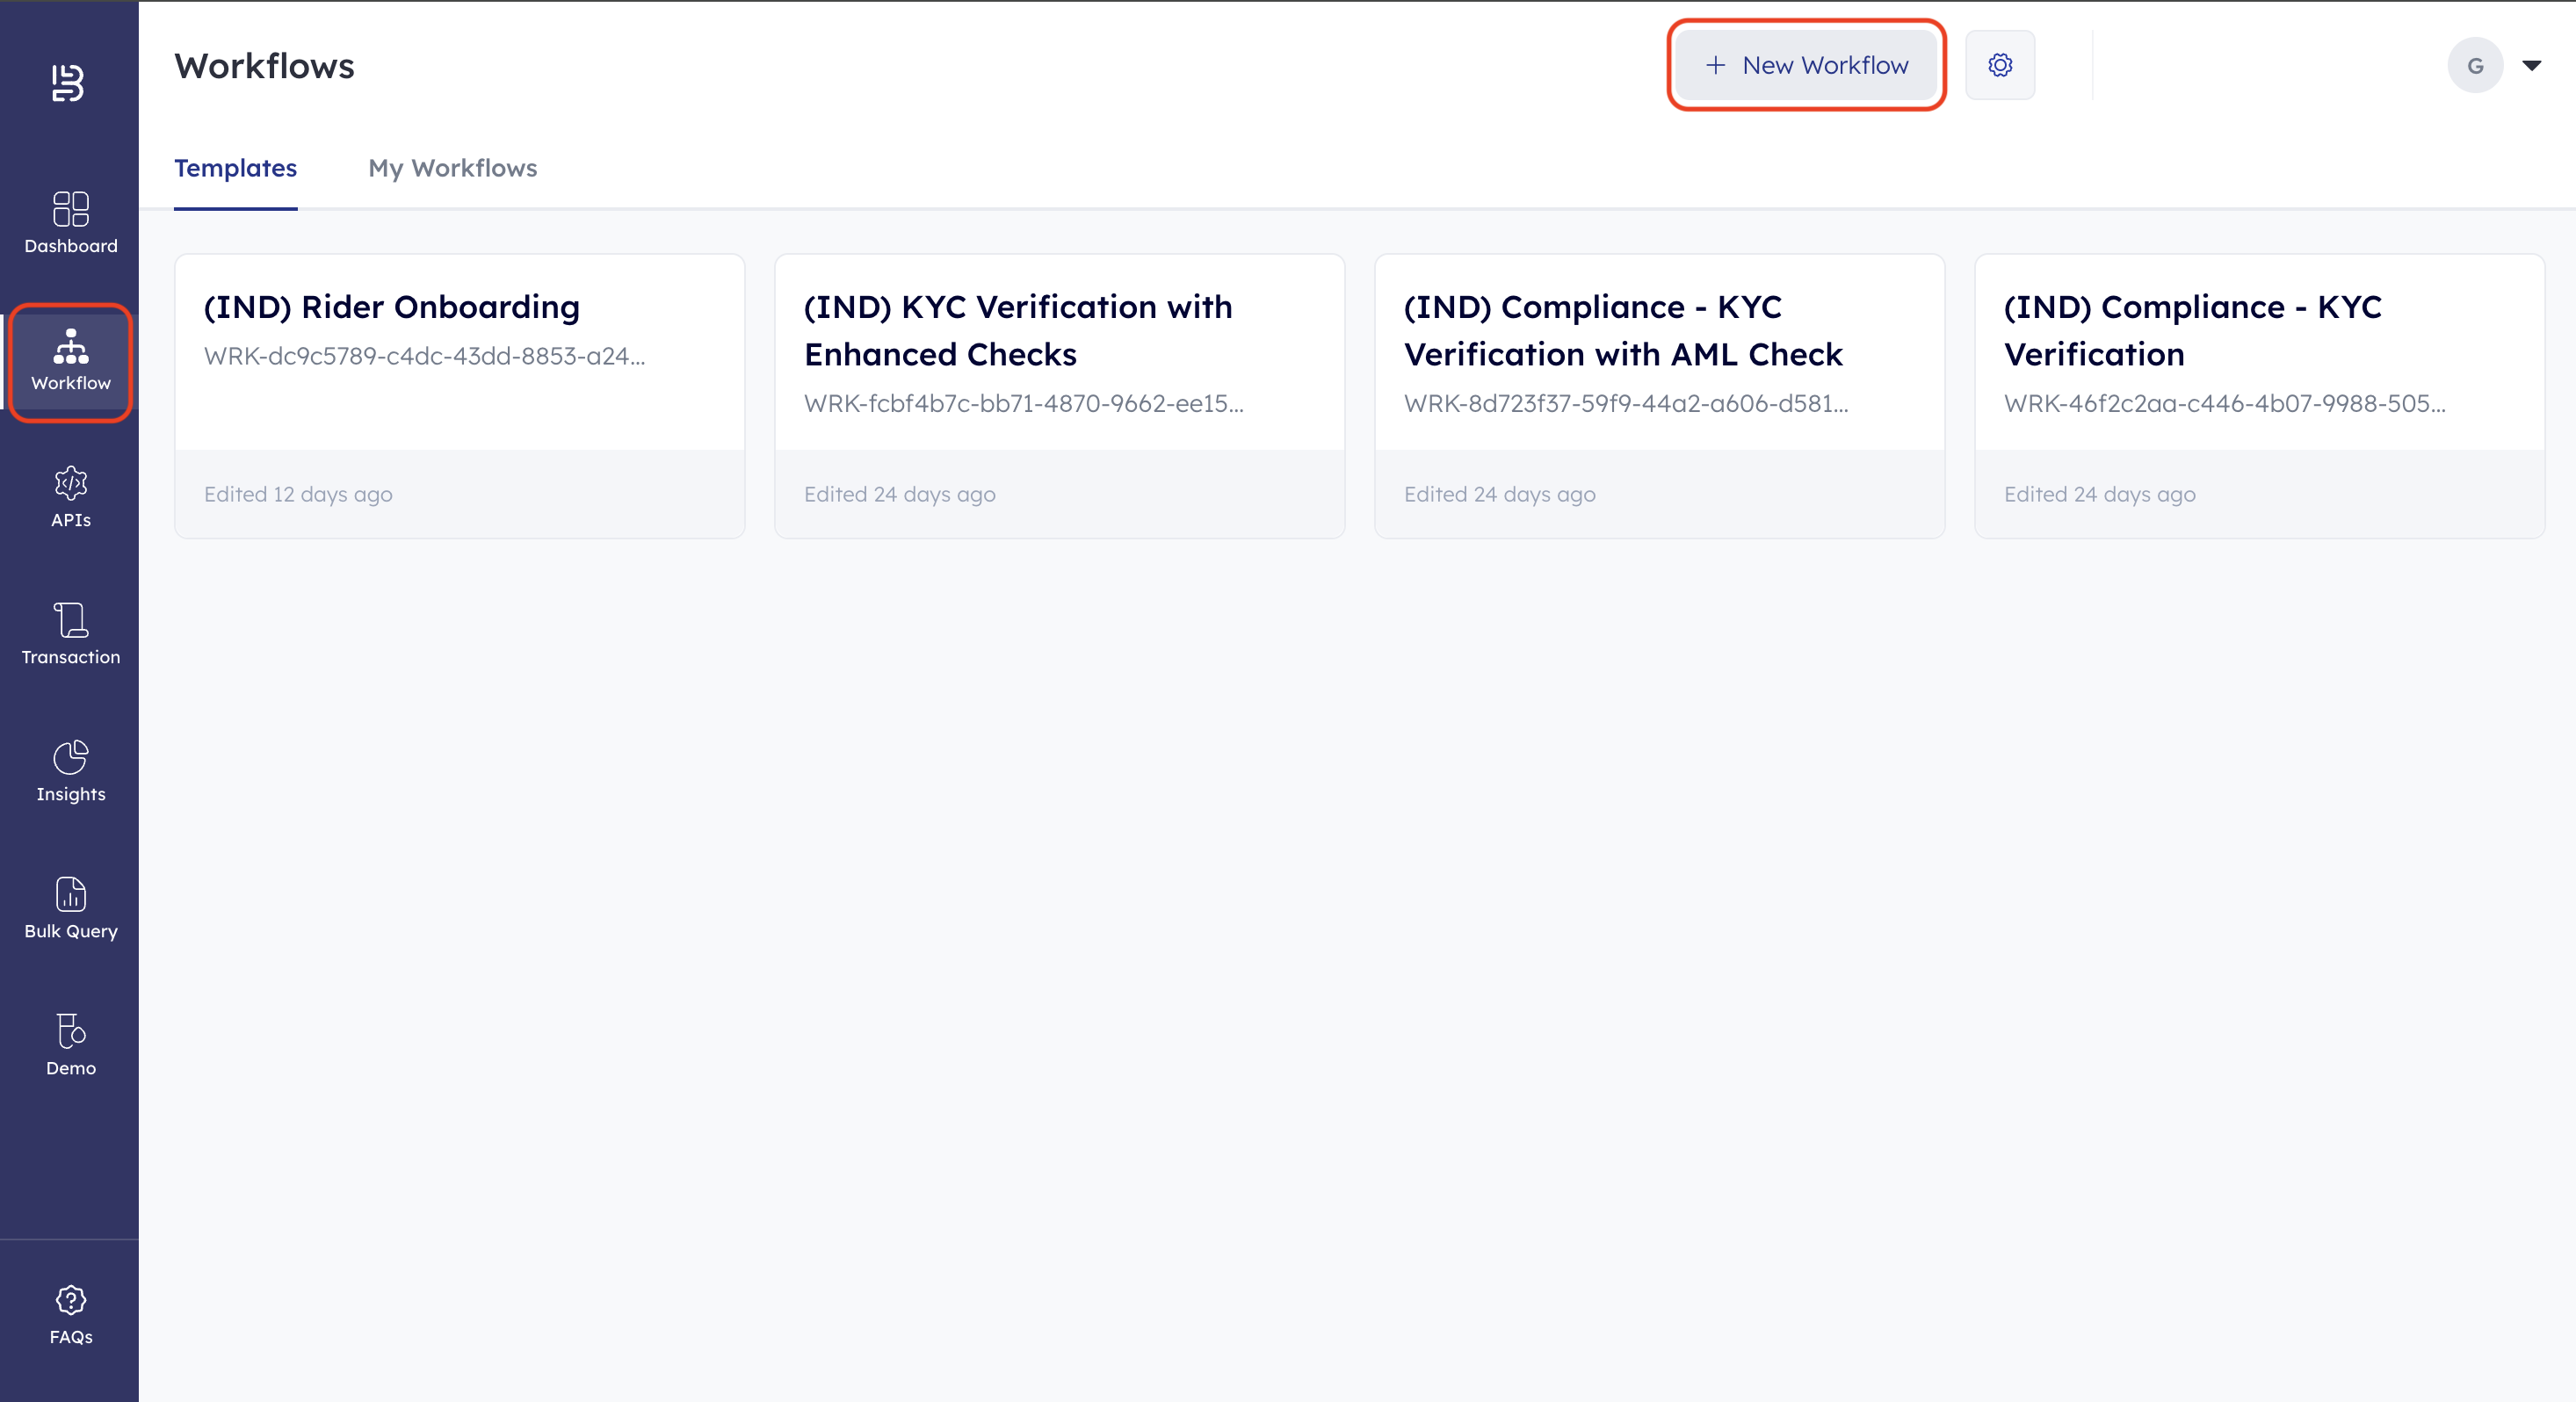
- Log in to the Bureau Dashboard.
- Click Workflows on the left navigation menu and then click + New Workflow.
- Select the purpose for creating the workflow and then click Create Workflow. The available capabilities will depend on the chosen purpose.

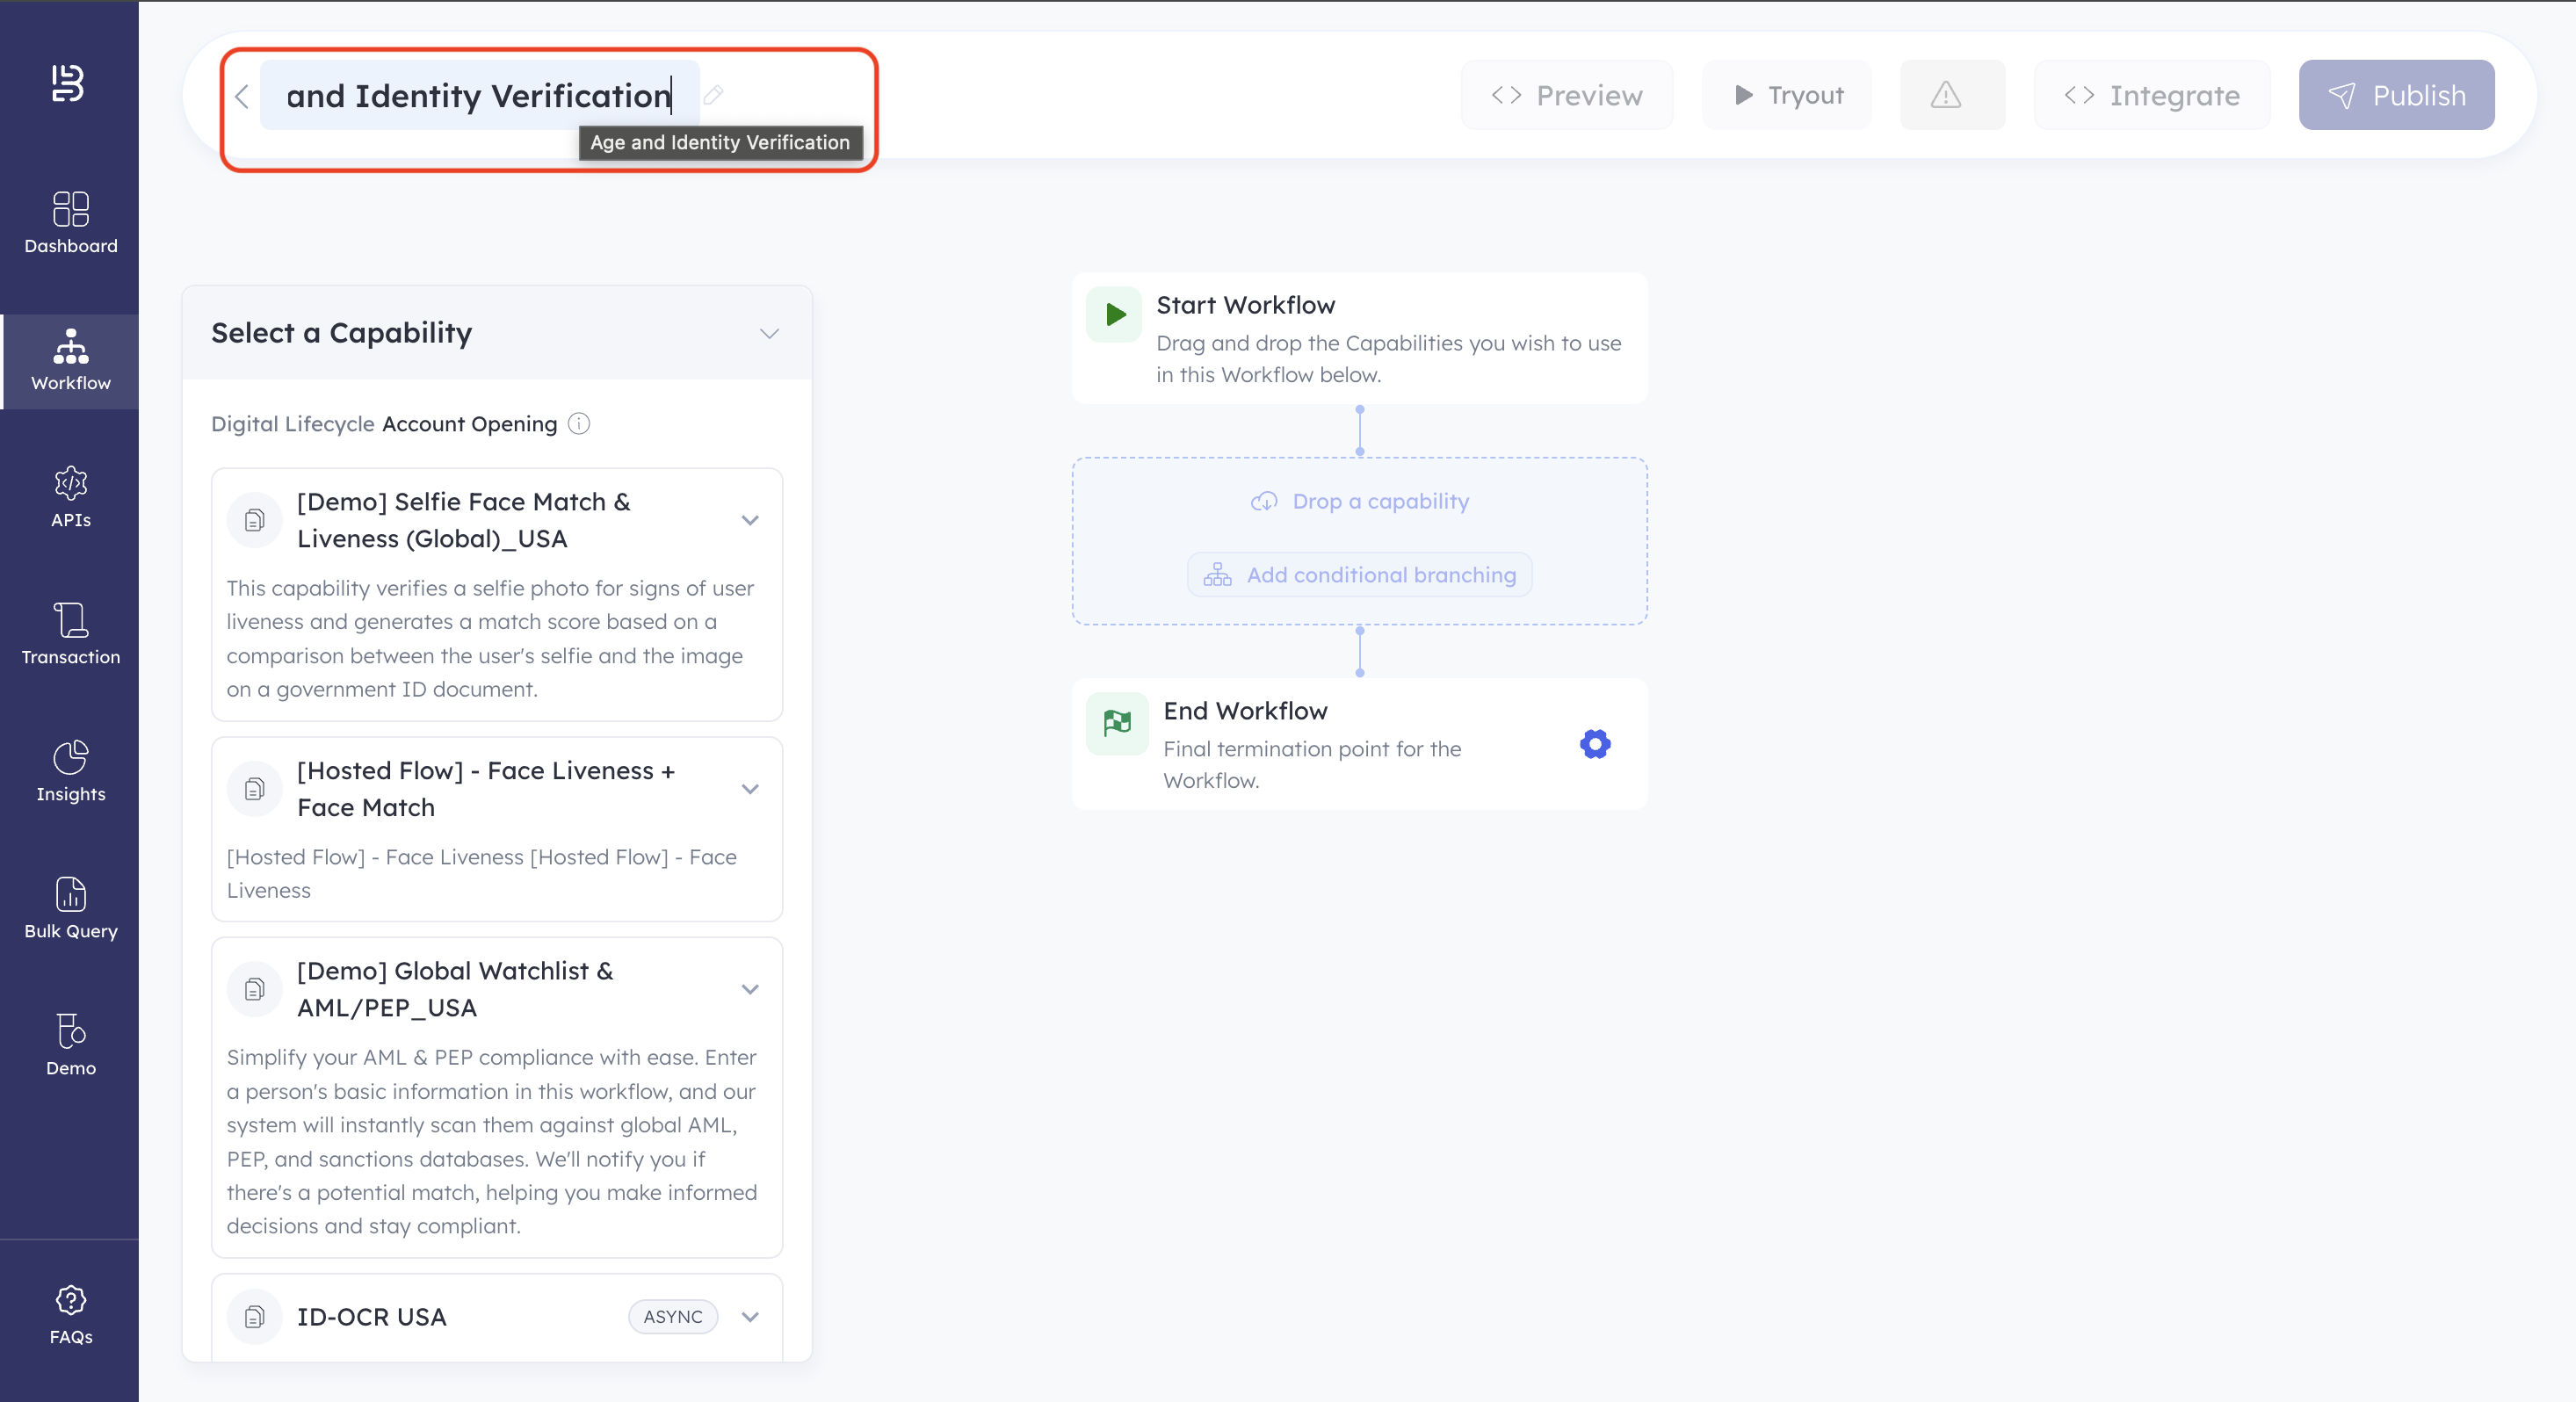
- Name the workflow. This makes it easy to identify and search on the Workflow page. Let us name the workflow Age and Identity Verification.
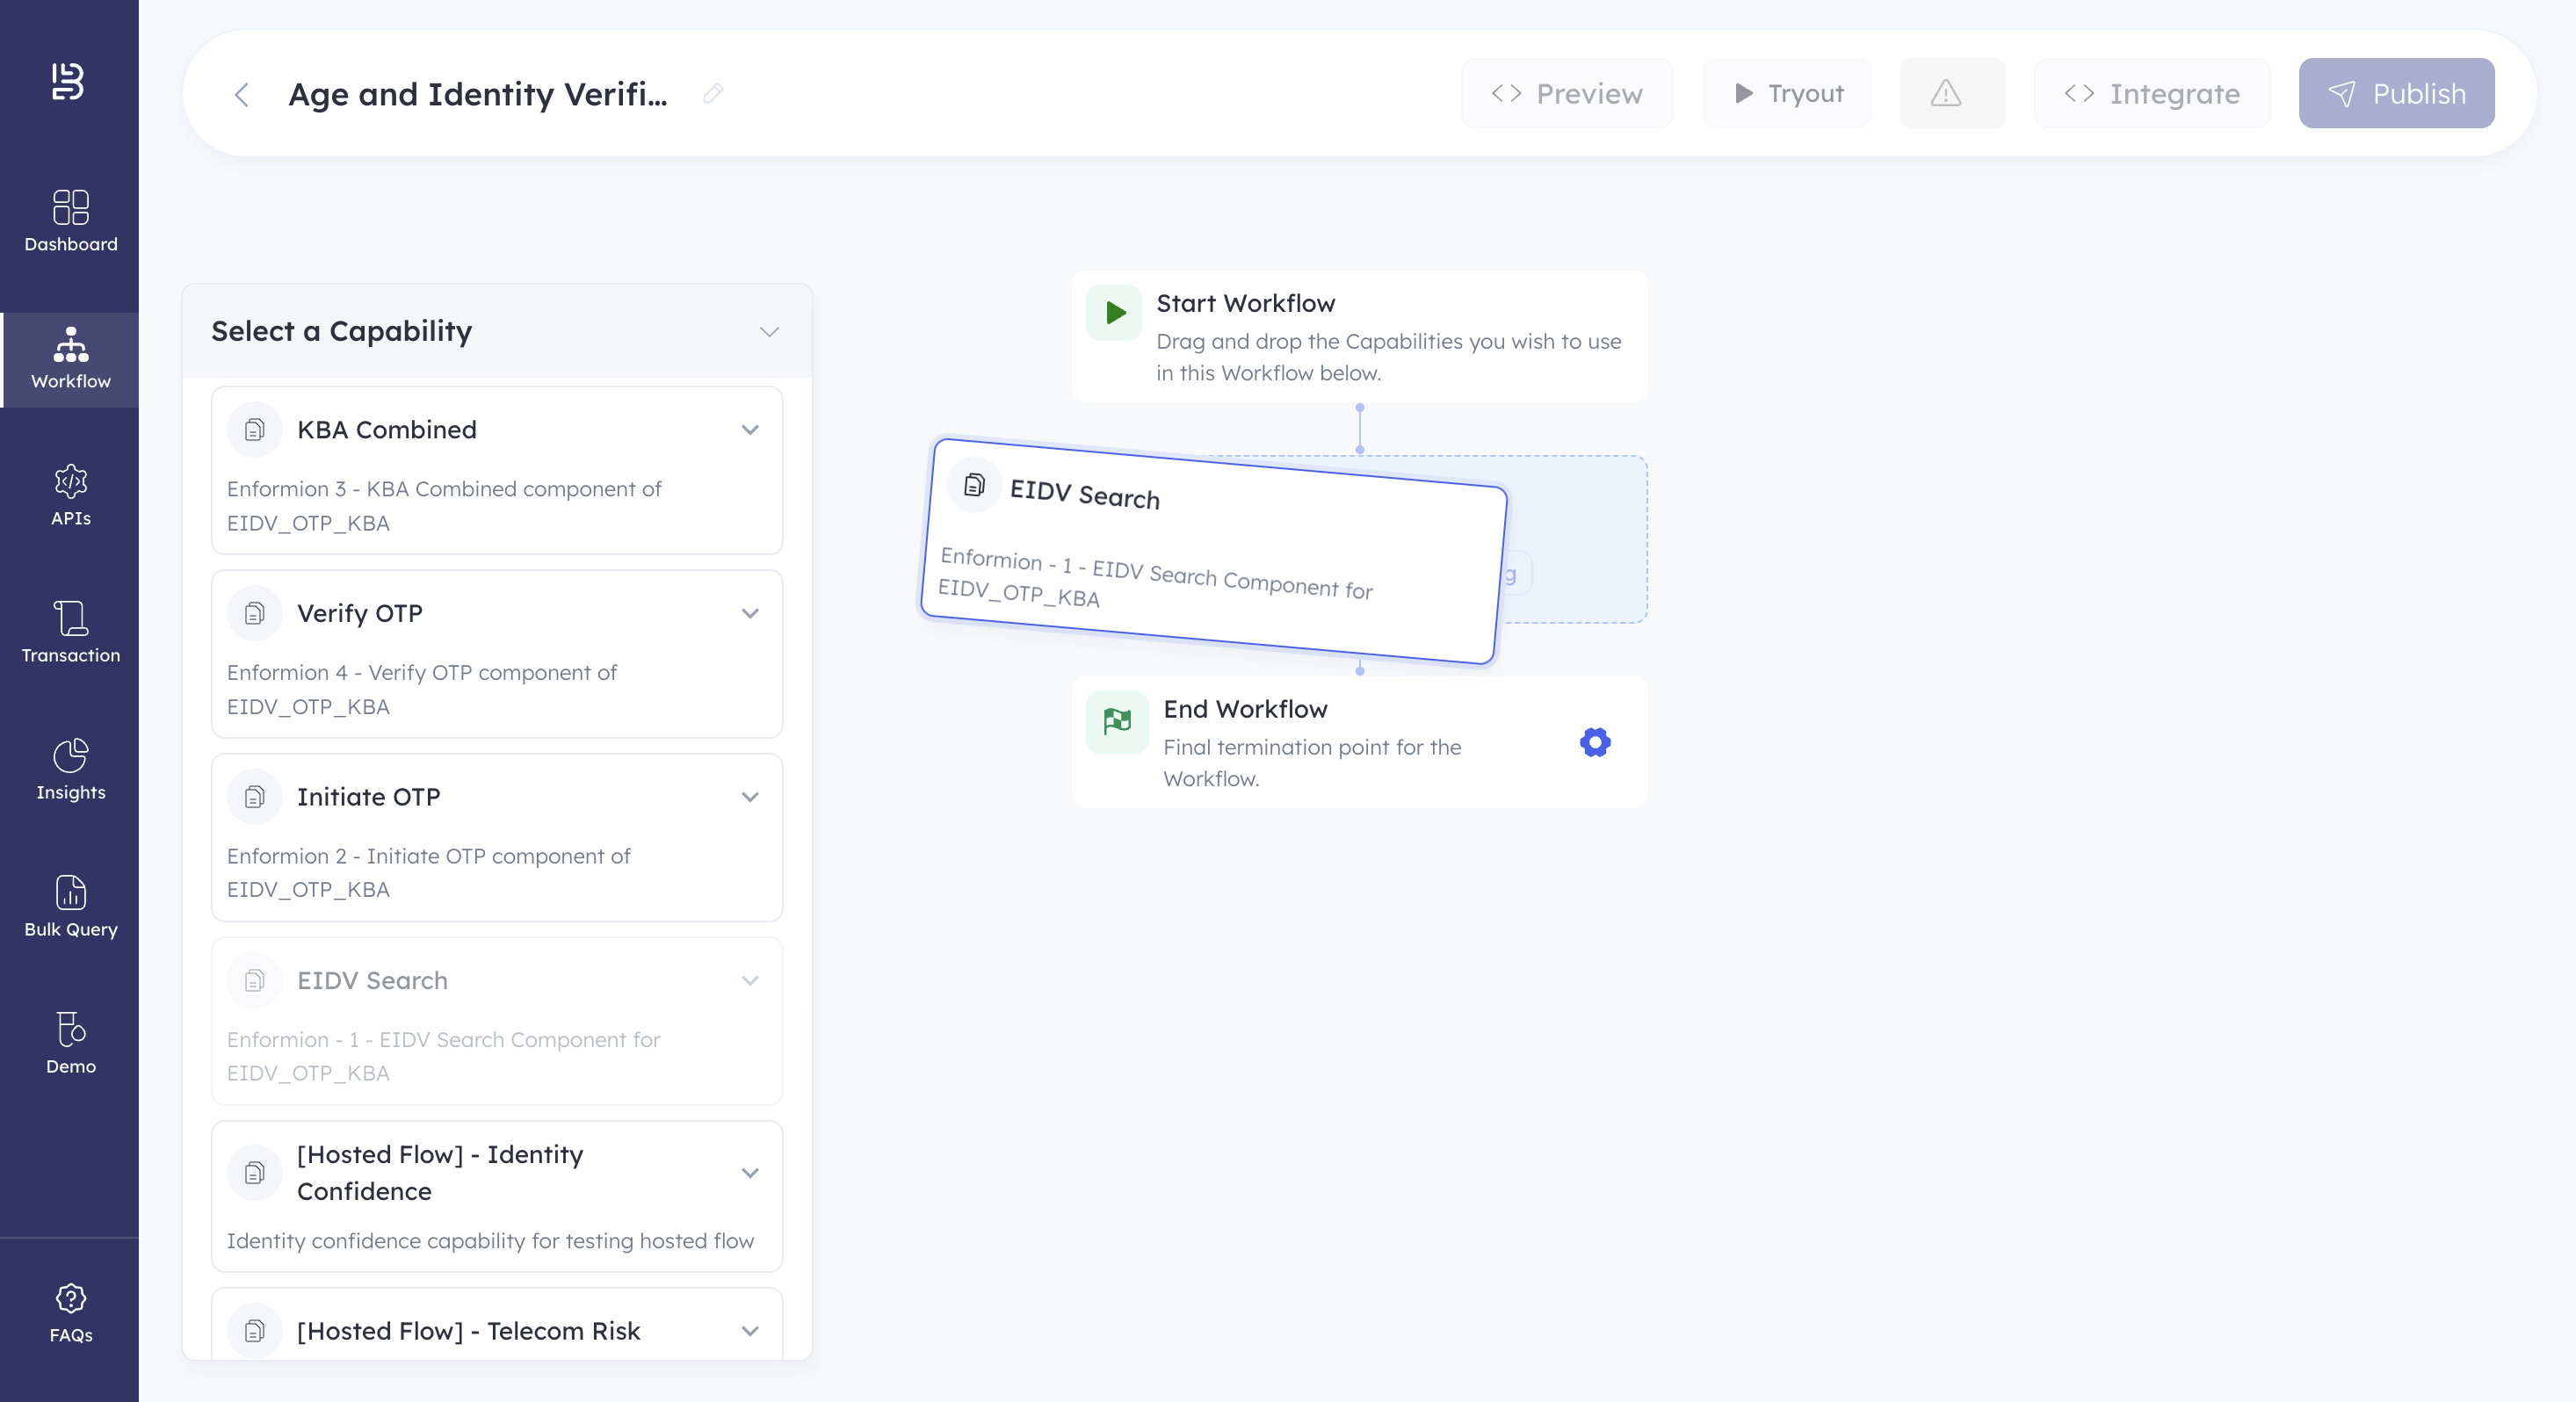
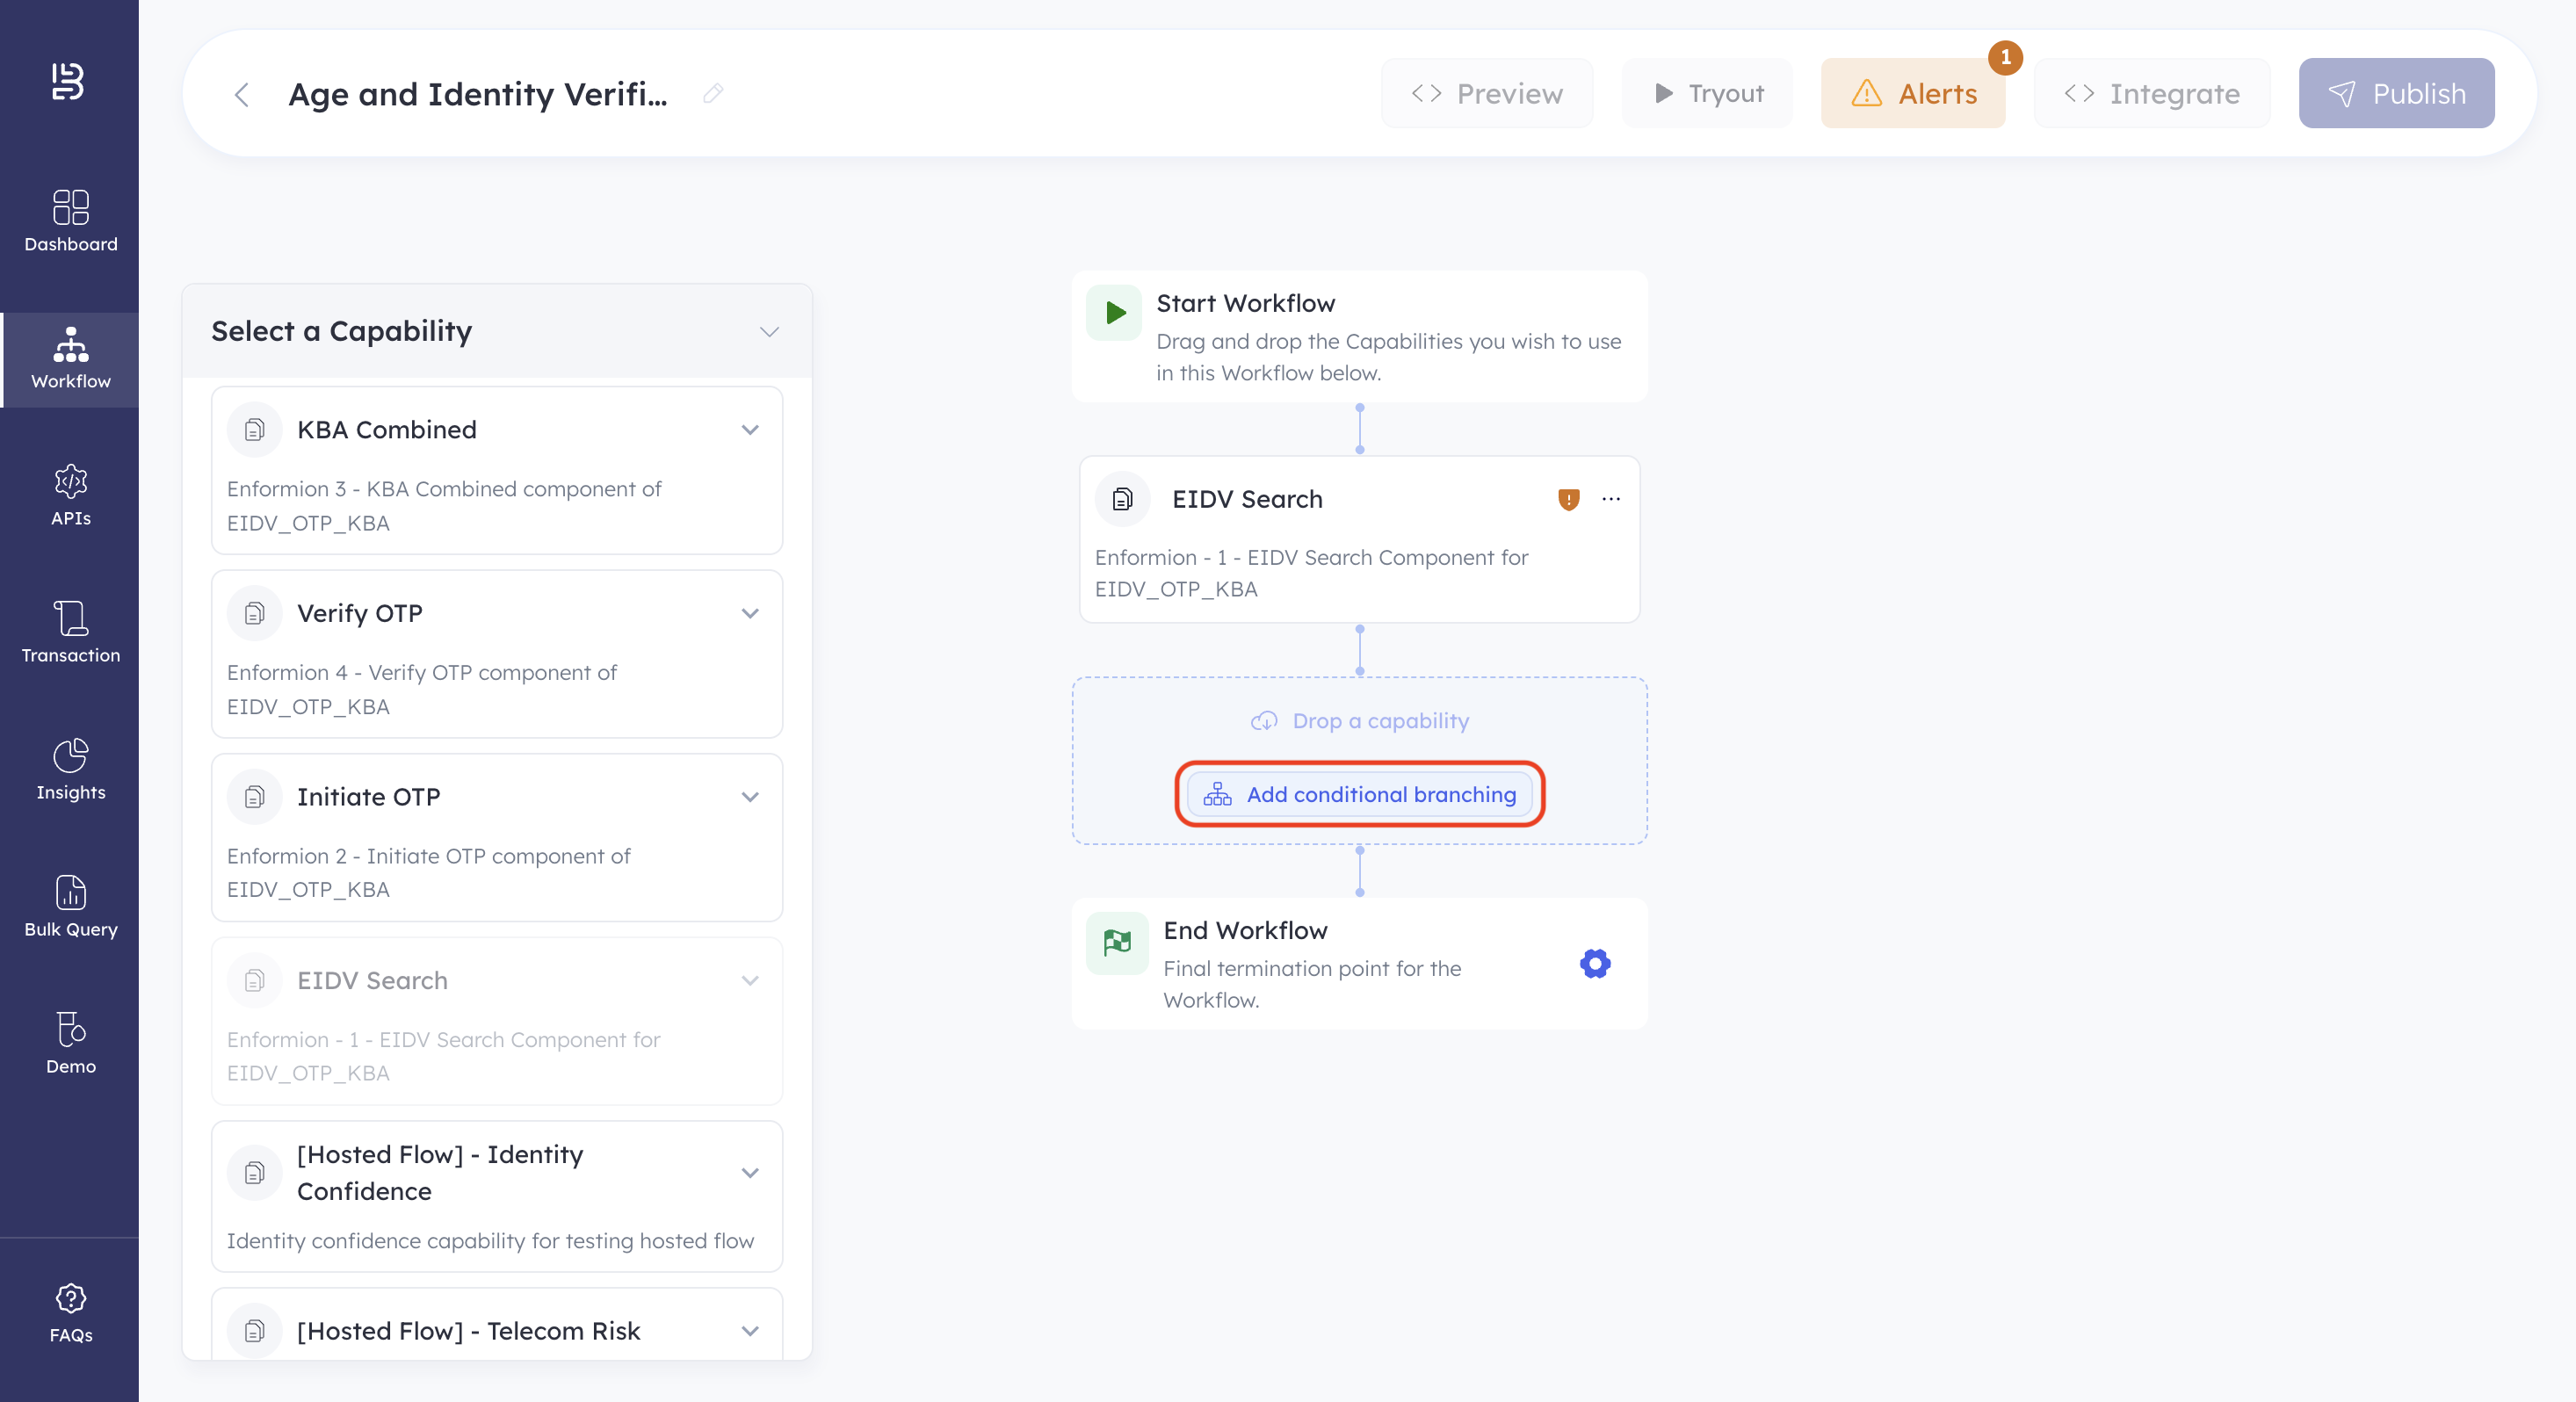
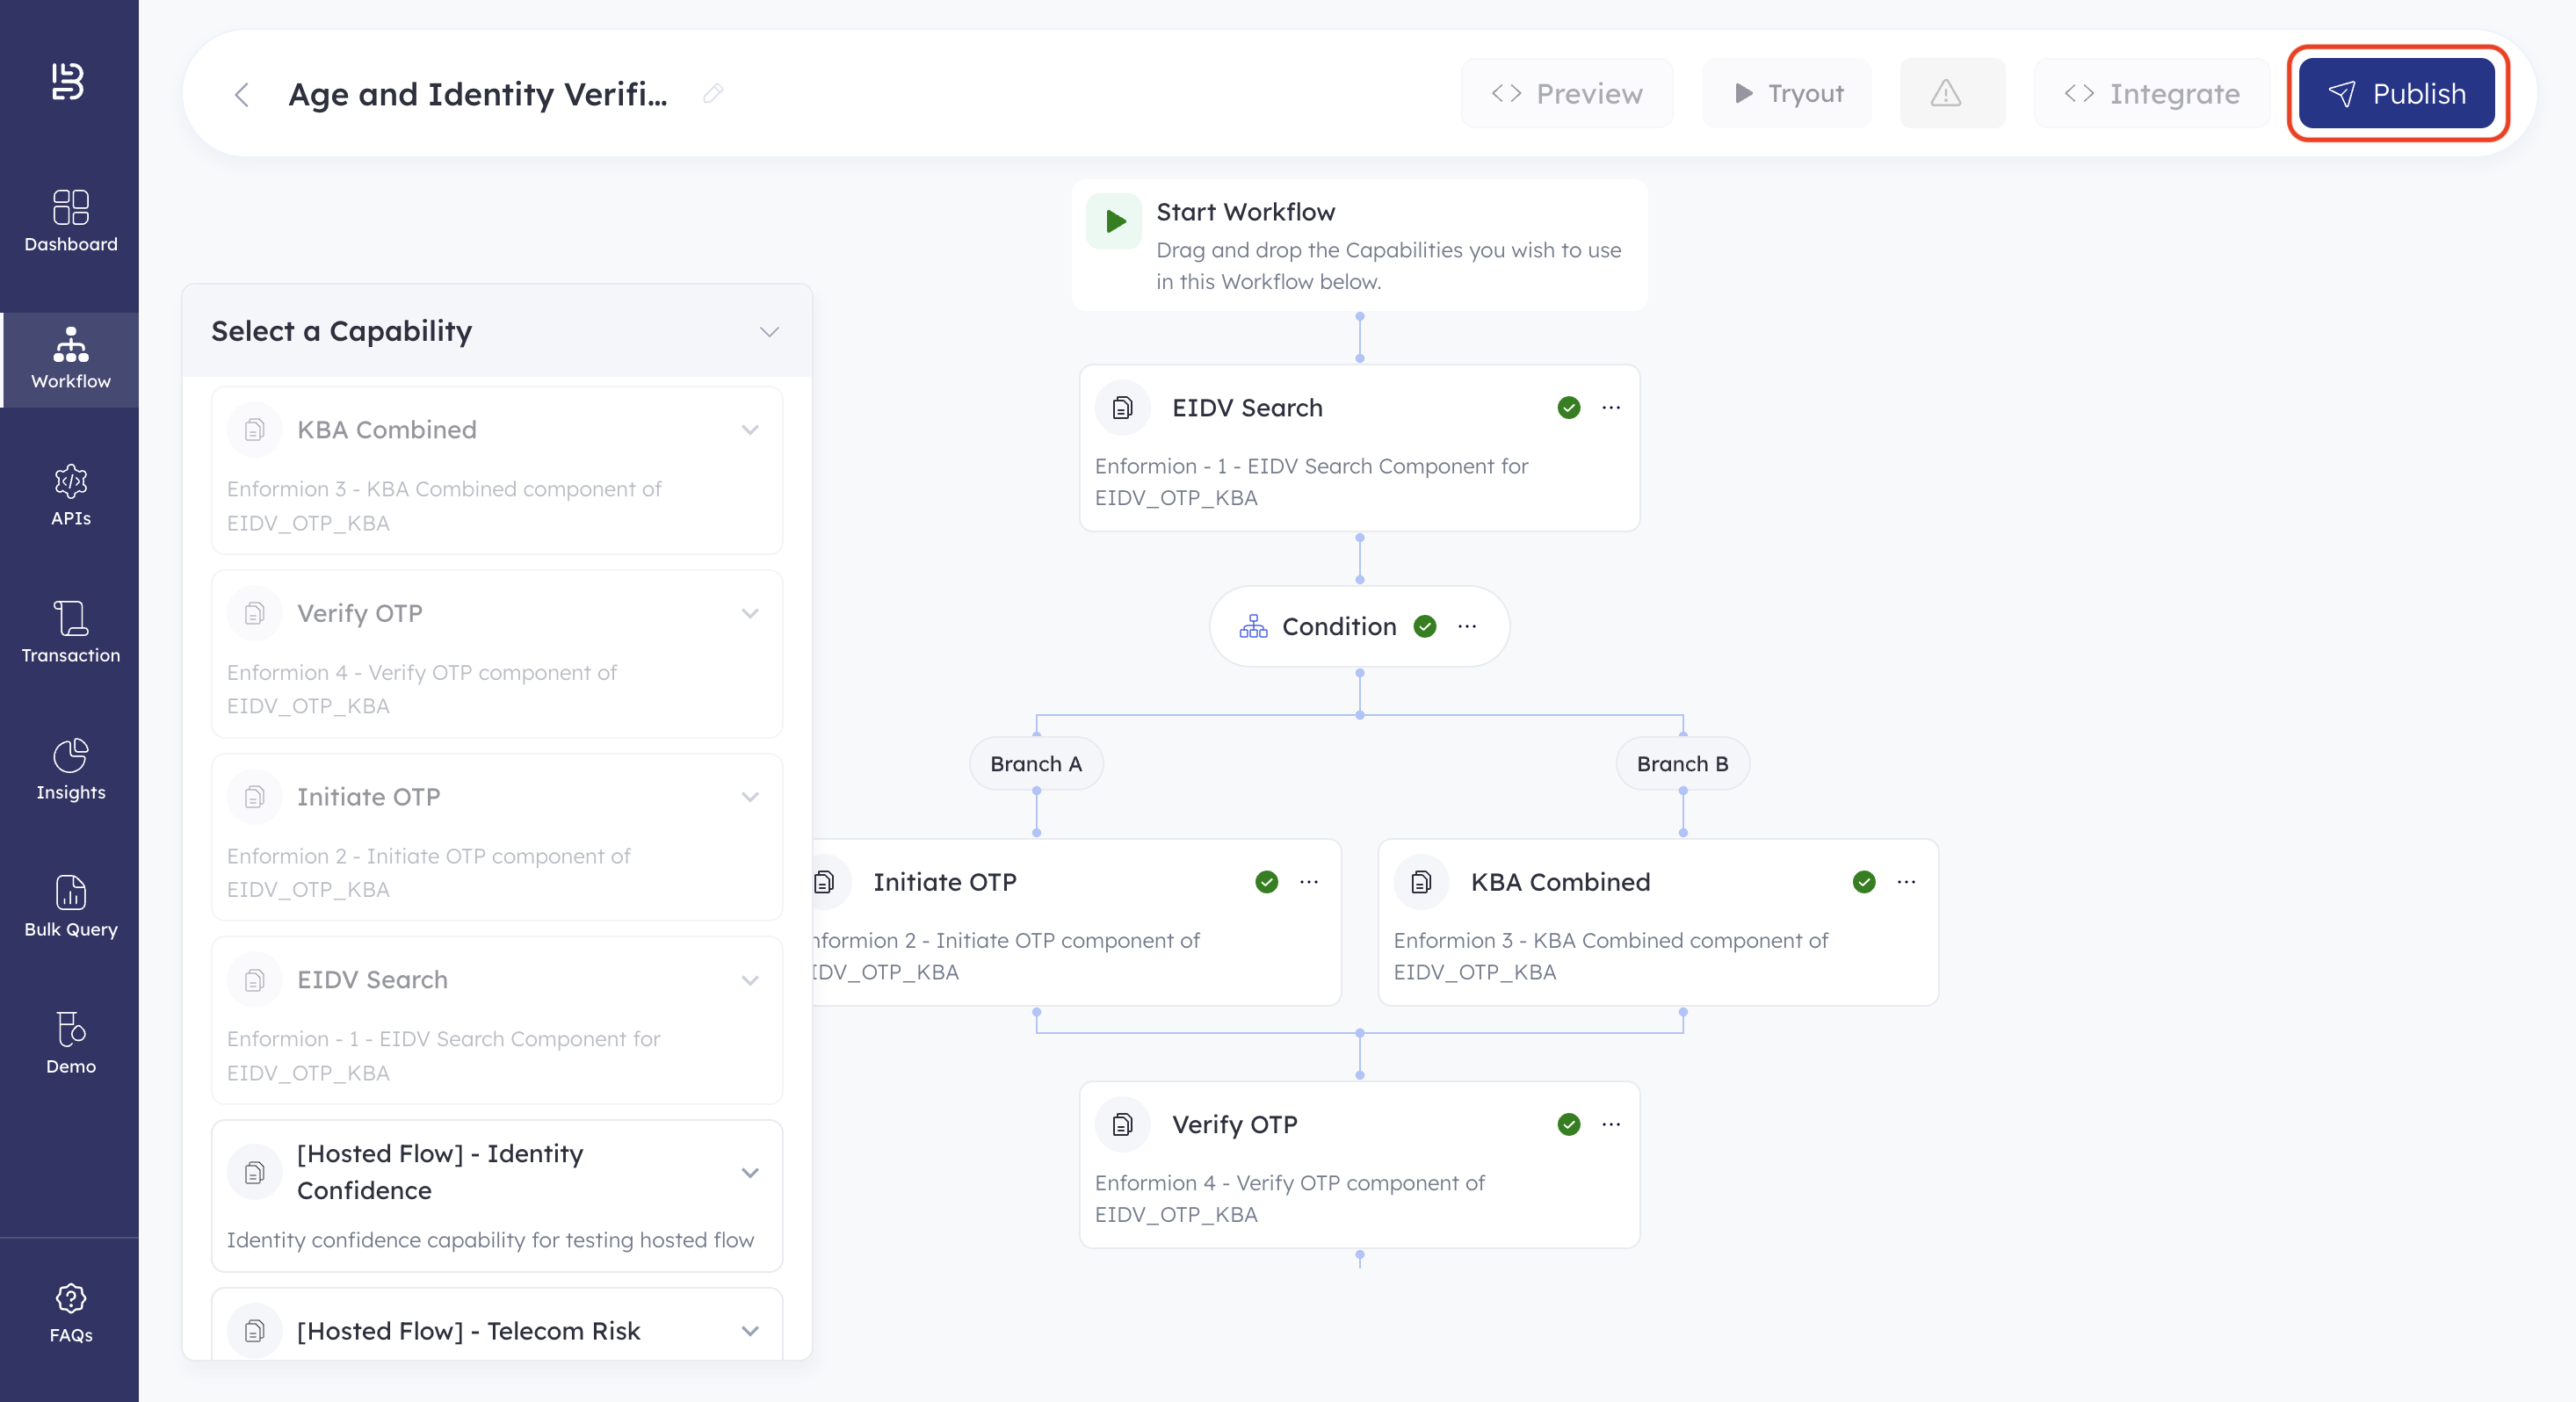
- Drag the EIDV Search capability from the Select a Capability window and drop it in the workflow builder area. This is the first action your workflow will perform.
- Click Add conditional branching in the workflow builder area. This allows you to define IF/ELSE conditions that control the user's path through the workflow. You will configure these conditions in the Define Workflow Conditions step.
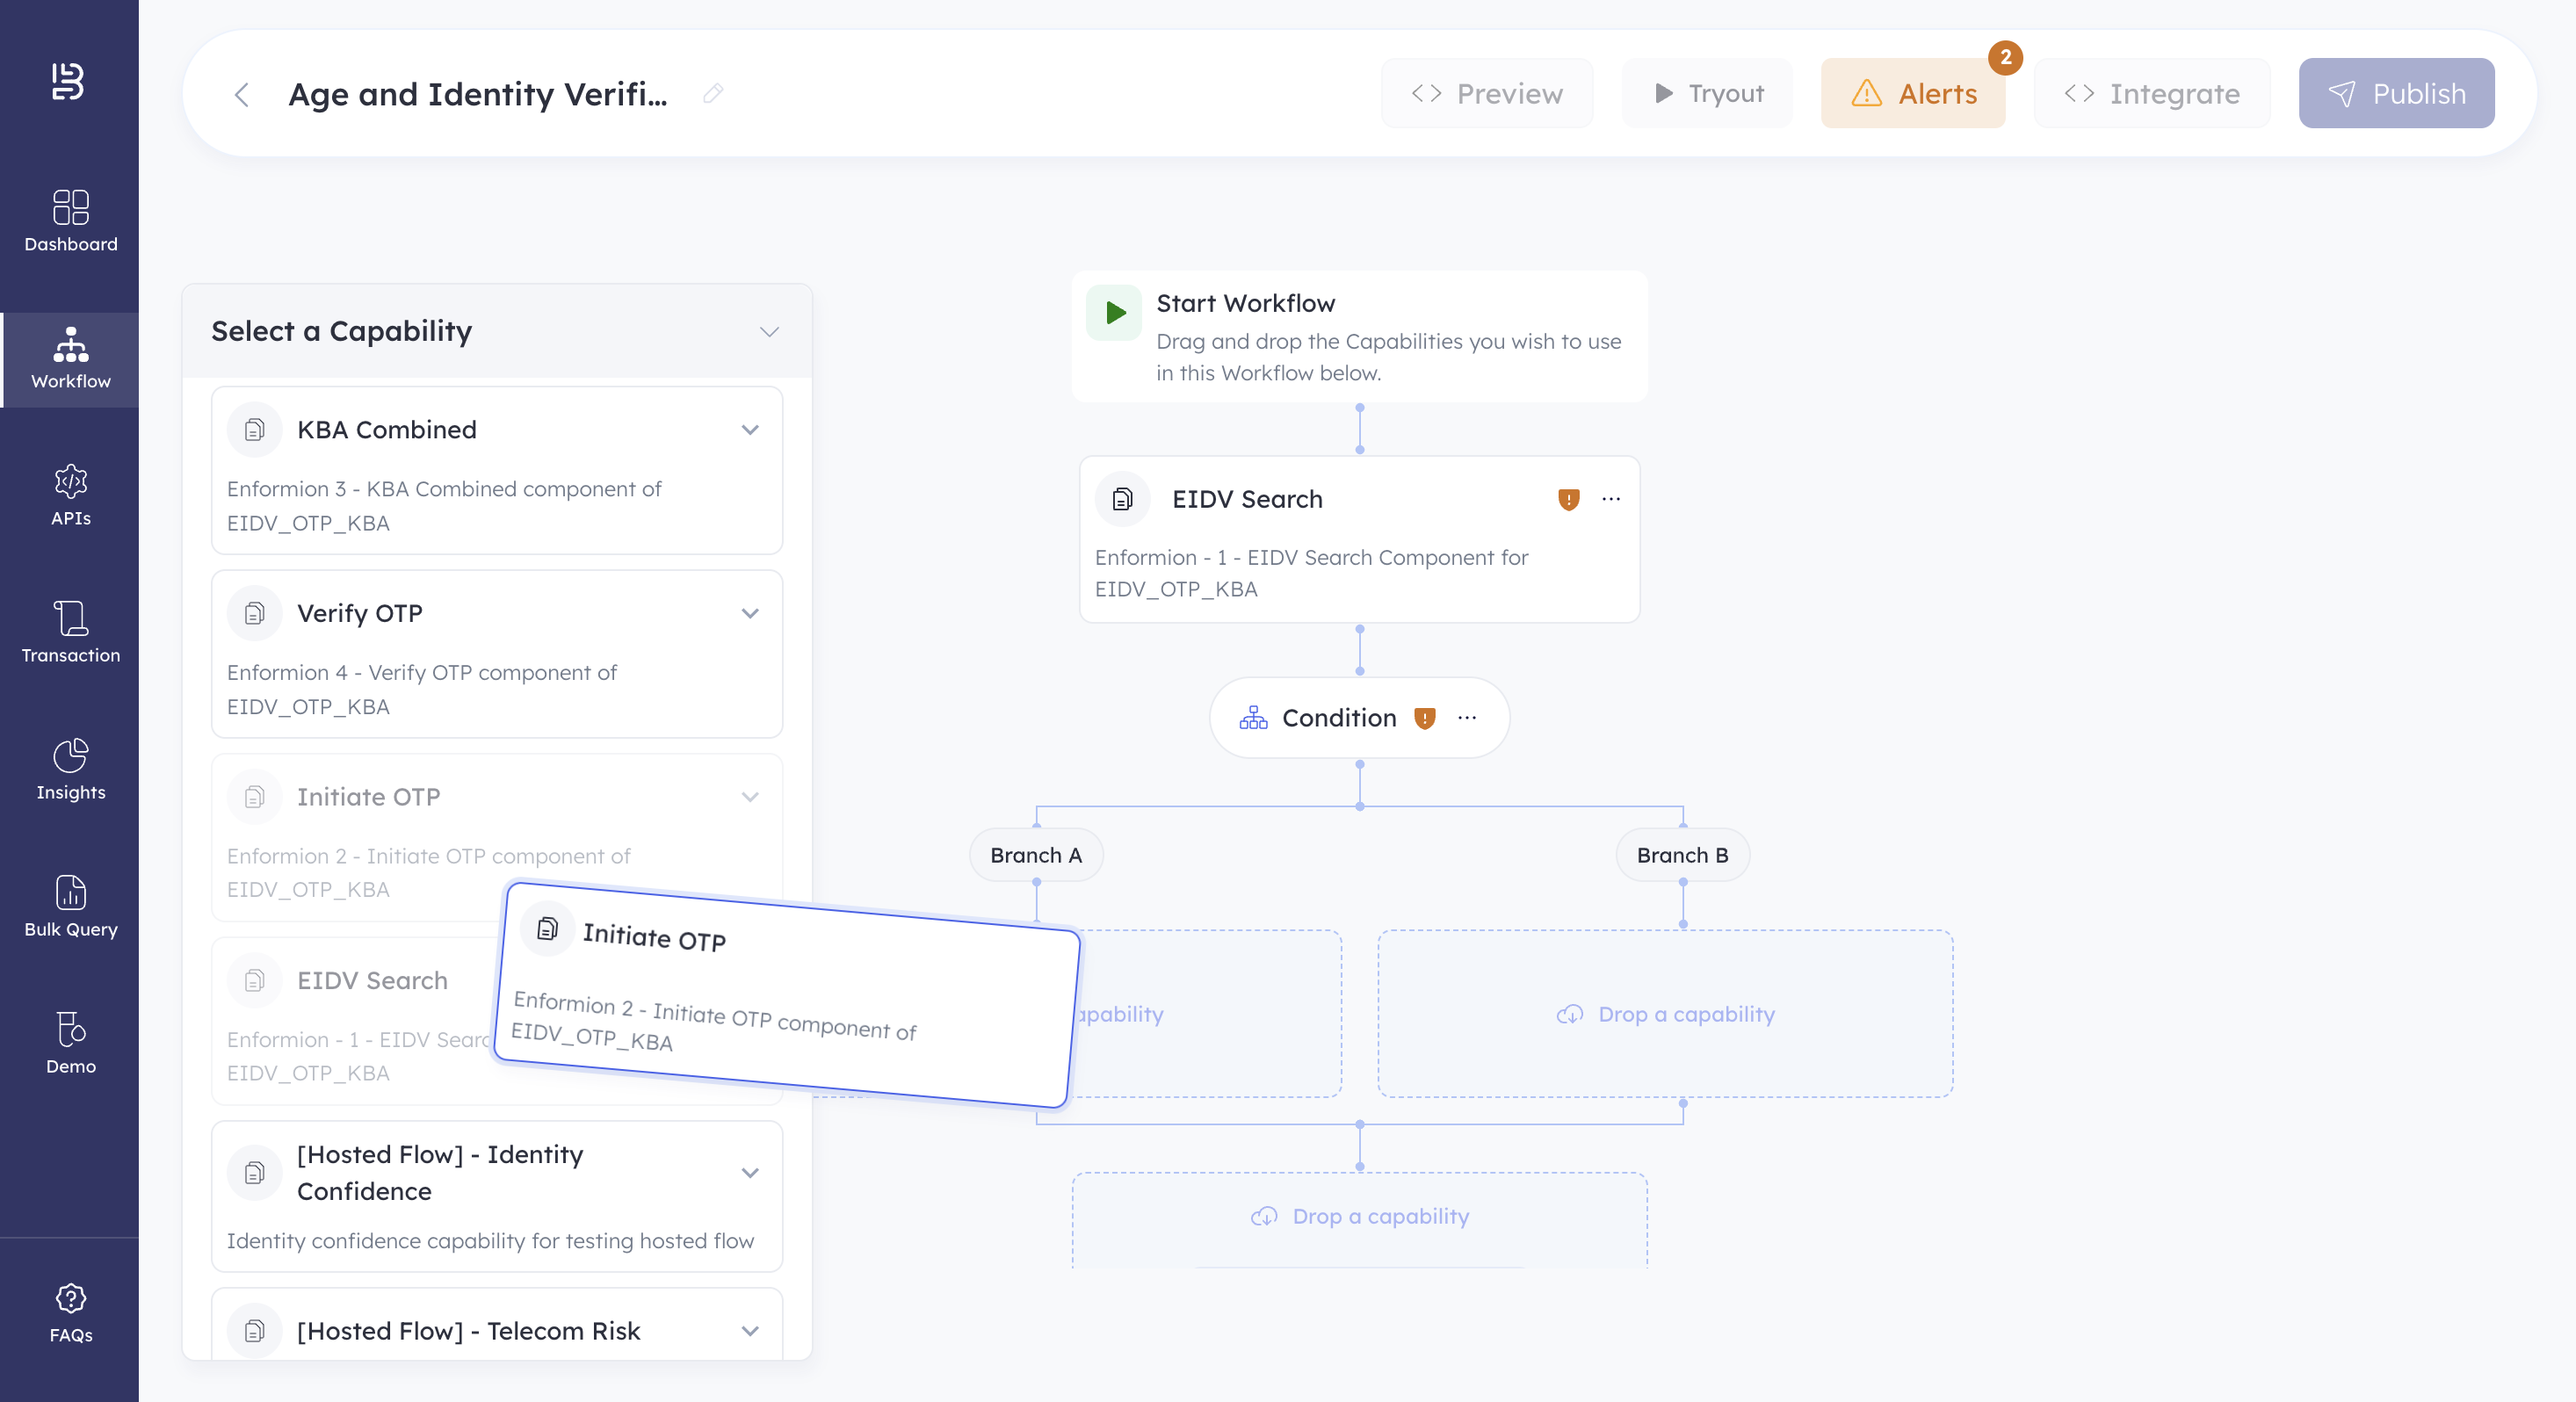
- Drag the Initiate OTP capability from the Select a Capability window and drop it under Branch A.
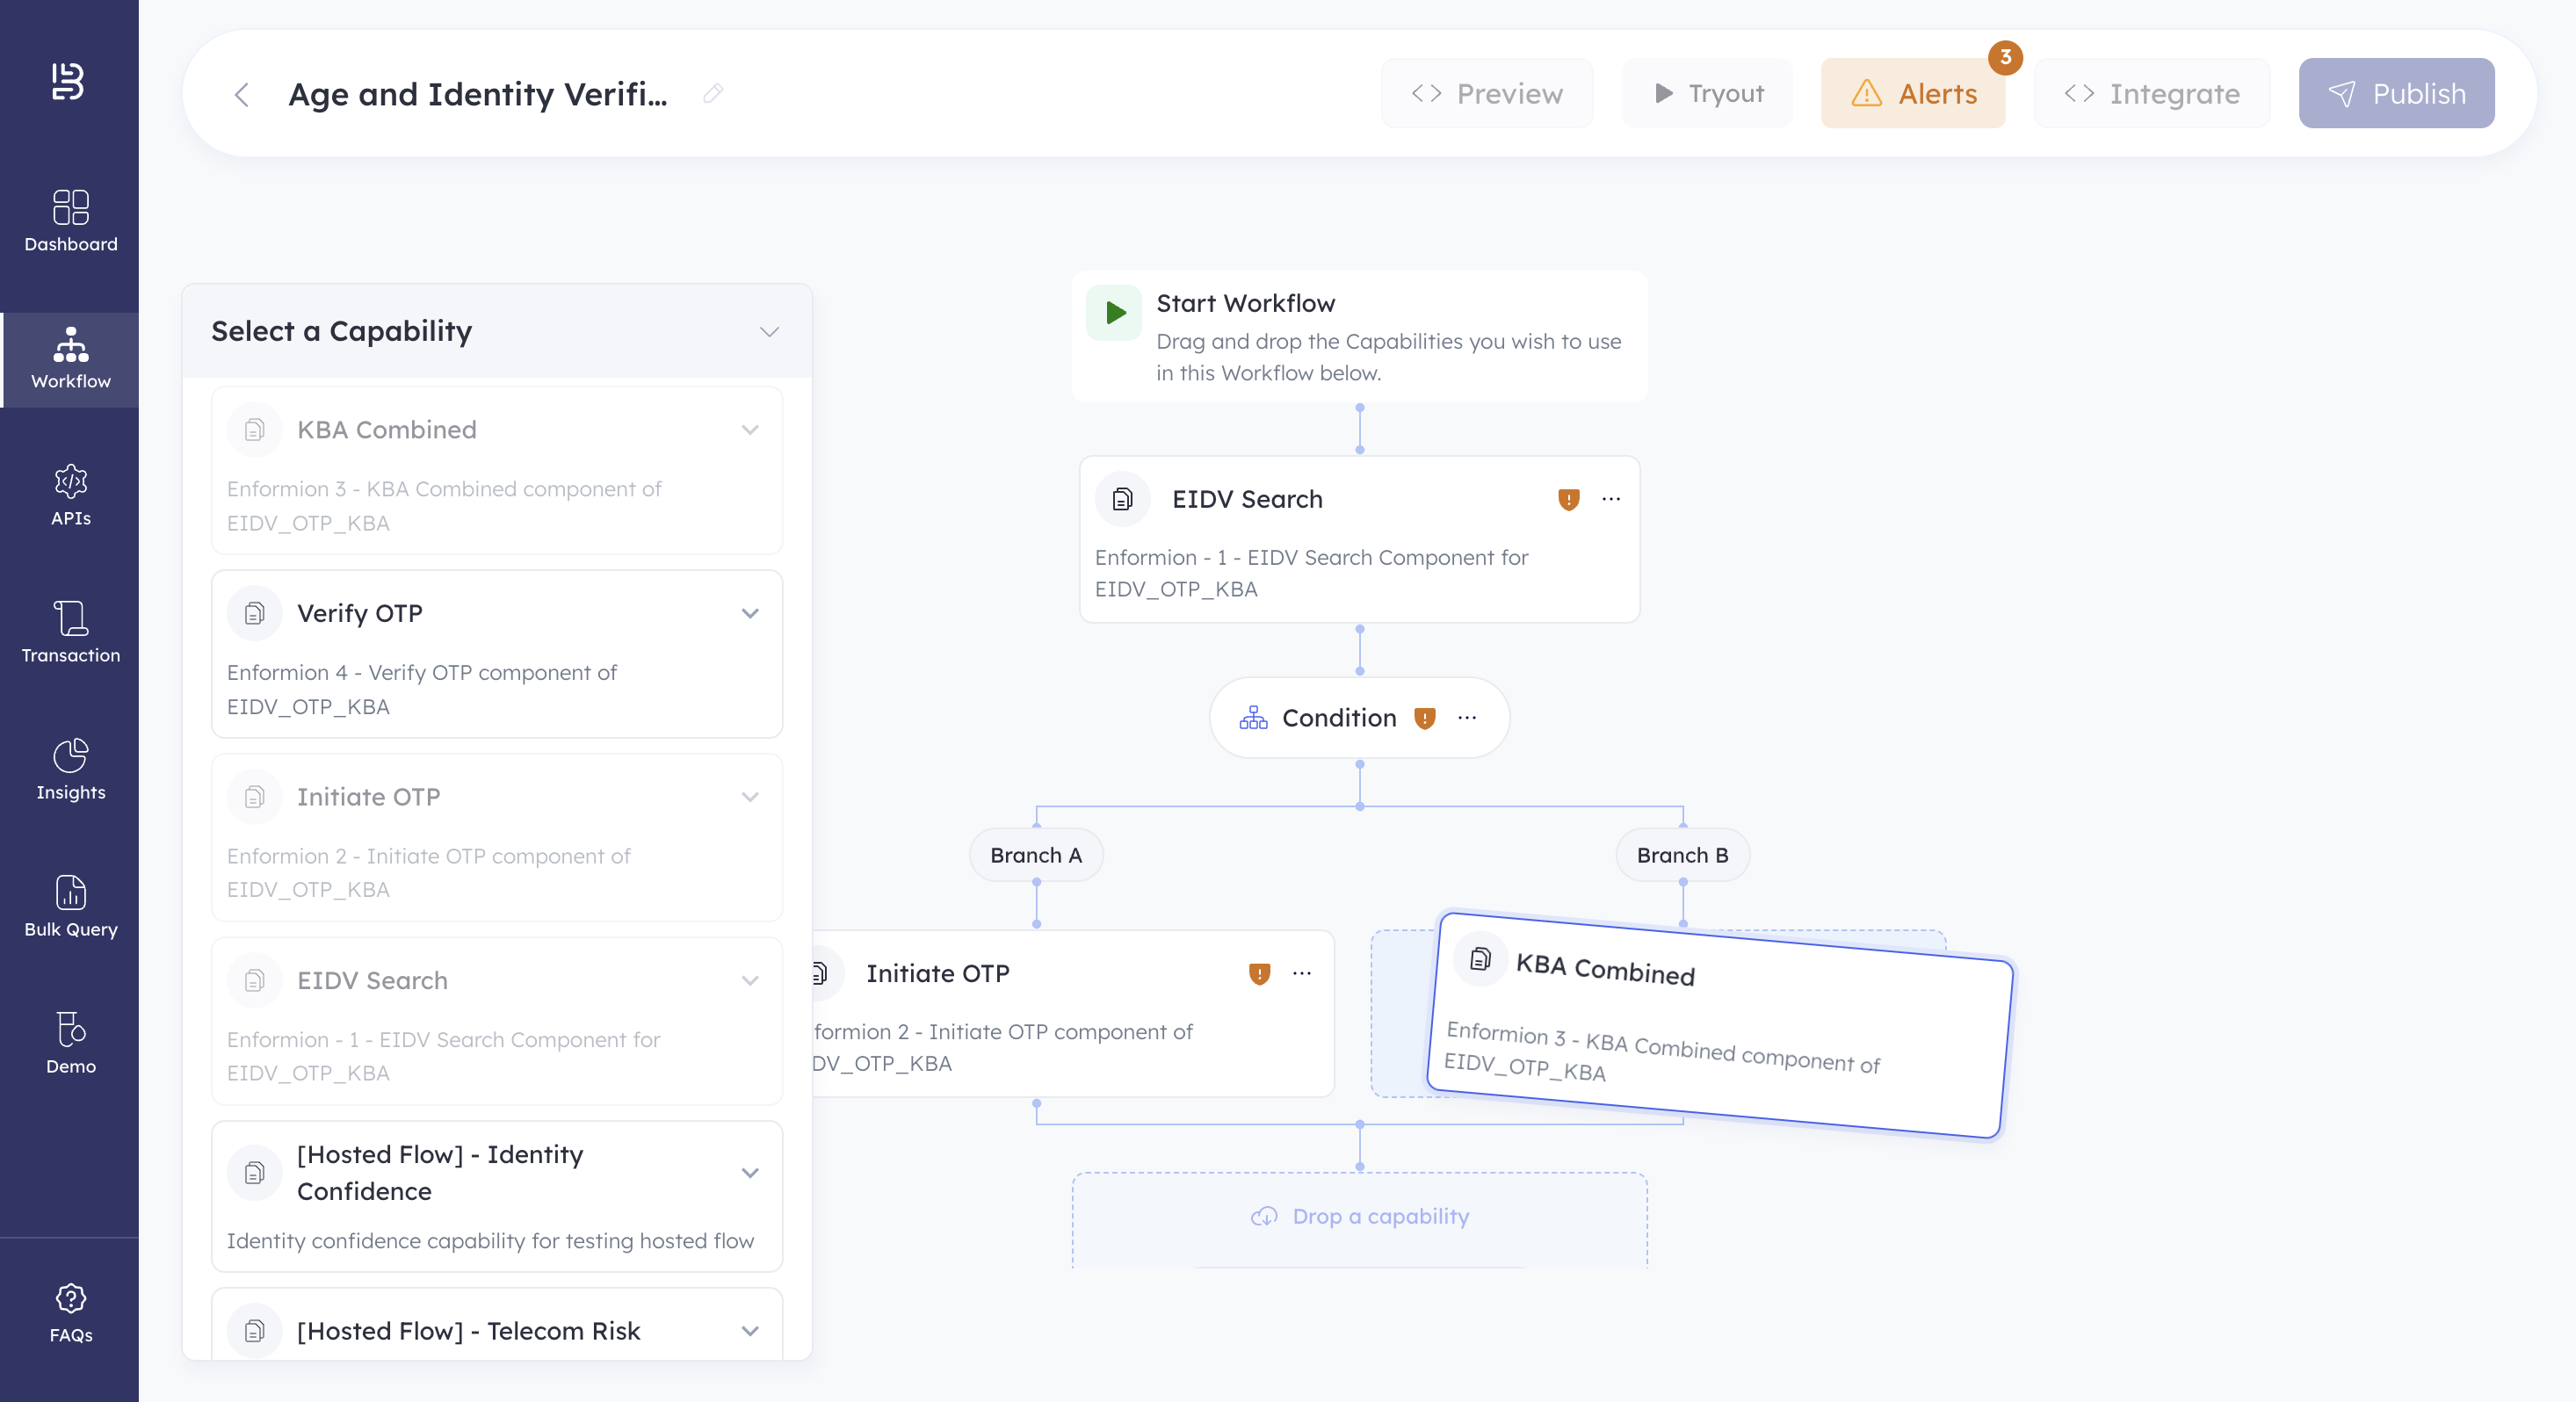
- Drag the KBA Combined capability from the Select a Capability window and drop it under Branch B.
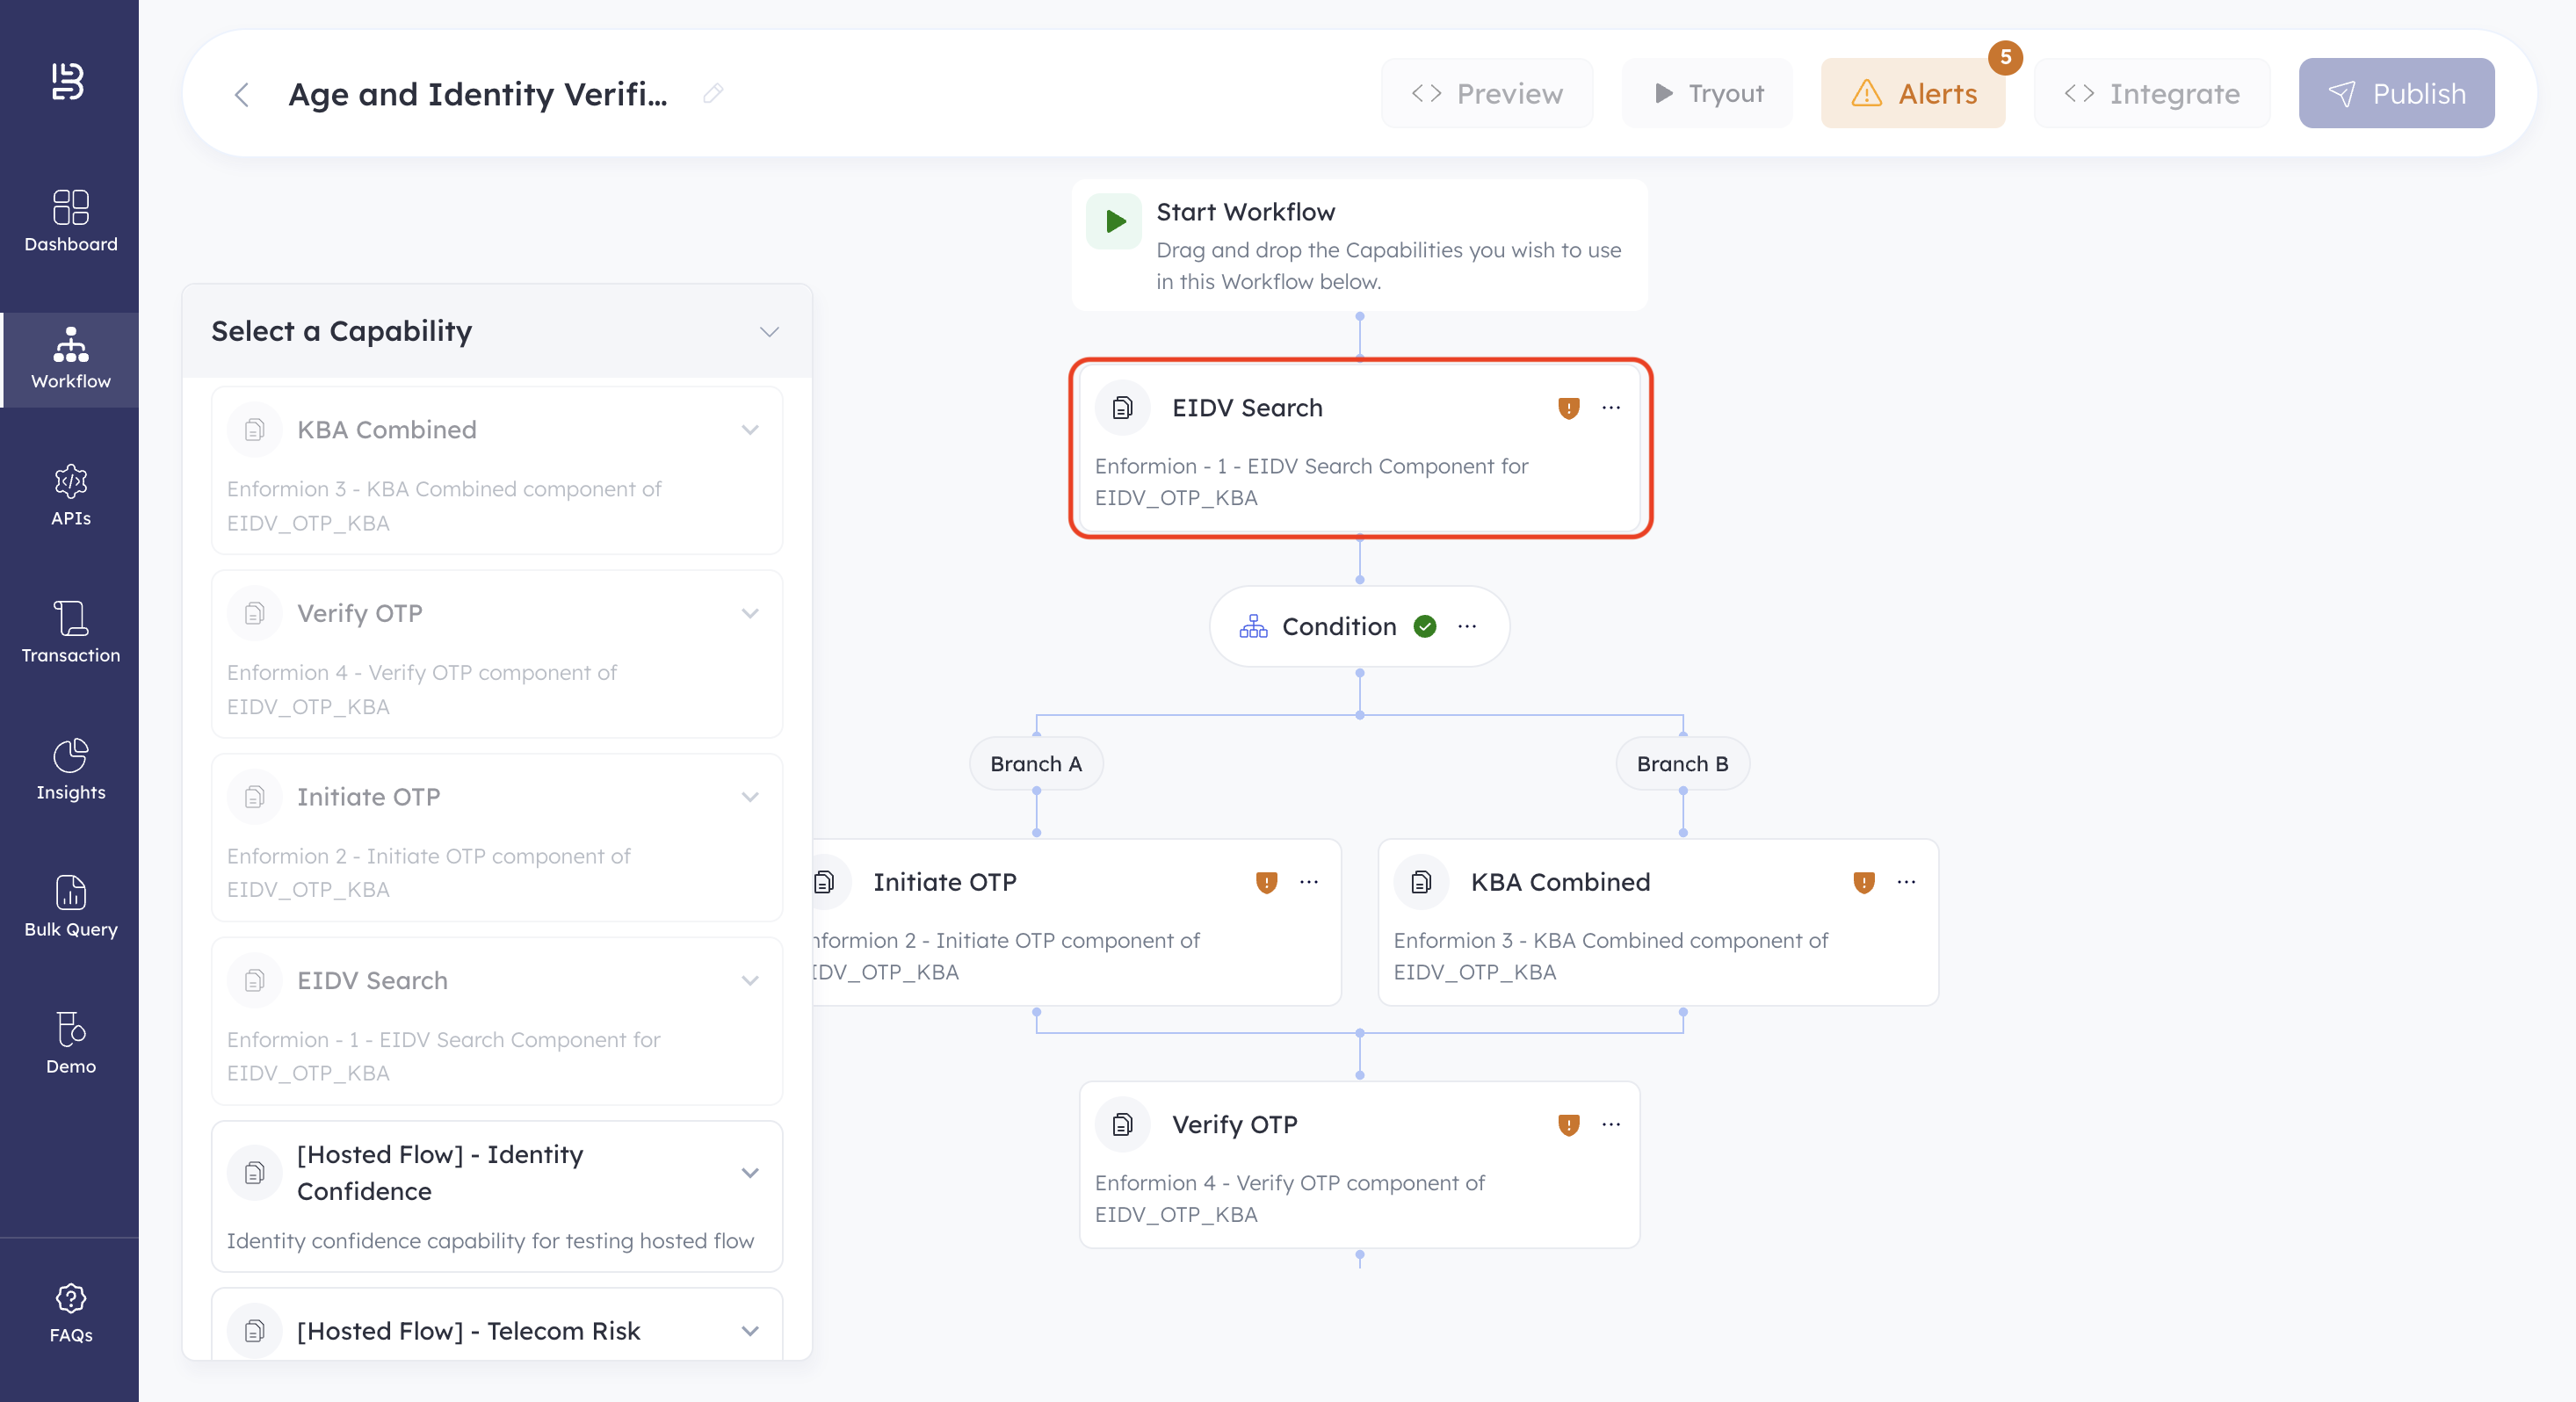
- Drag the Verify OTP capability from the Select a Capability window and drop it under the conditional branch.

You've added the necessary capabilities. Next, let's configure them to define their actions and parameters.
2. Configure Capabilities
After adding the necessary capabilities, configure them to match your specific requirements. This involves defining data sources and setting parameters.
Follow the below steps to configure capabilities in the workflow.
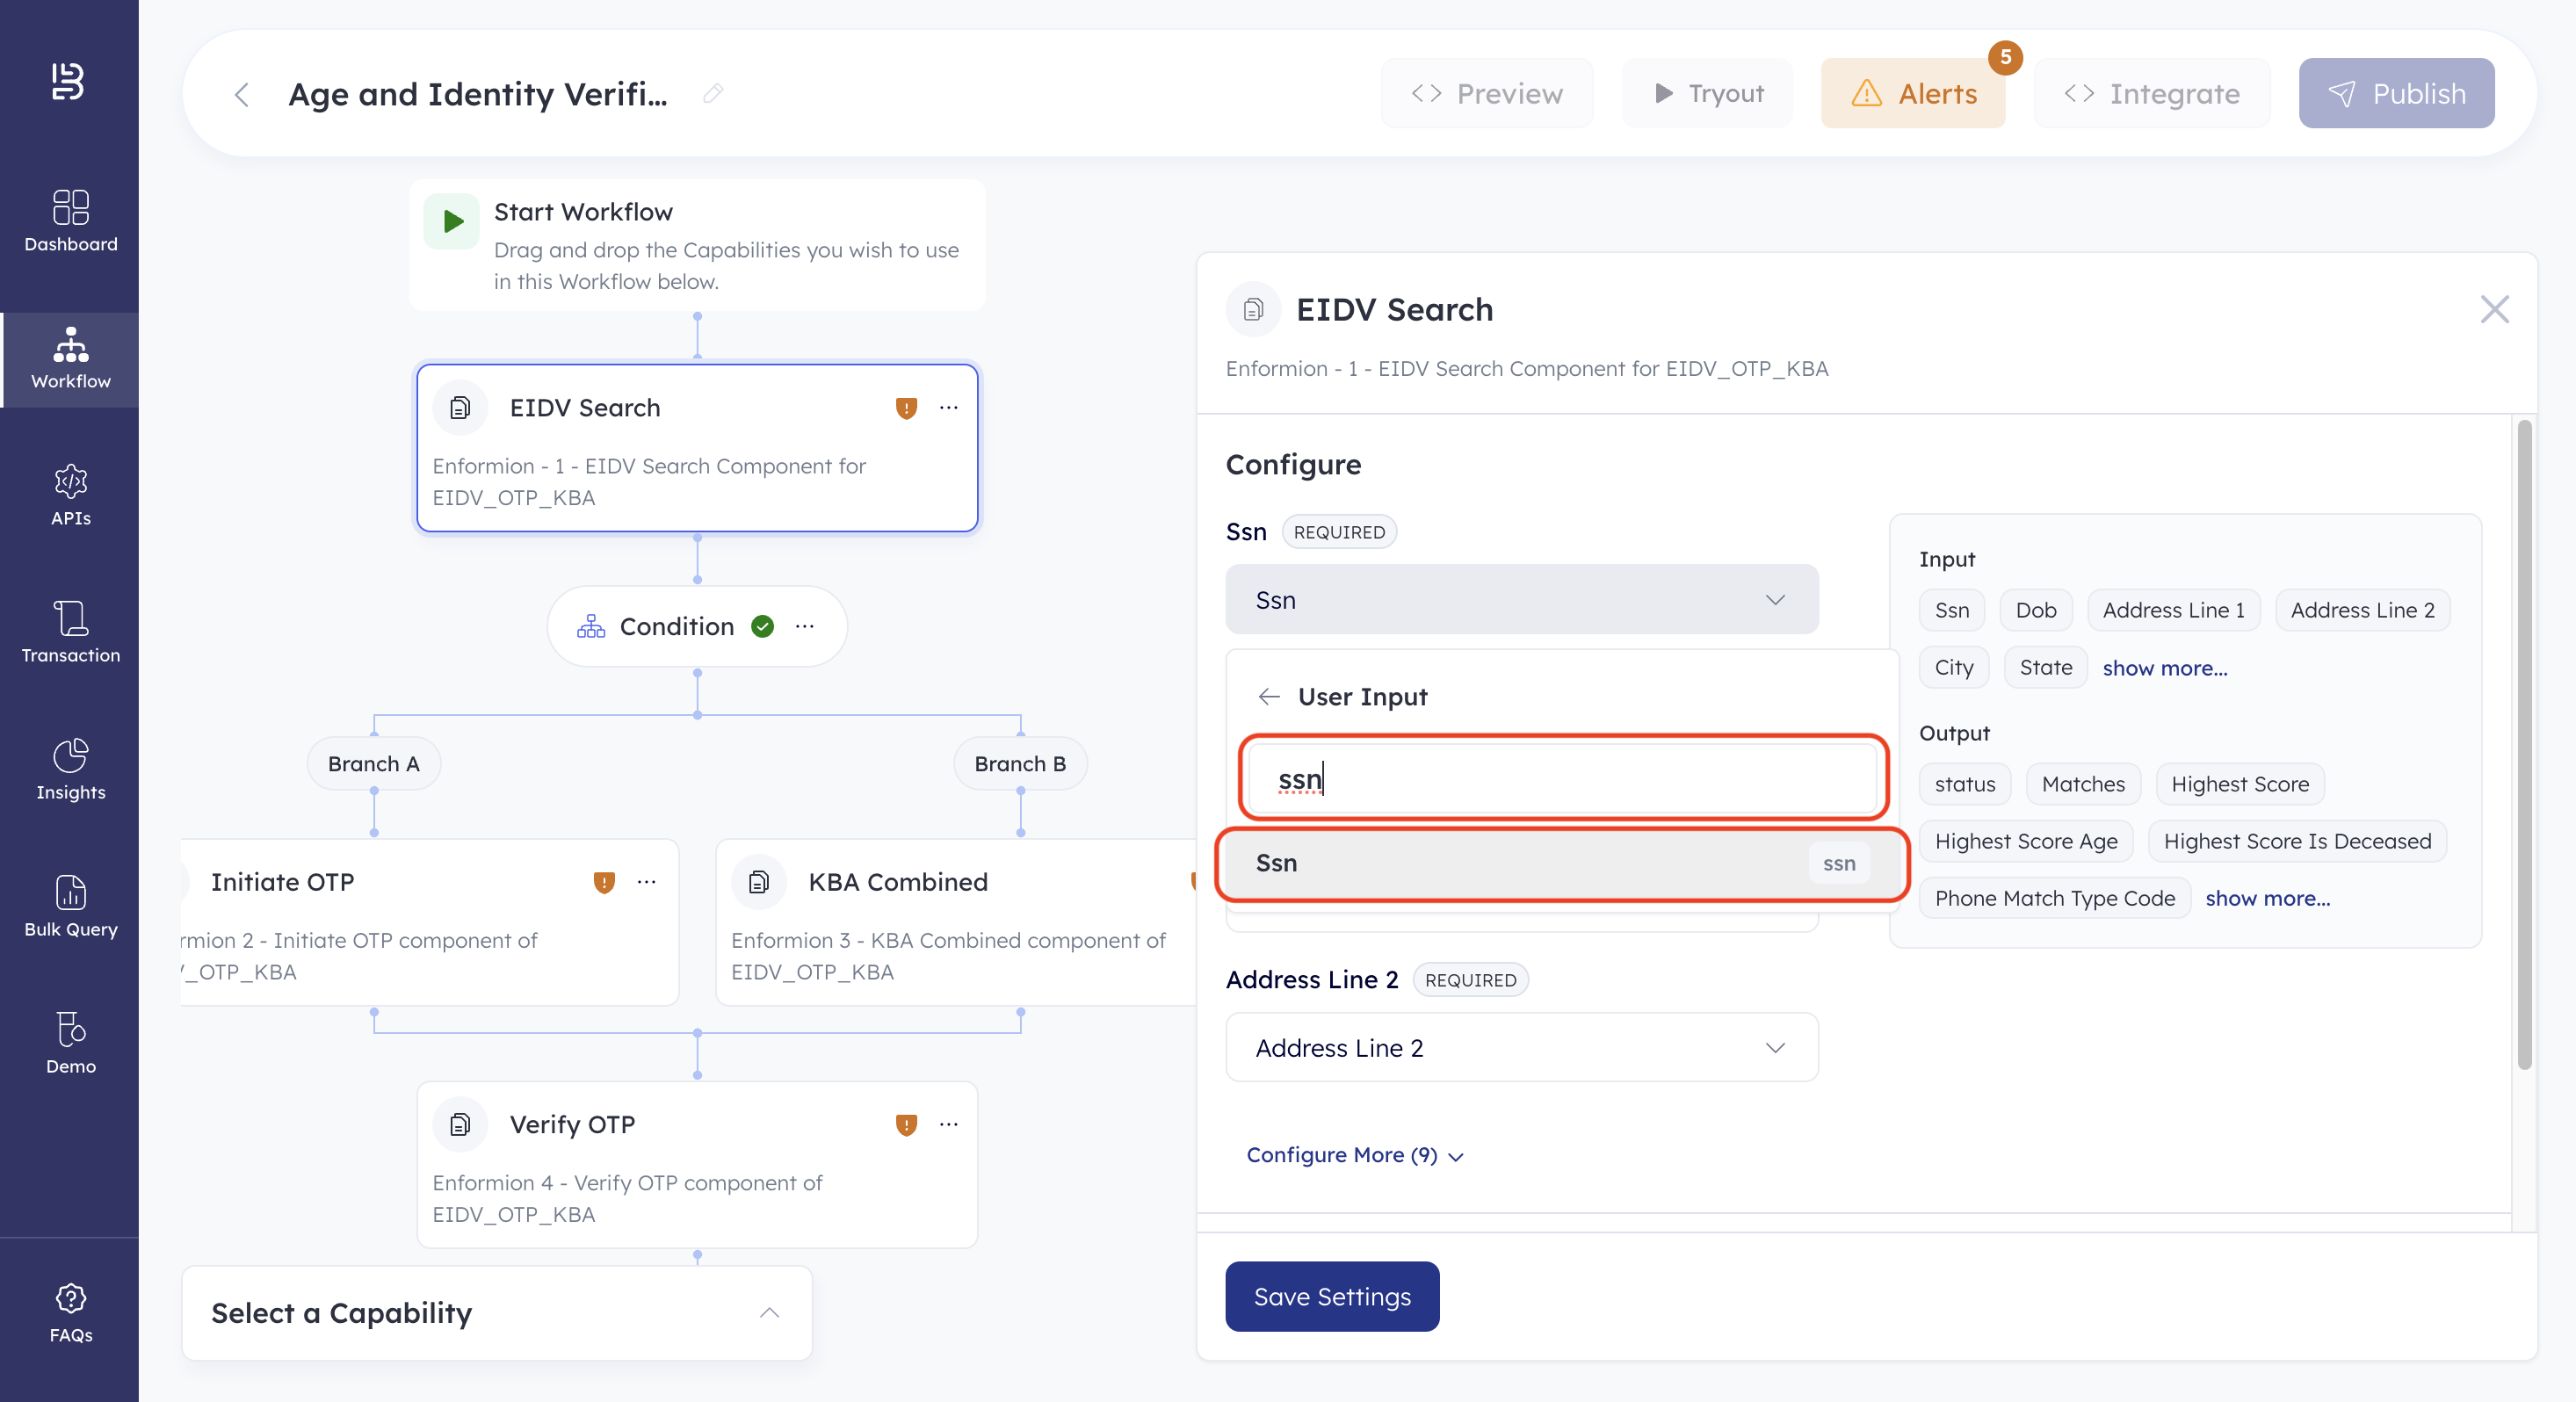
- Click the EIDV Search capability.
- Click the Ssn dropdown and select User Input.

- Search for and select Ssn.
- Define the data source for the remaining parameters. Click Configure More to view all parameters in the EIDV Search capability.
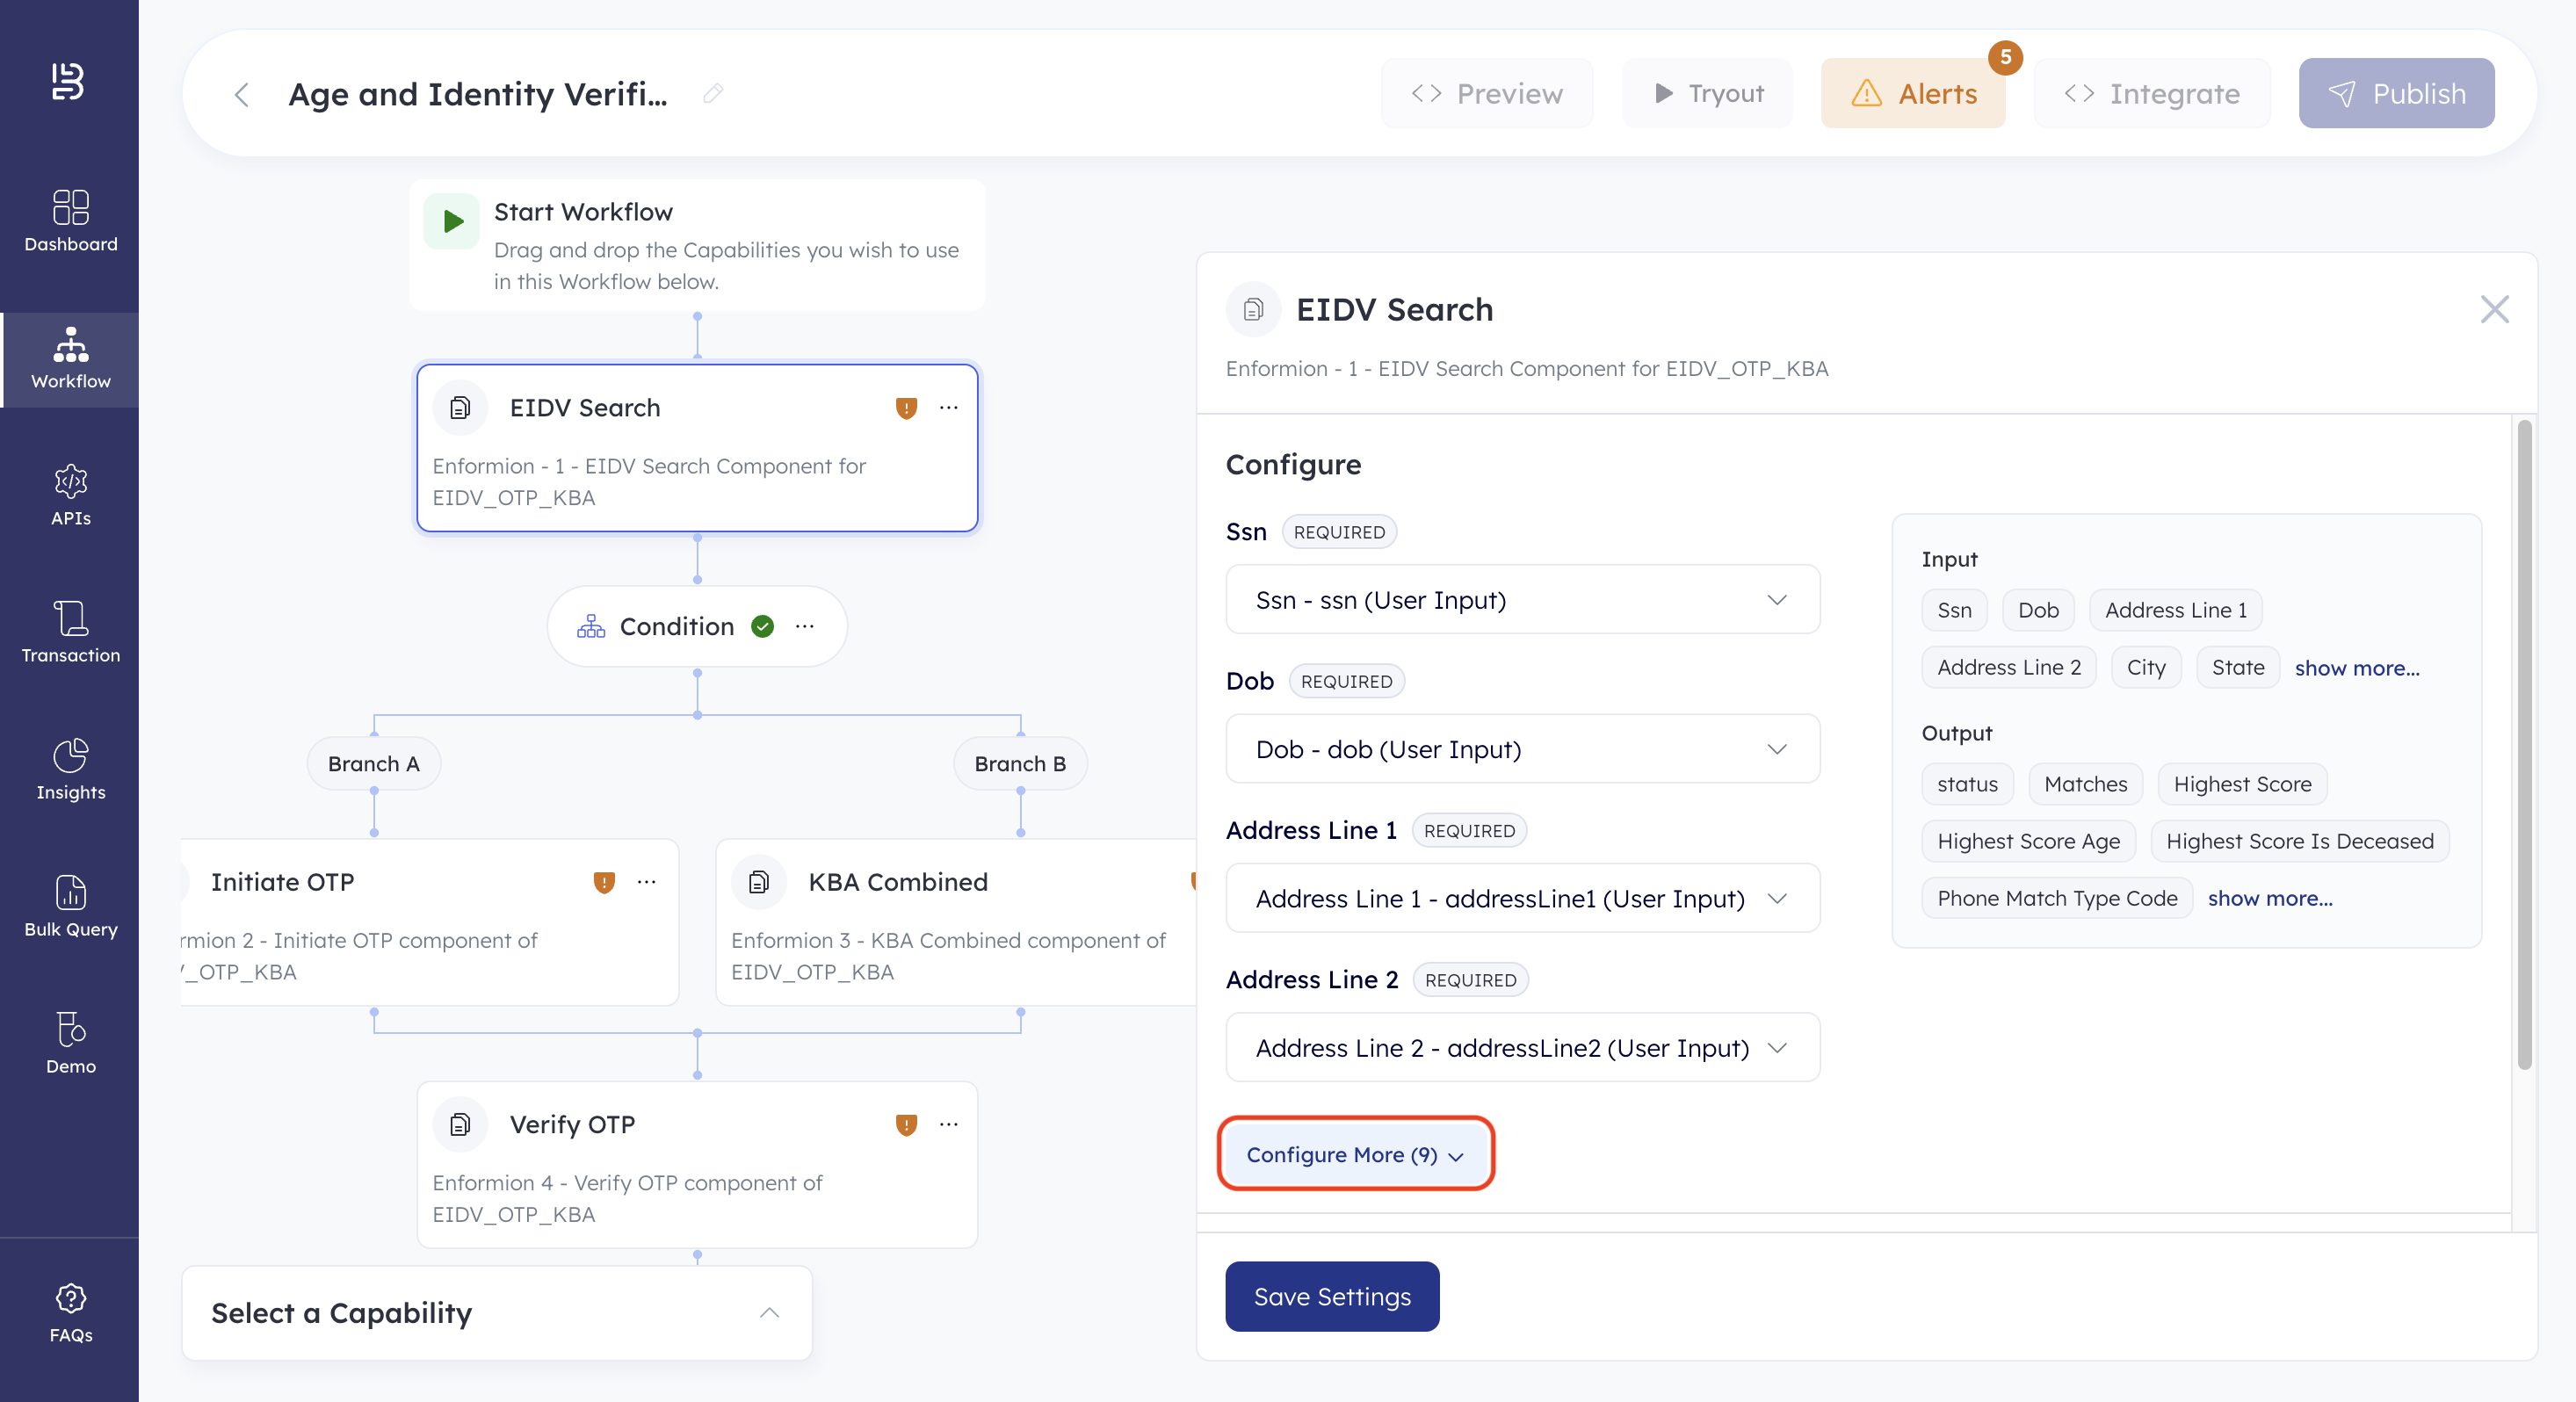
The table below lists the data source for all the parameters in the EIDV Search capability.
| Capability Parameter | Data Source | Data Source Parameter |
|---|---|---|
| Ssn | User Input | Ssn |
| Dob | User Input | Dob |
| Address Line 1 | User Input | Address Line 1 |
| Address Line 2 | User Input | Address Line 2 |
| City | User Input | City |
| State | User Input | State |
| Zip | User Input | Zip |
| First Name | User Input | First Name |
| Middle Name | User Input | Middle Name |
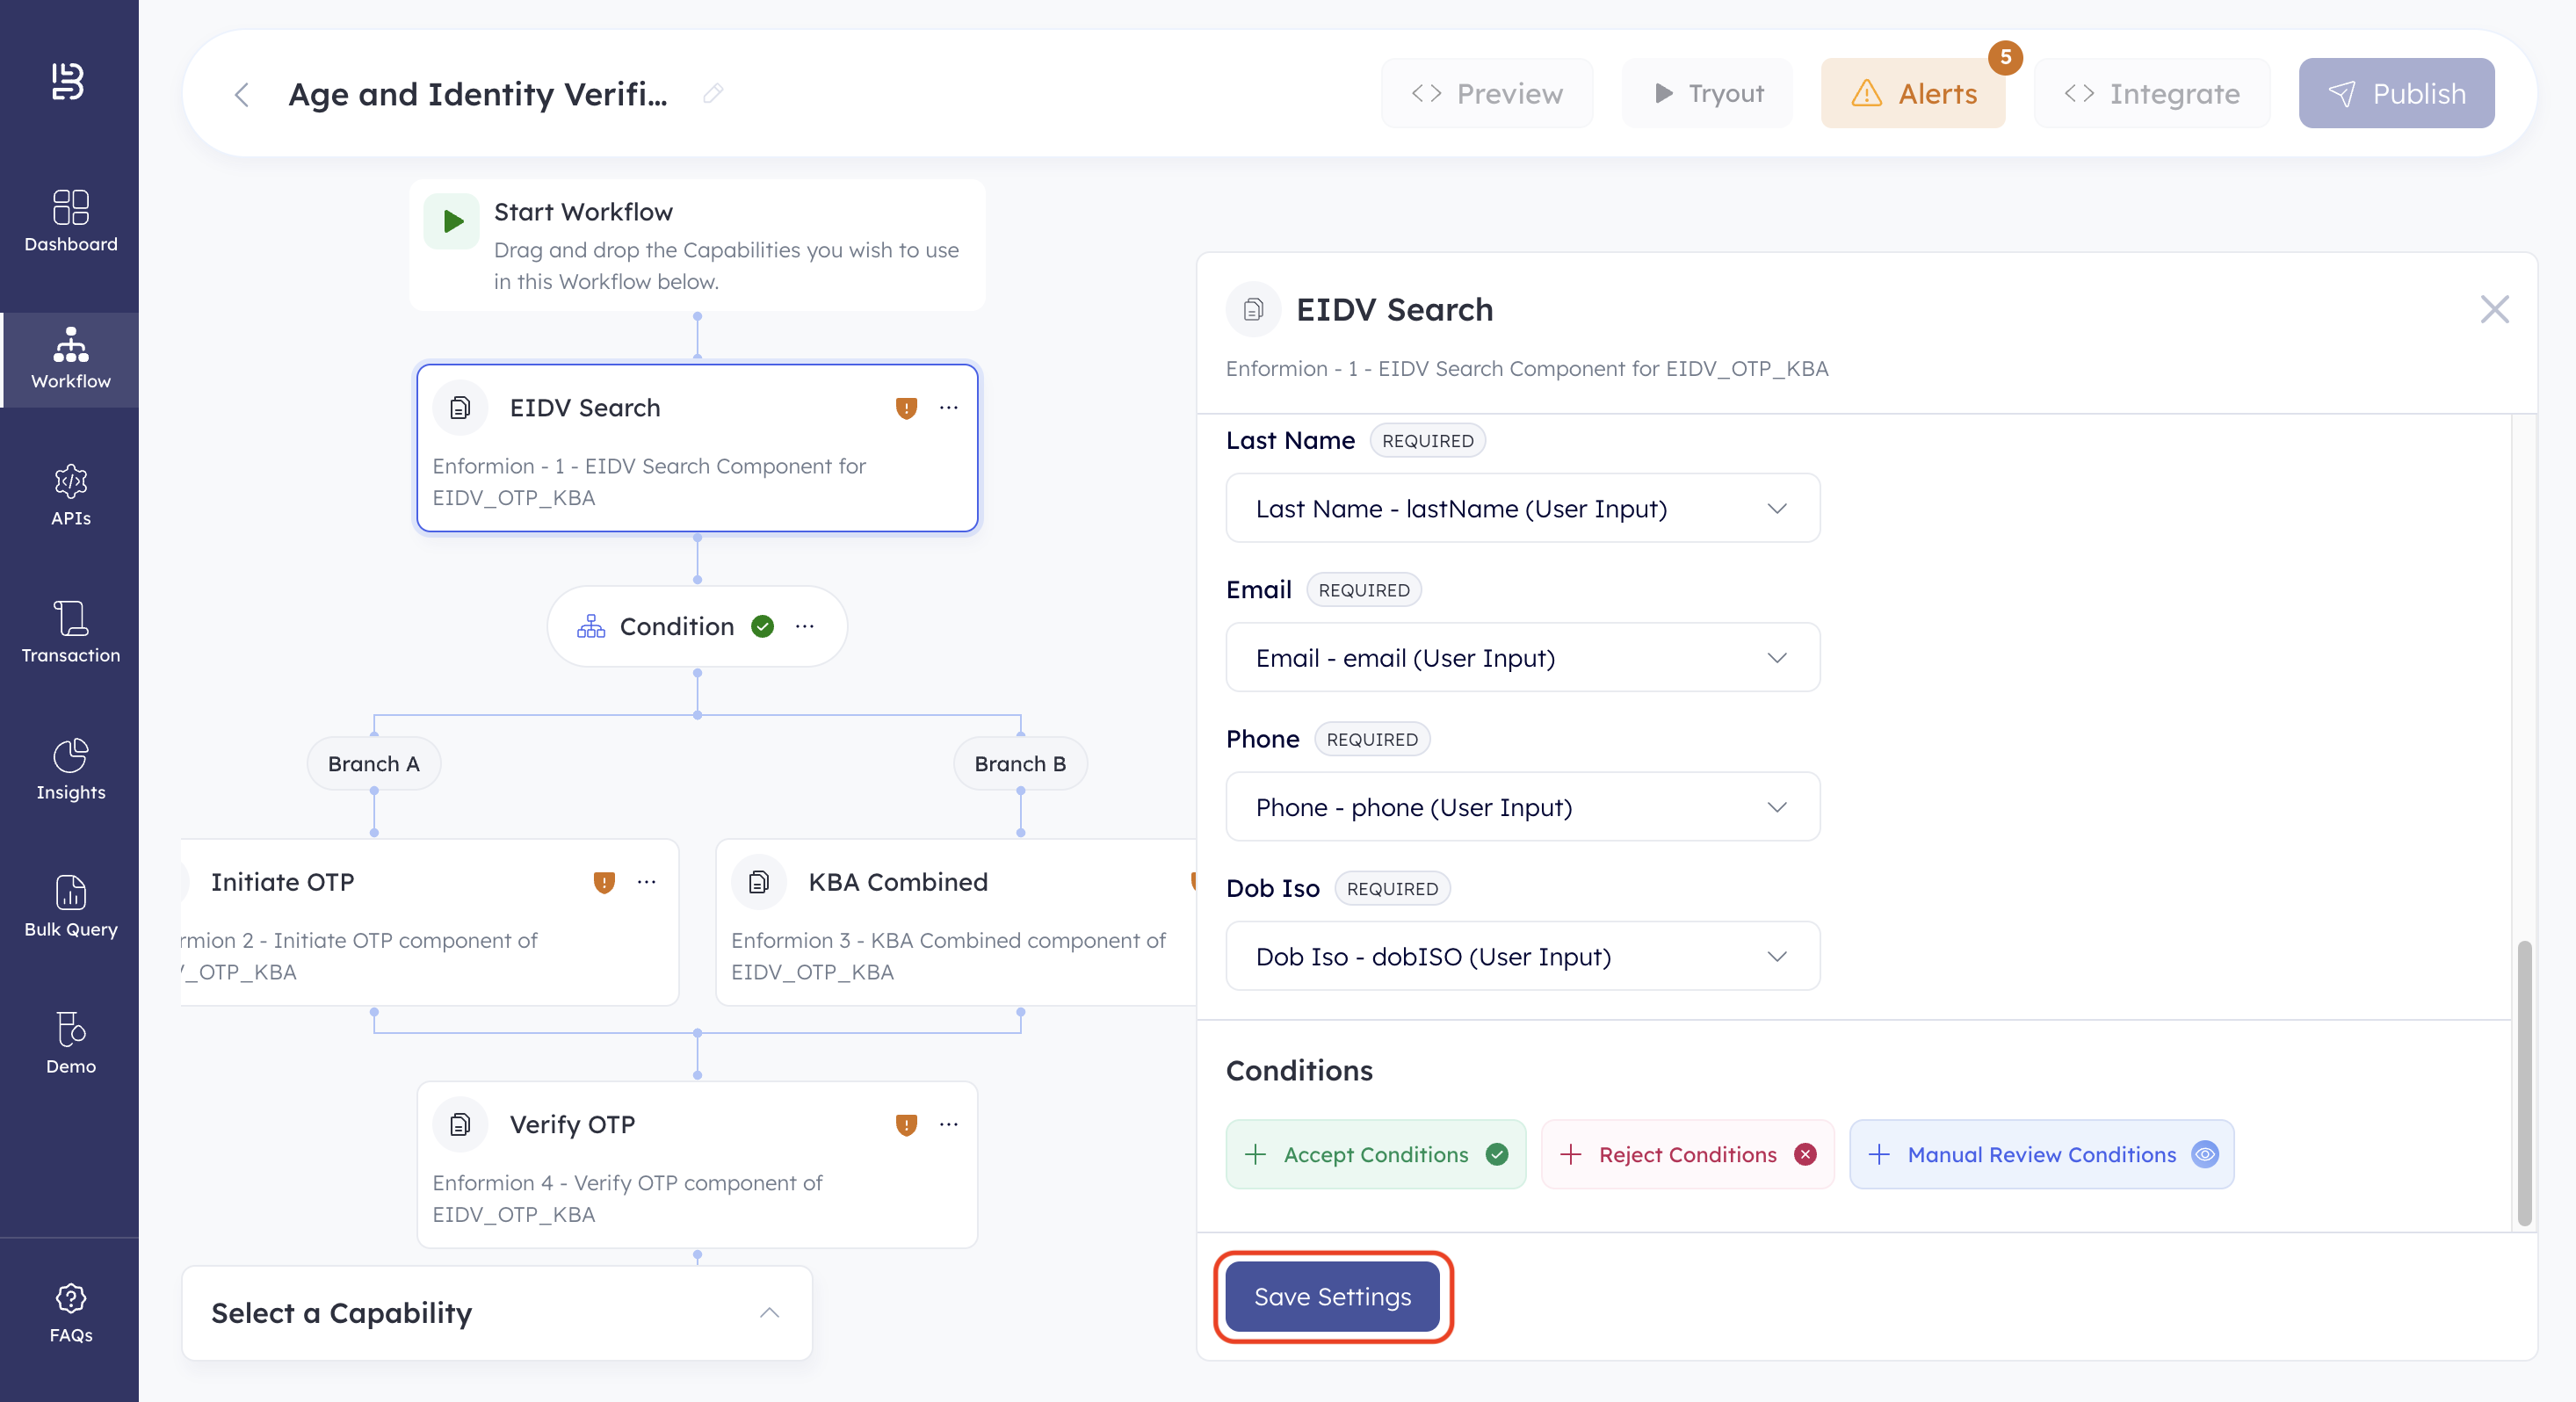
| Last Name | User Input | Last Name |
| User Input | ||
| Phone | User Input | Phone |
| Dob Iso | User Input | Dob Iso |
- Click Save Settings. The EIDV Search capability is configured.
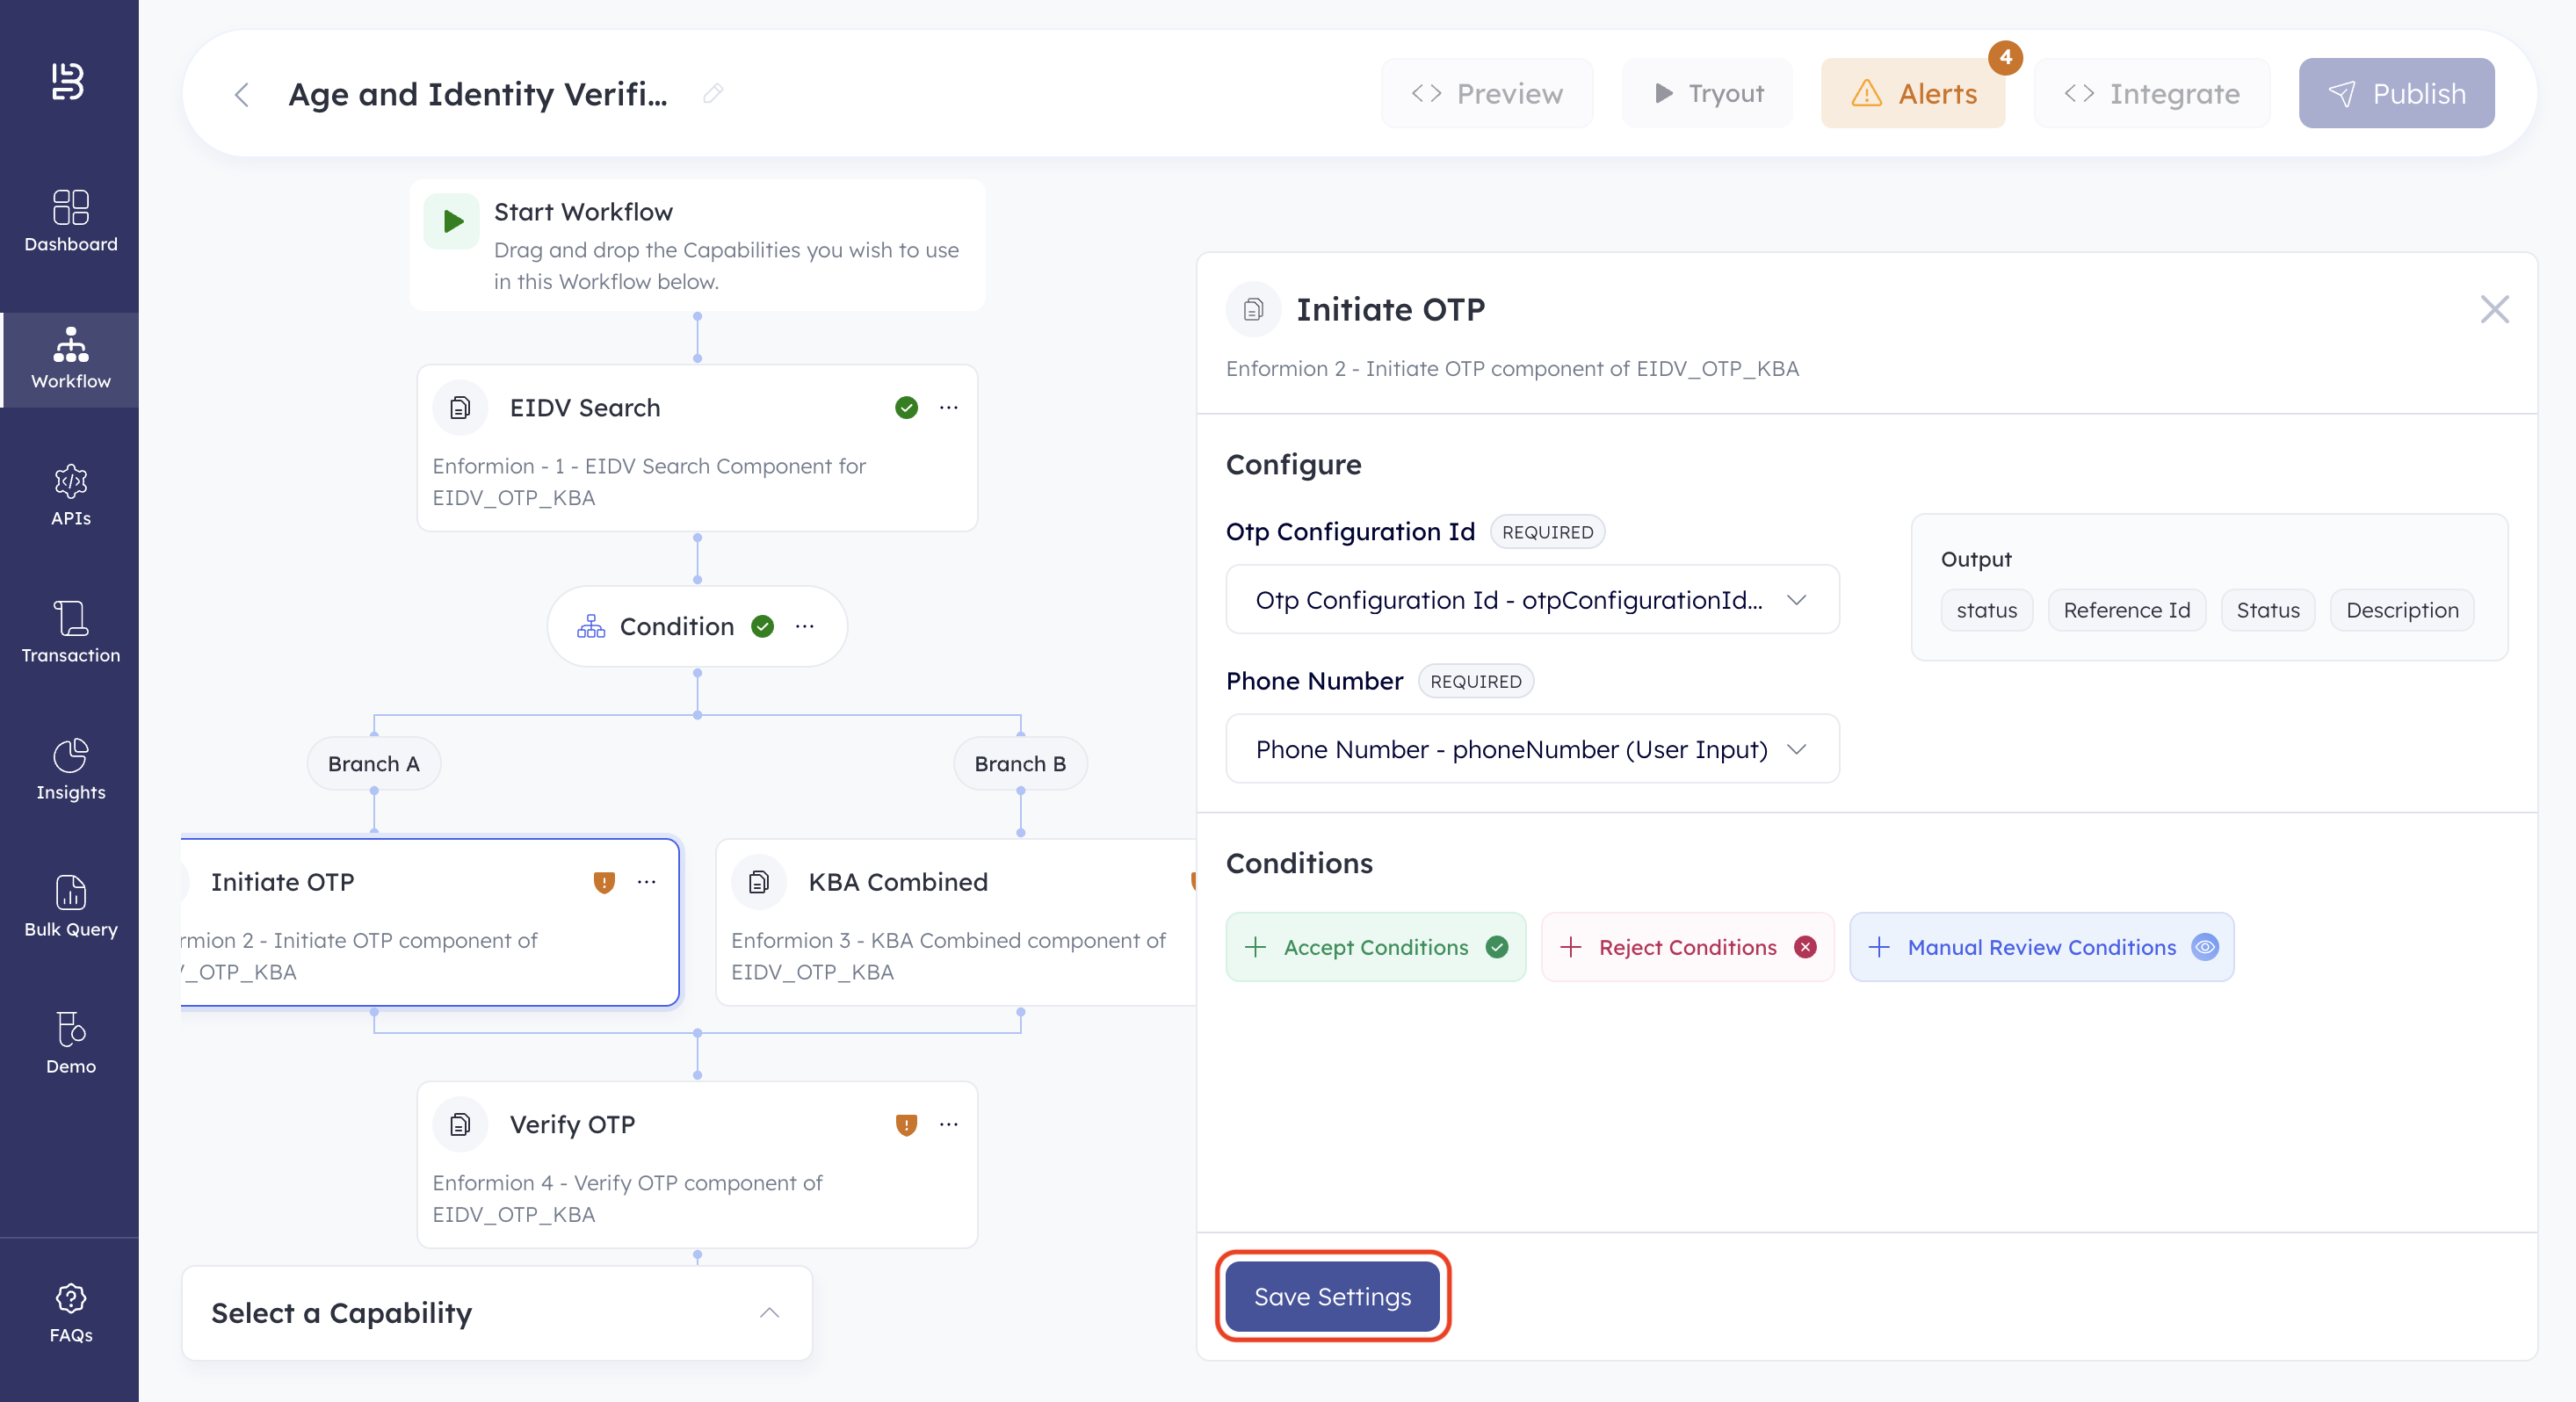
- Click the Initiate OTP capability and define the data source for the parameters in the capability.

The table below lists the data source for all the parameters in the Initiate OTP capability.
| Capability Parameter | Data Source | Data Source Parameter |
|---|---|---|
| Otp Configuration Id | User Input | Otp Configuration Id |
| Phone Number | User Input | Phone Number |
- Click Save Settings. The Initiate OTP capability is configured.
- Click the KBA Combined capability and define the data source for the parameters in the capability.
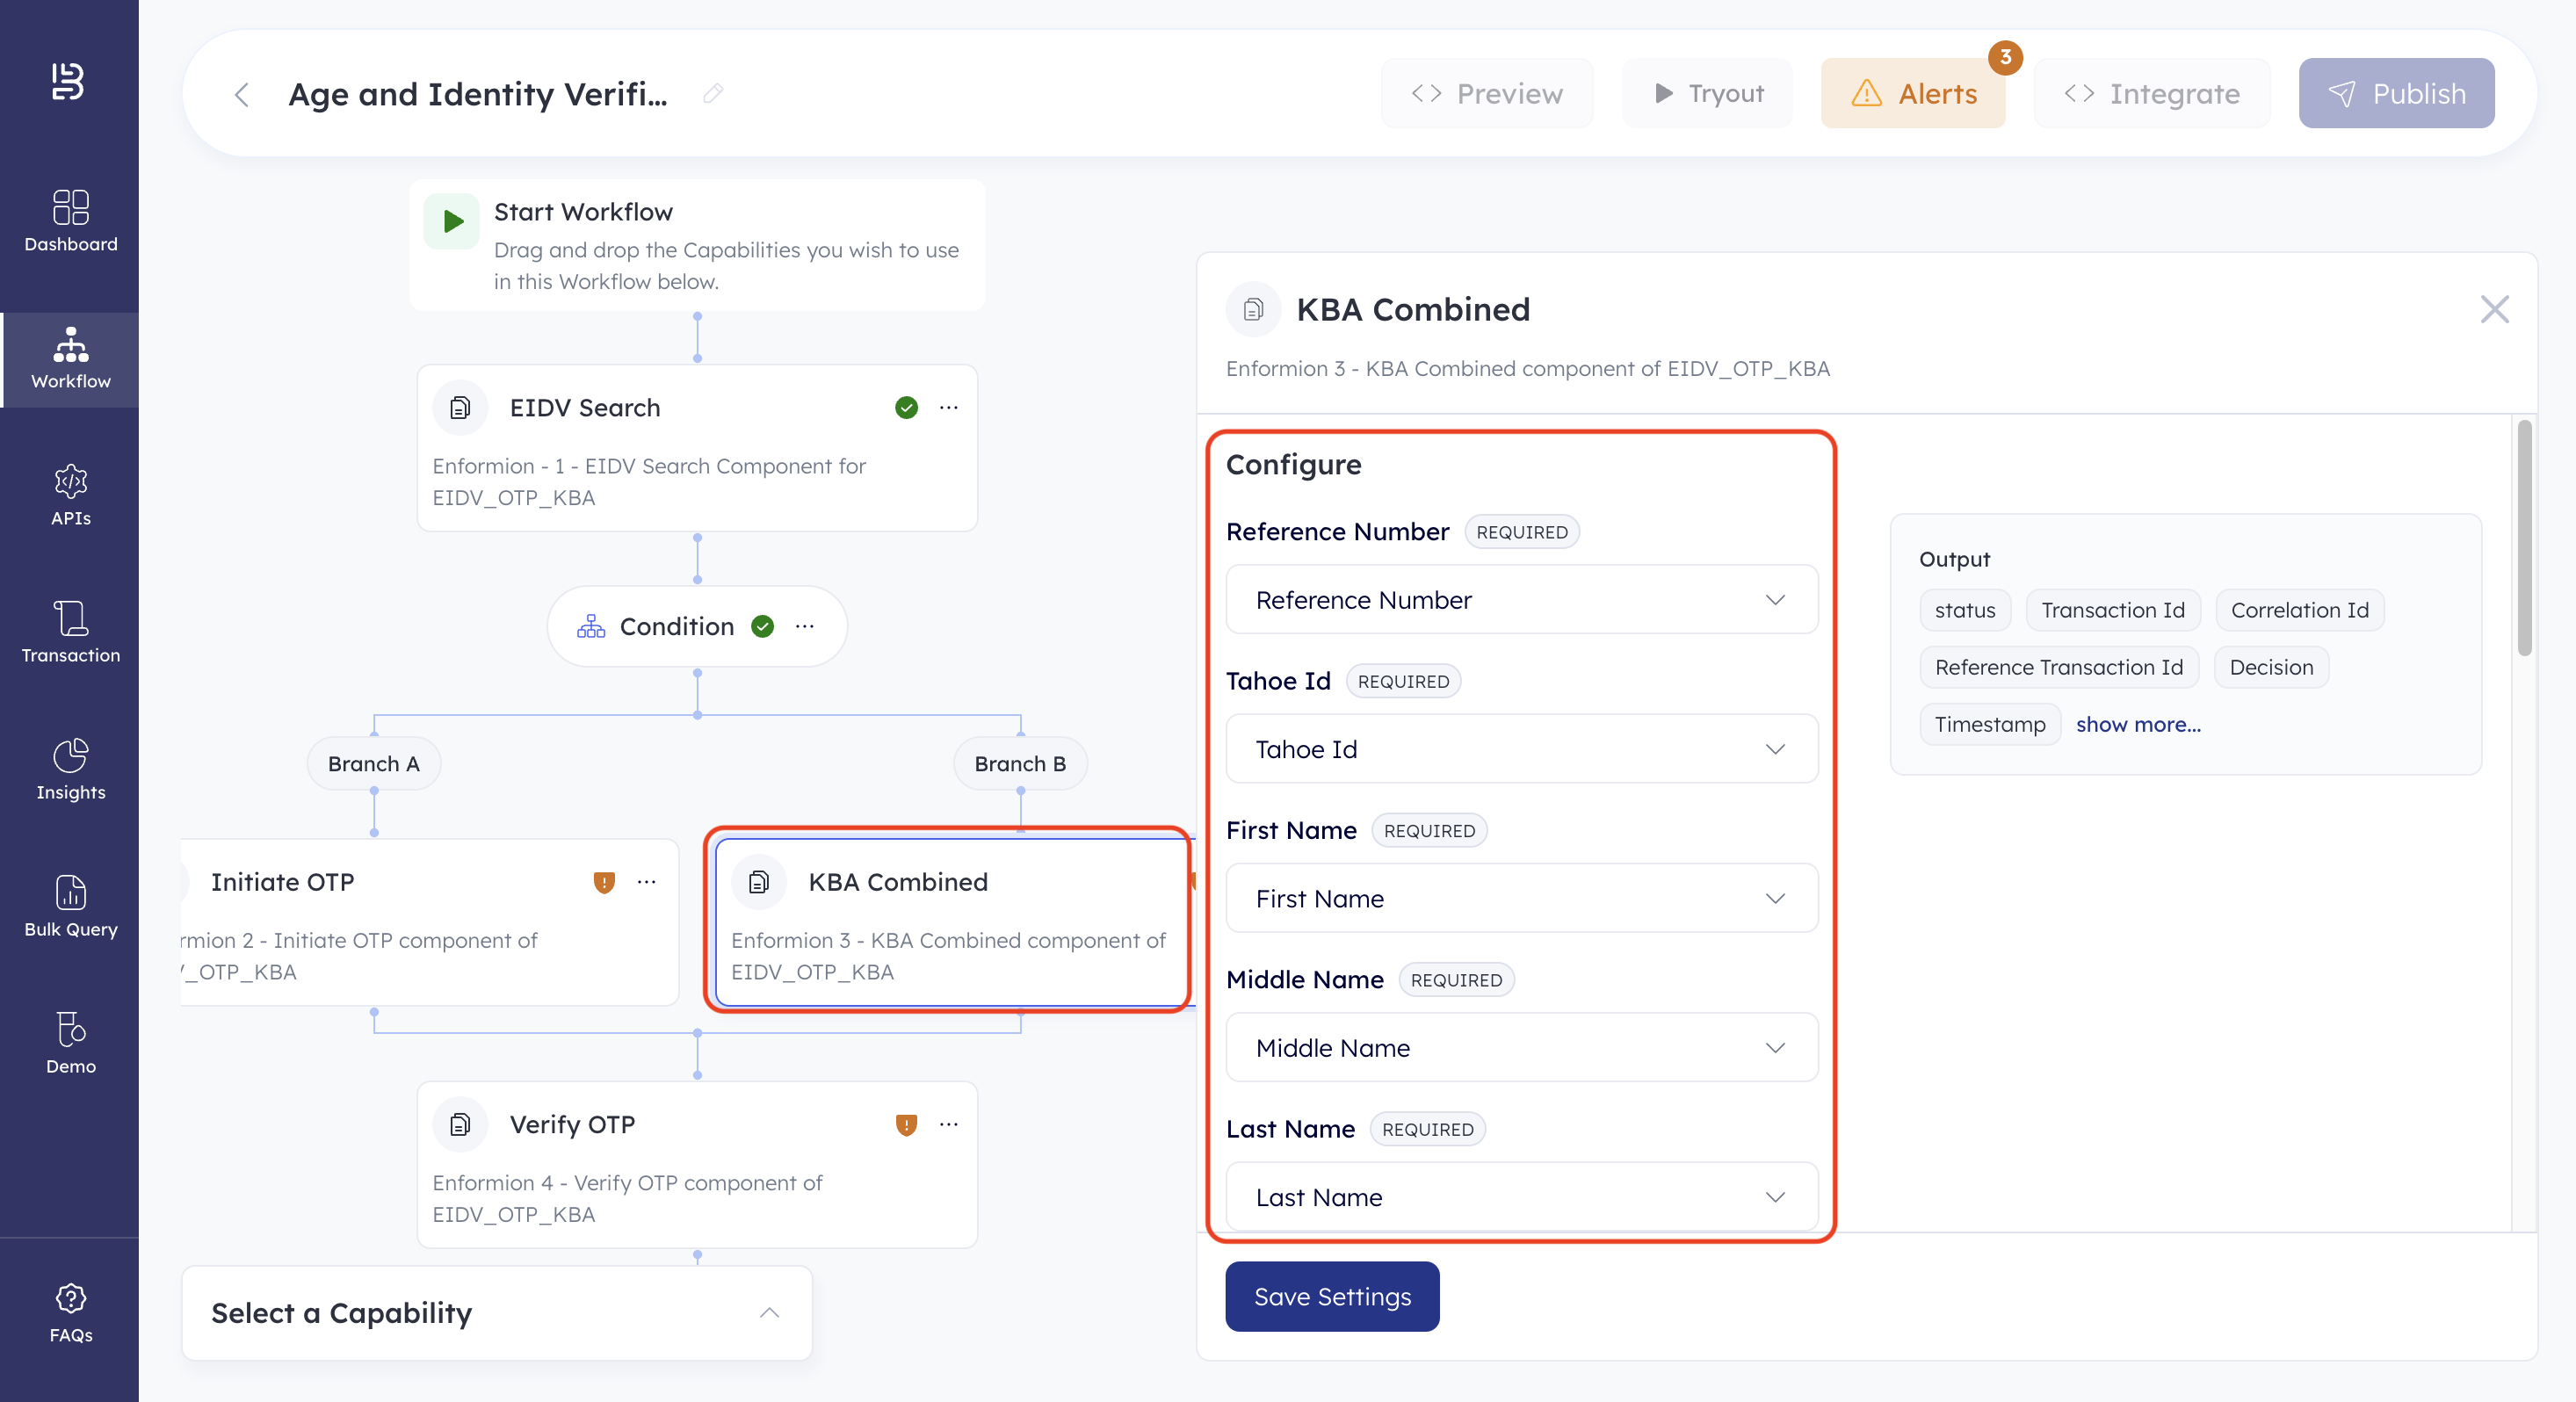
The table below lists the data source for all the parameters in the KBA Combined capability.
| Capability Parameter | Data Source | Data Source Parameter |
|---|---|---|
| Reference Number | User Input | Reference Number |
| Tahoe Id | User Input | Tahoe Id |
| First Name | User Input | First Name |
| Middle Name | User Input | Middle Name |
| Last Name | User Input | Last Name |
| Dob | User Input | Dob |
| Address Line 1 | User Input | Address Line 1 |
| Address Line 2 | User Input | Address Line 2 |
| Phone | User Input | Phone |
| Ssn | User Input | Ssn |
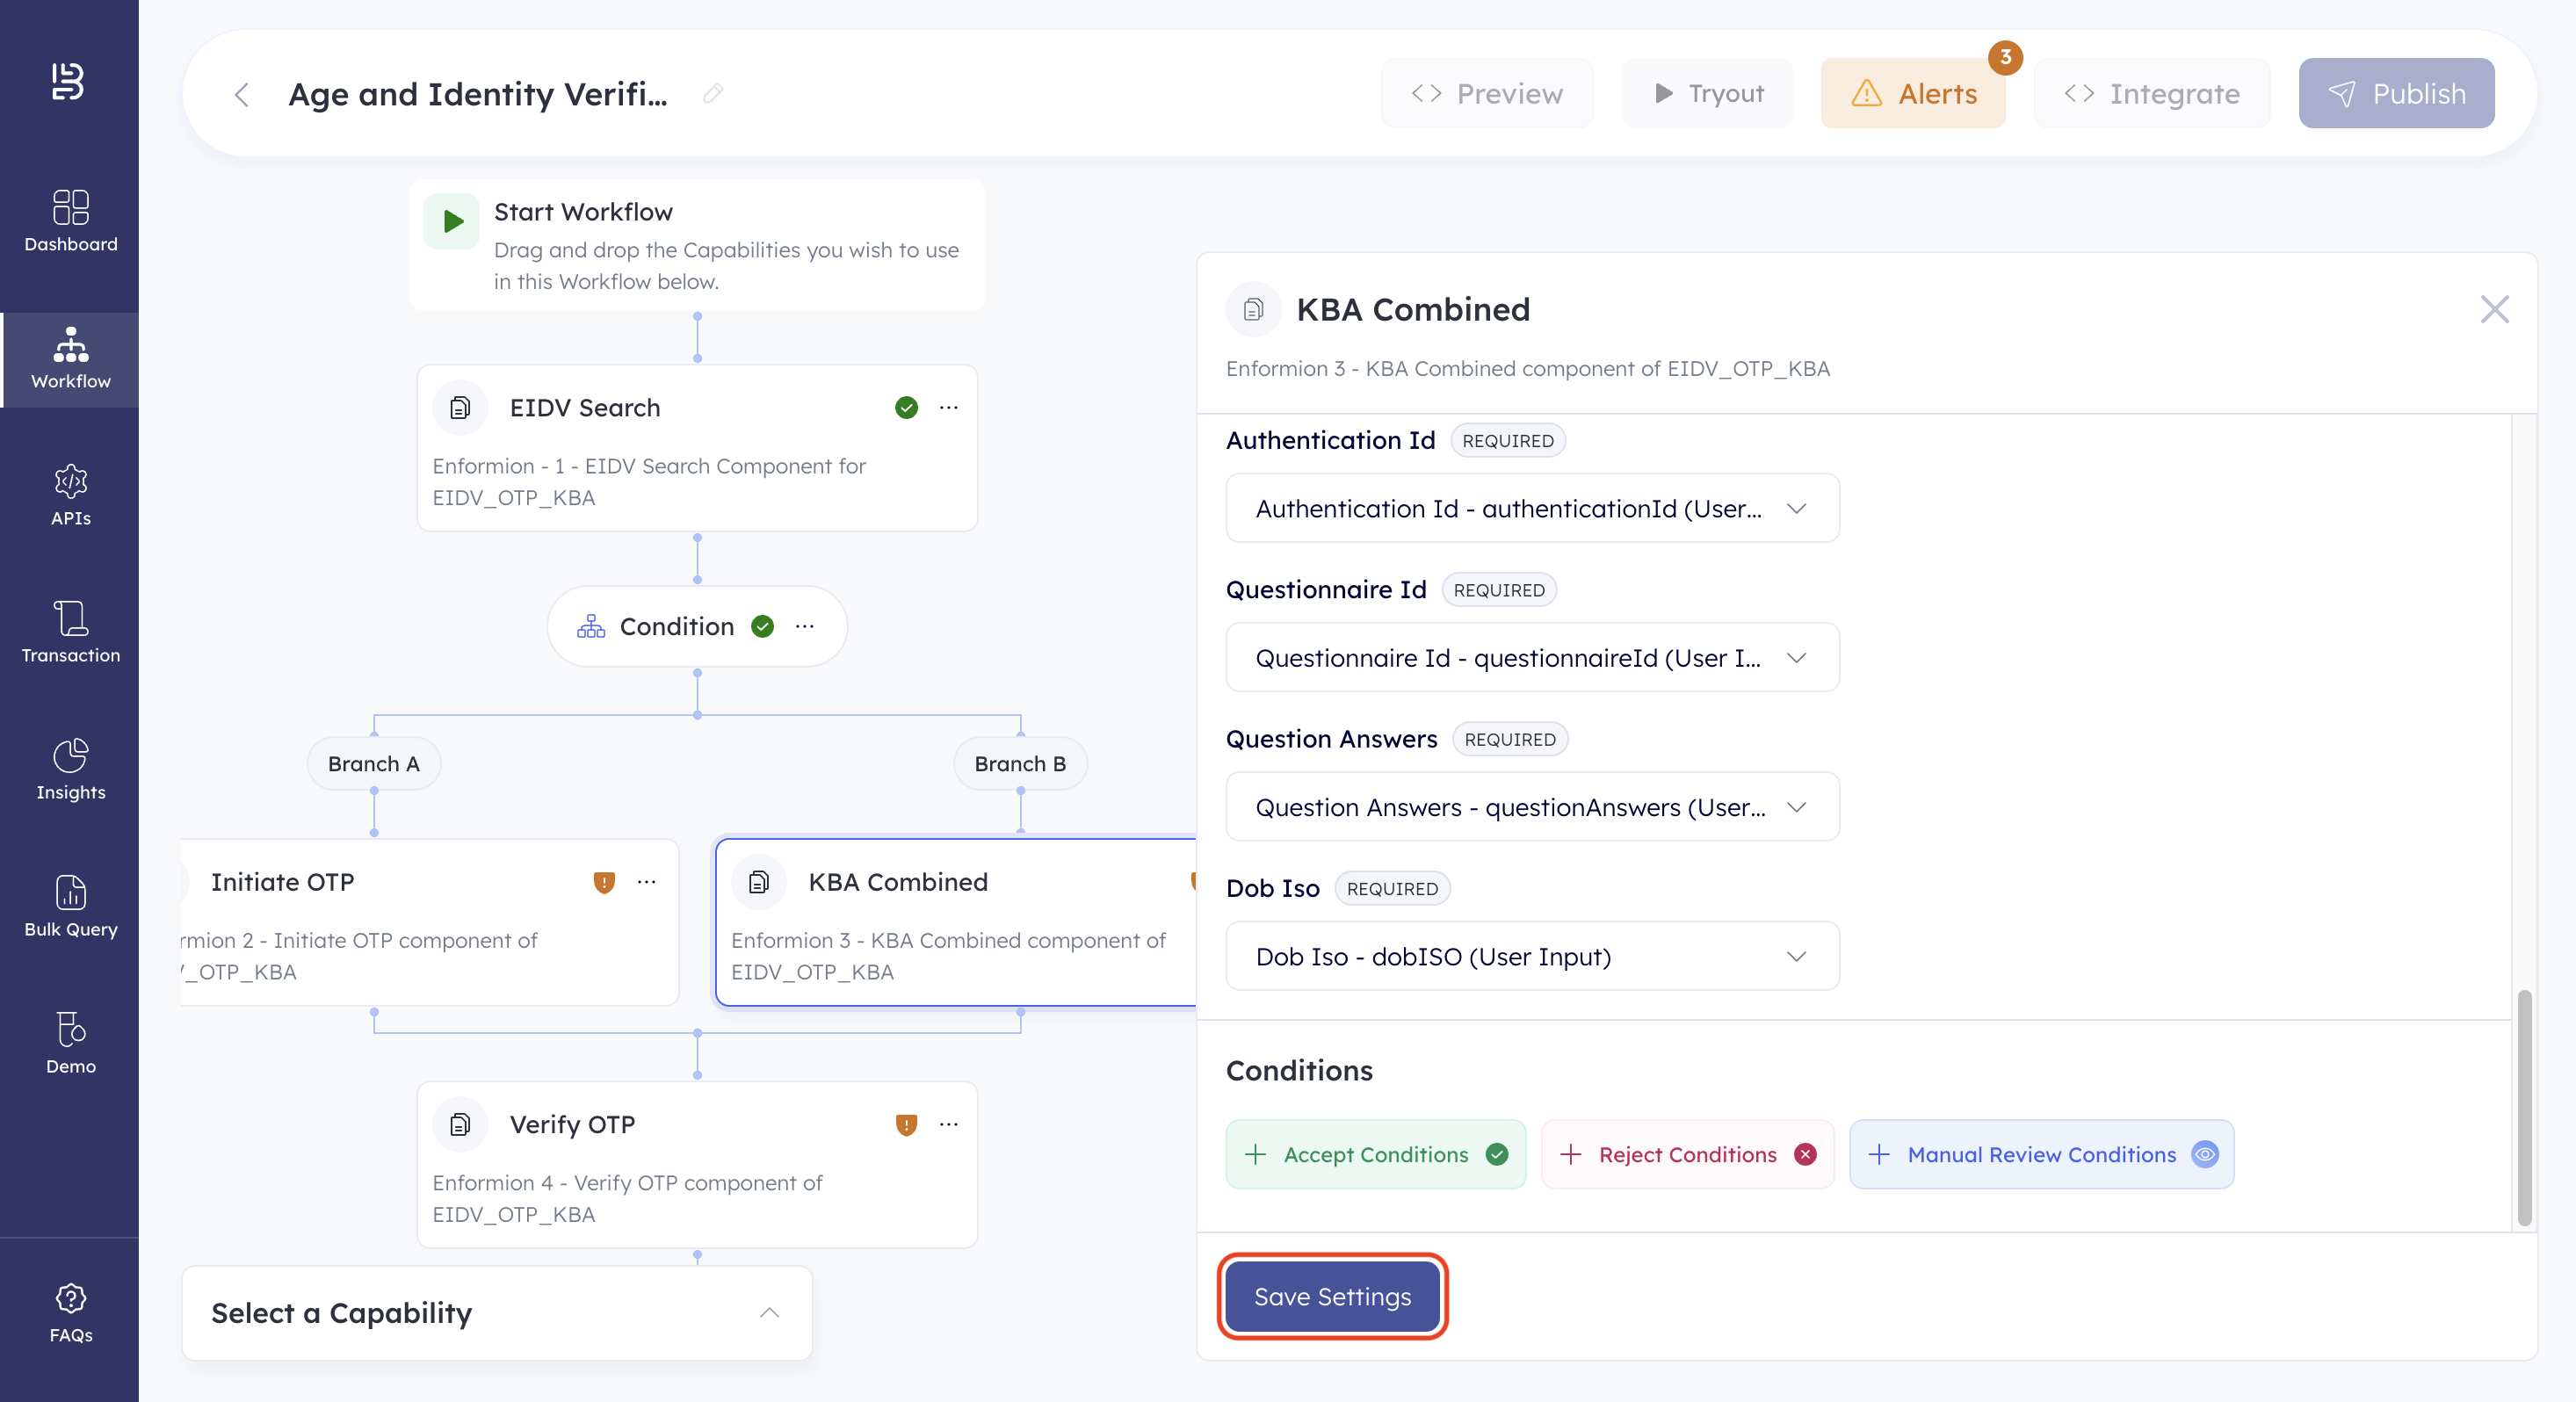
| User Input | ||
| Correlation Id | User Input | Correlation Id |
| Authentication Id | User Input | Authentication Id |
| Questionnaire Id | User Input | Questionnaire Id |
| Question Answers | User Input | Question Answers |
| Dob Iso | User Input | Dob Iso |
- Click Save Settings. The KBA Combined capability is configured.
- Click the Verify OTP capability and define the data source for the parameters in the capability.
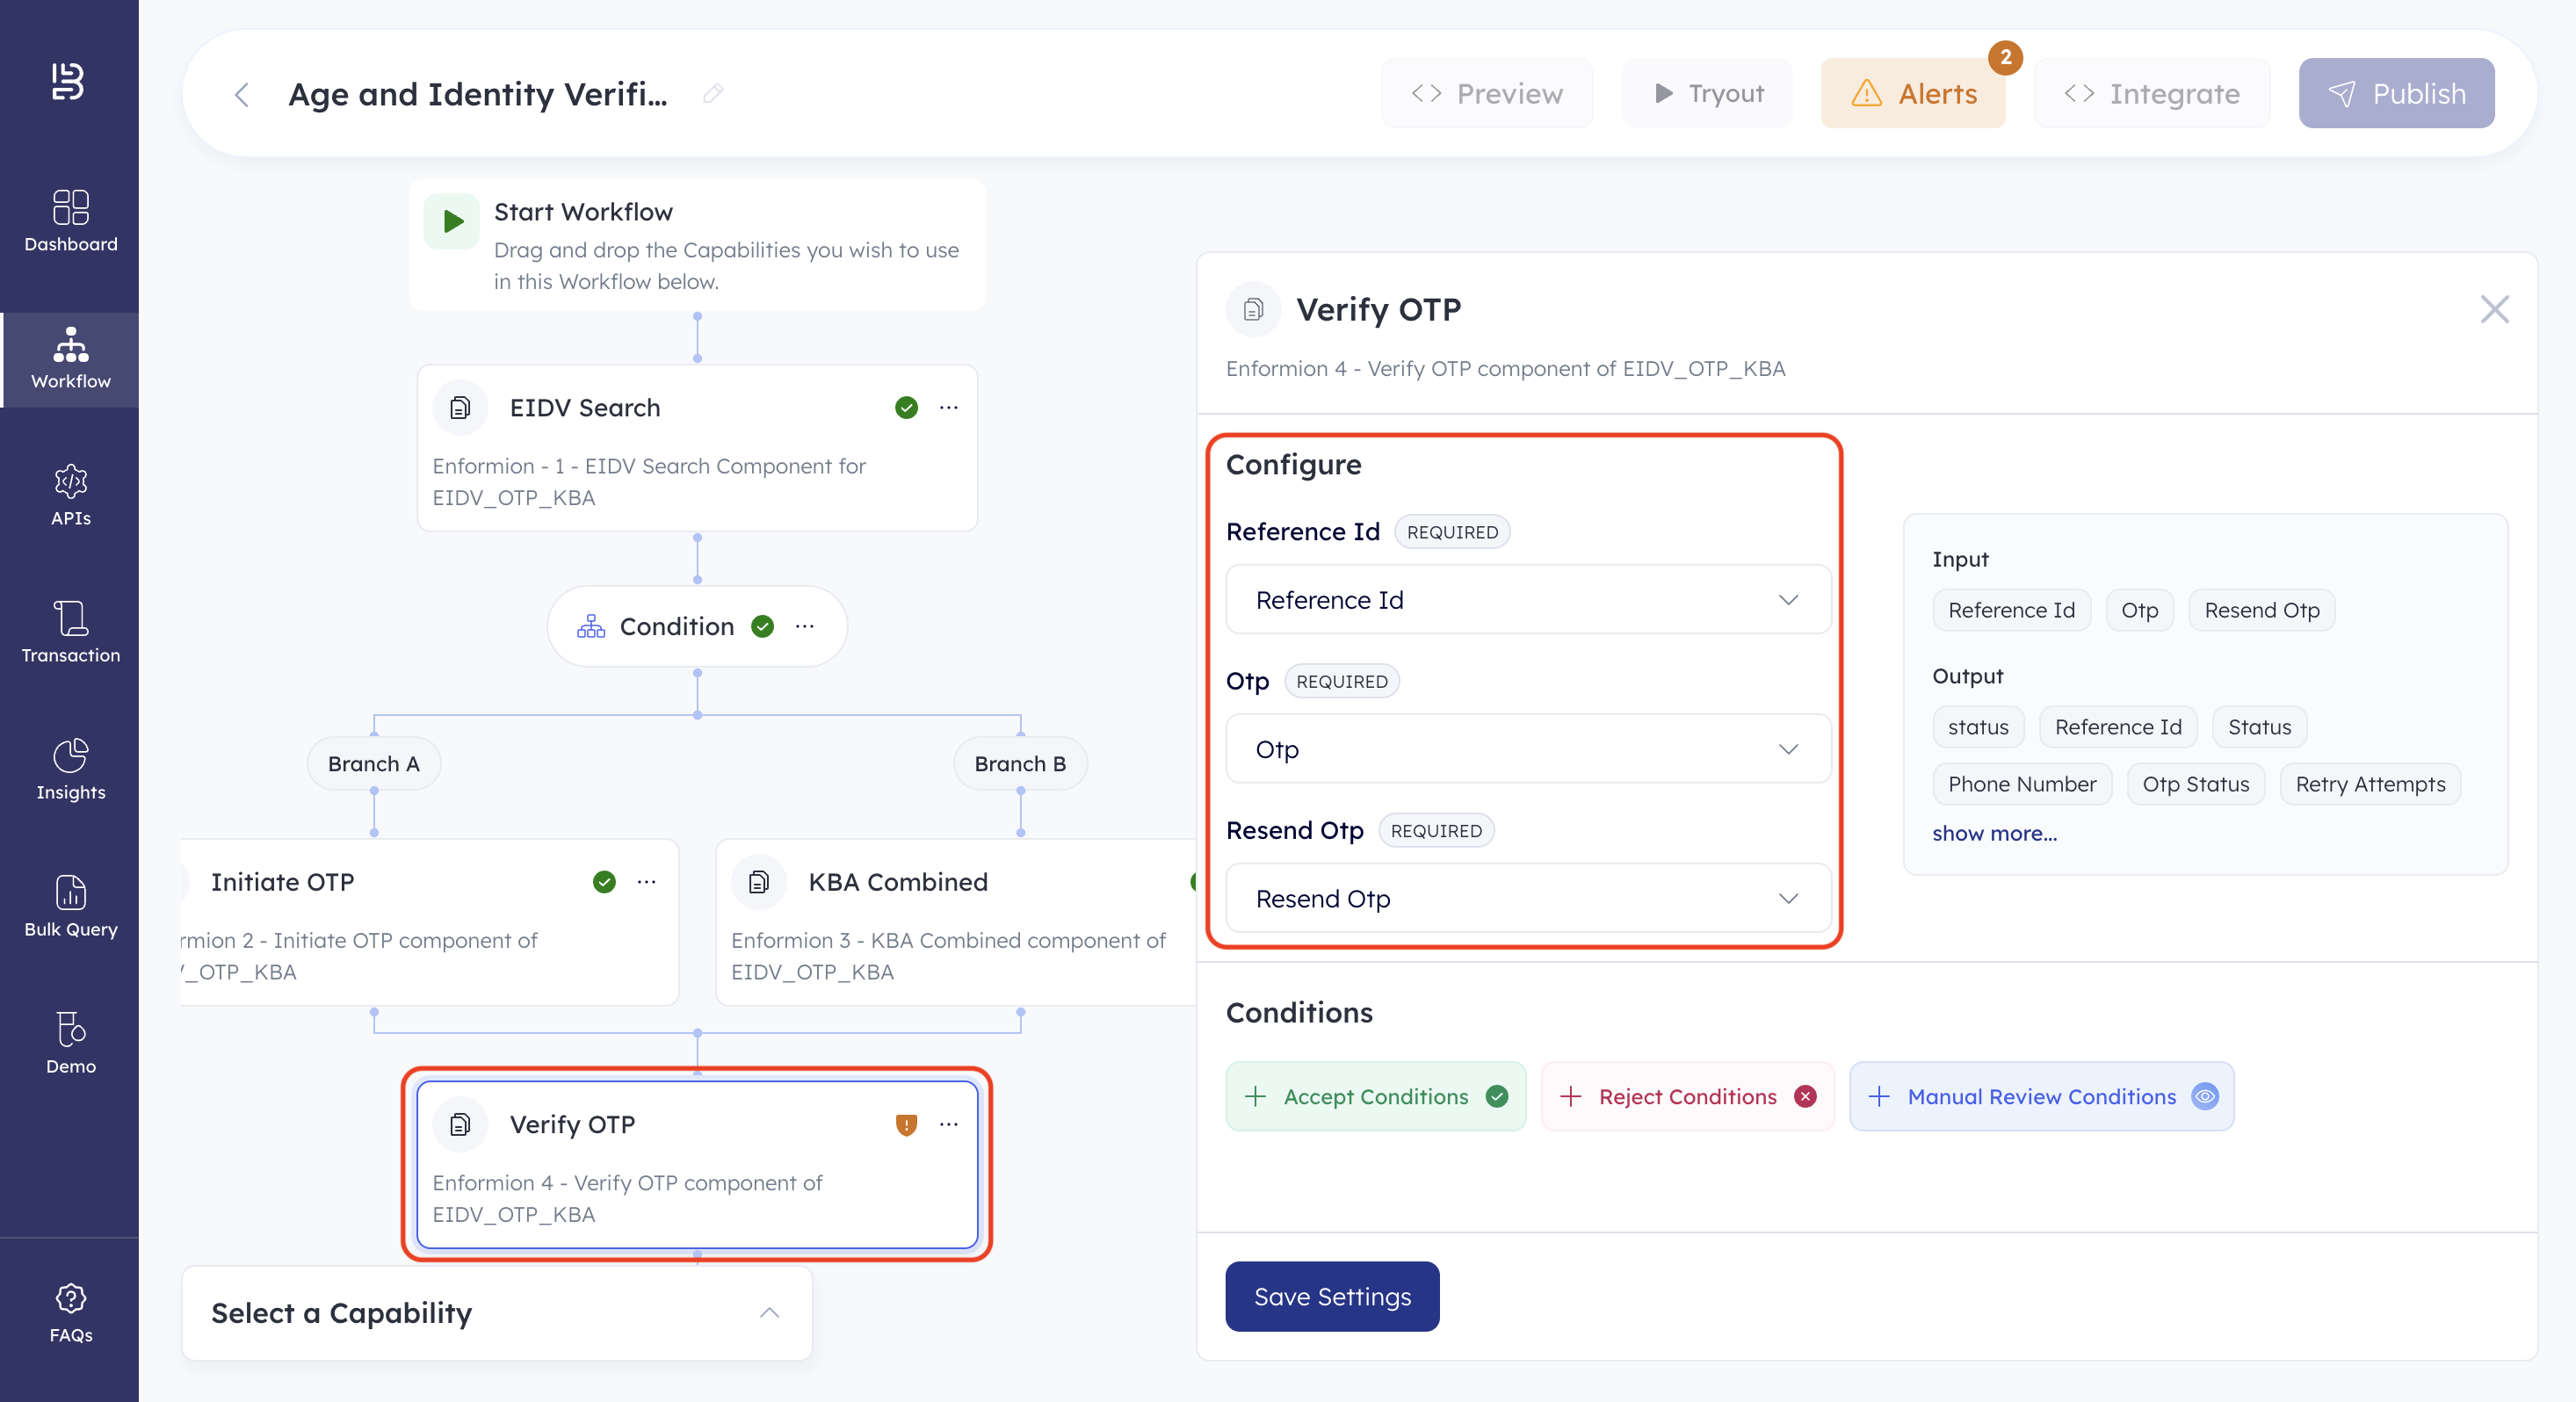
The table below lists the data source for all the parameters in the Verify OTP capability.
| Capability Parameter | Data Source | Data Source Parameter |
|---|---|---|
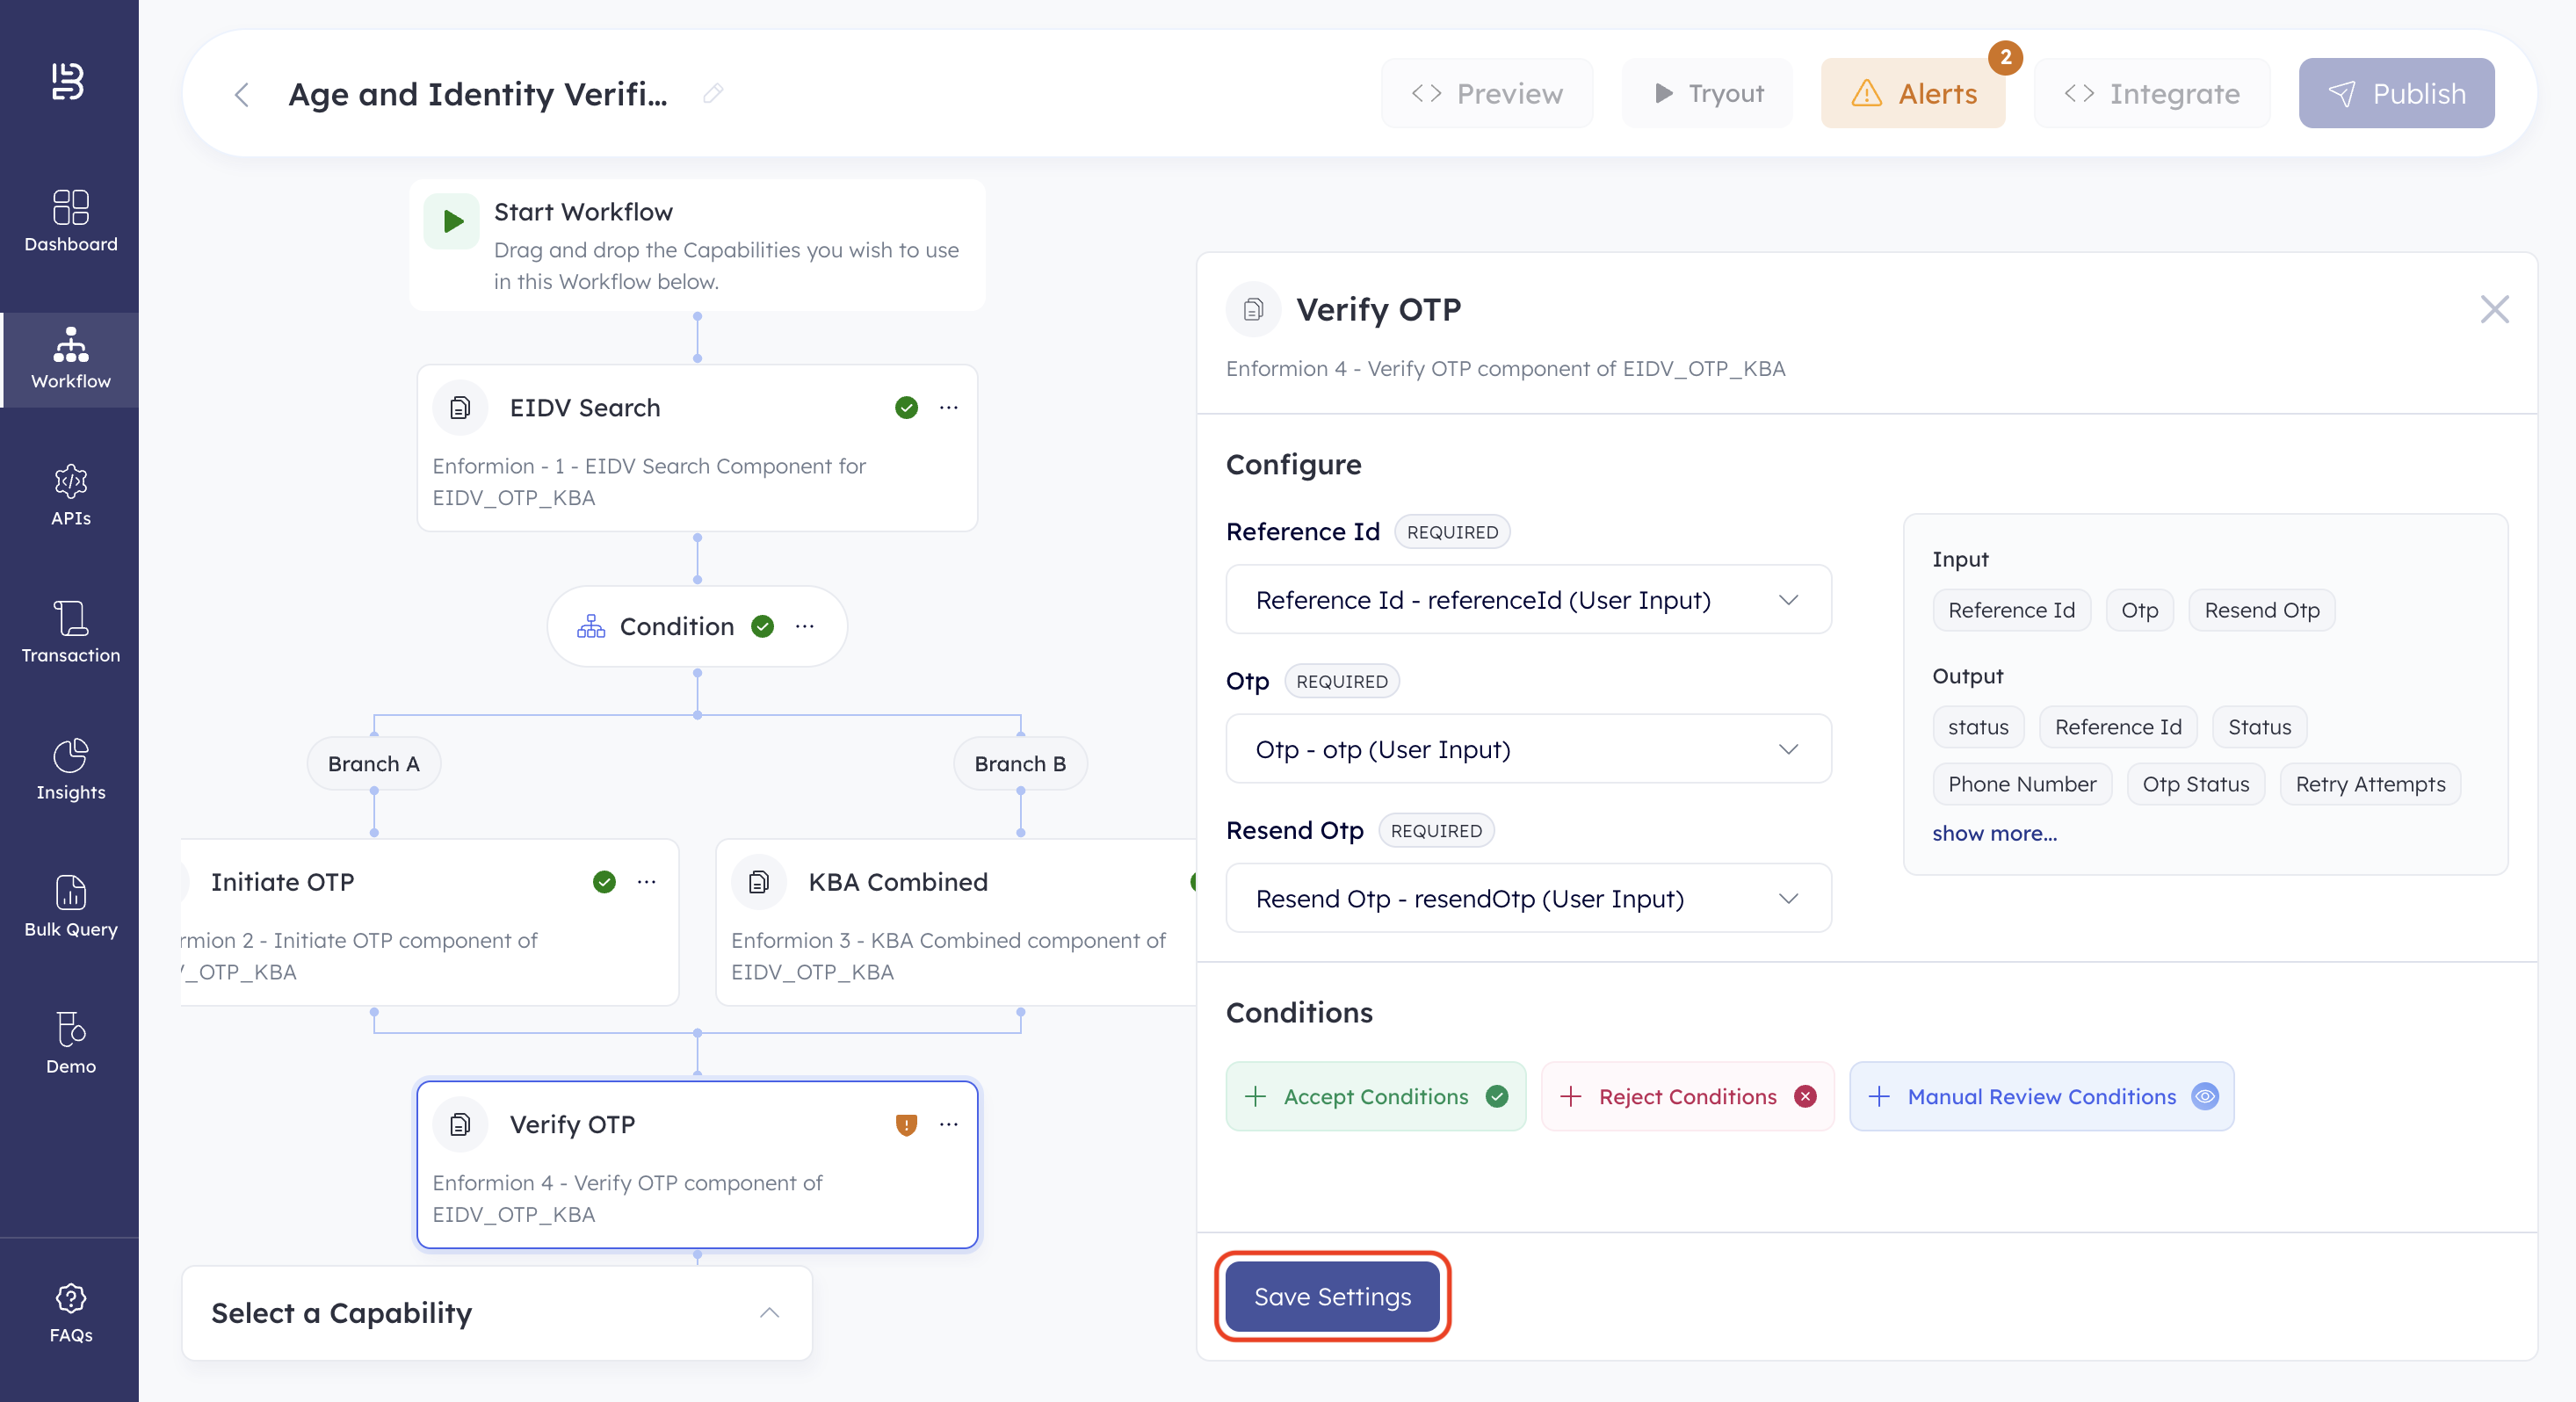
| Reference Id | User Input | Reference Id |
| Otp | User Input | Otp |
| Resend Otp | User Input | Resend Otp |
- Click Save Settings. The Verify OTP capability is configured.
With the capabilities configured, you're ready to define the workflow conditions.
3. Define Workflow Conditions
After configuring capabilities, define the conditions that determine the workflow's outcome. This is done using If/Else statements.
Note
This workflow involves complex capabilities, each of which includes predefined end (accept, reject, and manual review) conditions.
No separate end conditions need to be defined for this workflow.
Follow the below steps to define the workflow conditions.
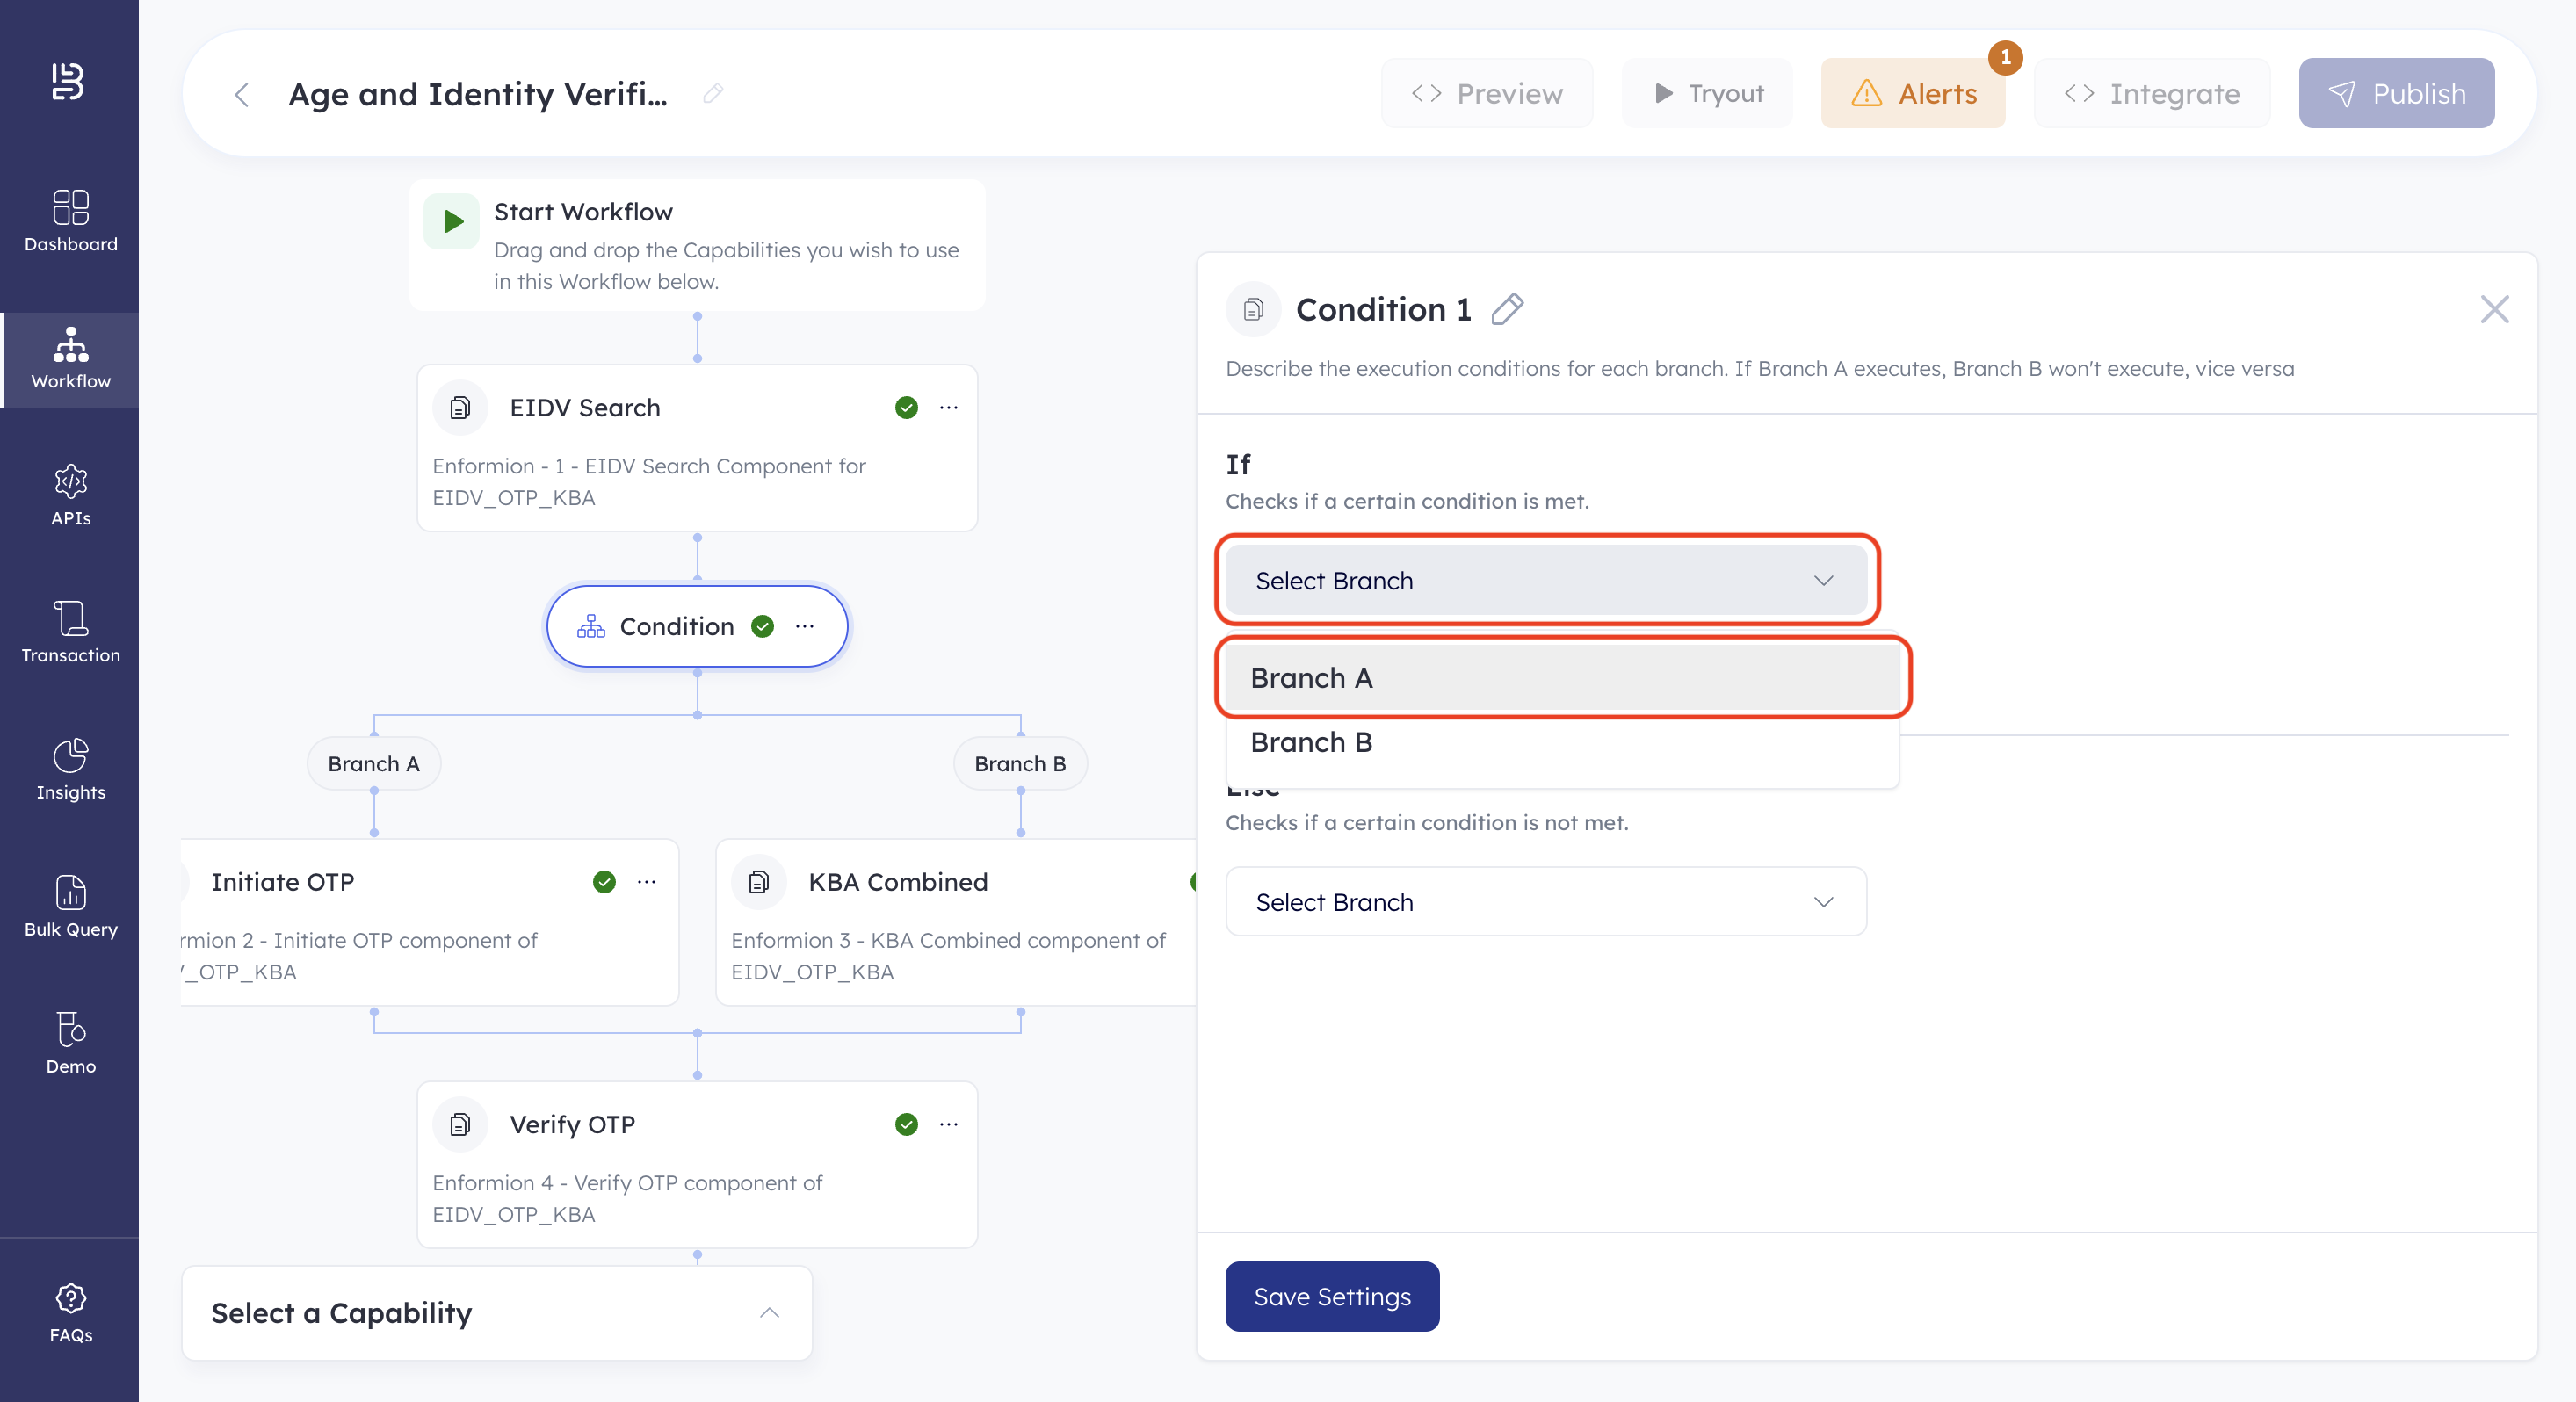
- Click Condition.

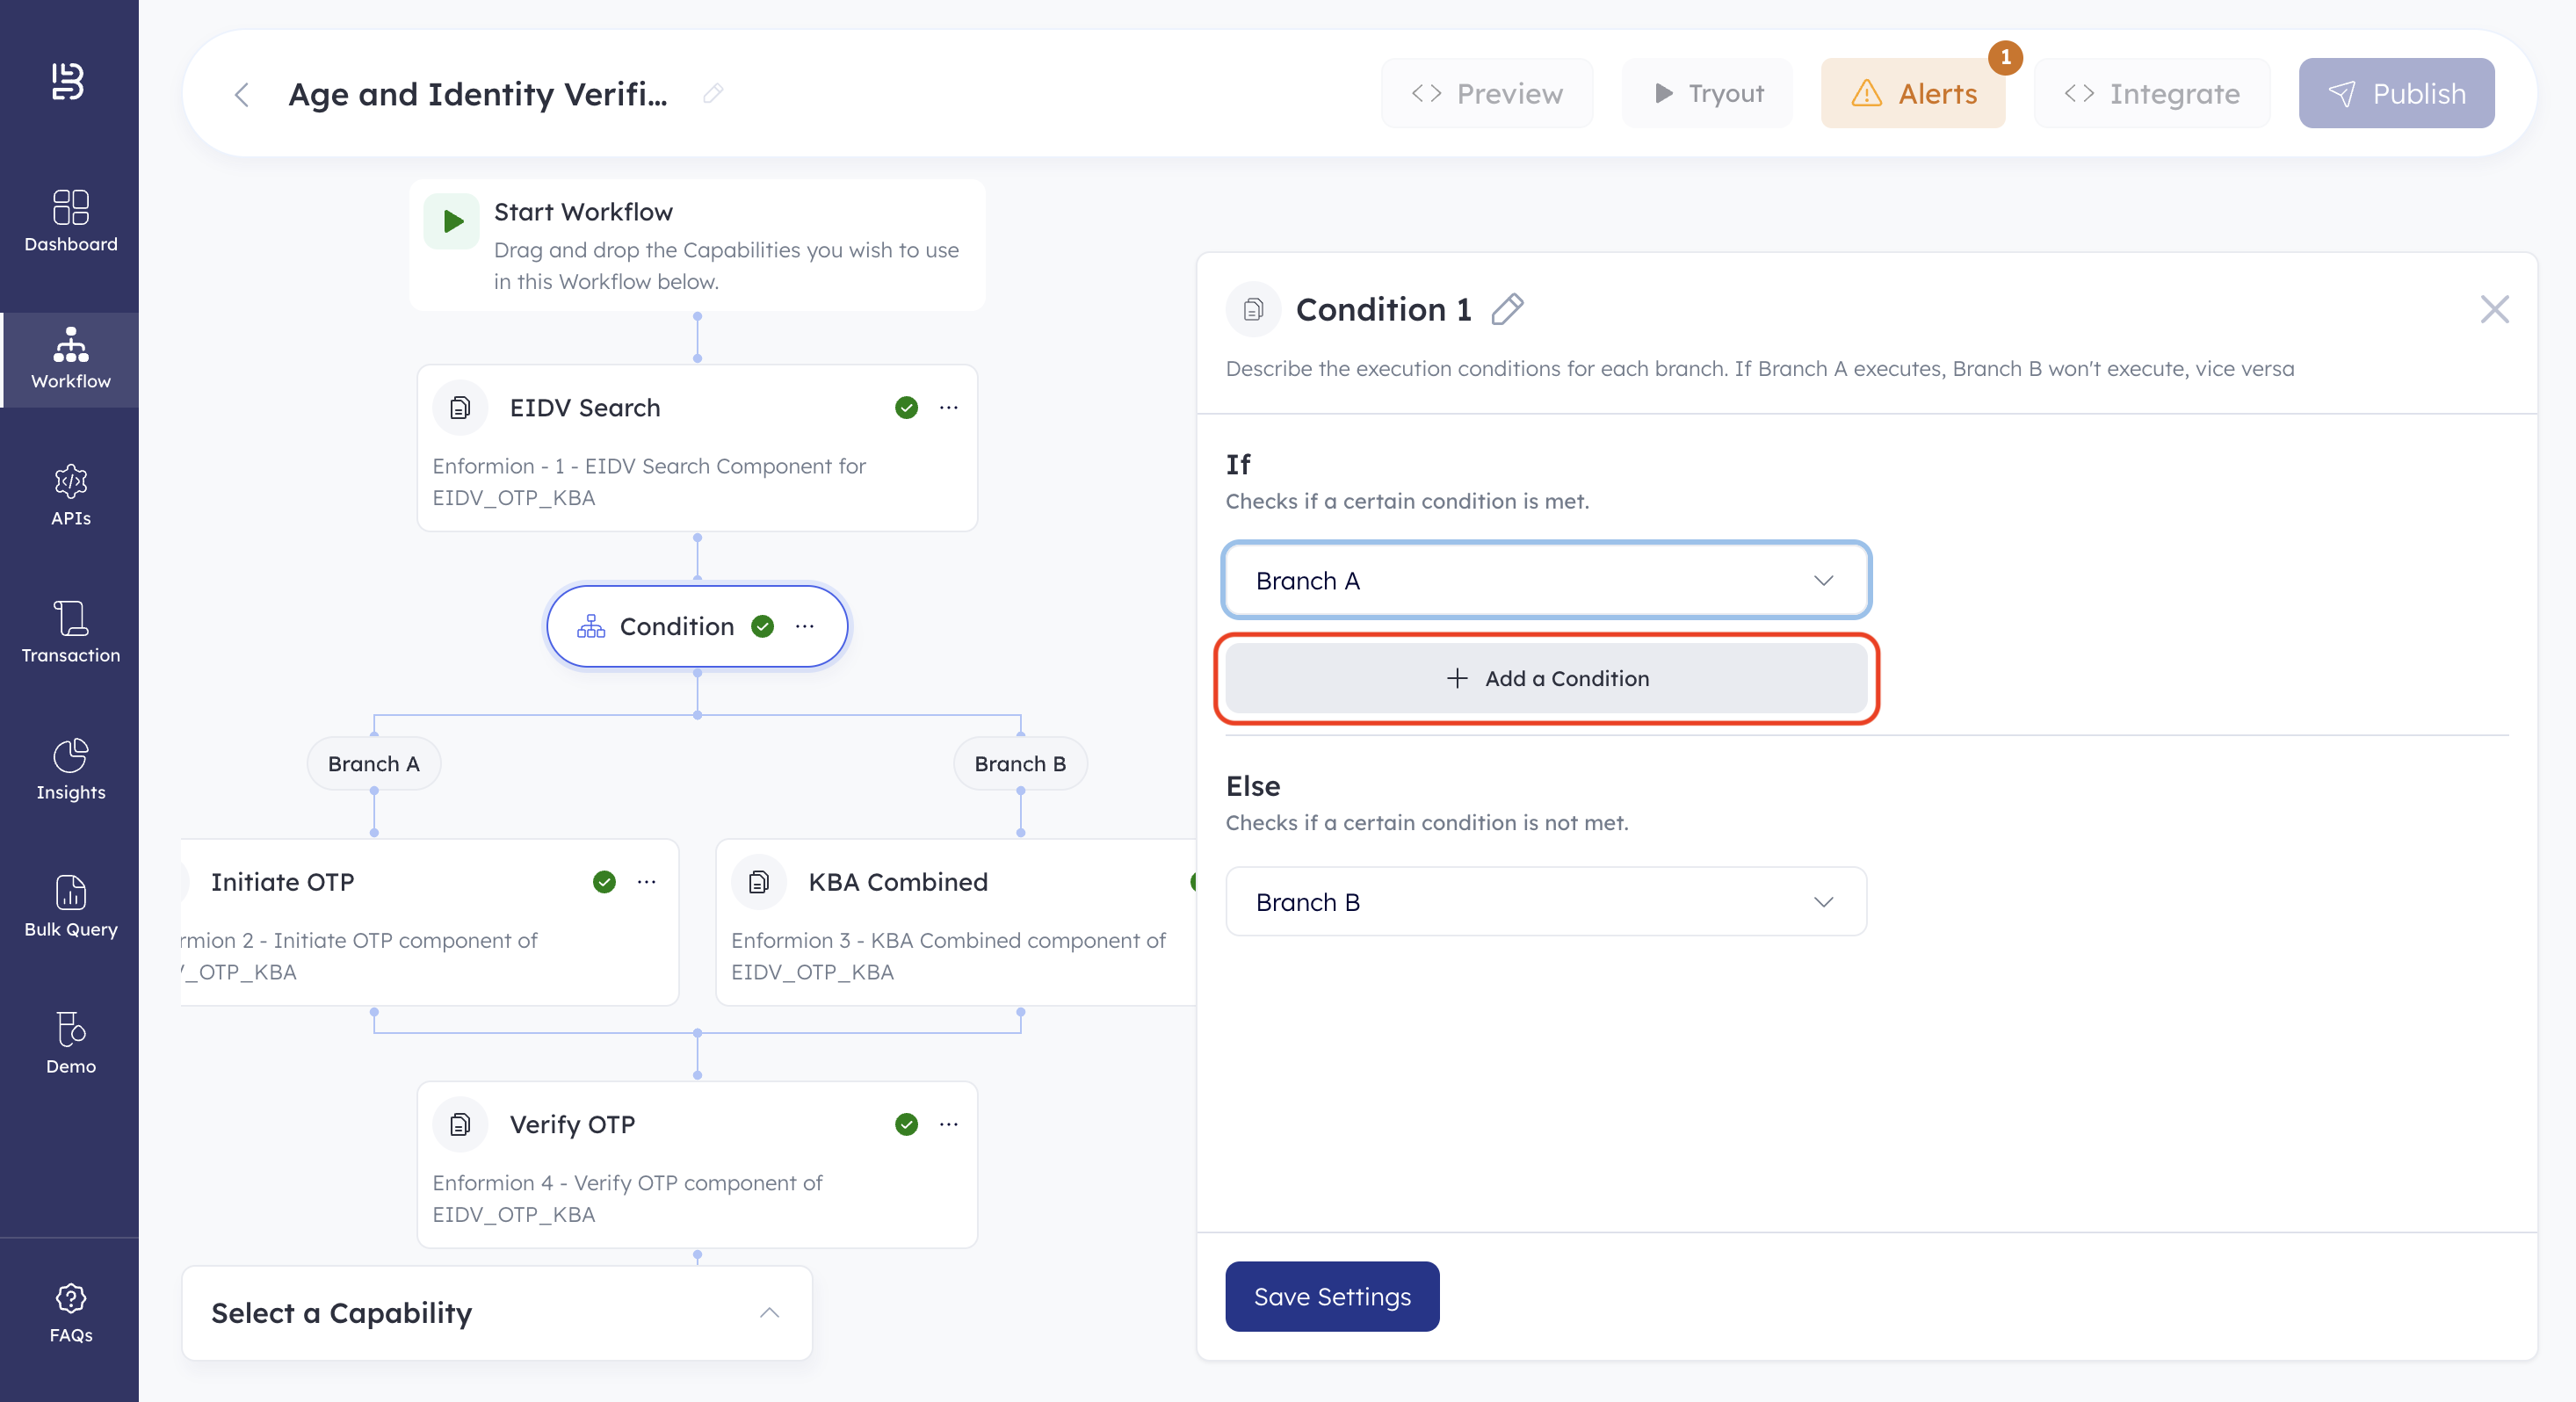
- Click the Select Branch dropdown under the If condition and select Branch A.
- Click Add Condition.
- Click the condition dropdown.
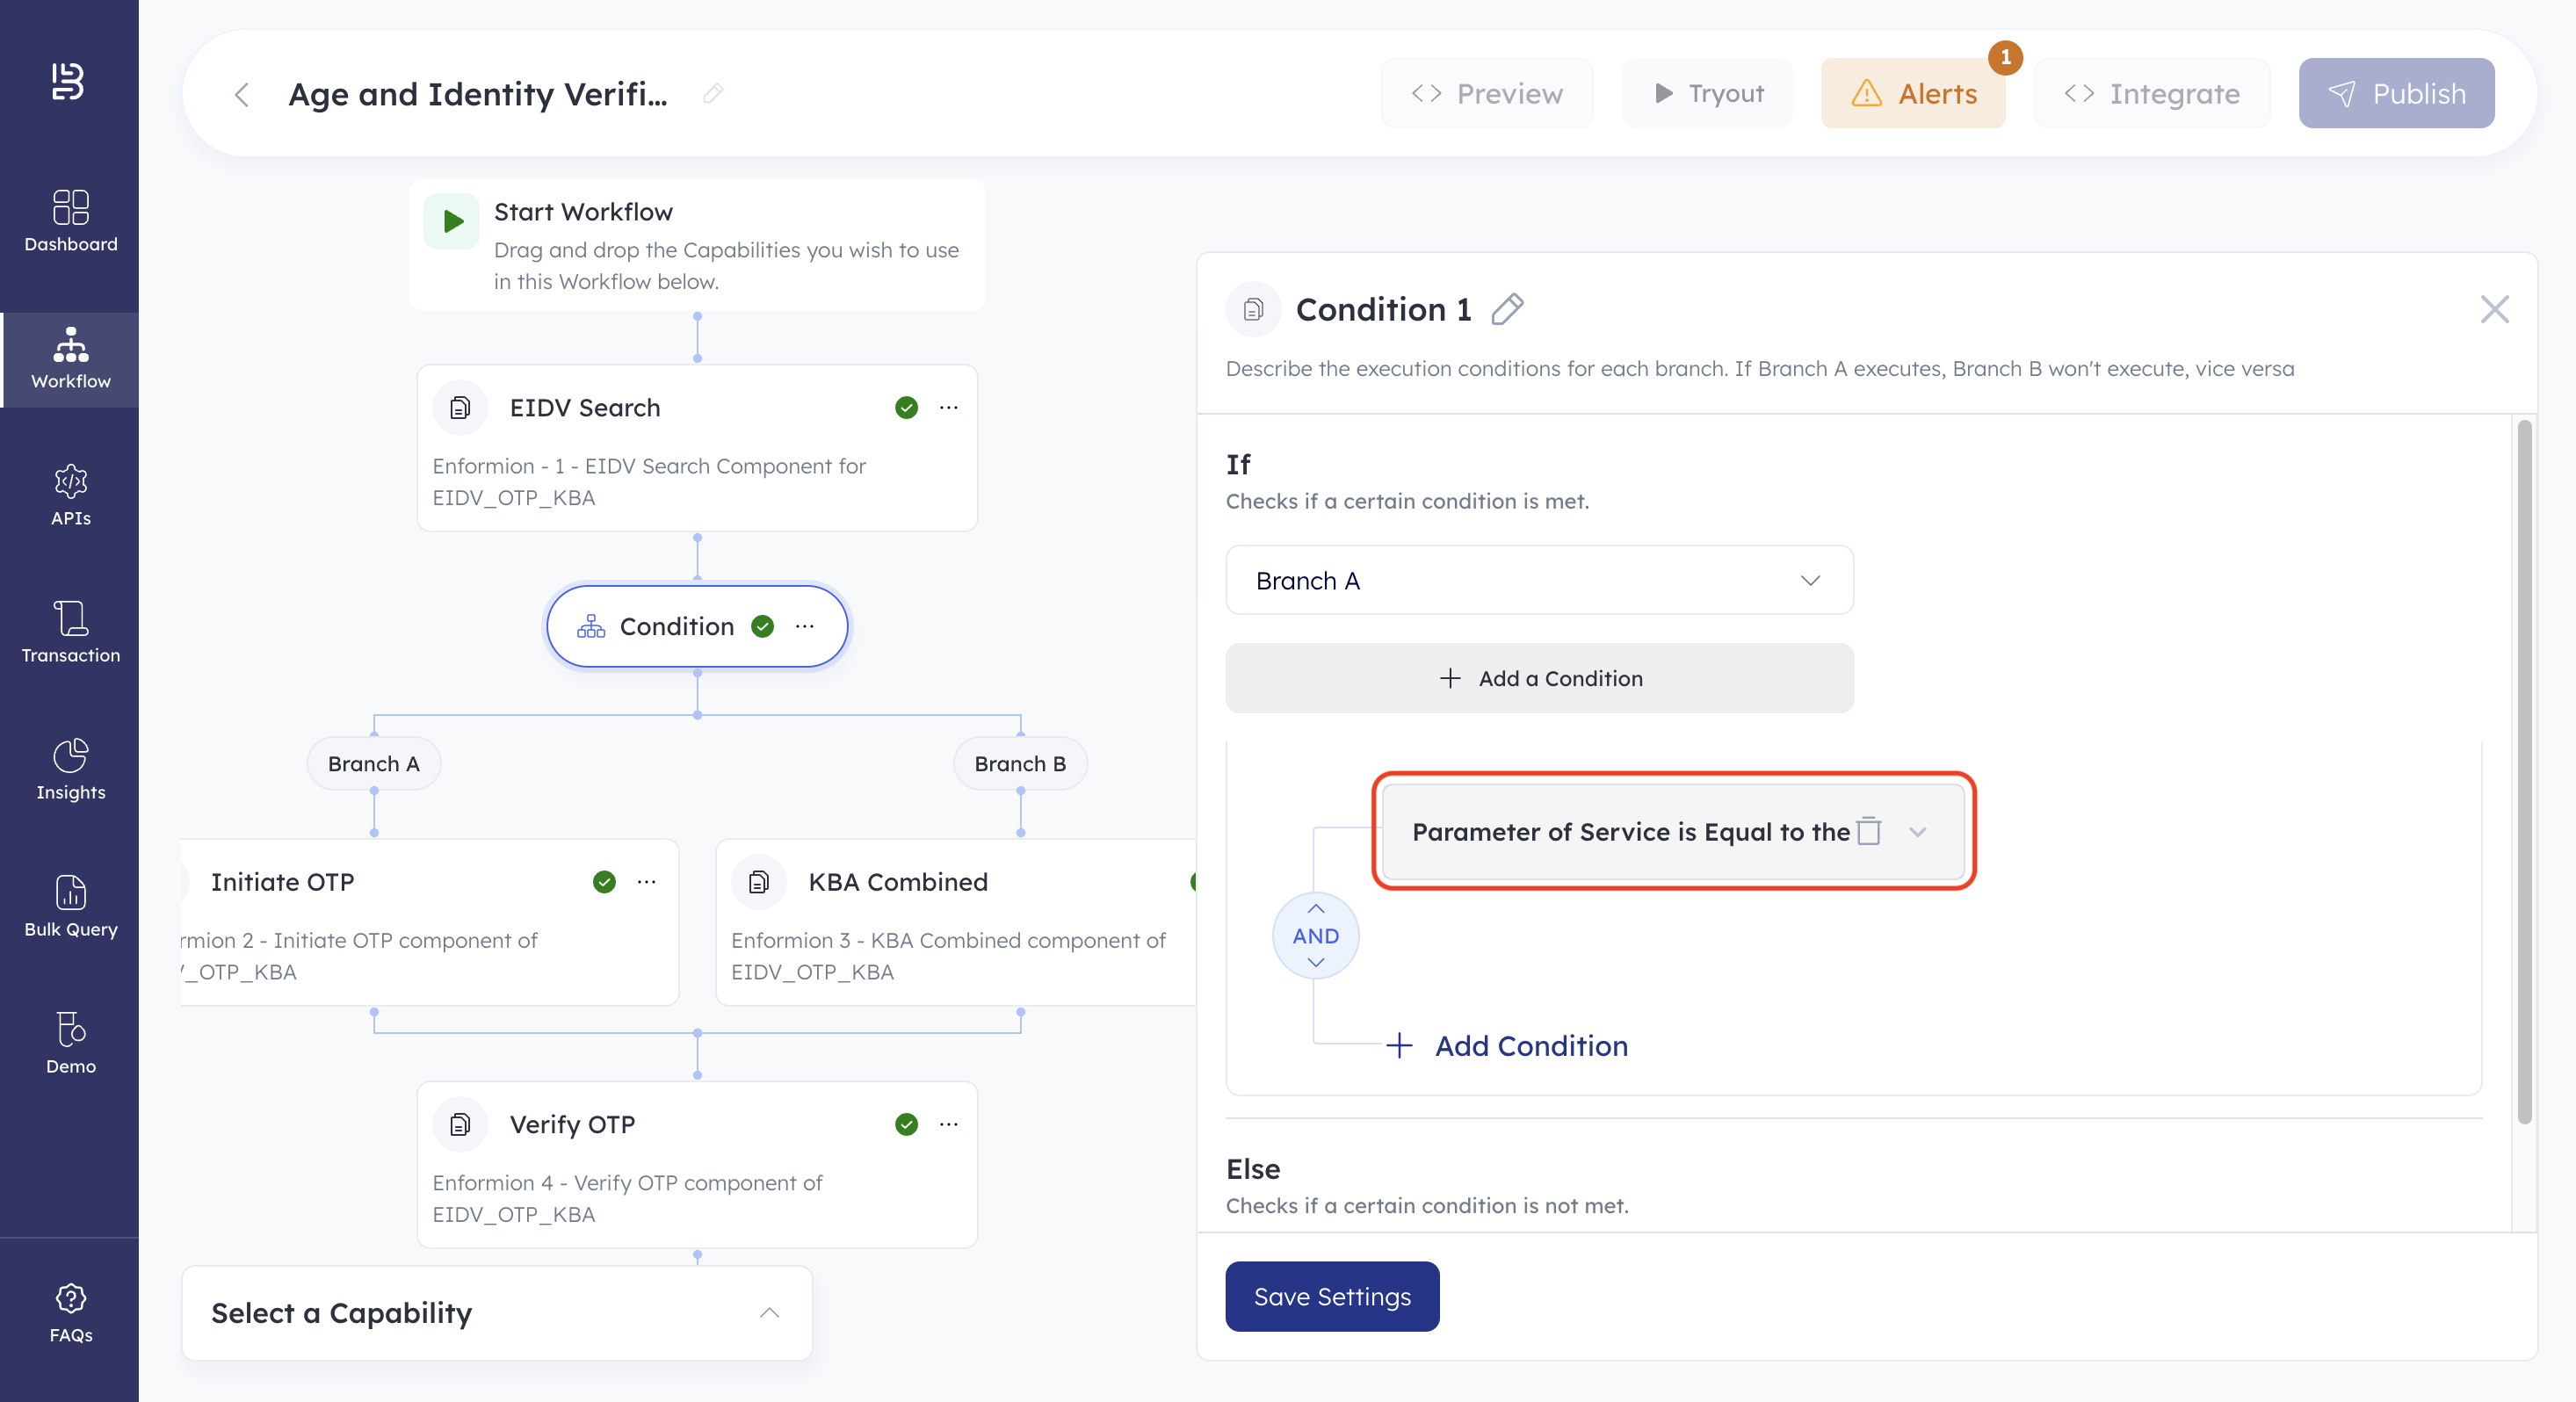
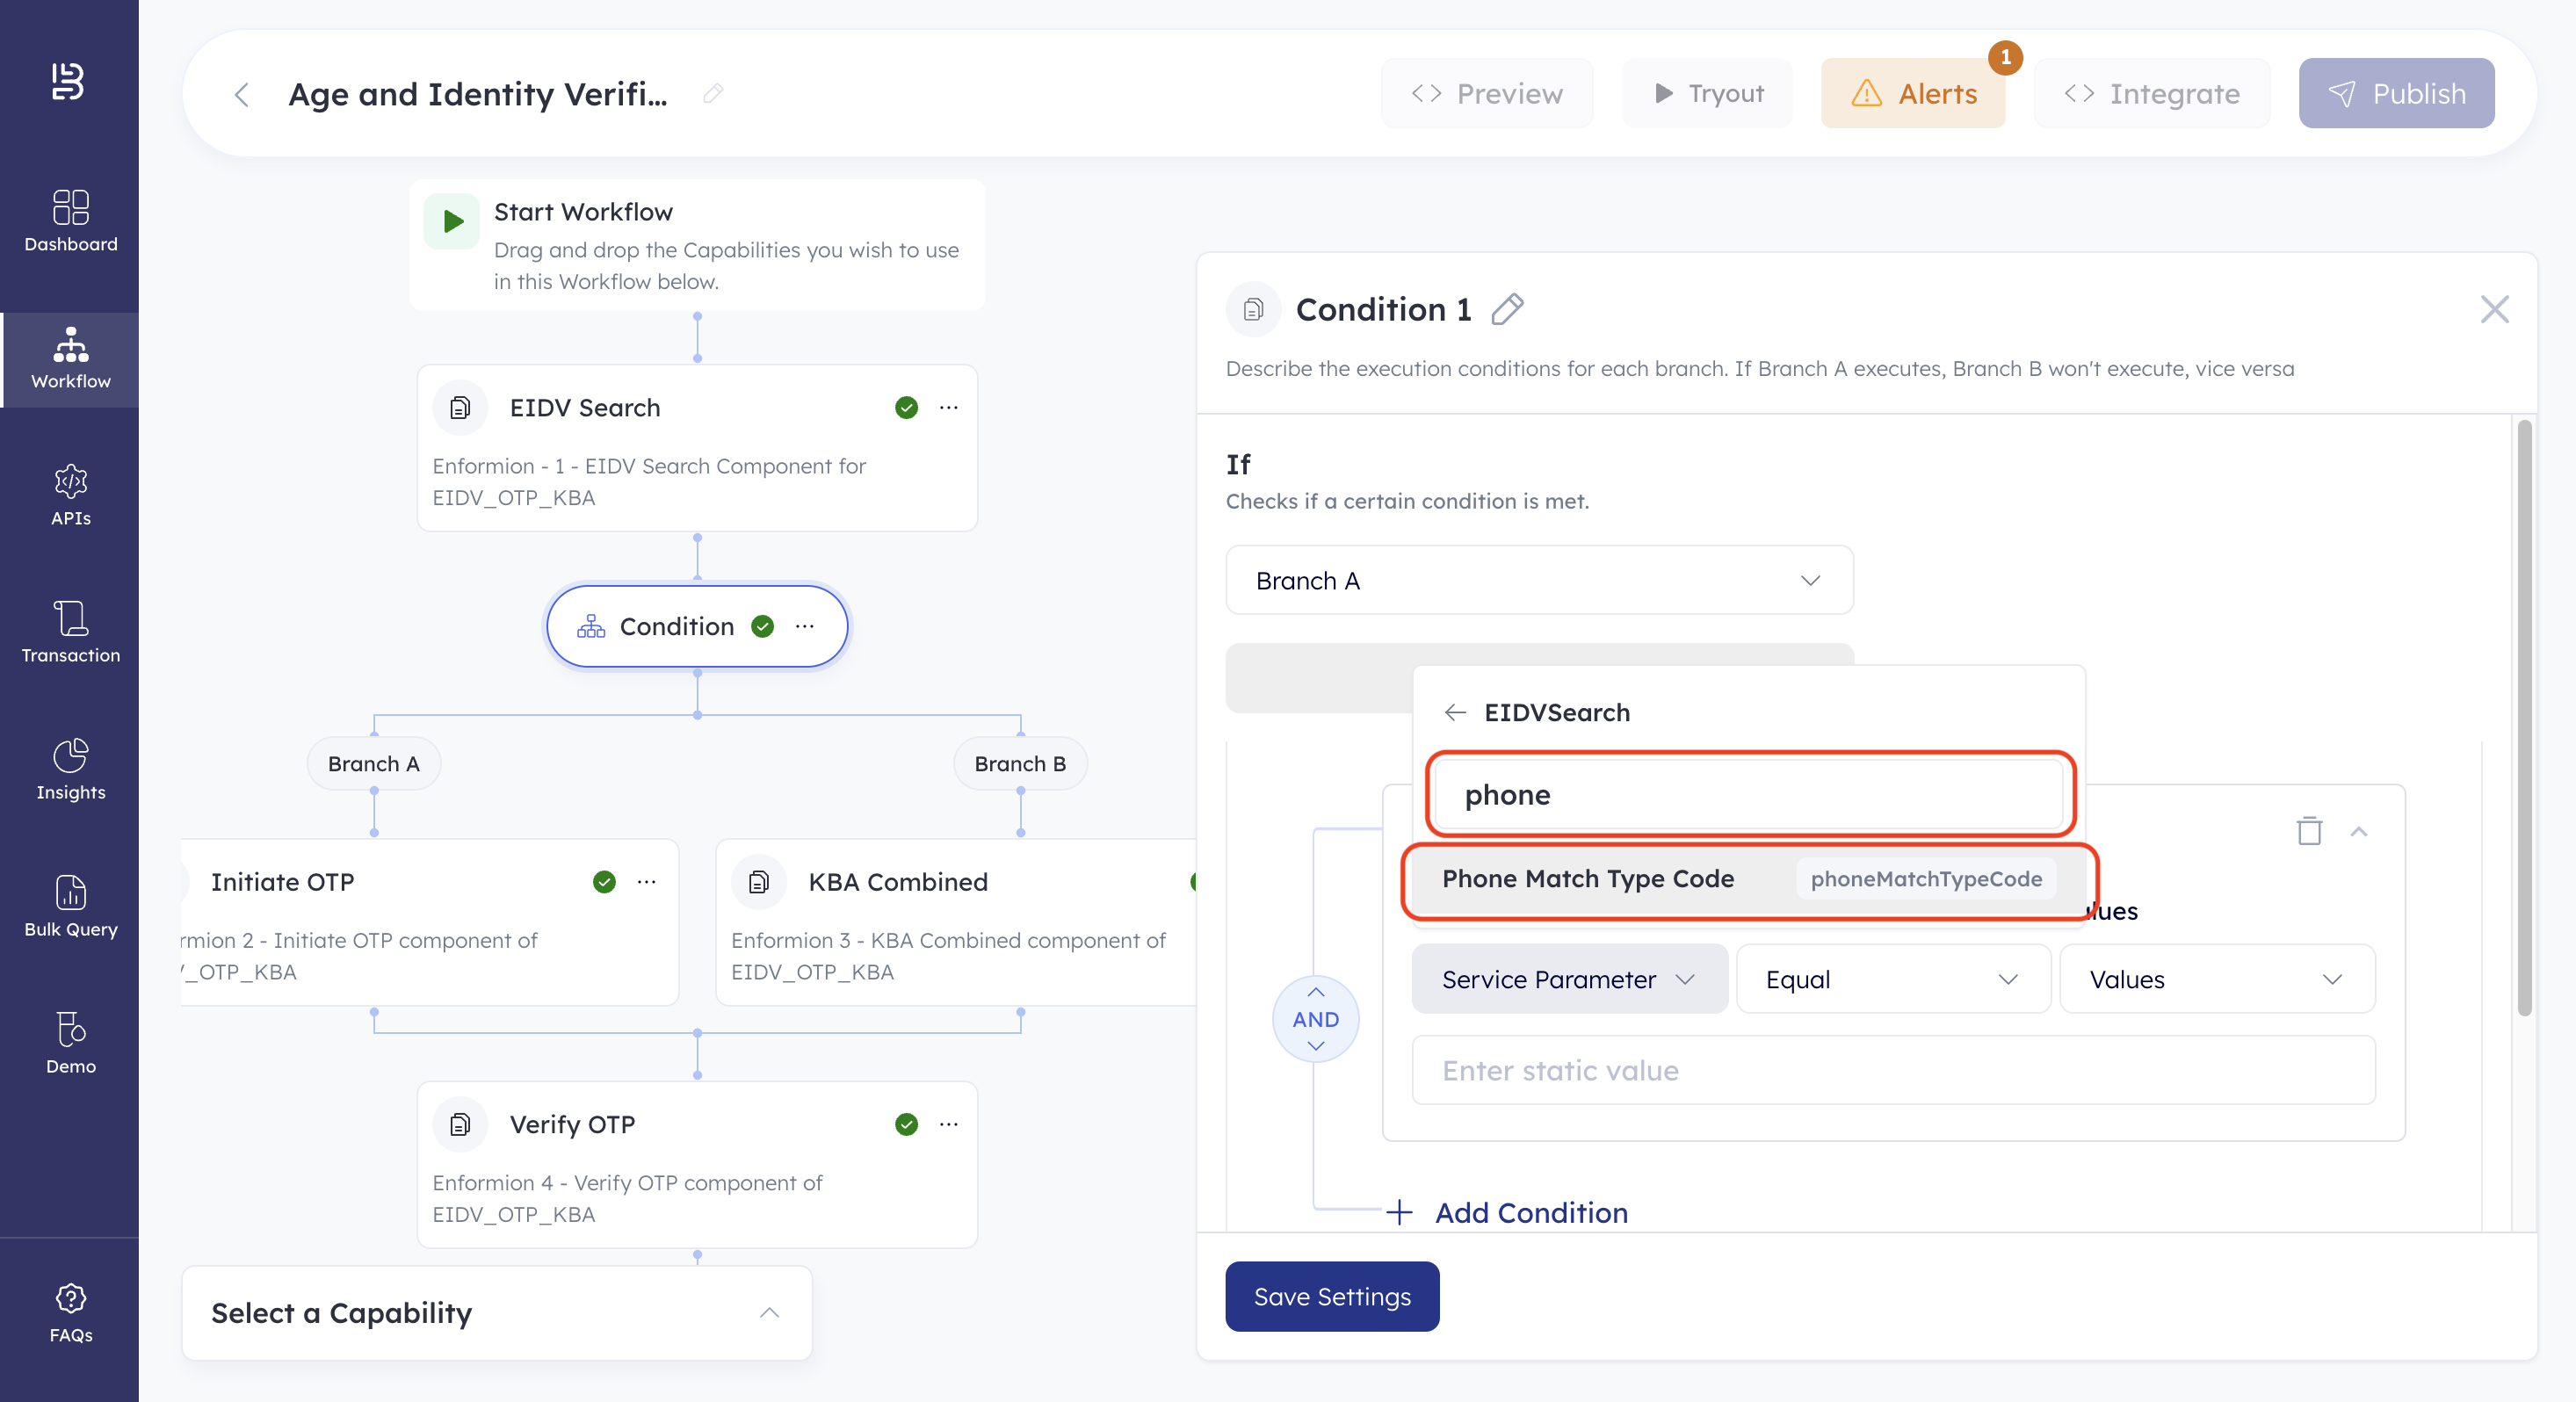
- Click the first dropdown on the left. This lets you select the service to define the IF condition.
- Select EIDVSearch. This shows you a list of all parameters to define the IF condition.
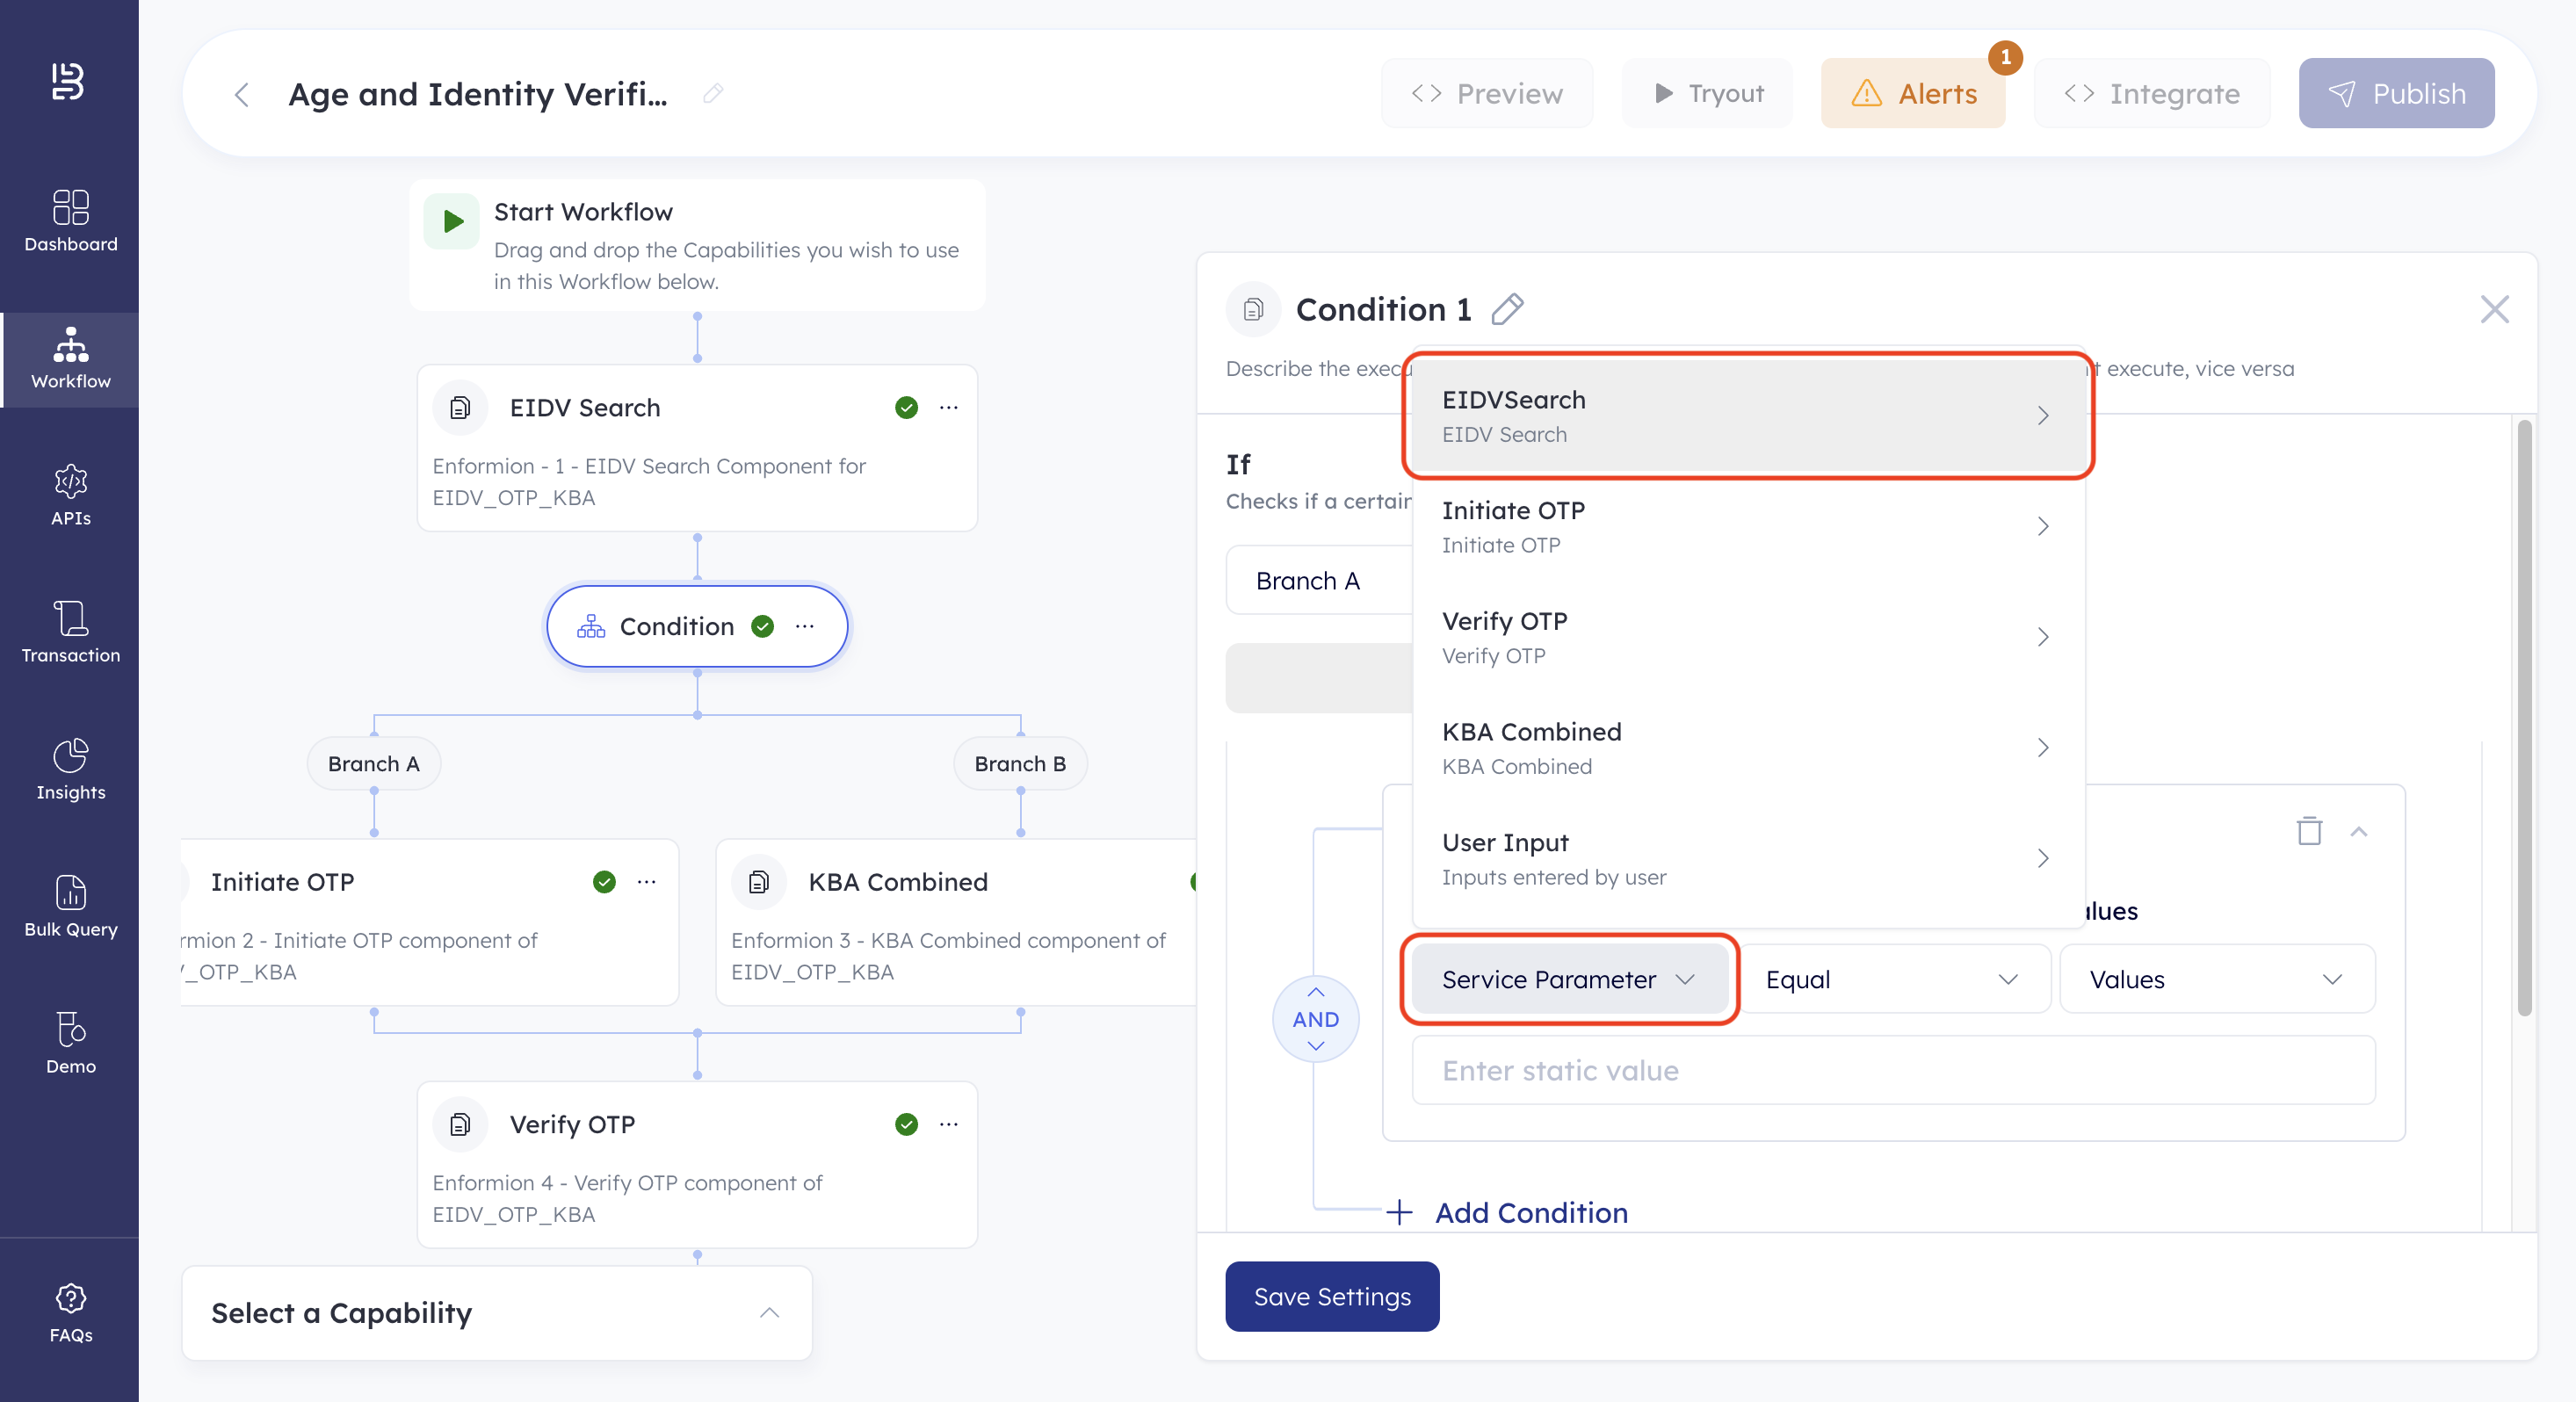
- Search for and select Phone Match Type Code.
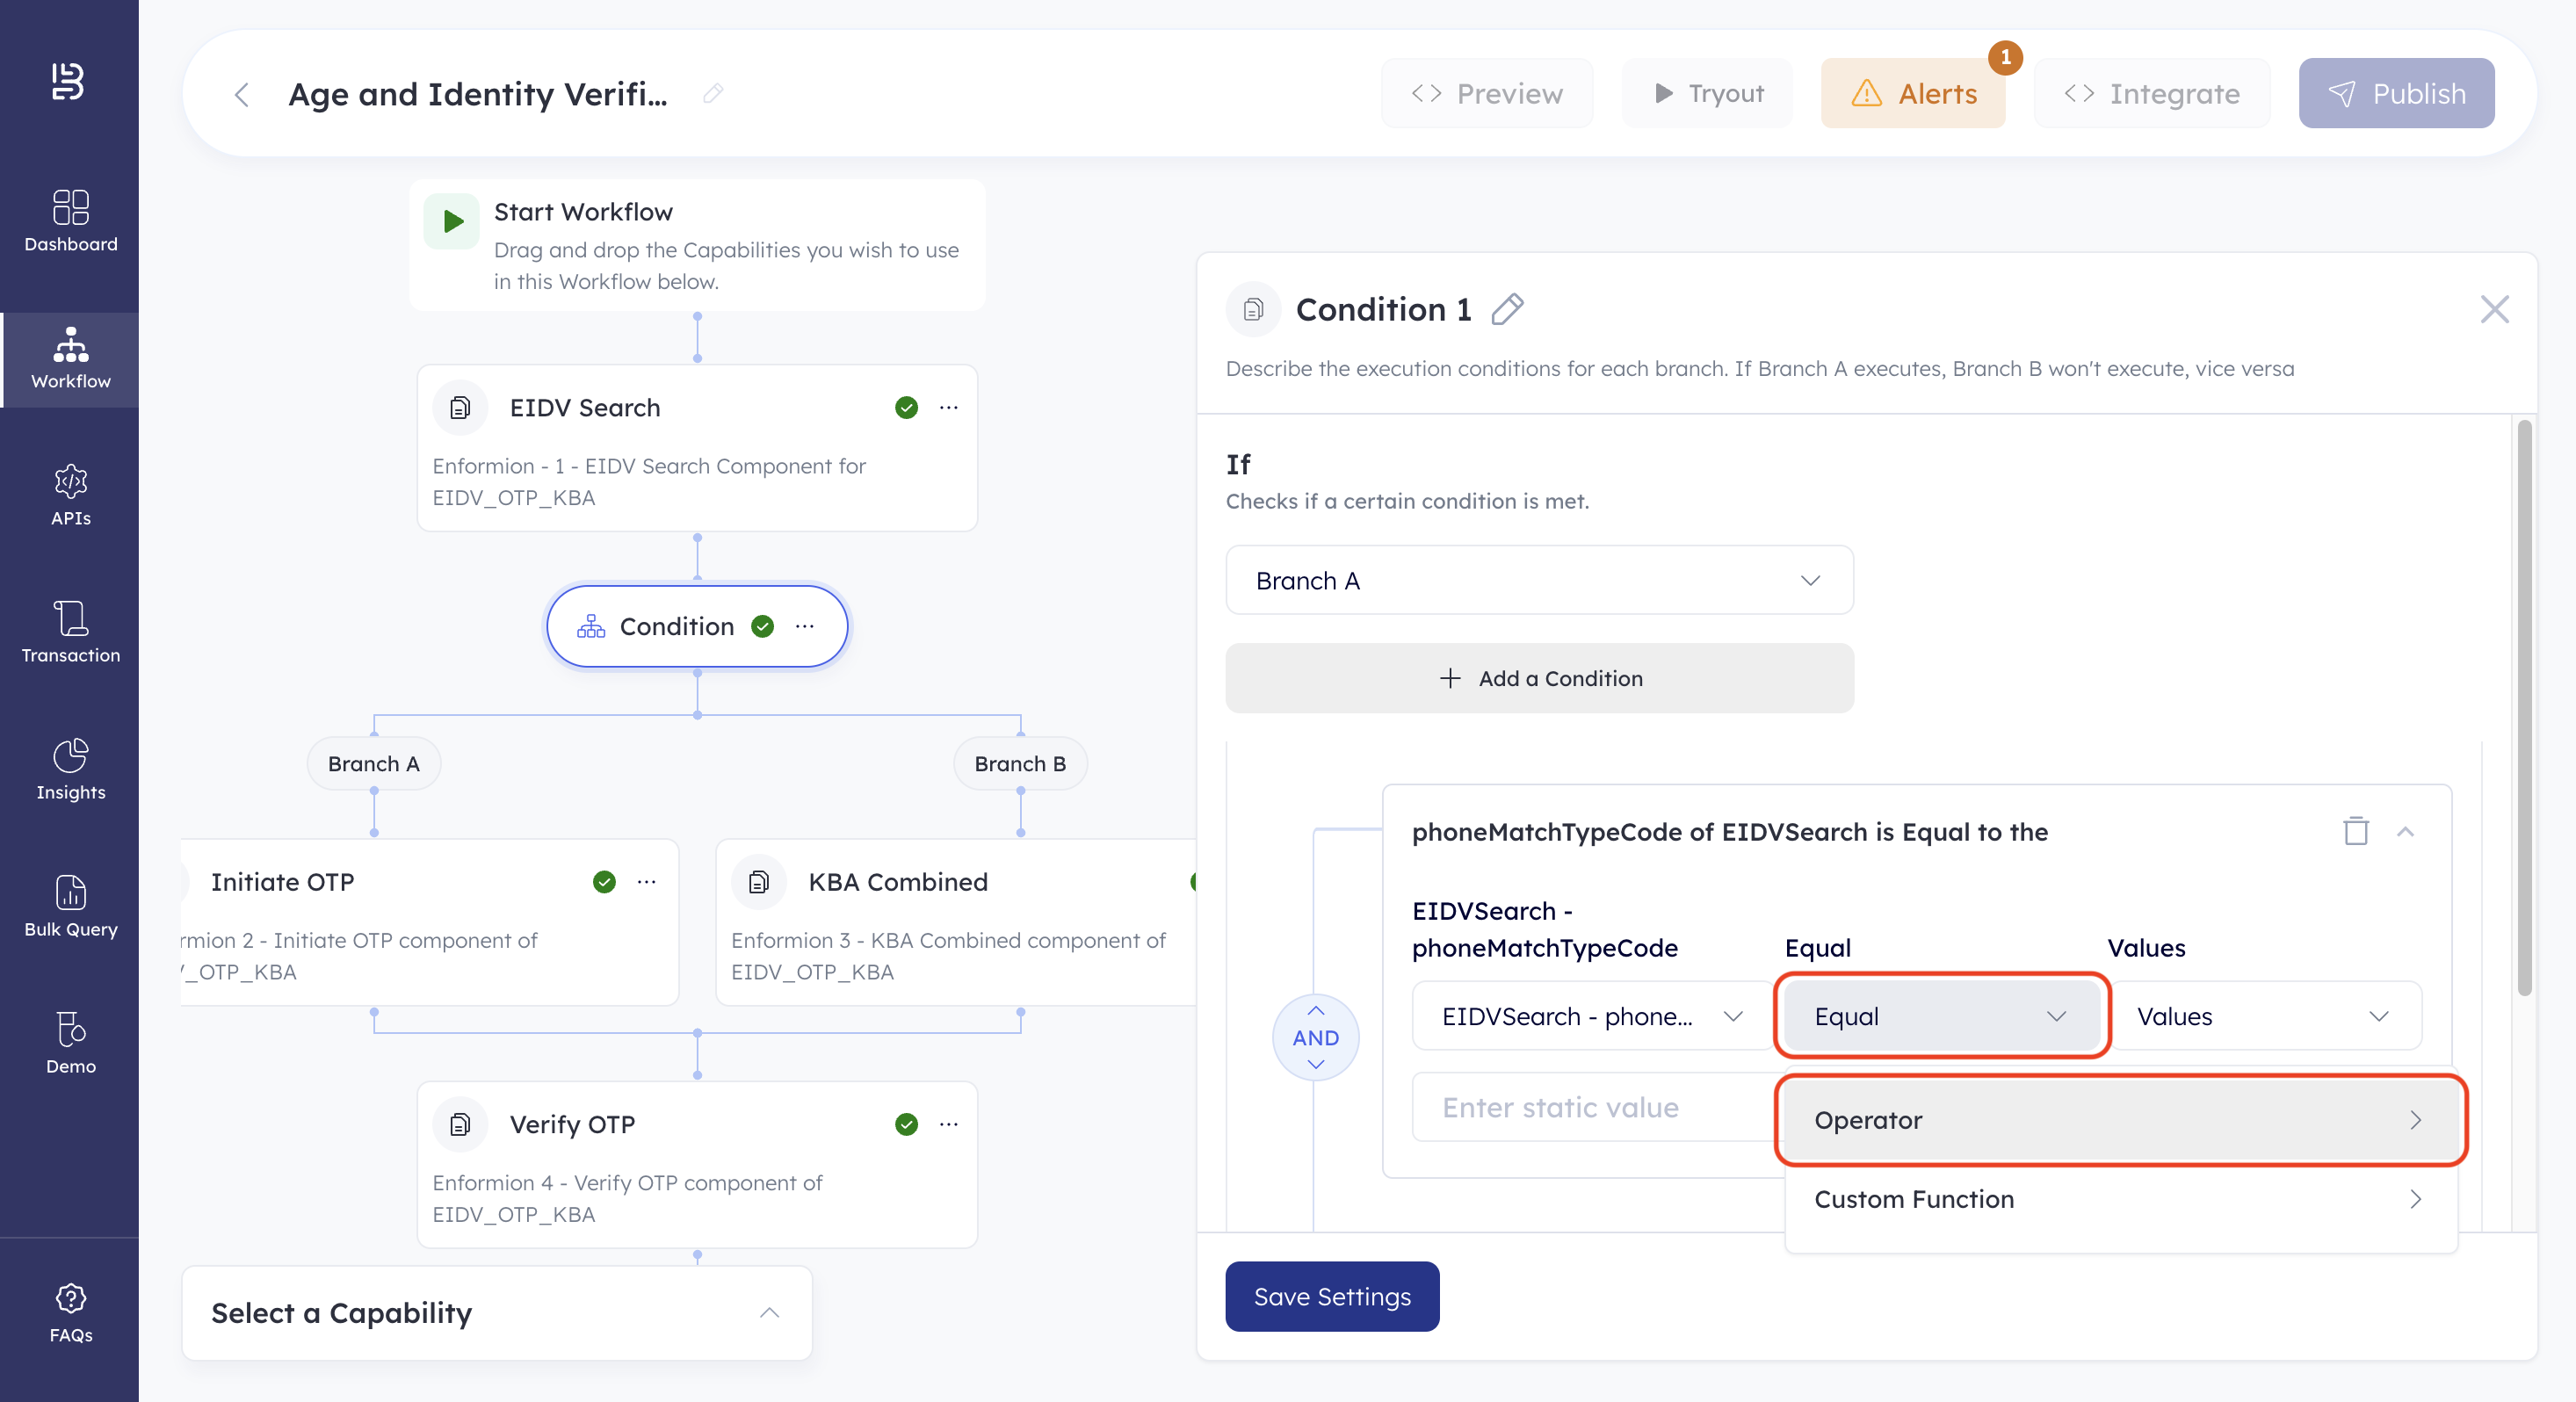
- Click the middle dropdown. This lets you select the logical condition to define the IF condition.
- Select Operator.
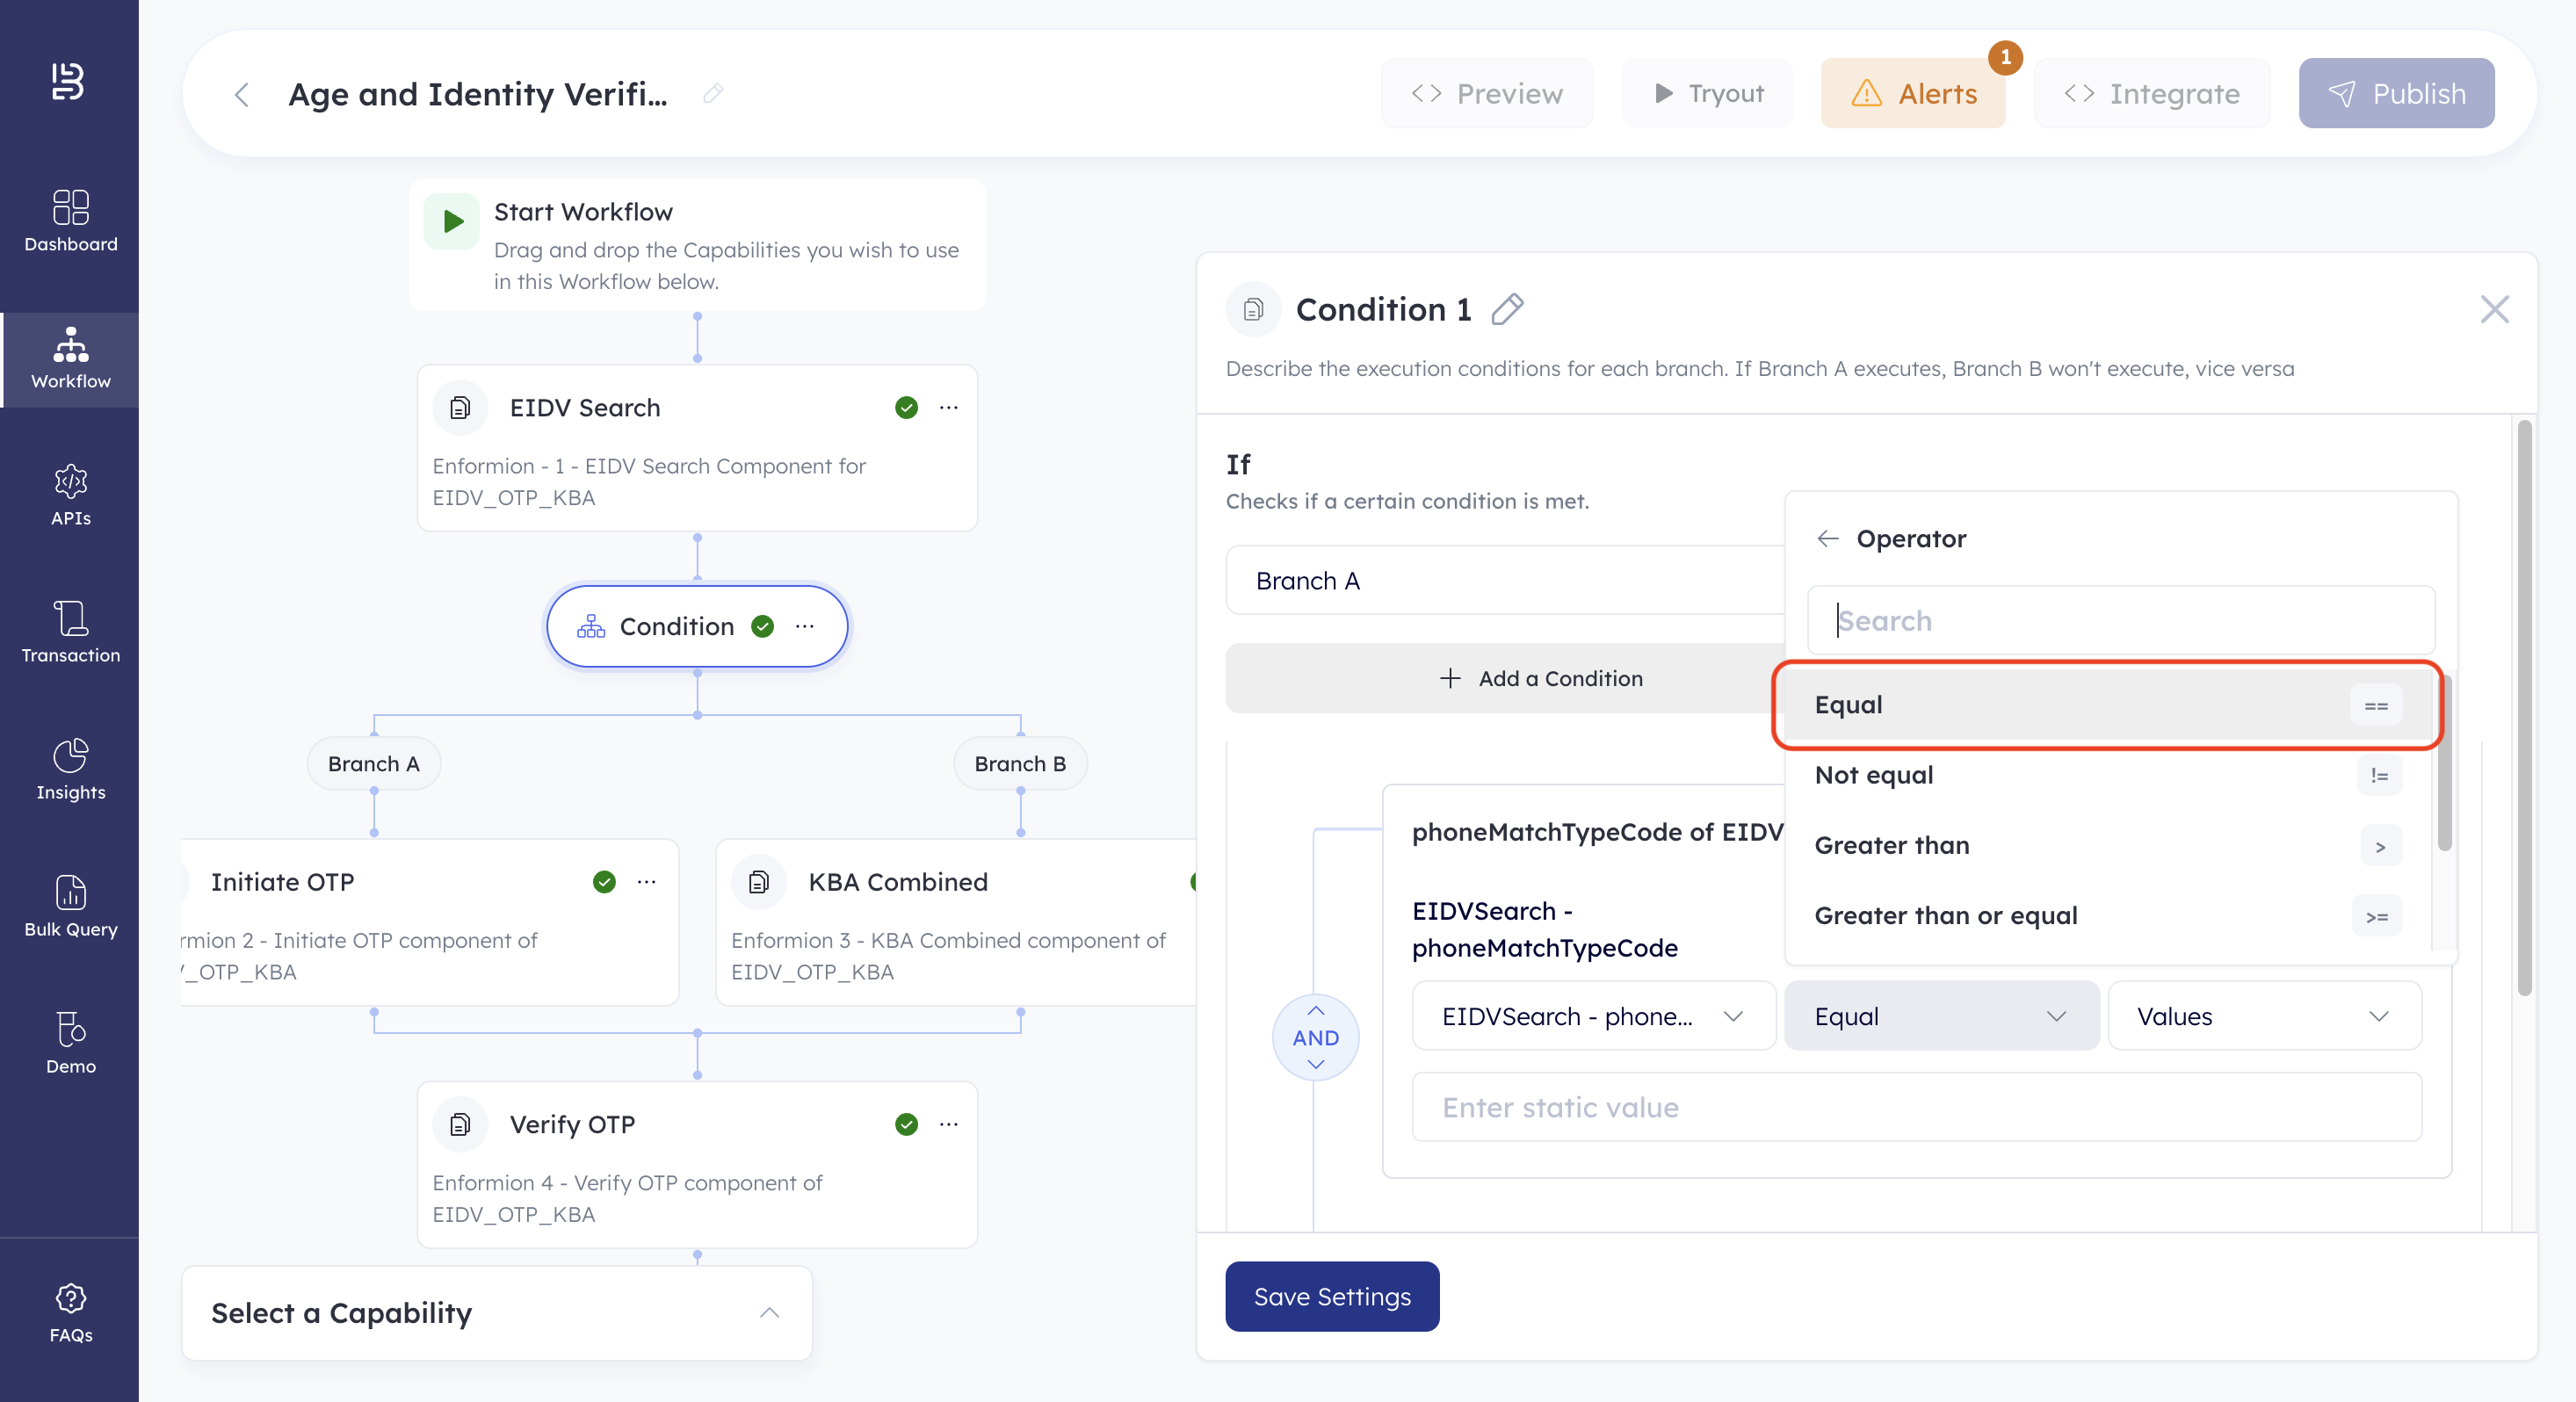
- Select Equal.
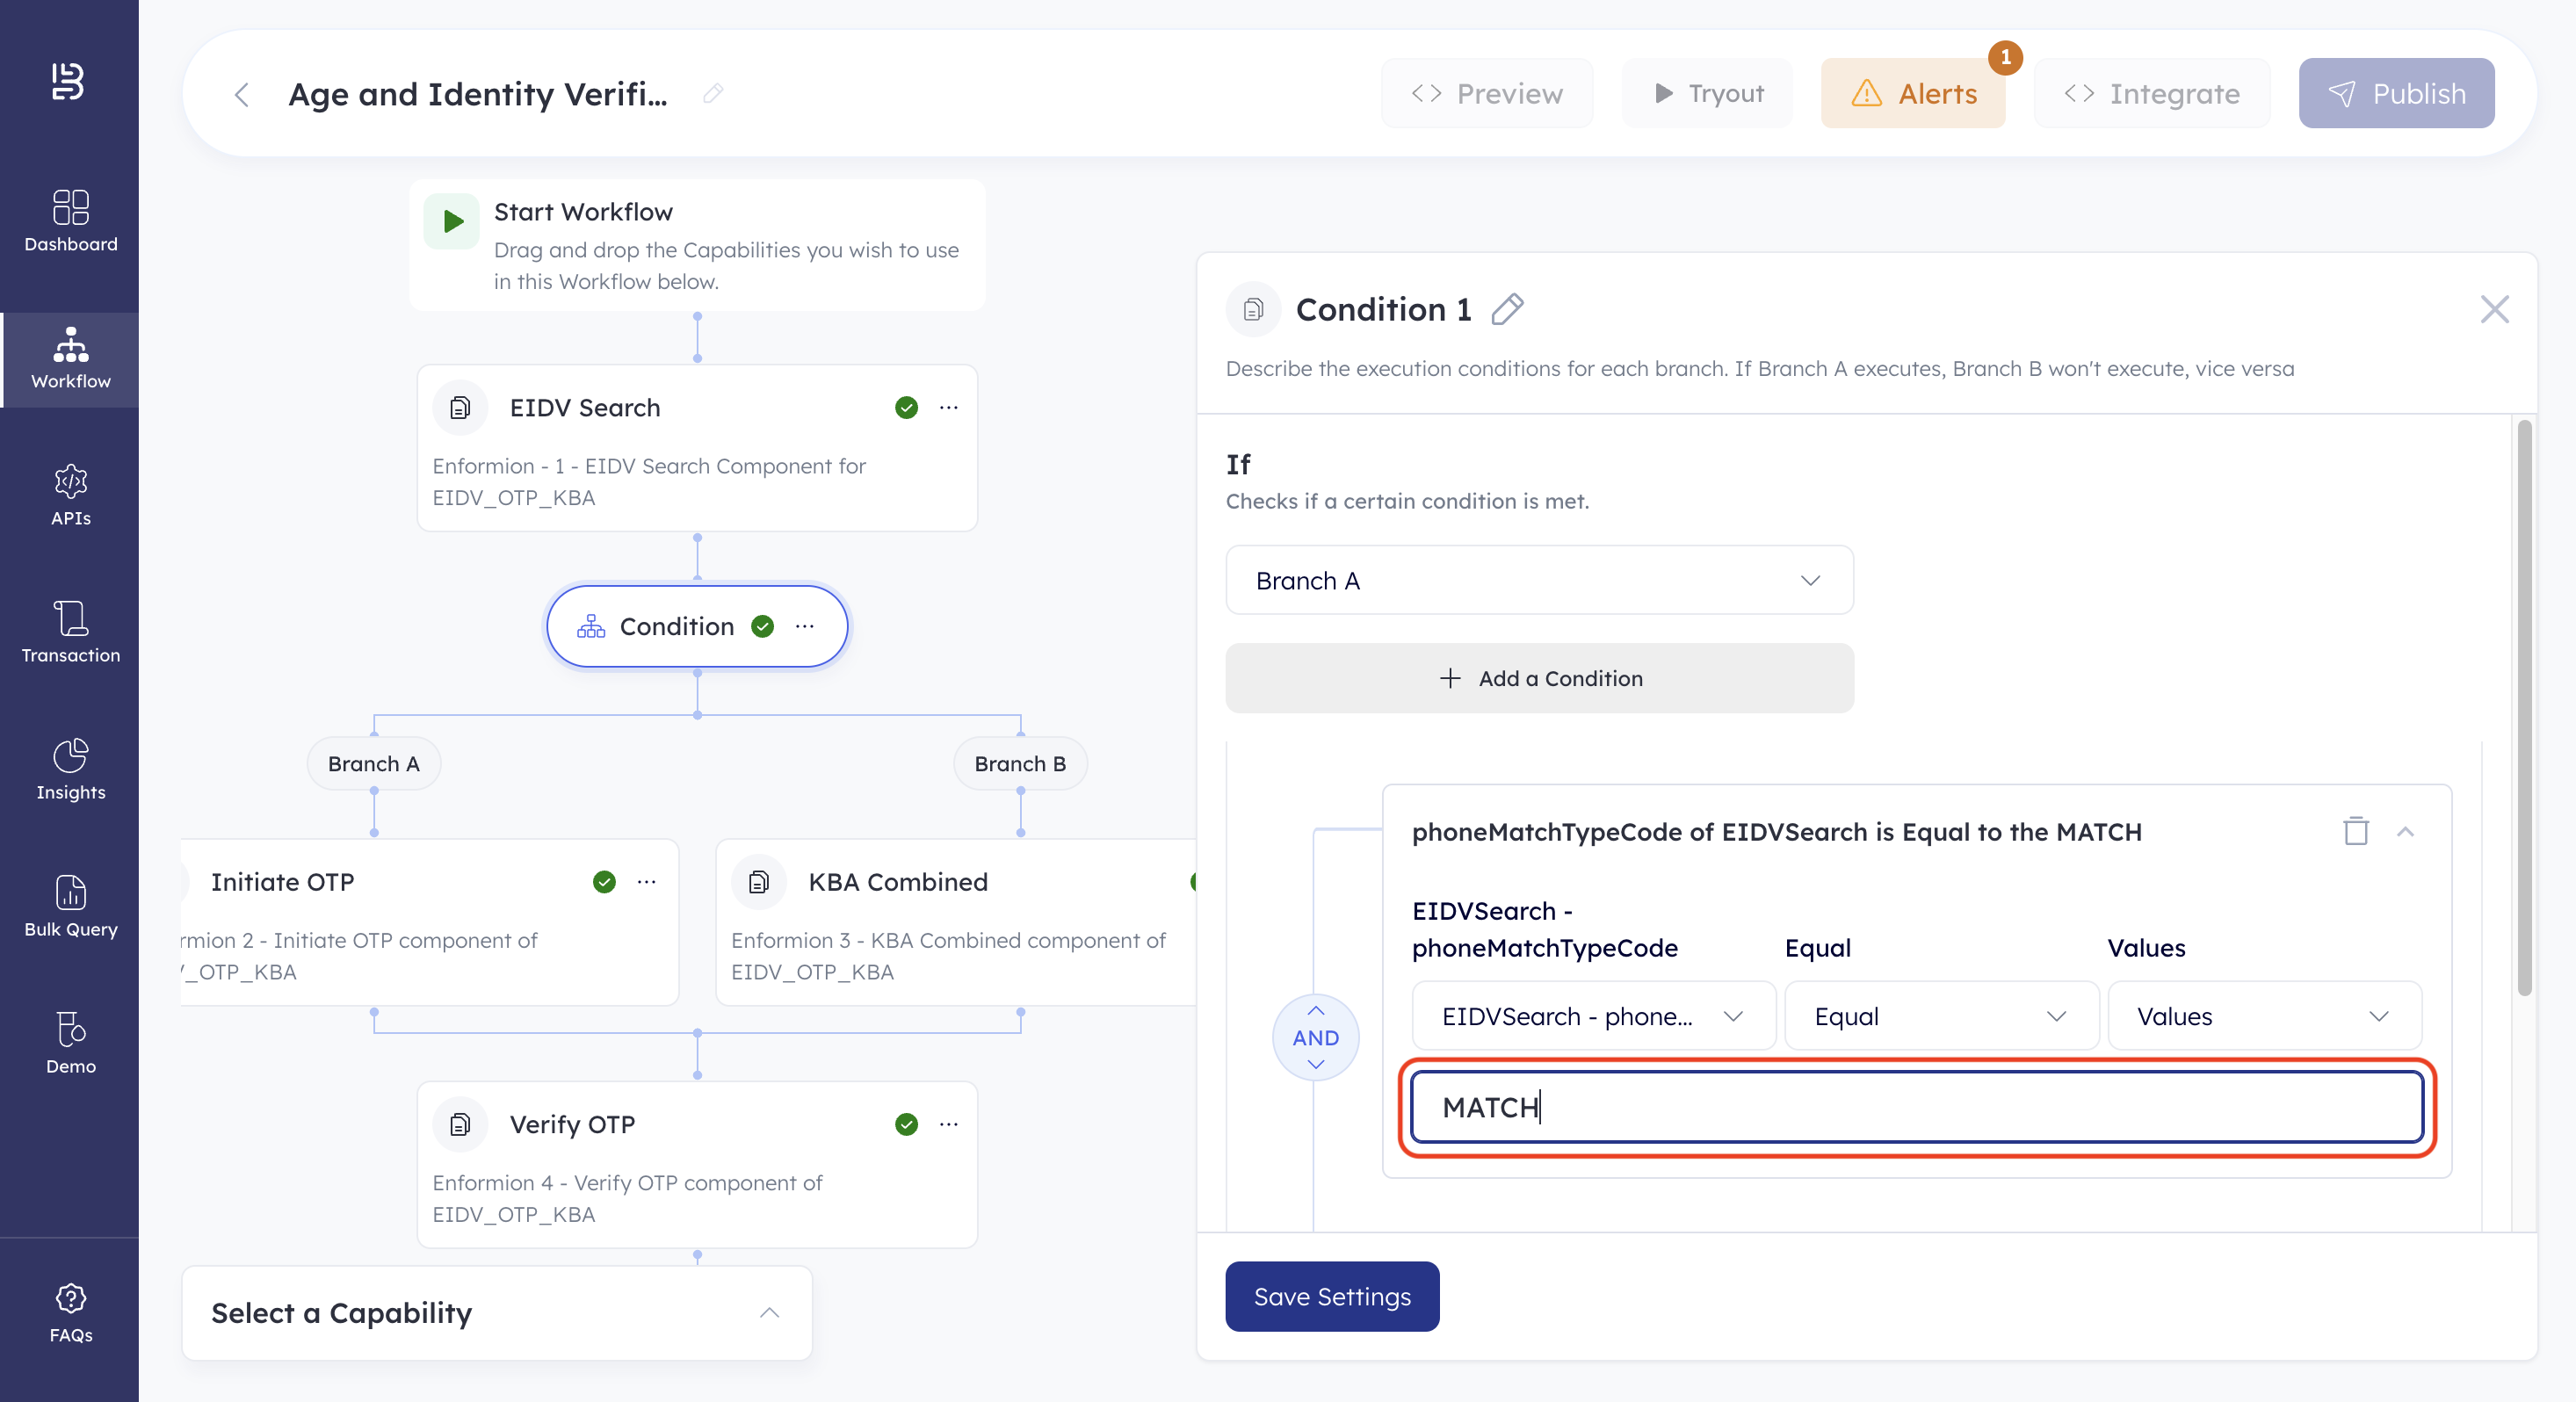
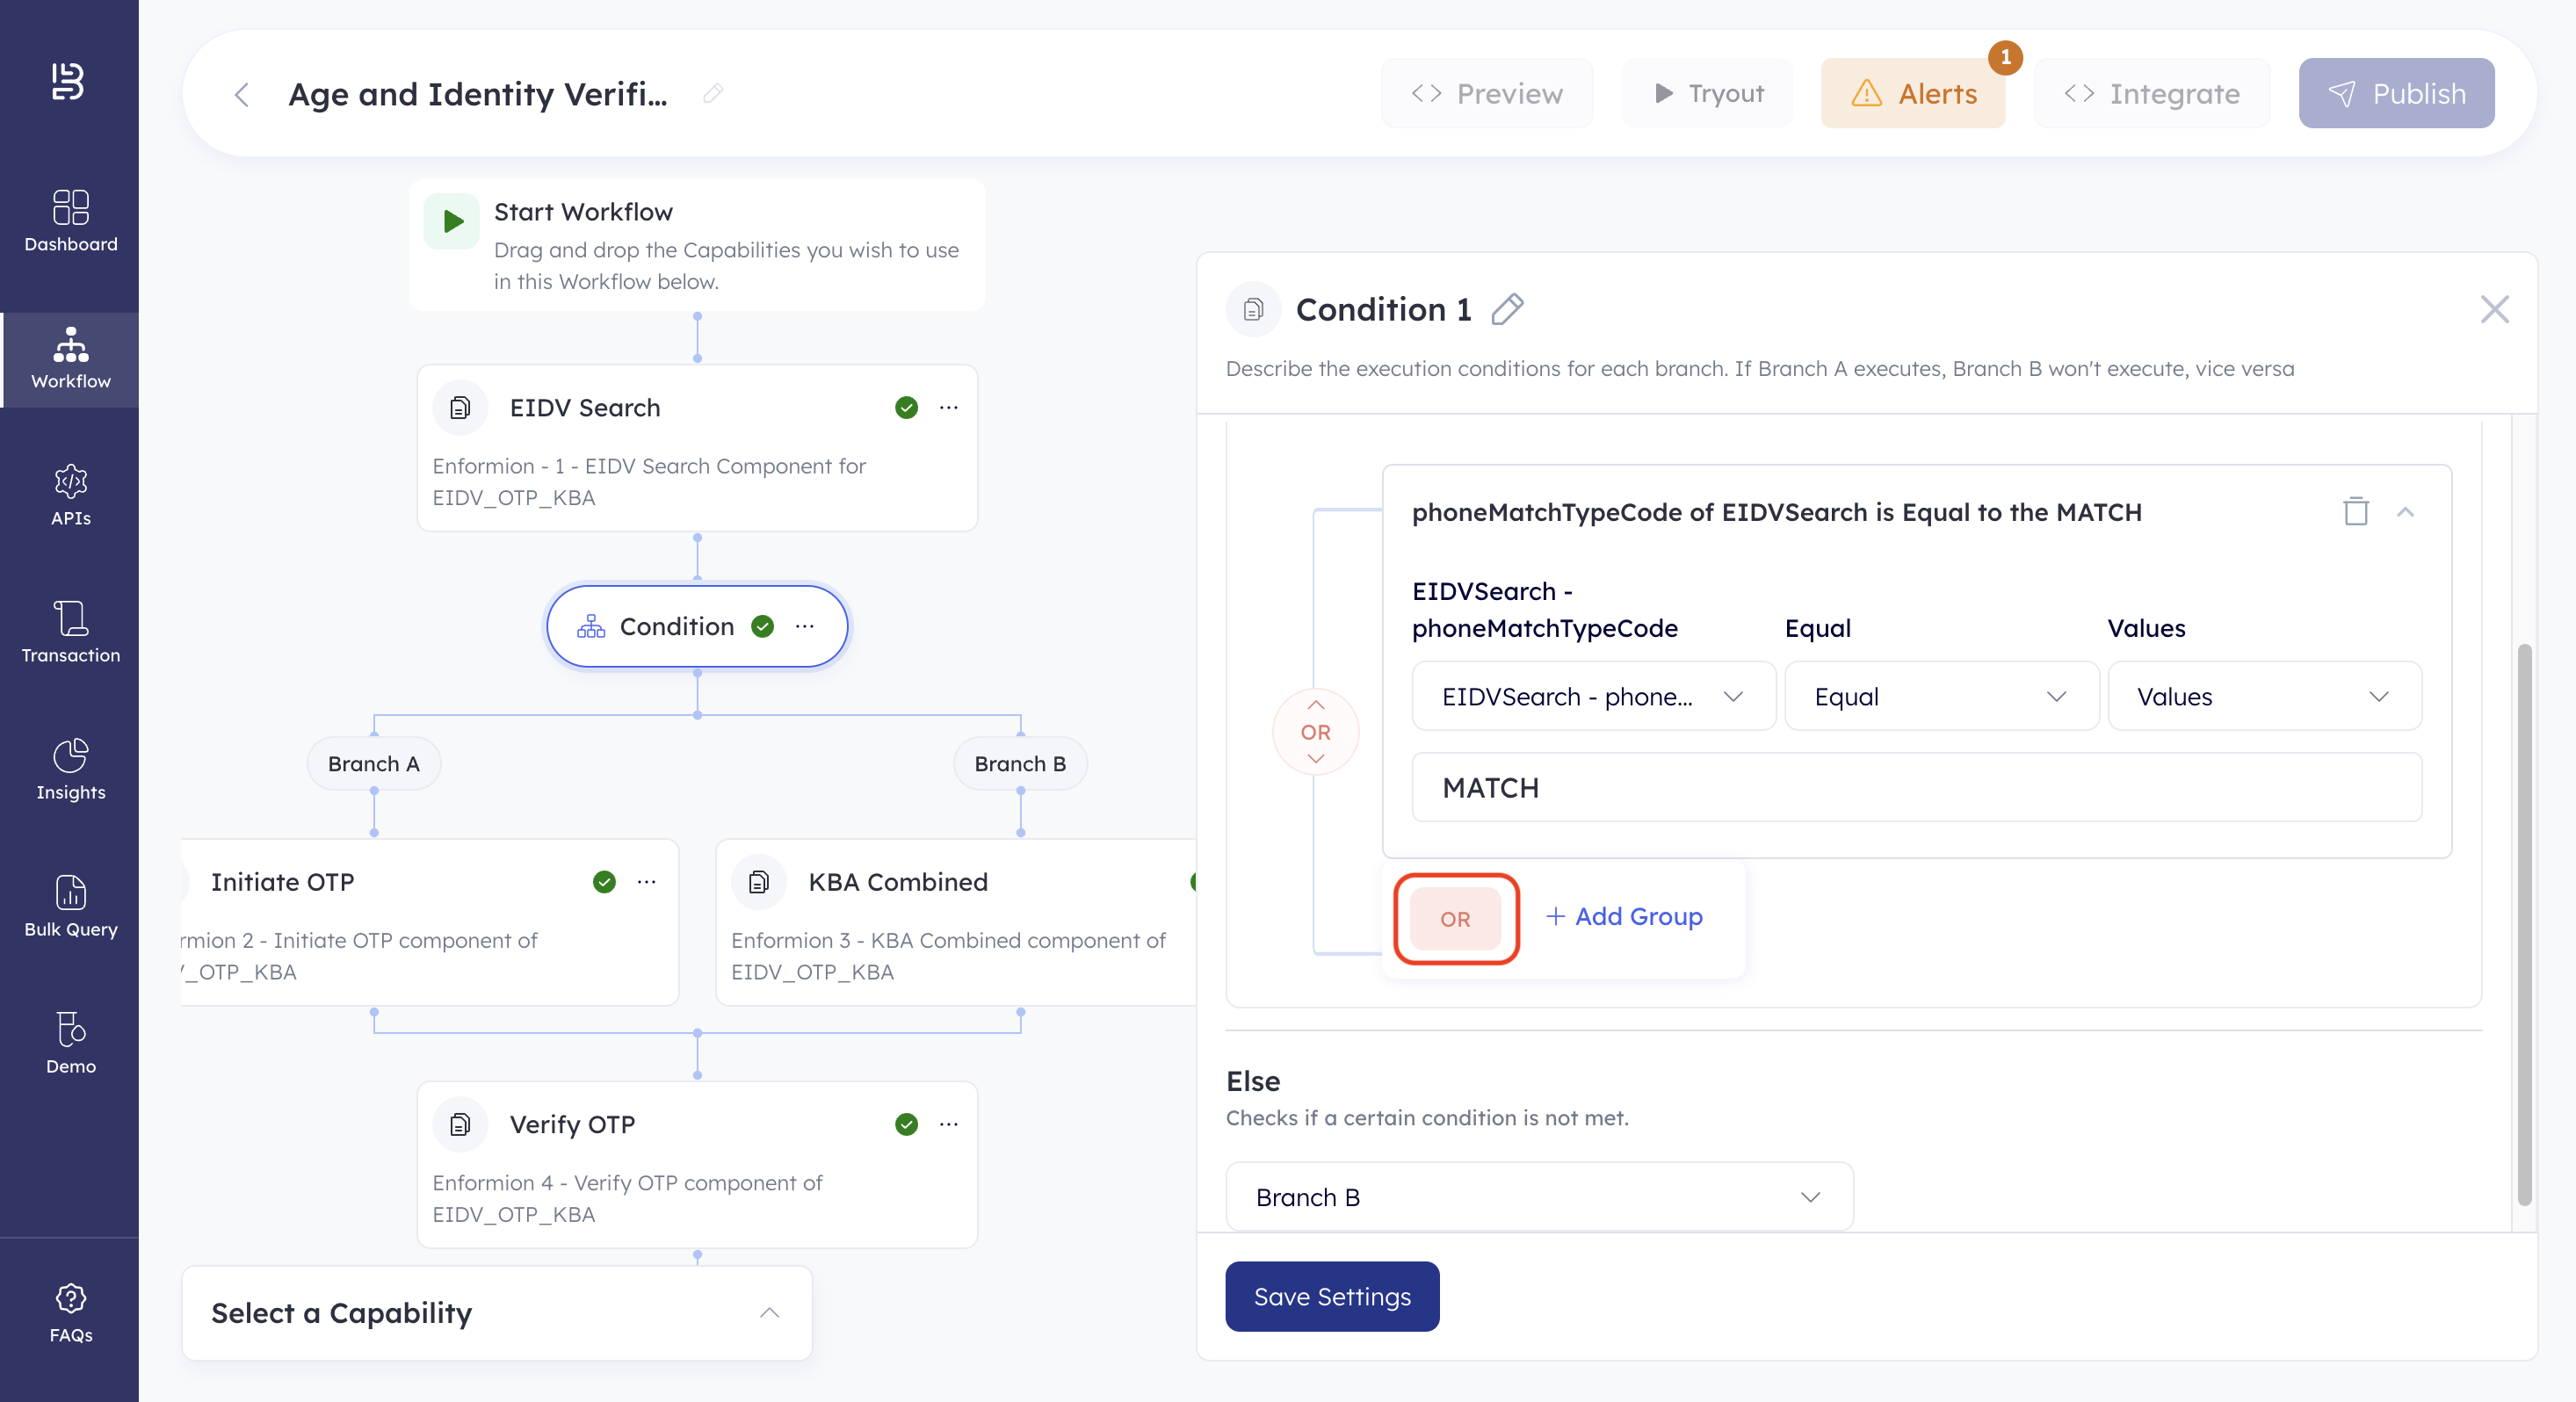
- Click the right-most dropdown. This lets you select the value to define the IF condition.
- Select Static Value.
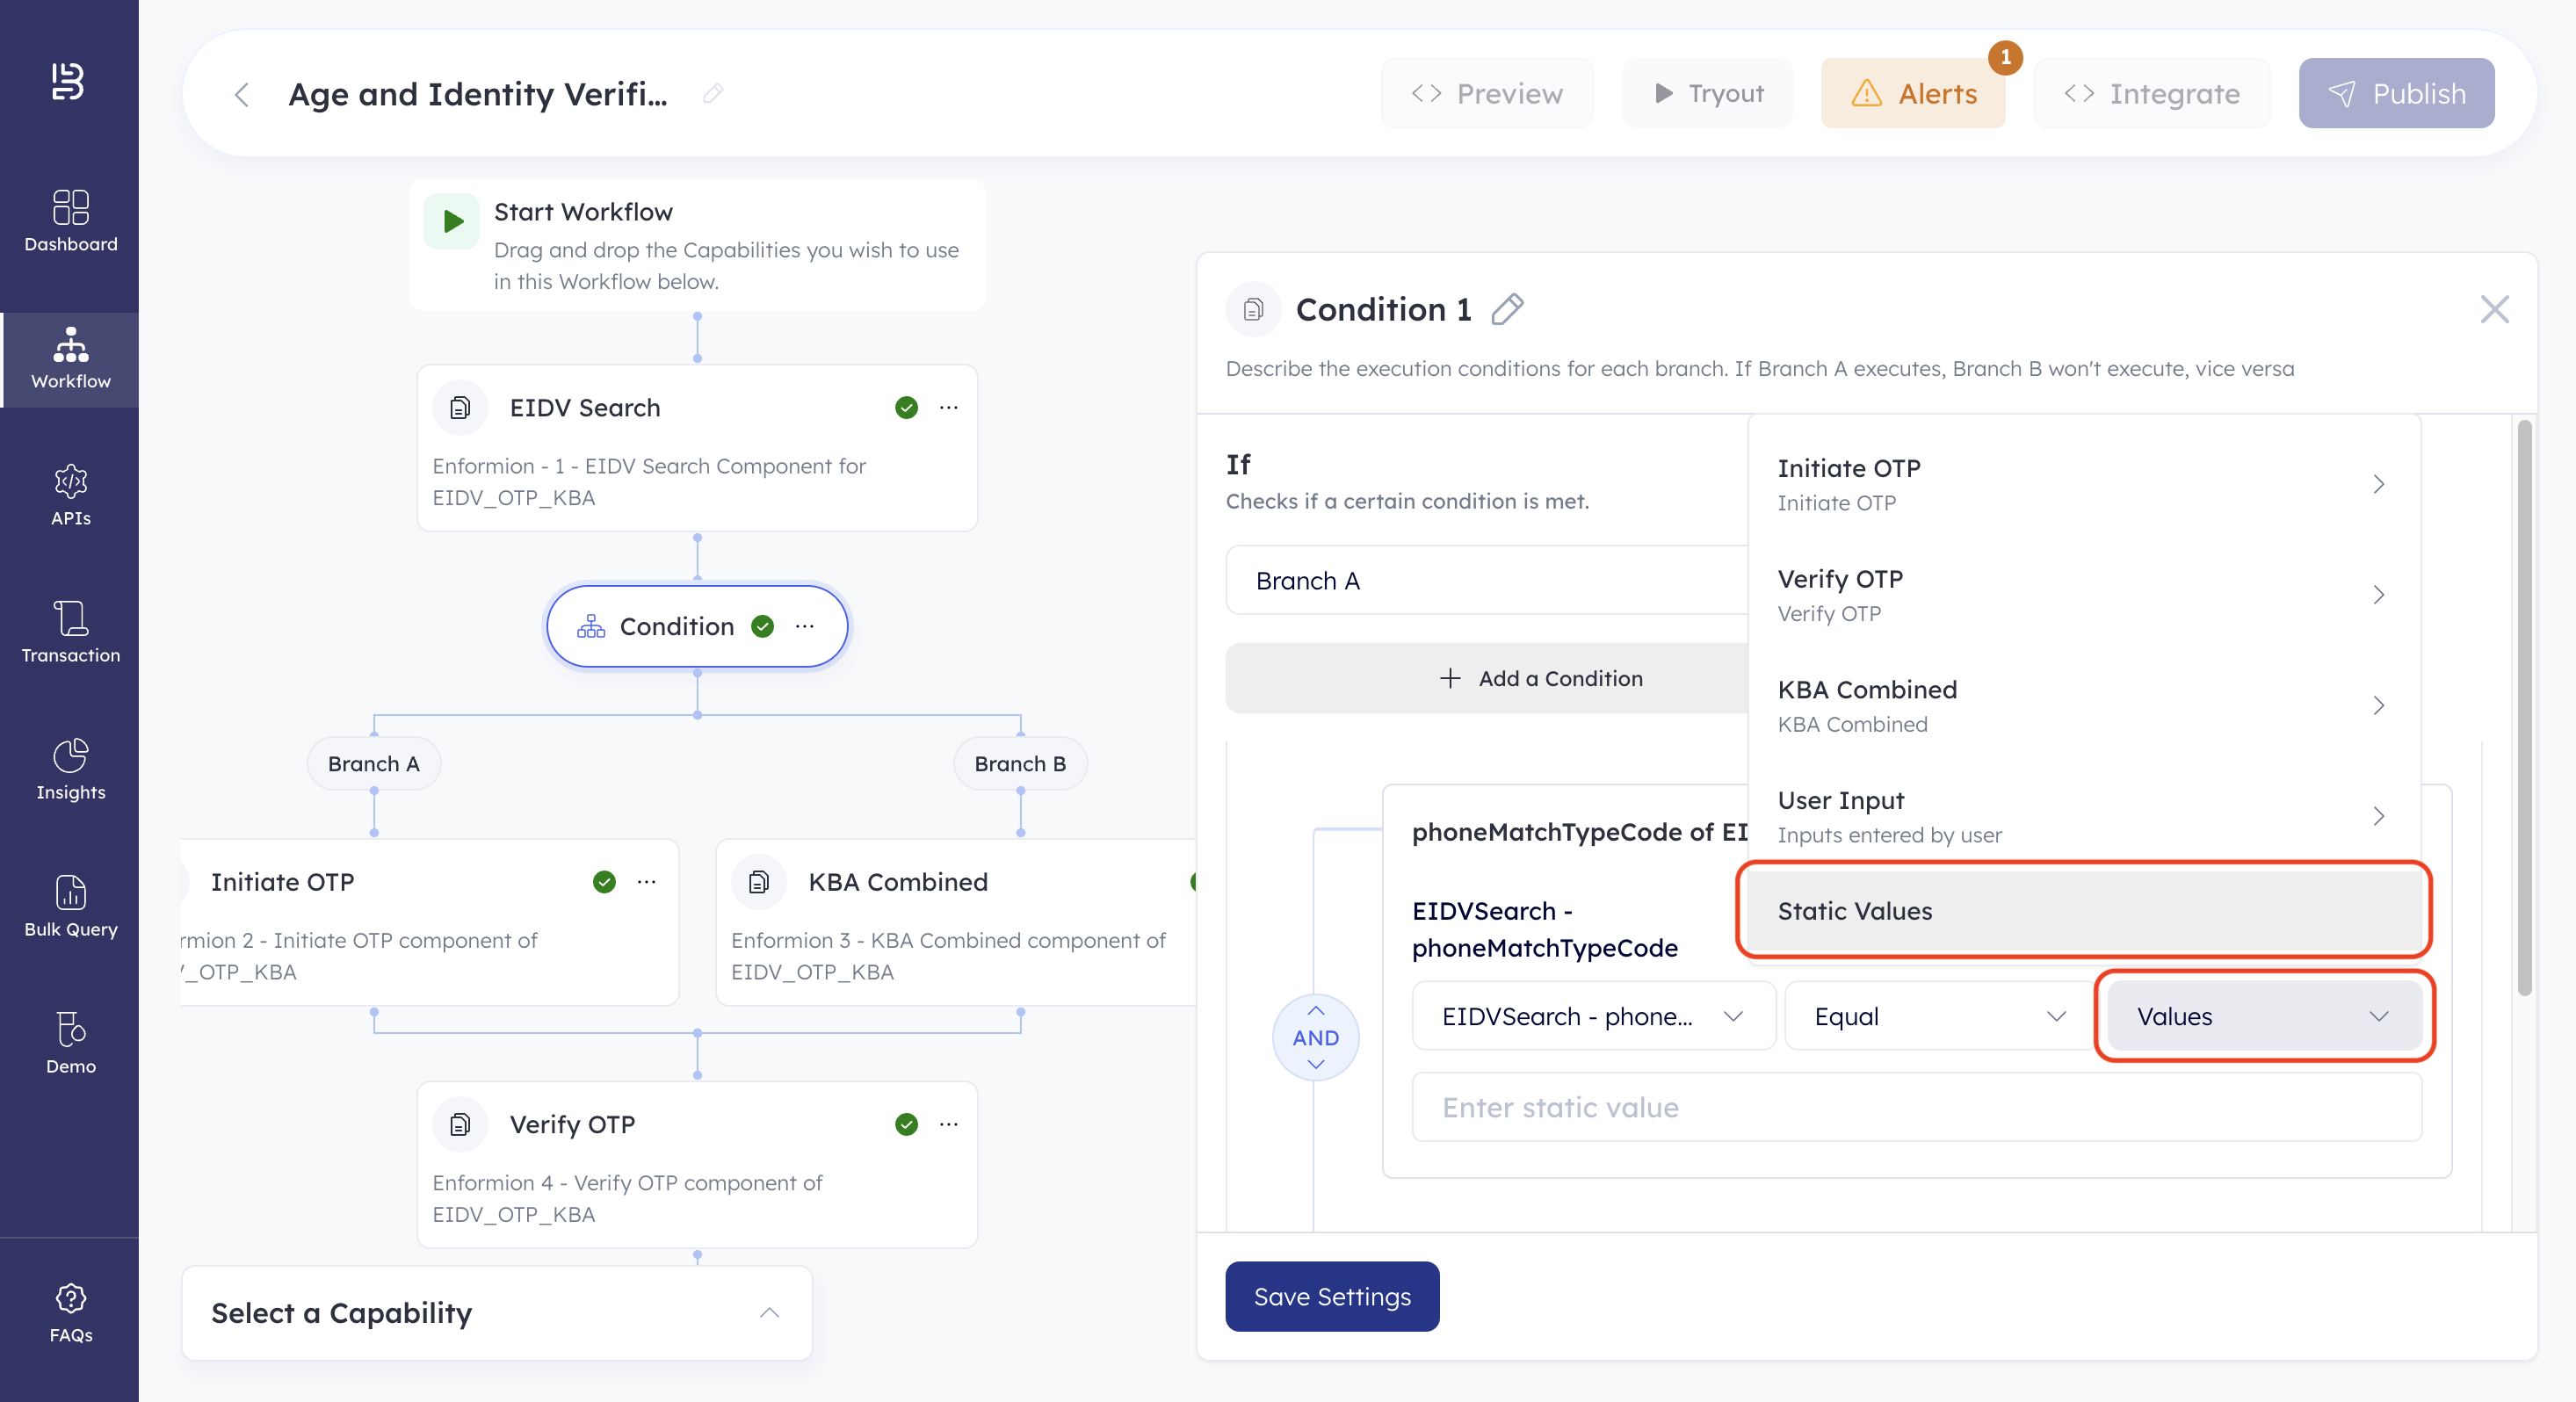
- Enter MATCH as the static value in the field below the dropdowns. This defines a condition Phone Match Type Code equal to the static value MATCH.
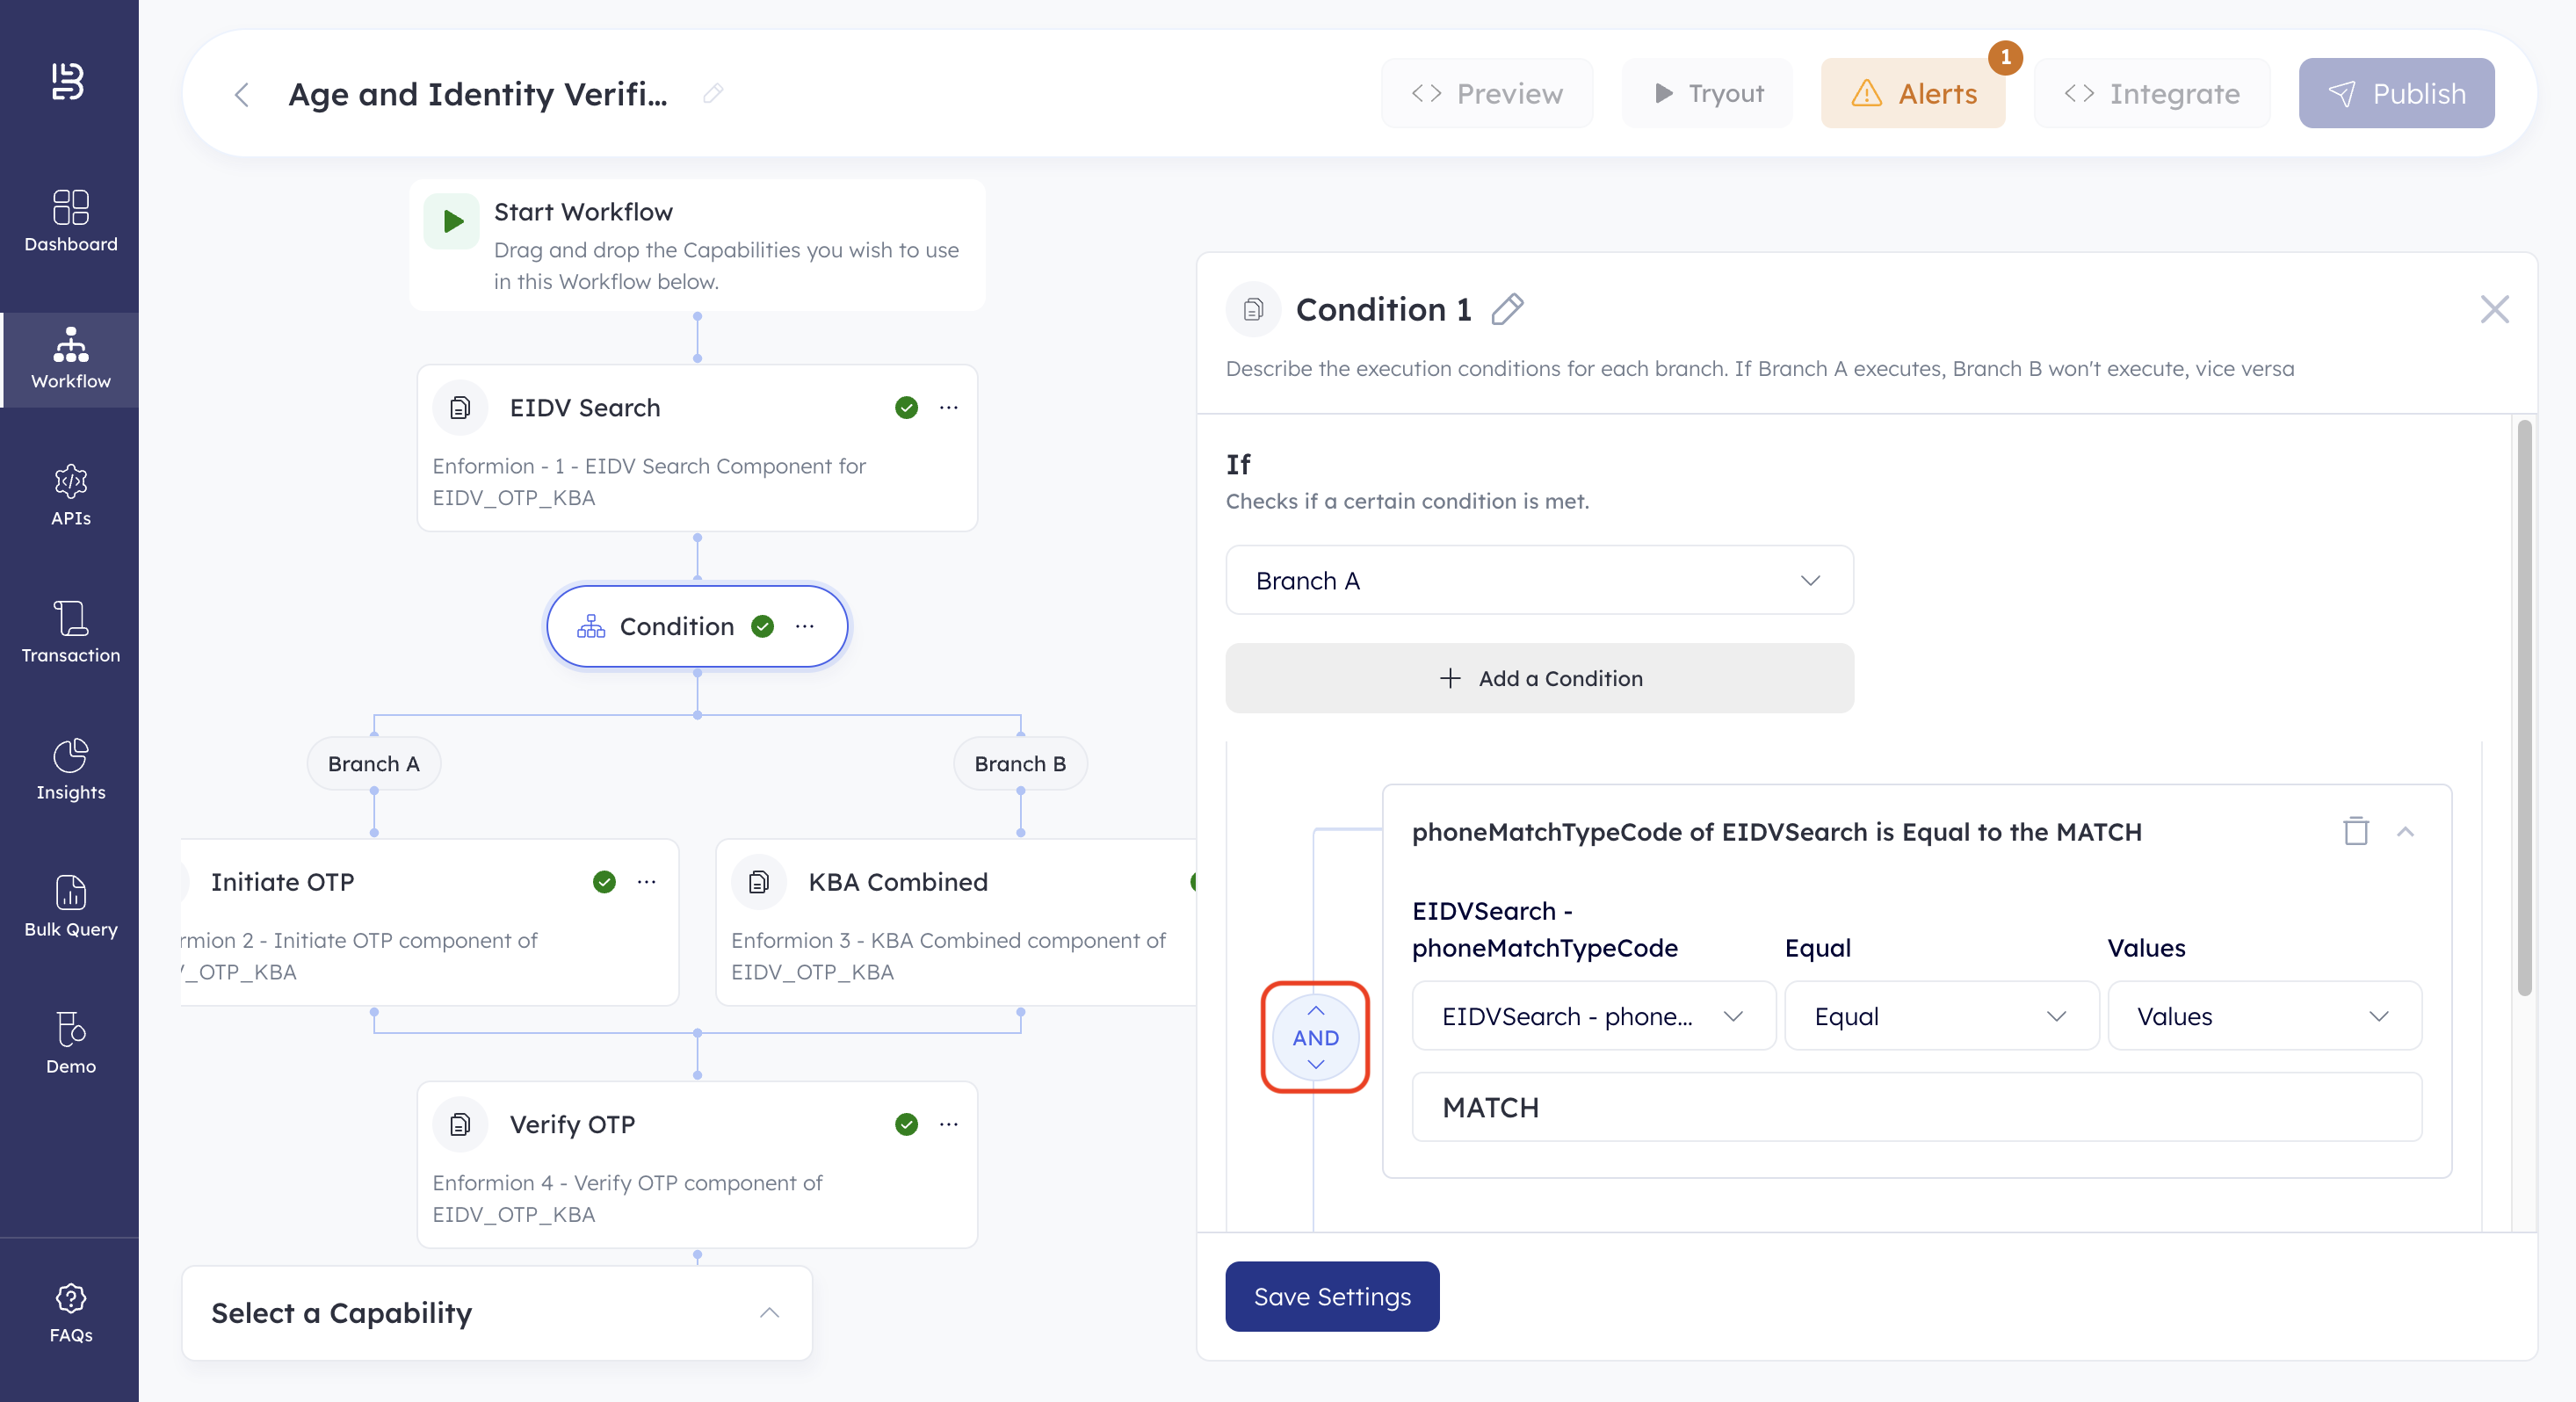
- Click the Logical Operator. This changes it from AND to OR.
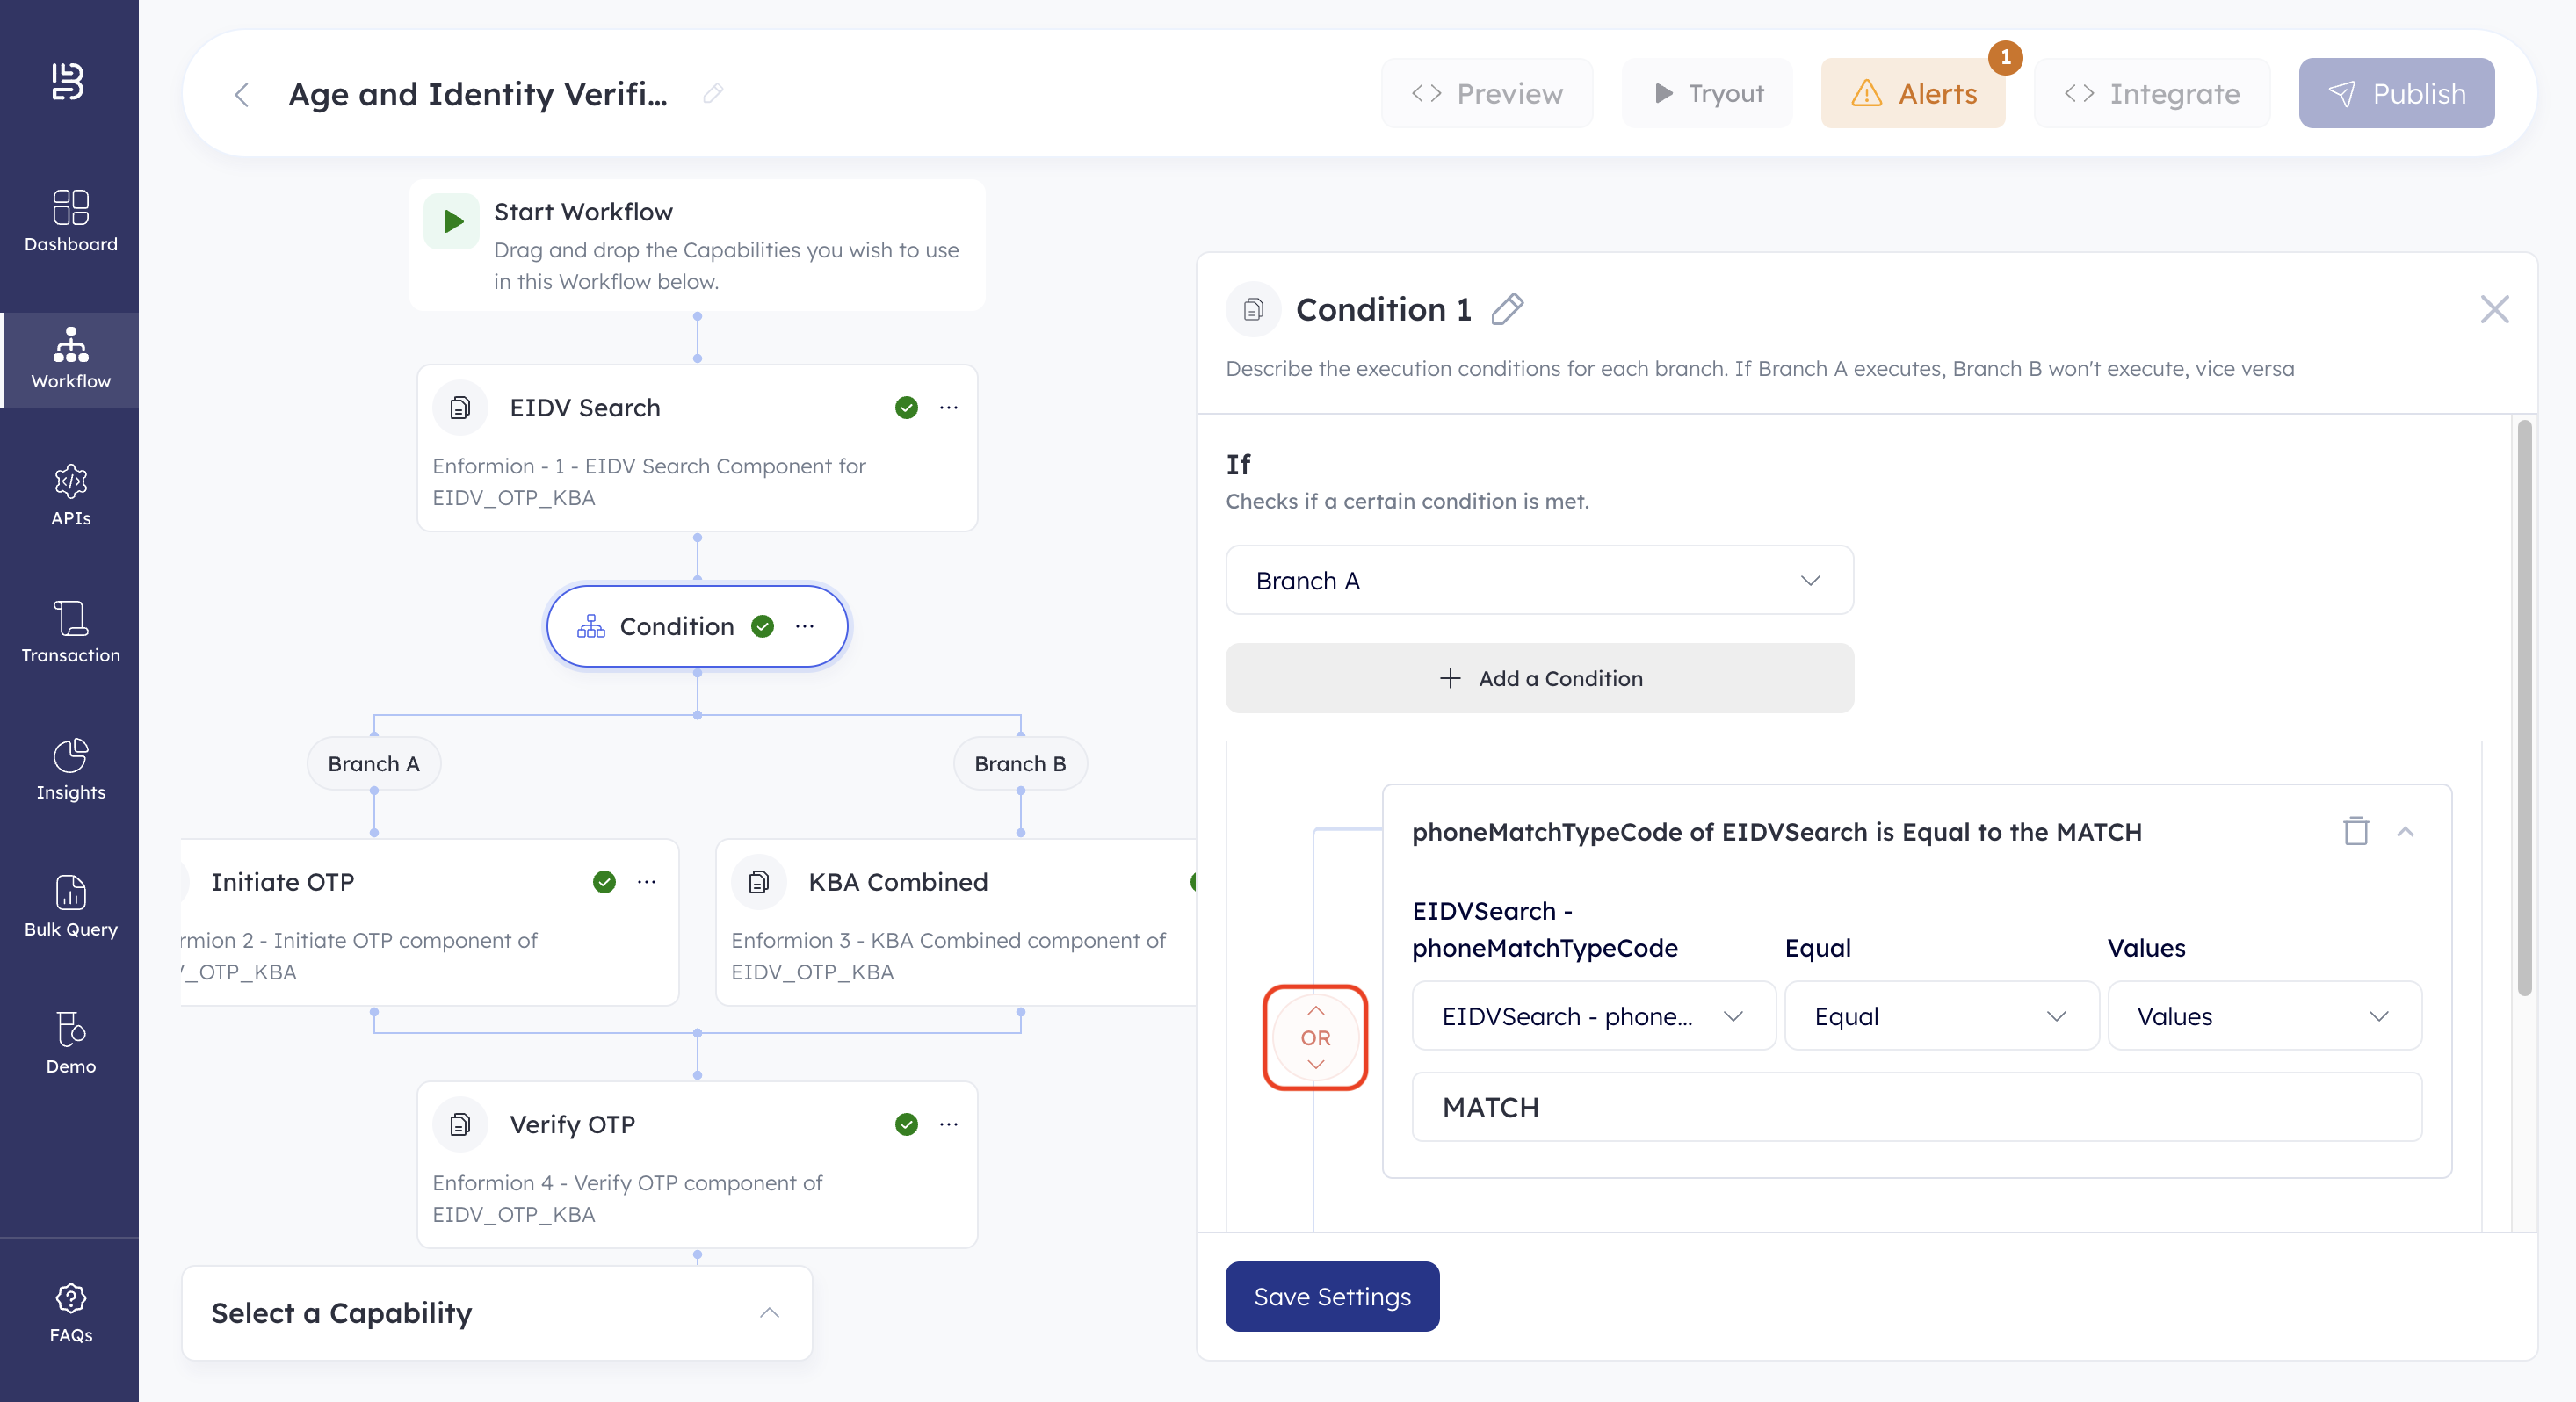
- Click + Add Condition.
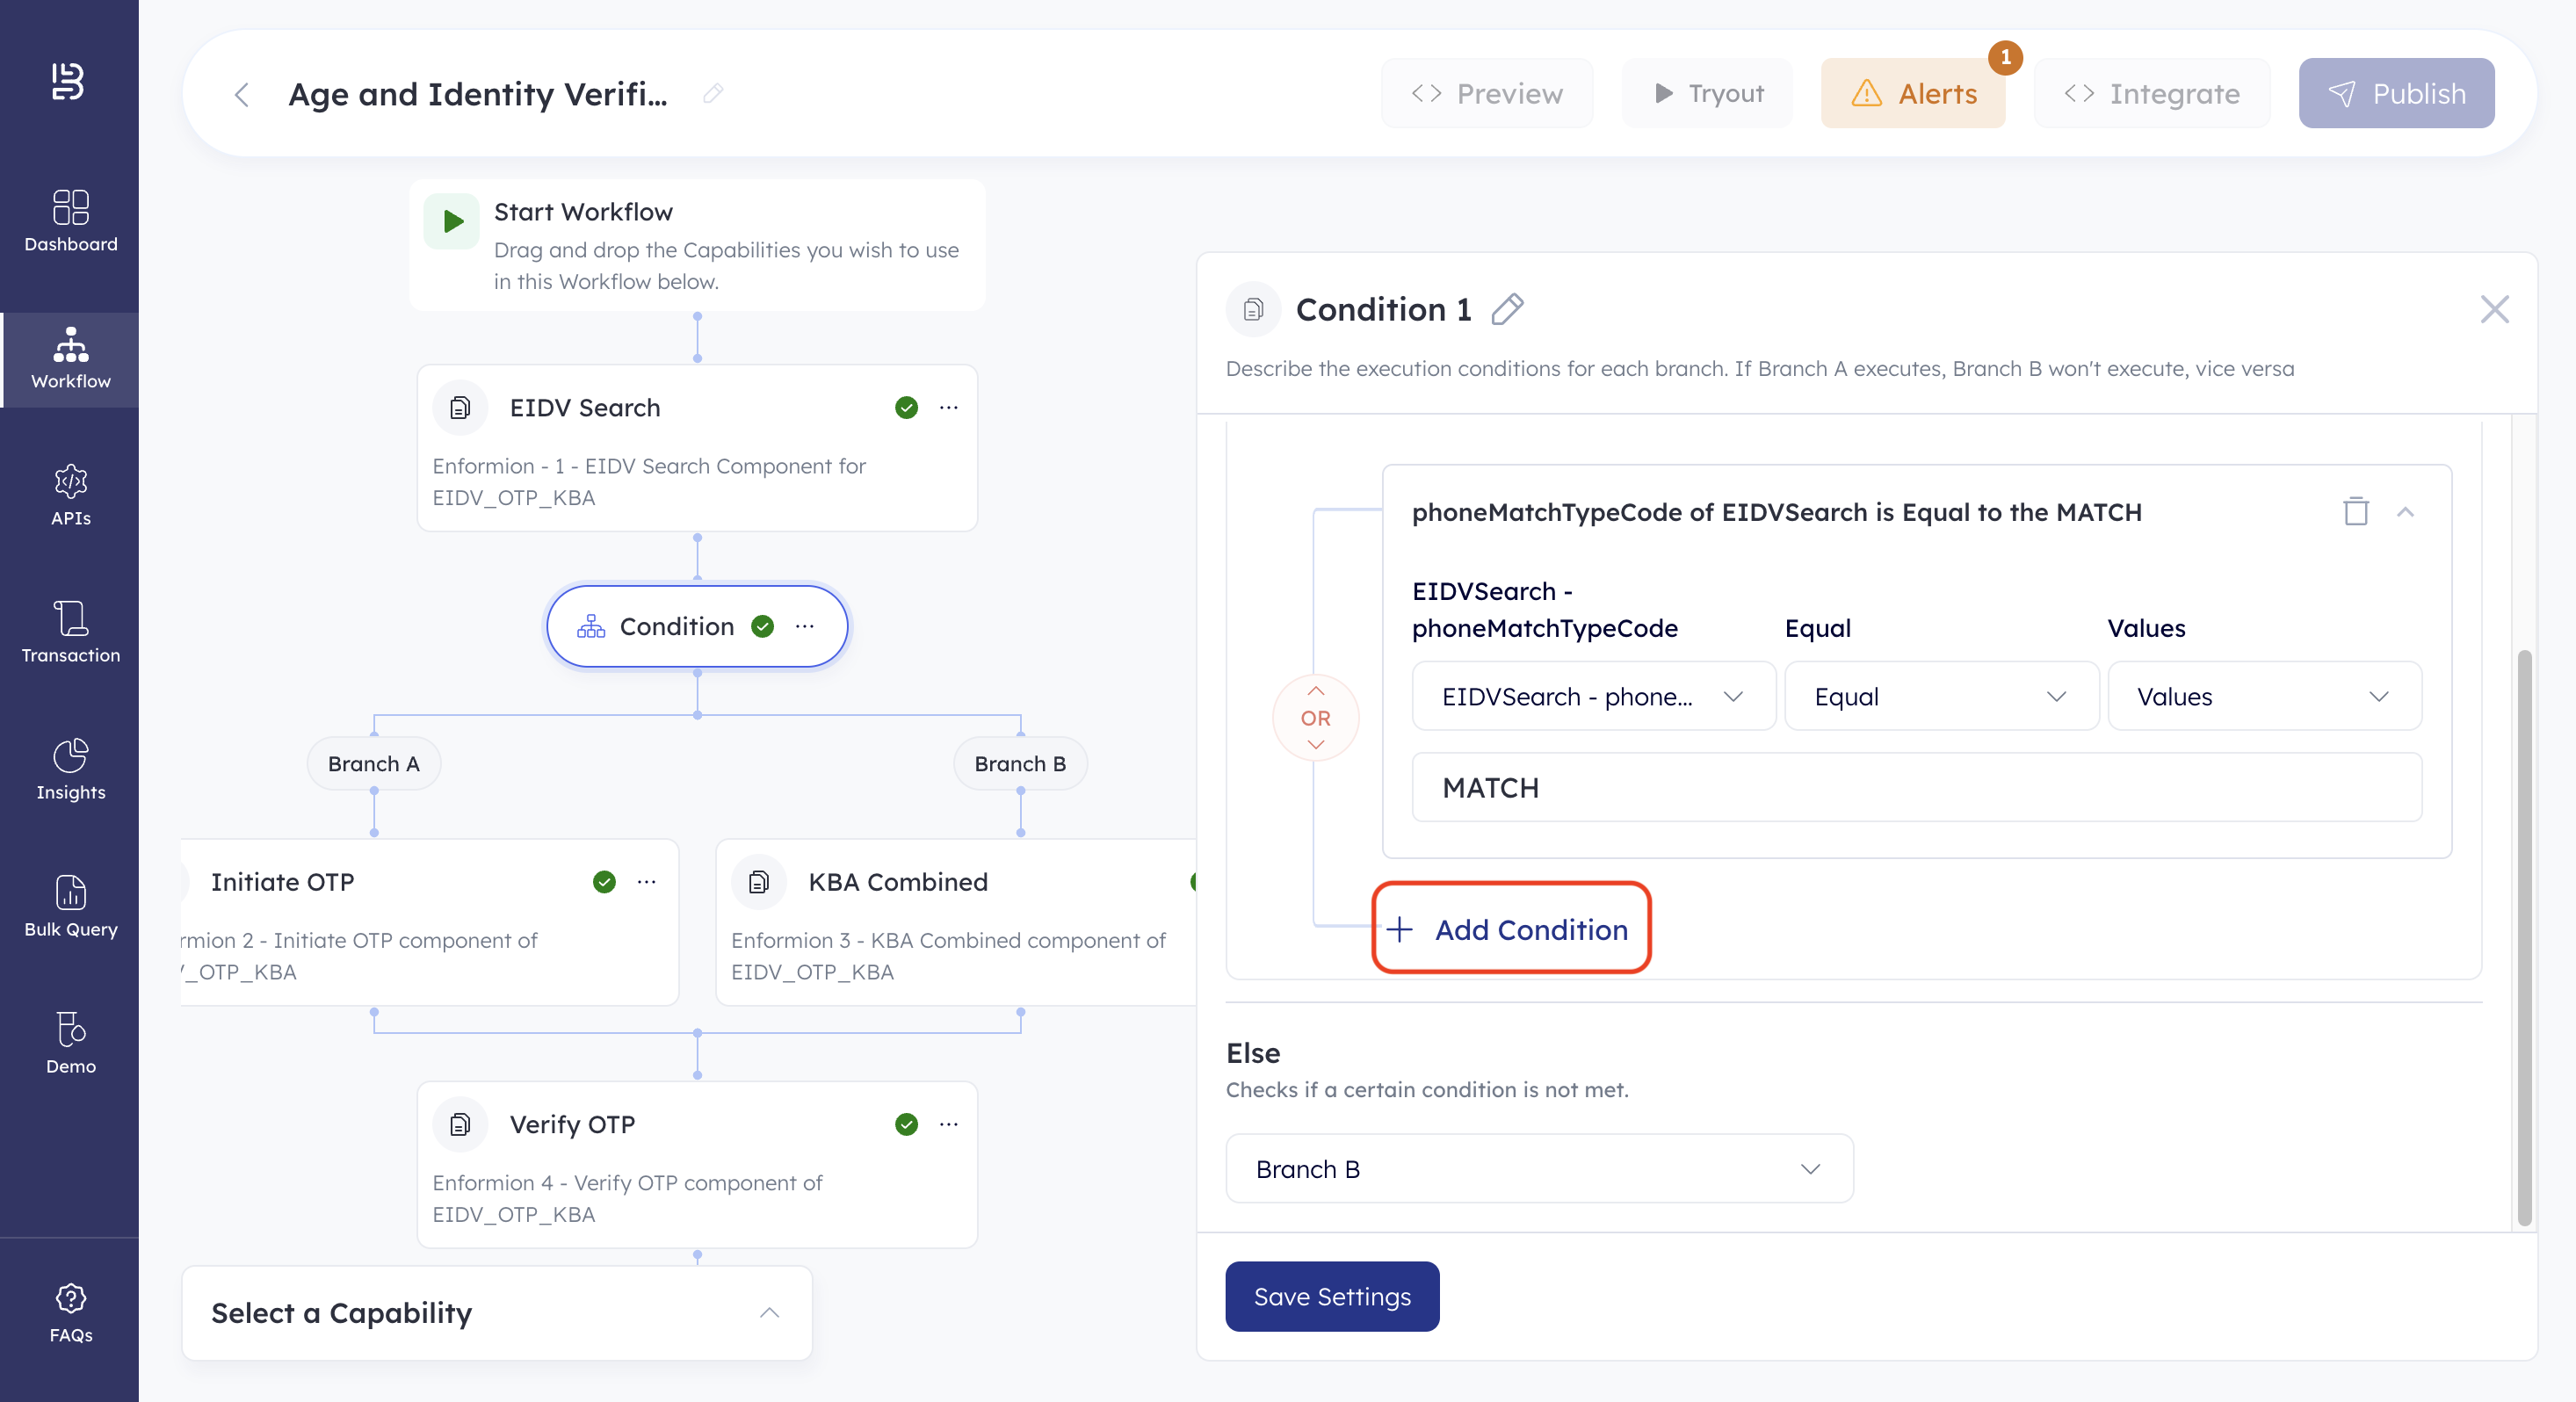
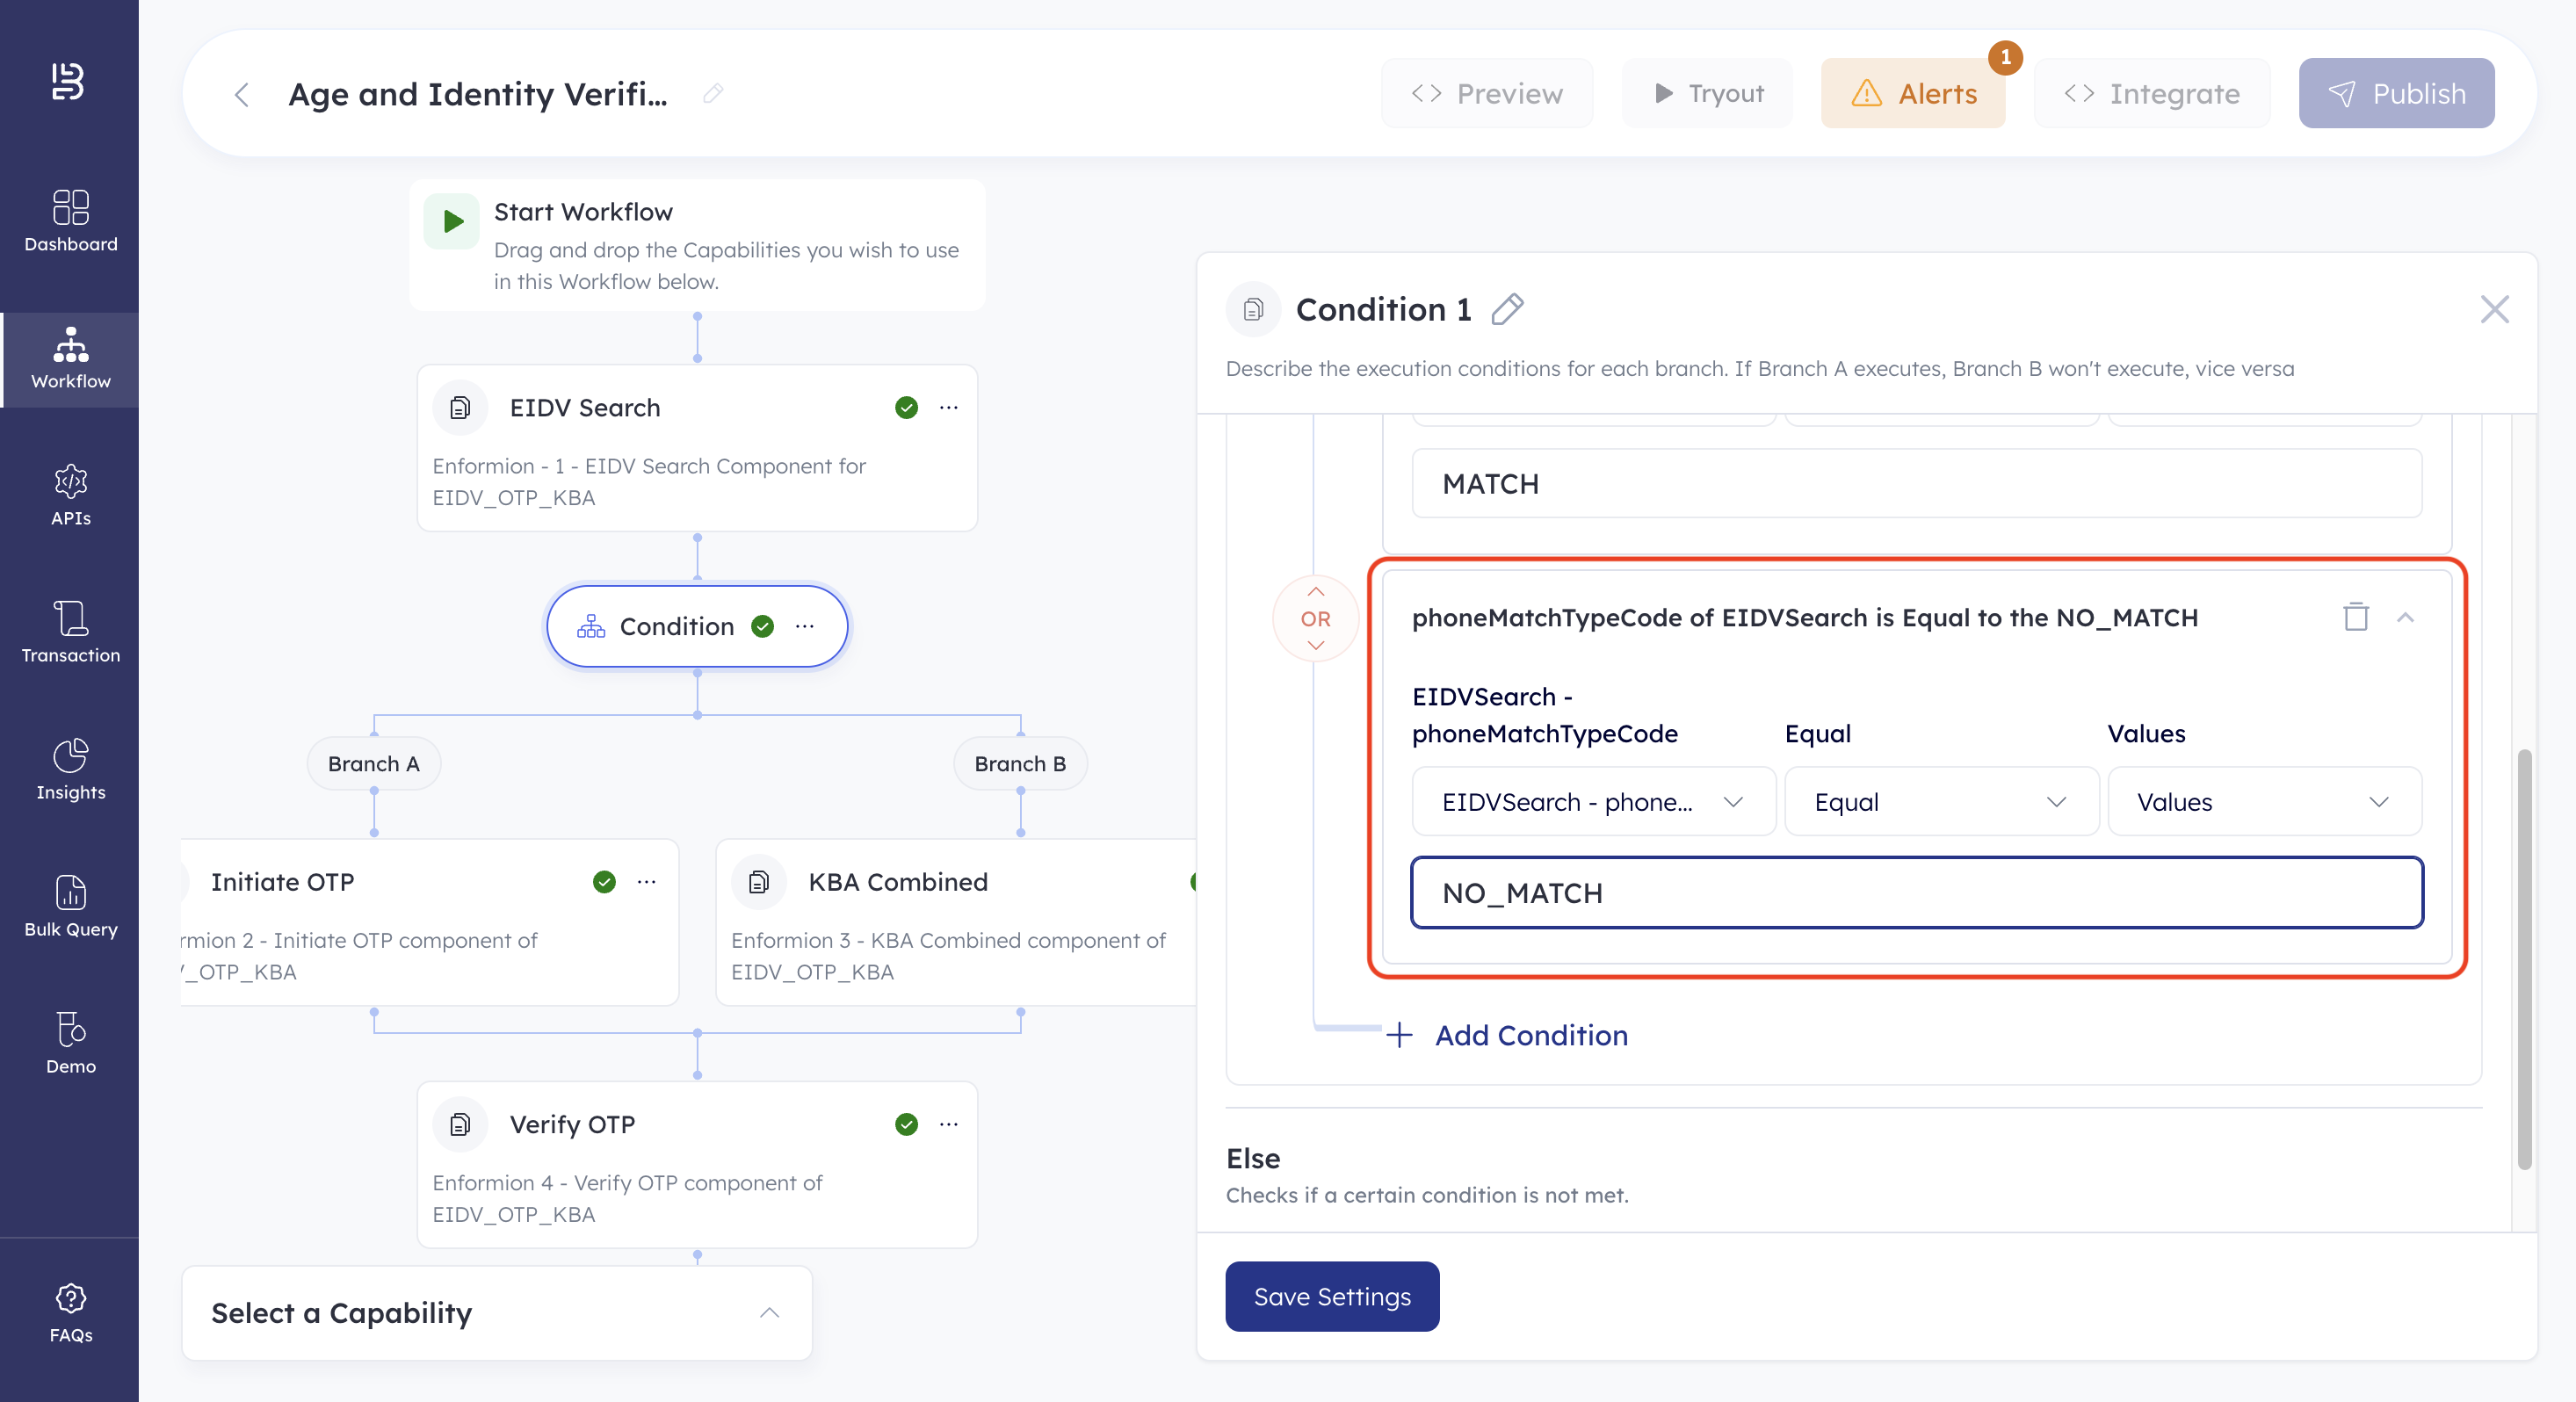
- Click OR.
- Define another condition as Phone Match Type Code equal to the static value NO_MATCH.
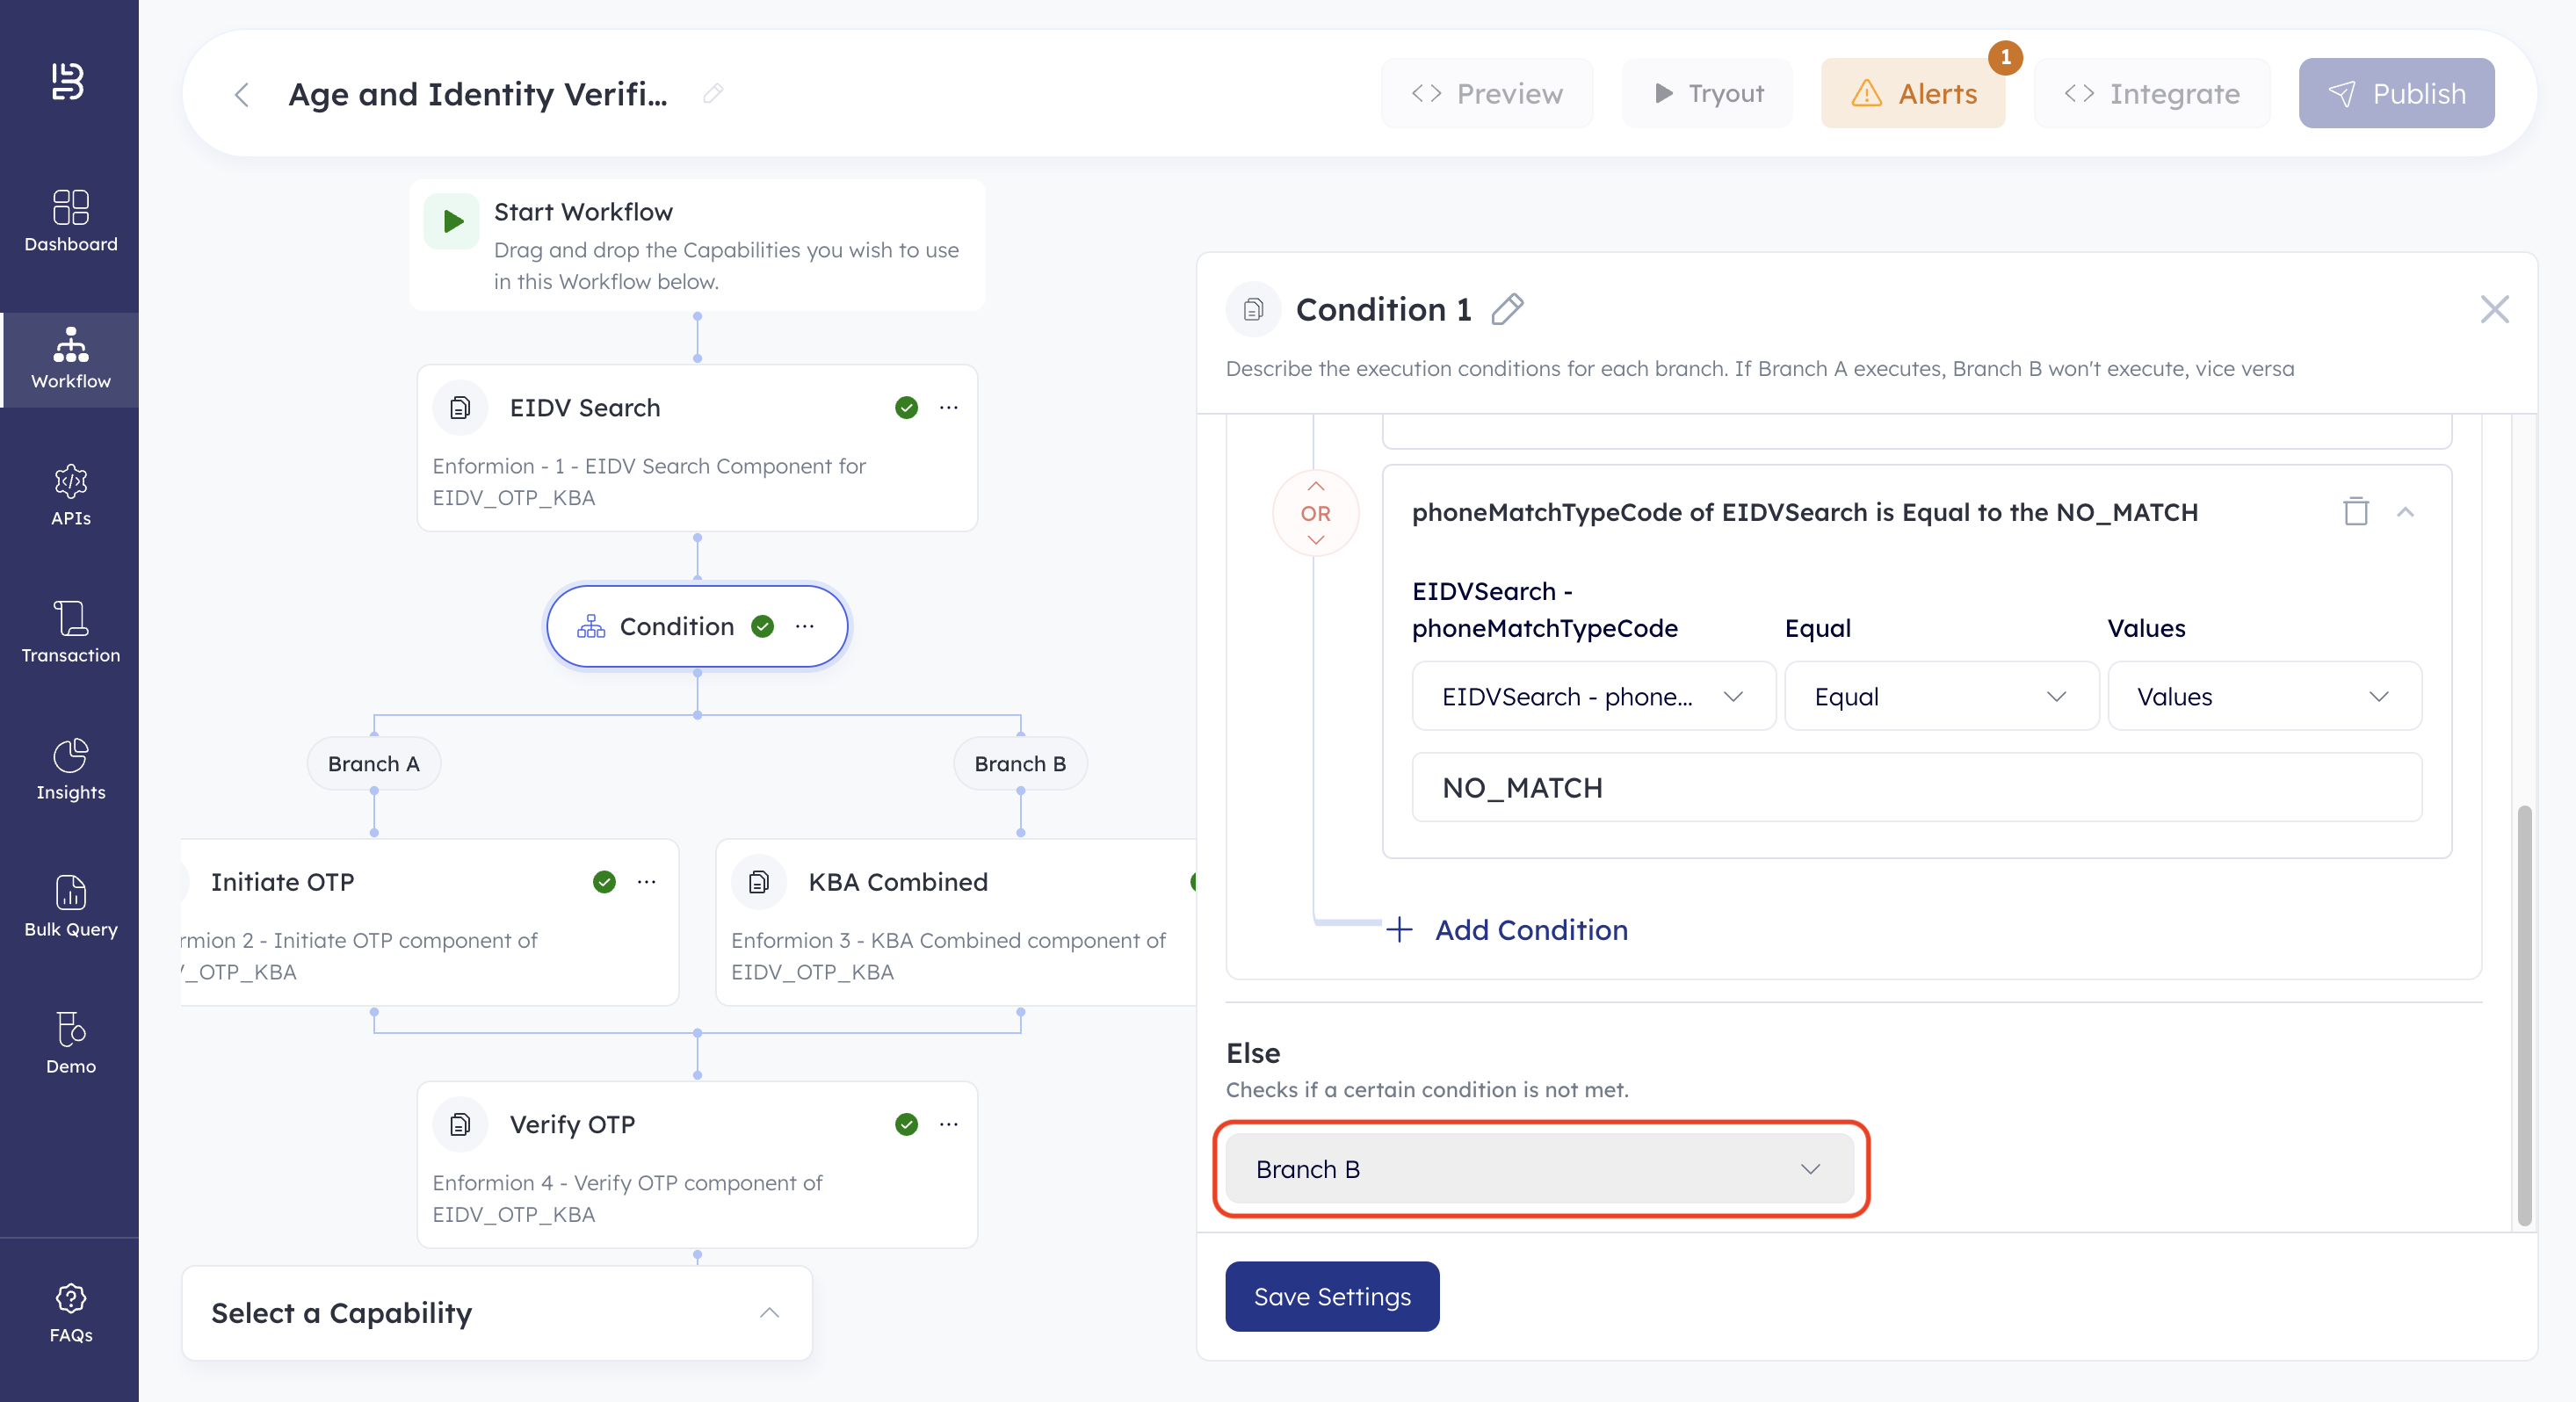
- Ensure the Else condition is set to Branch B.
- Click Save Settings.
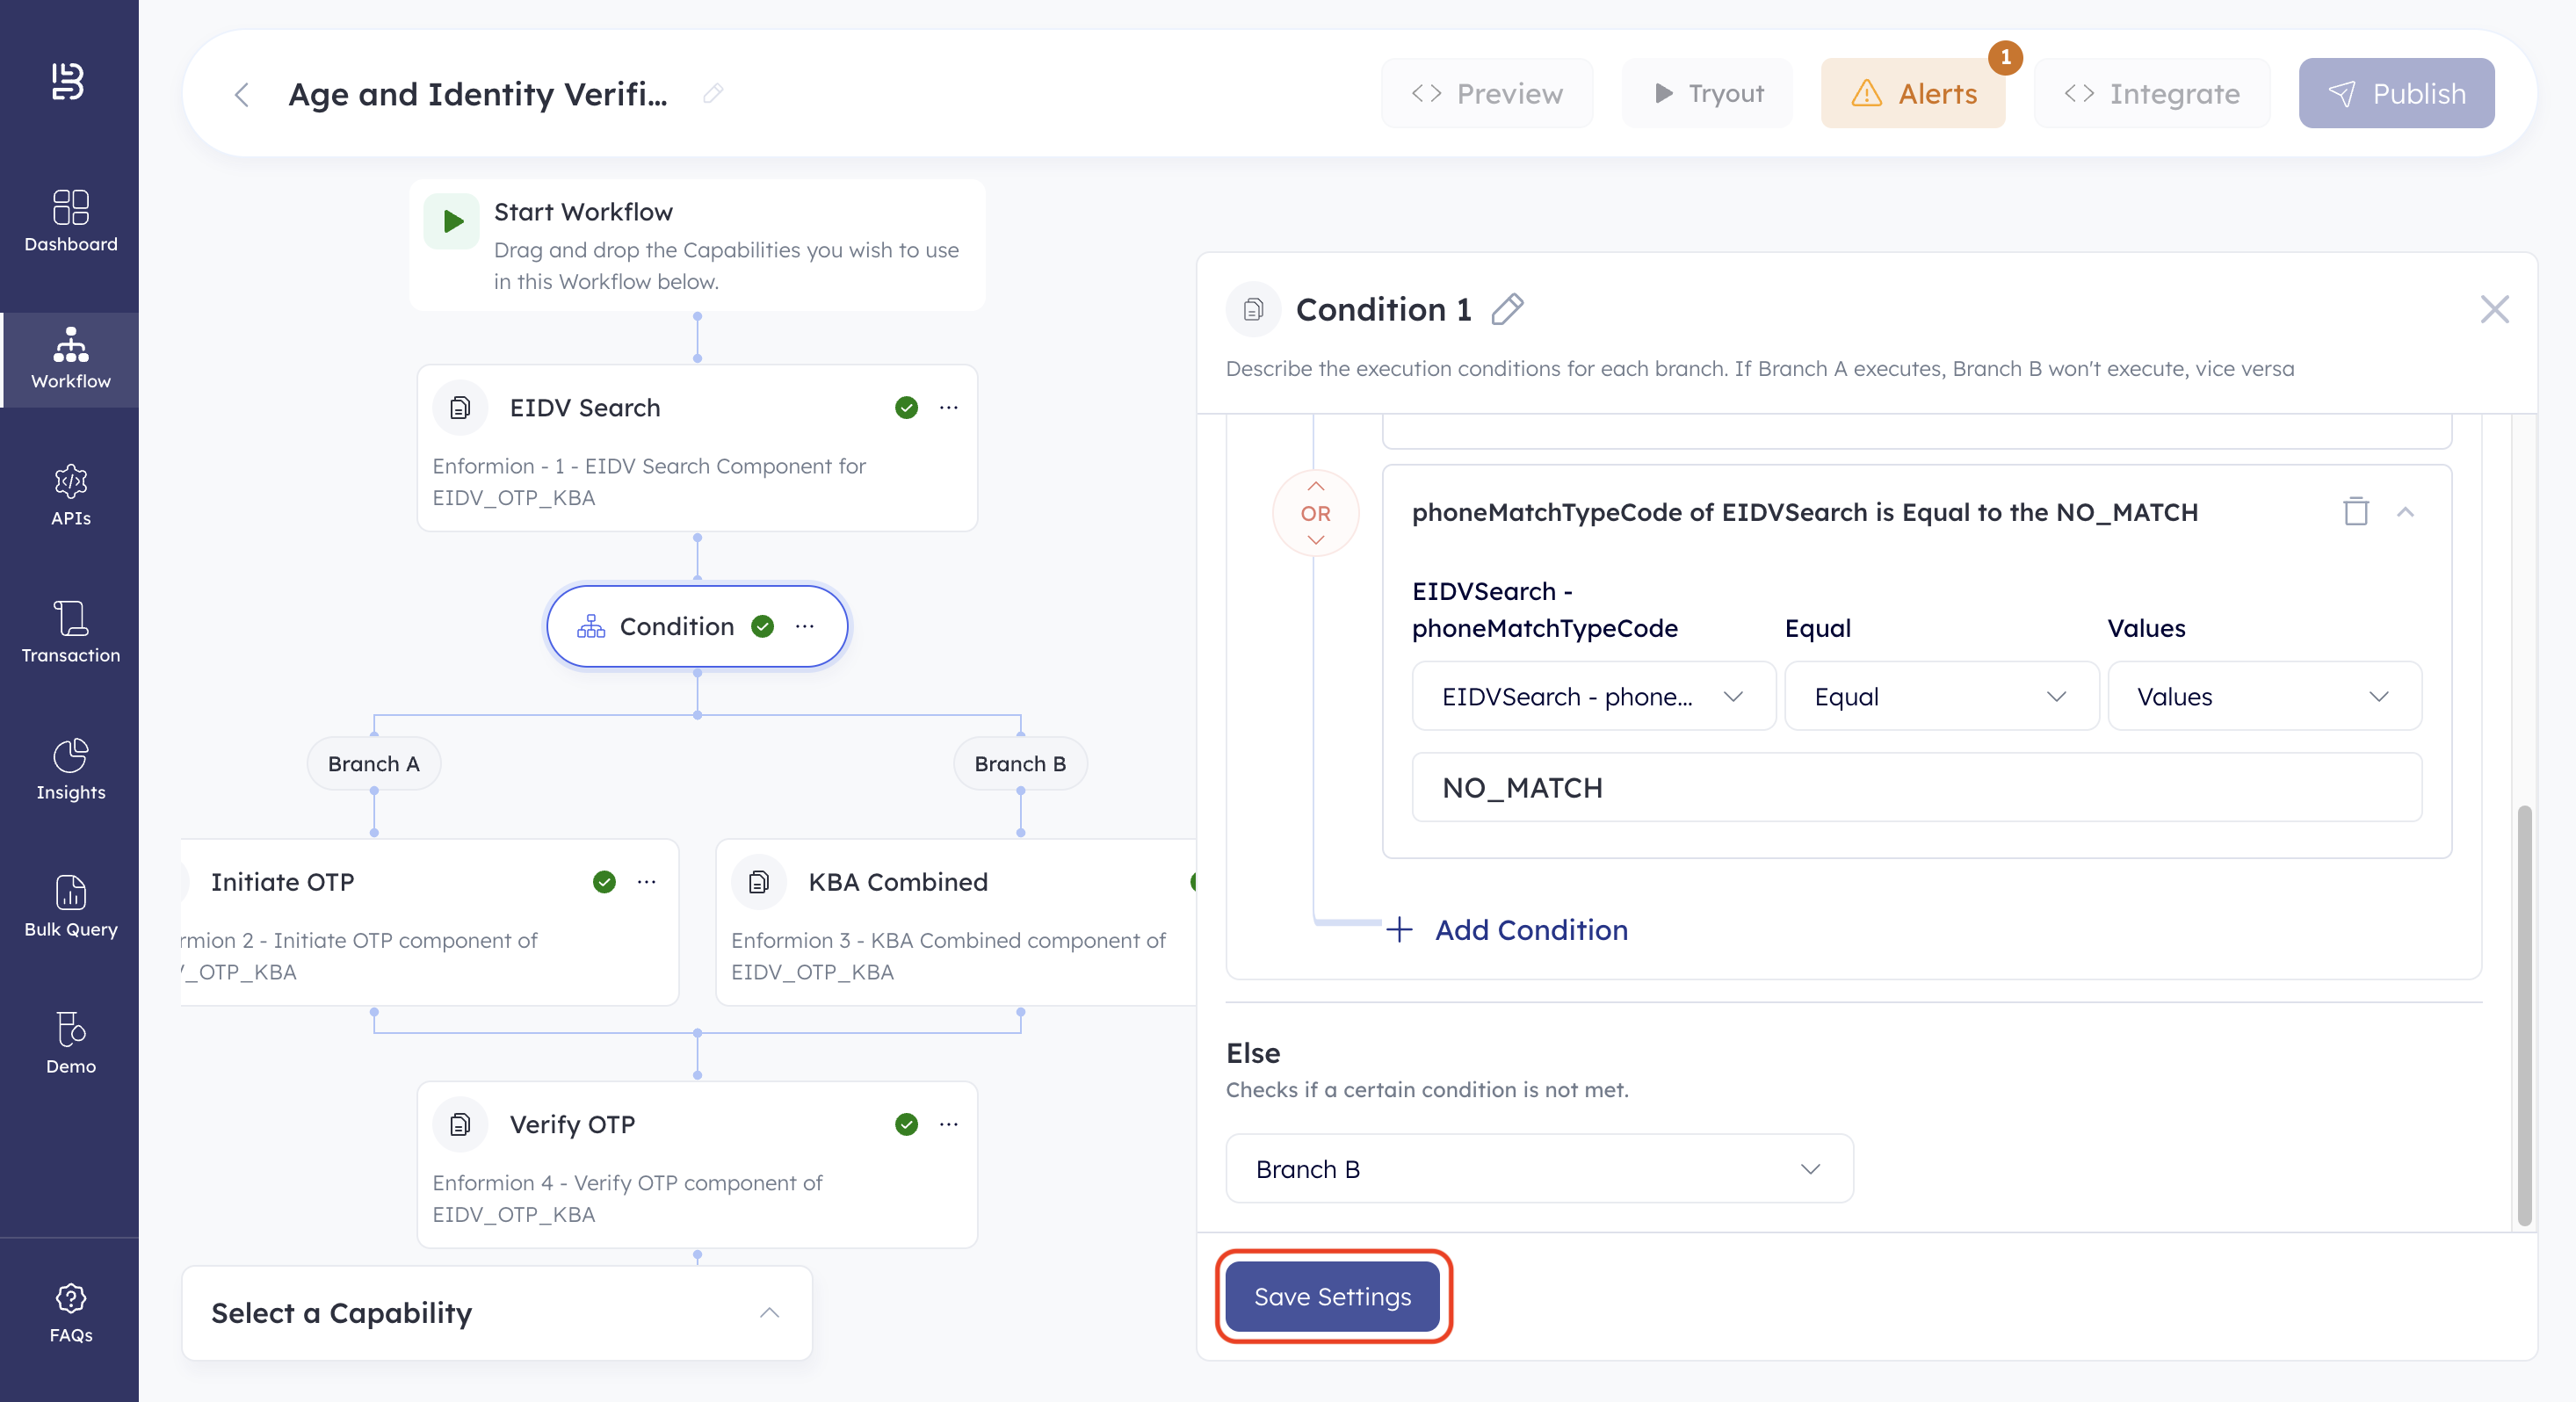
You have defined the workflow conditions. Next, let us publish and test the workflow.
Publish the Workflow
Click Publish to Publish the workflow.
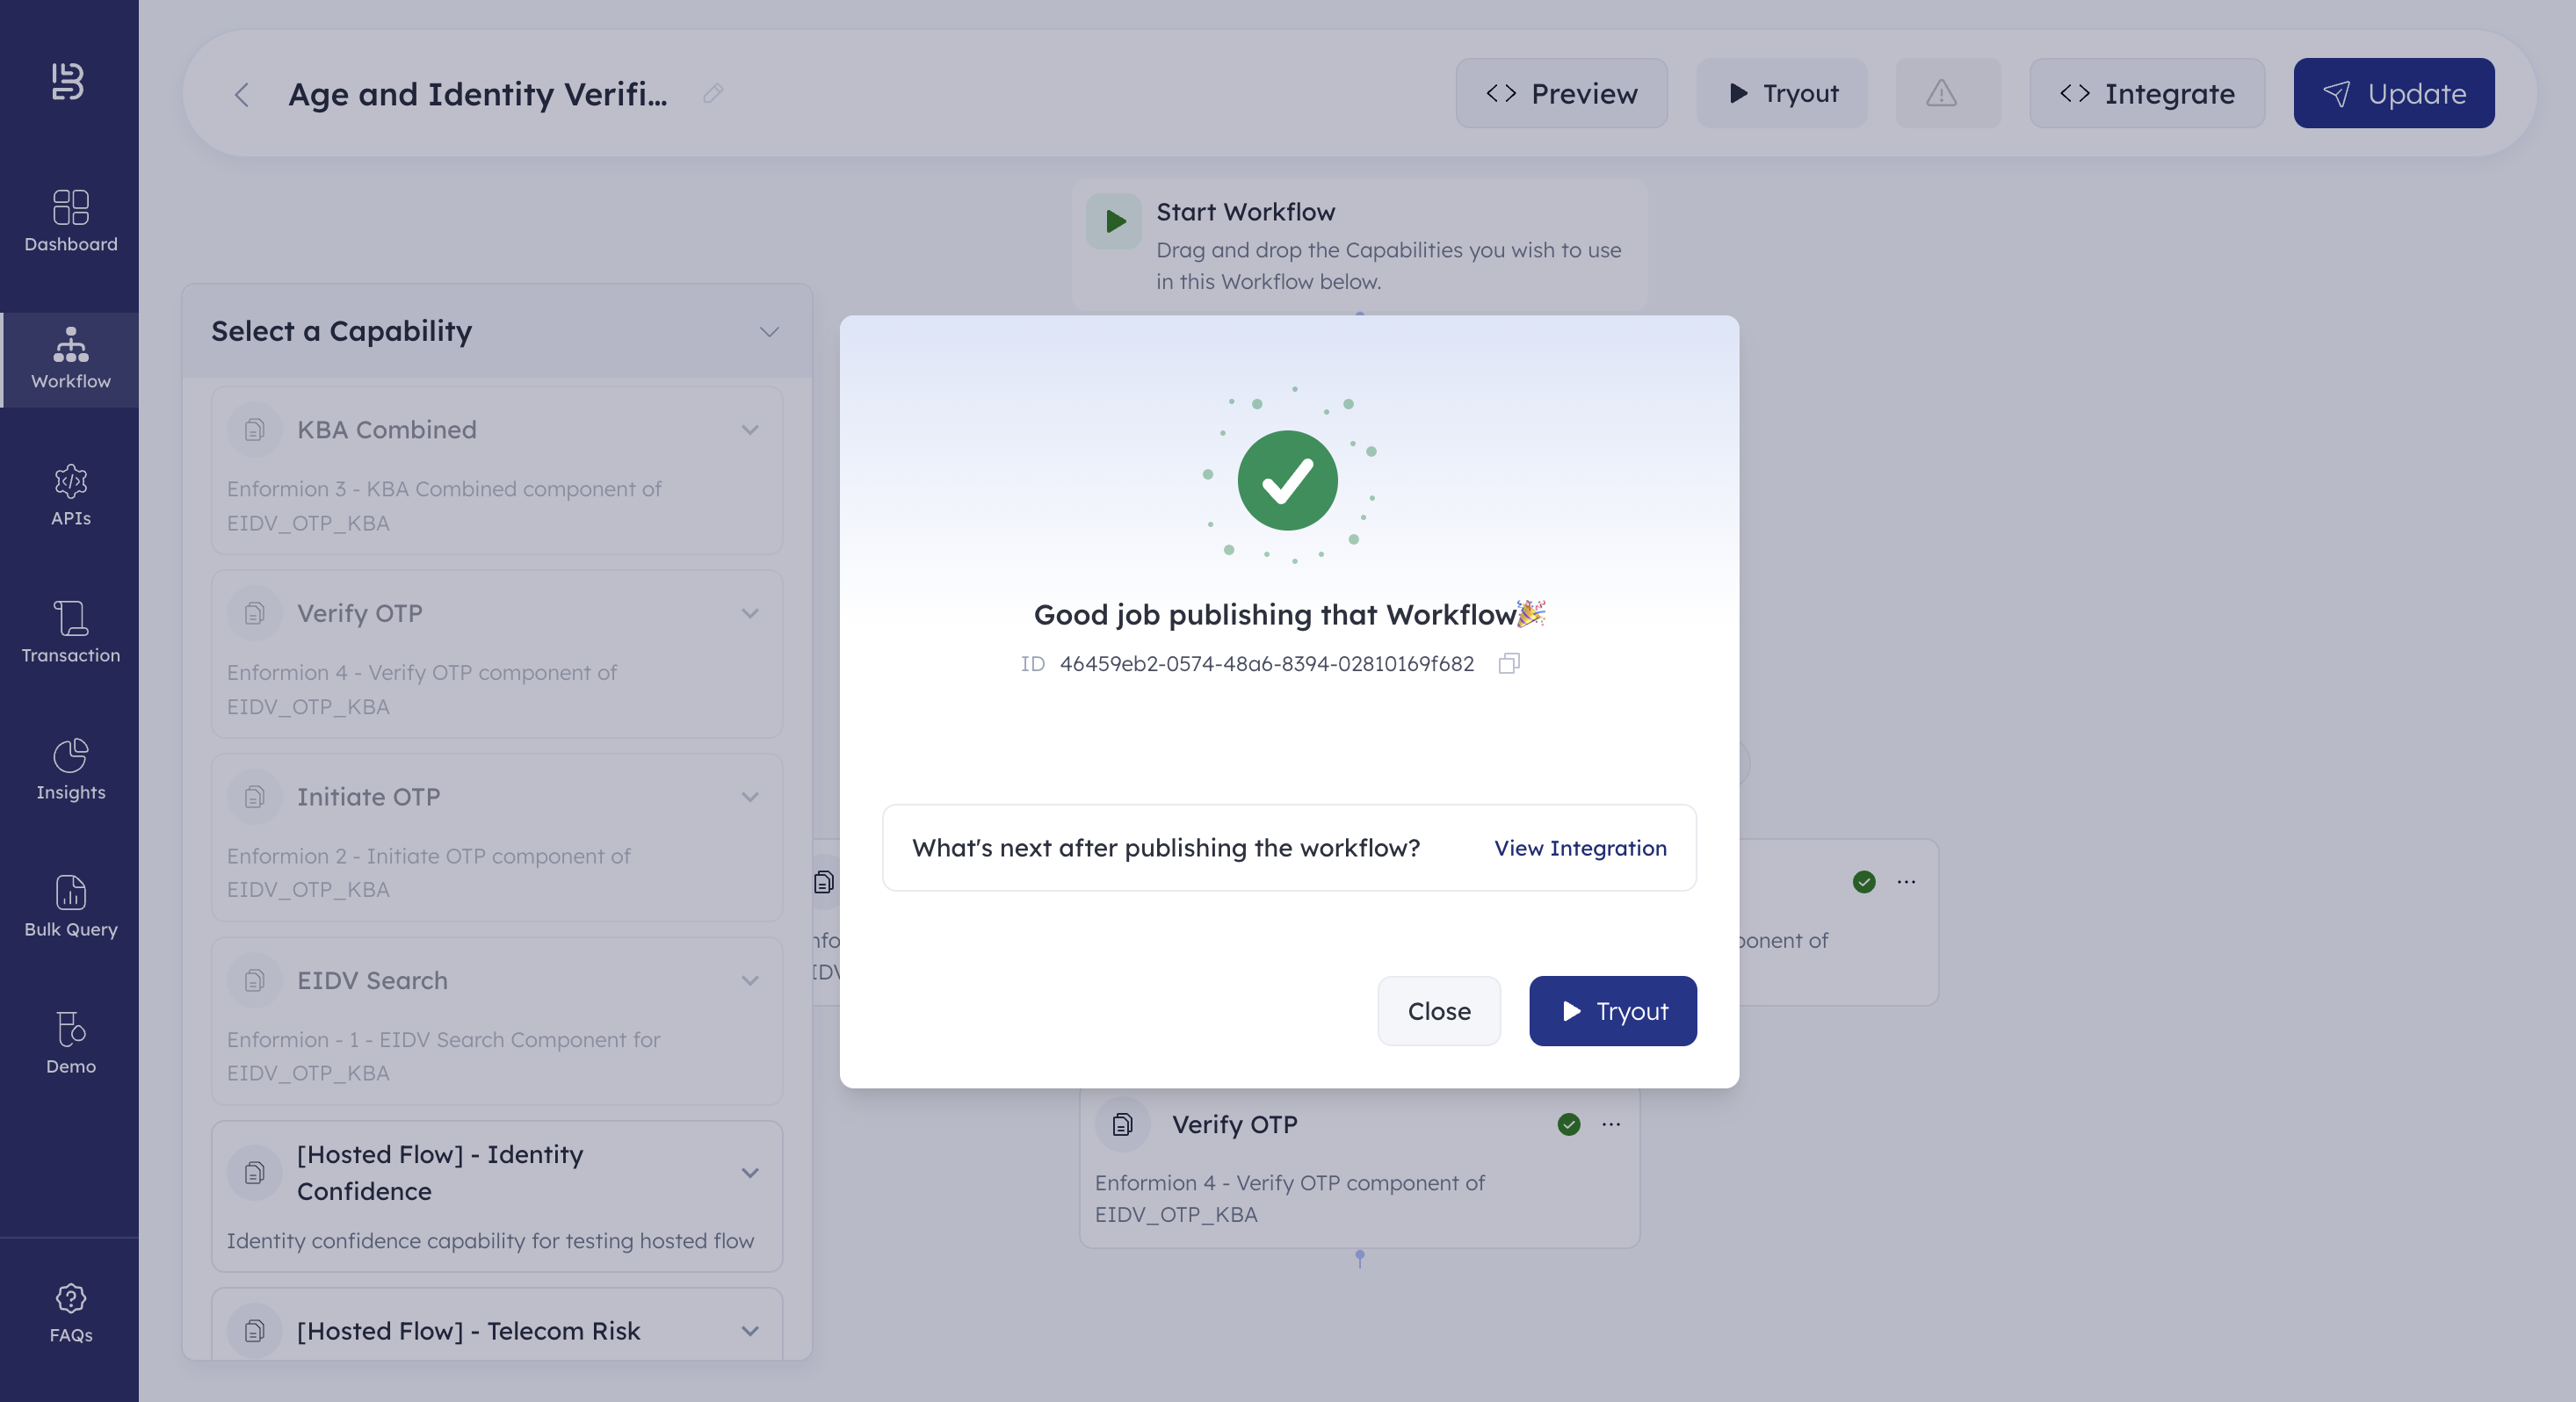
The workflow is now published and is ready to be used.
Test Workflow
You can test workflows either from the Dashboard or using Postman. Refer to the Test Workflow page for more details.
Updated about 2 months ago