
Create a Basic Workflow
Learn how to create a basic workflow with an example.
On this page, you will learn to create a basic workflow using an example. Visit the Test Workflow page to learn how you can test workflows from the Bureau Dashboard and using Postman.
Let's build a workflow to verify an individual's identity using their Permanent Account Number (PAN). We will use two capabilities for this:
- PAN Basic
- Name Match v2
Note
These capabilities should already be available to you.
Contact our Support Team if they are not, if you want to customize the existing capabilities, or if you want to create other custom capabilities.
Workflow Breakdown
The below figure gives an overview of how the identity verification solution works.
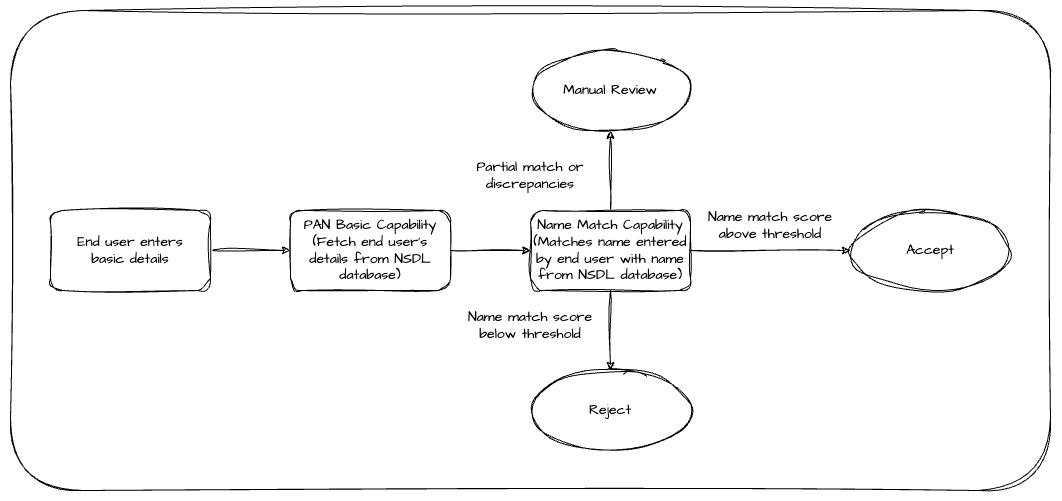
- User Input: The user provides their PAN and name on the application frontend.
- NSDL Information Retrieval: The PAN Basic capability fetches user details from the NSDL database.
- Name Matching: The Name Match v2 capability compares the entered name with the NSDL data.
- Verification Outcome: Based on the pre-defined match threshold you've established, the workflow assigns an outcome to the identity verification request:
- Accepted: Names match score is above the pre-defined threshold.
- Rejected: Names match score does not meet the match threshold.
- Manual Review: Names have a partial match or other discrepancies requiring human review.
Build the Basic Workflow
Creating a workflow involves three key steps:
- Add capabilities: Select the functionalities needed for the workflow.
- Configure capabilities: Define parameters and settings for each capability.
- Define workflow conditions: Determine the workflow's path using If/Else statements.
1. Add Capabilities
First, you must select the building blocks for your workflow, known as capabilities. These pre-built modules perform specific functions.
Note
While adding capabilities, keep in mind the overall workflow logic and how each capability contributes to the verification process.
Follow the below steps to add capabilities to a workflow.
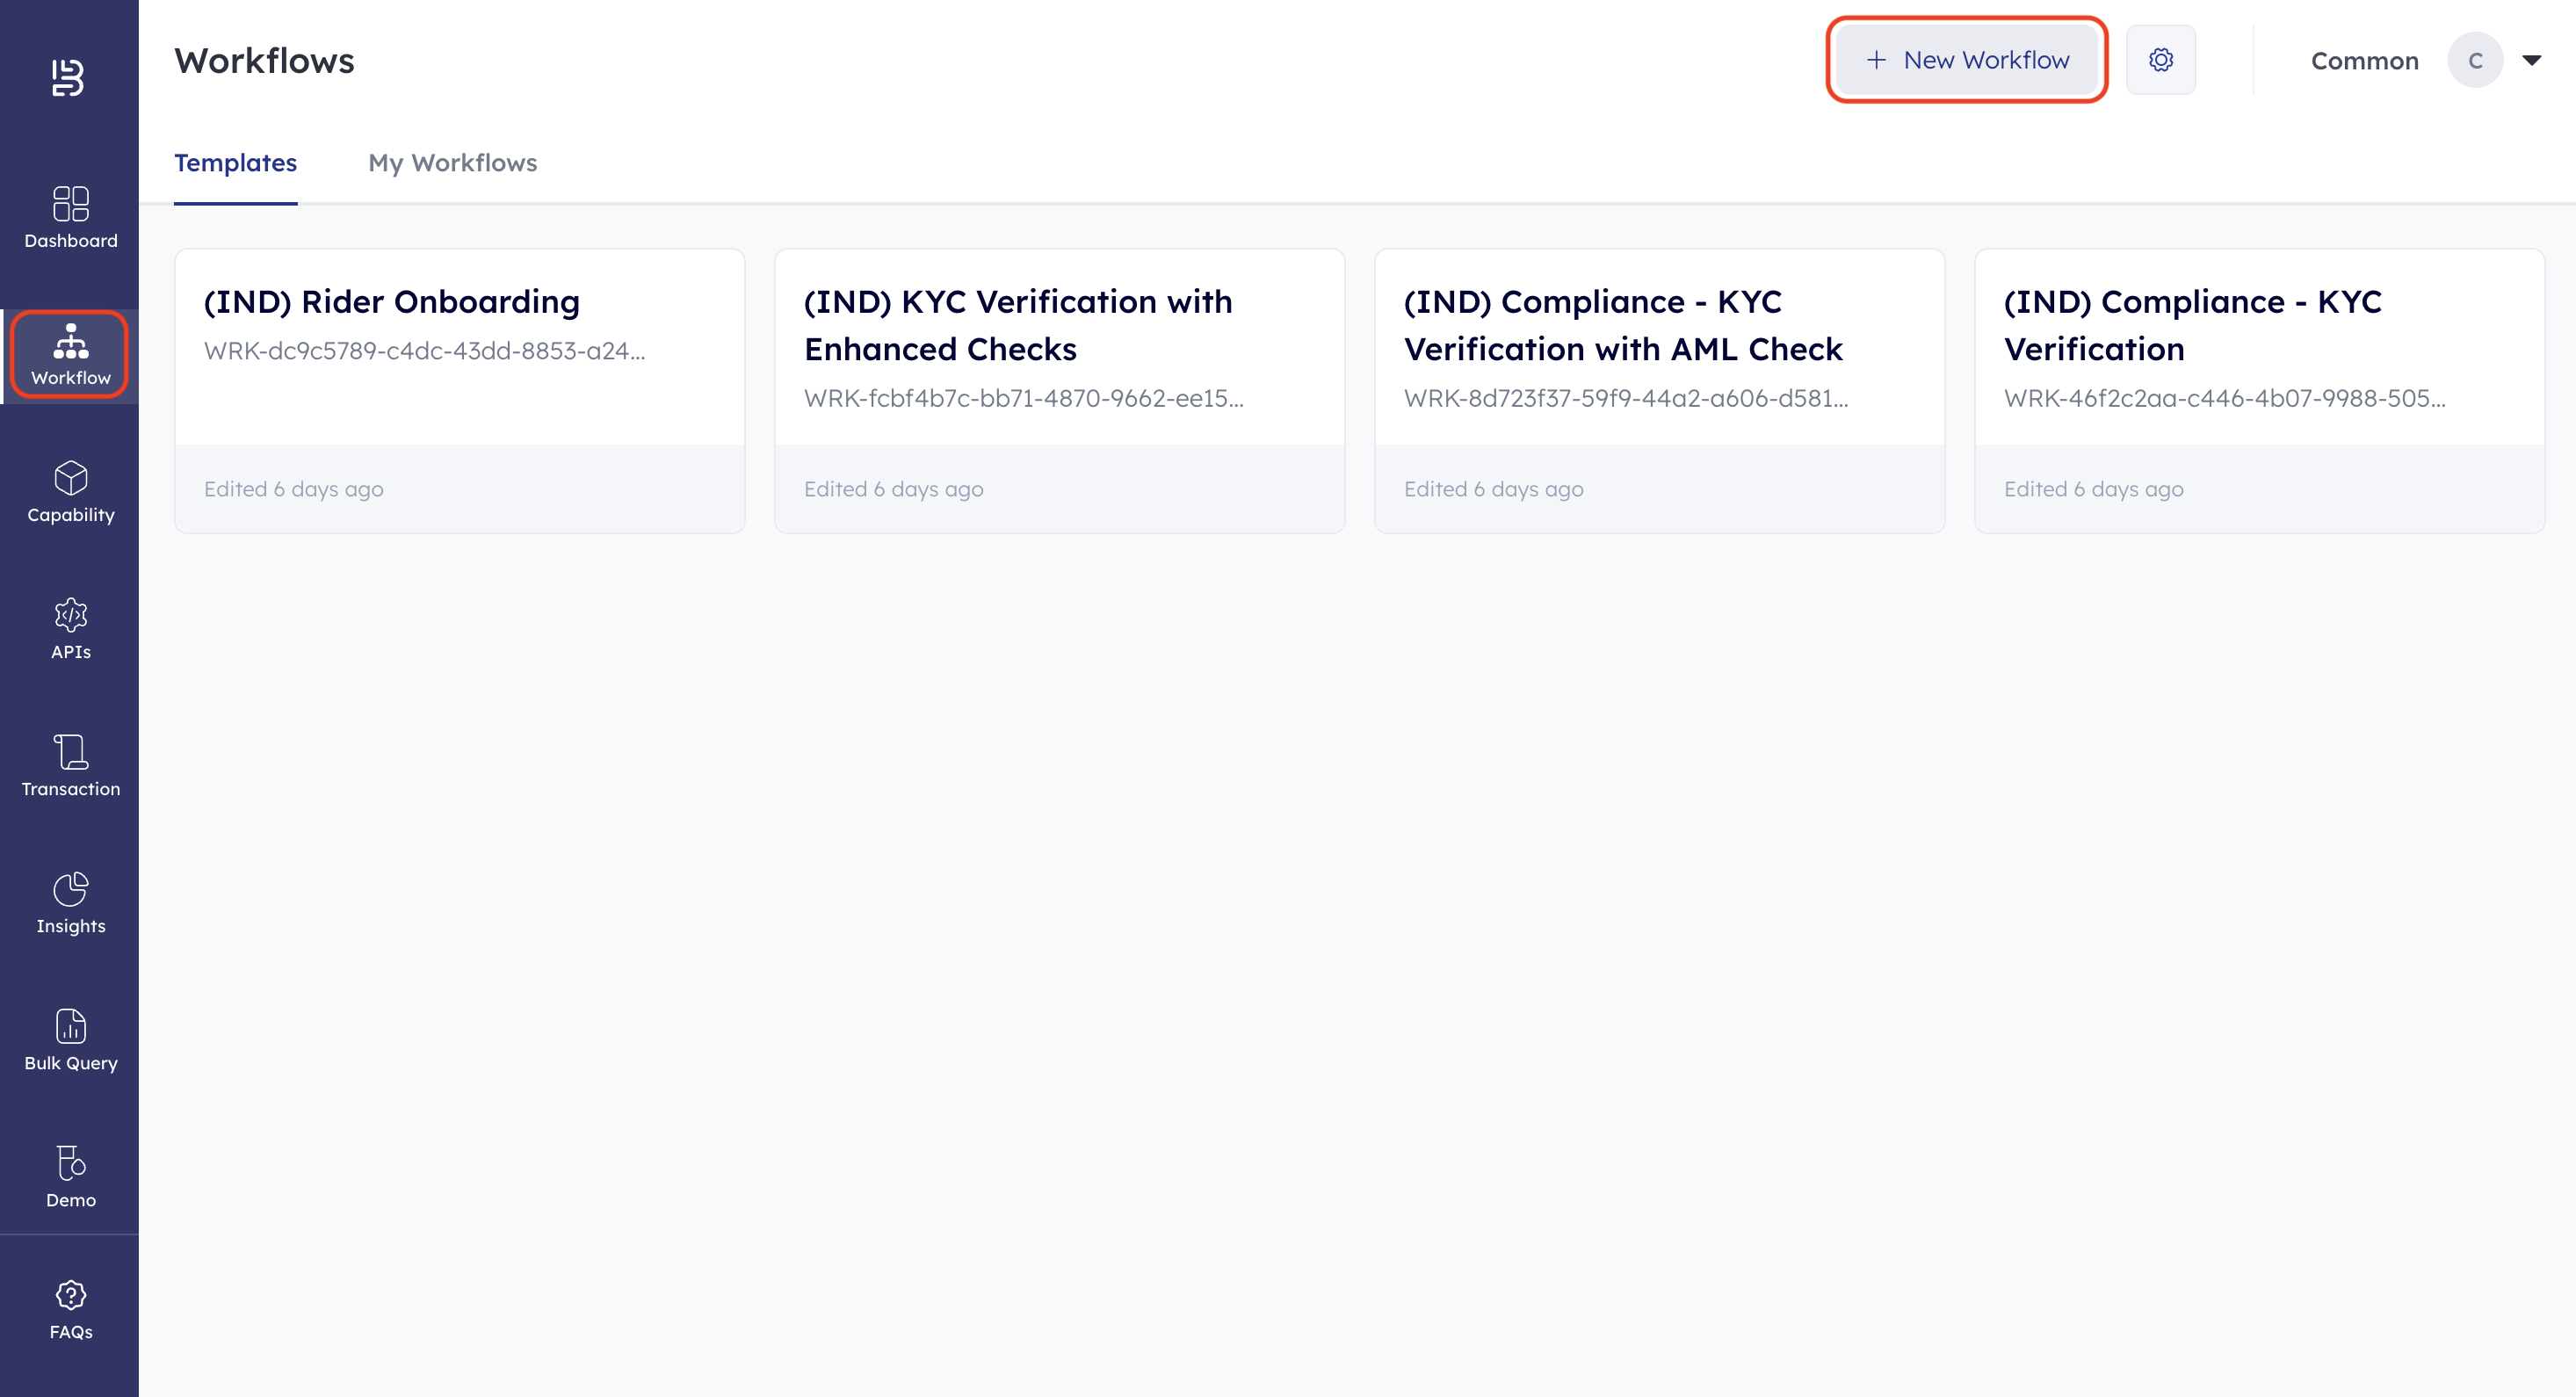
- Log in to the Bureau Dashboard.
- Click Workflows on the left navigation menu and then click + Create Workflow.
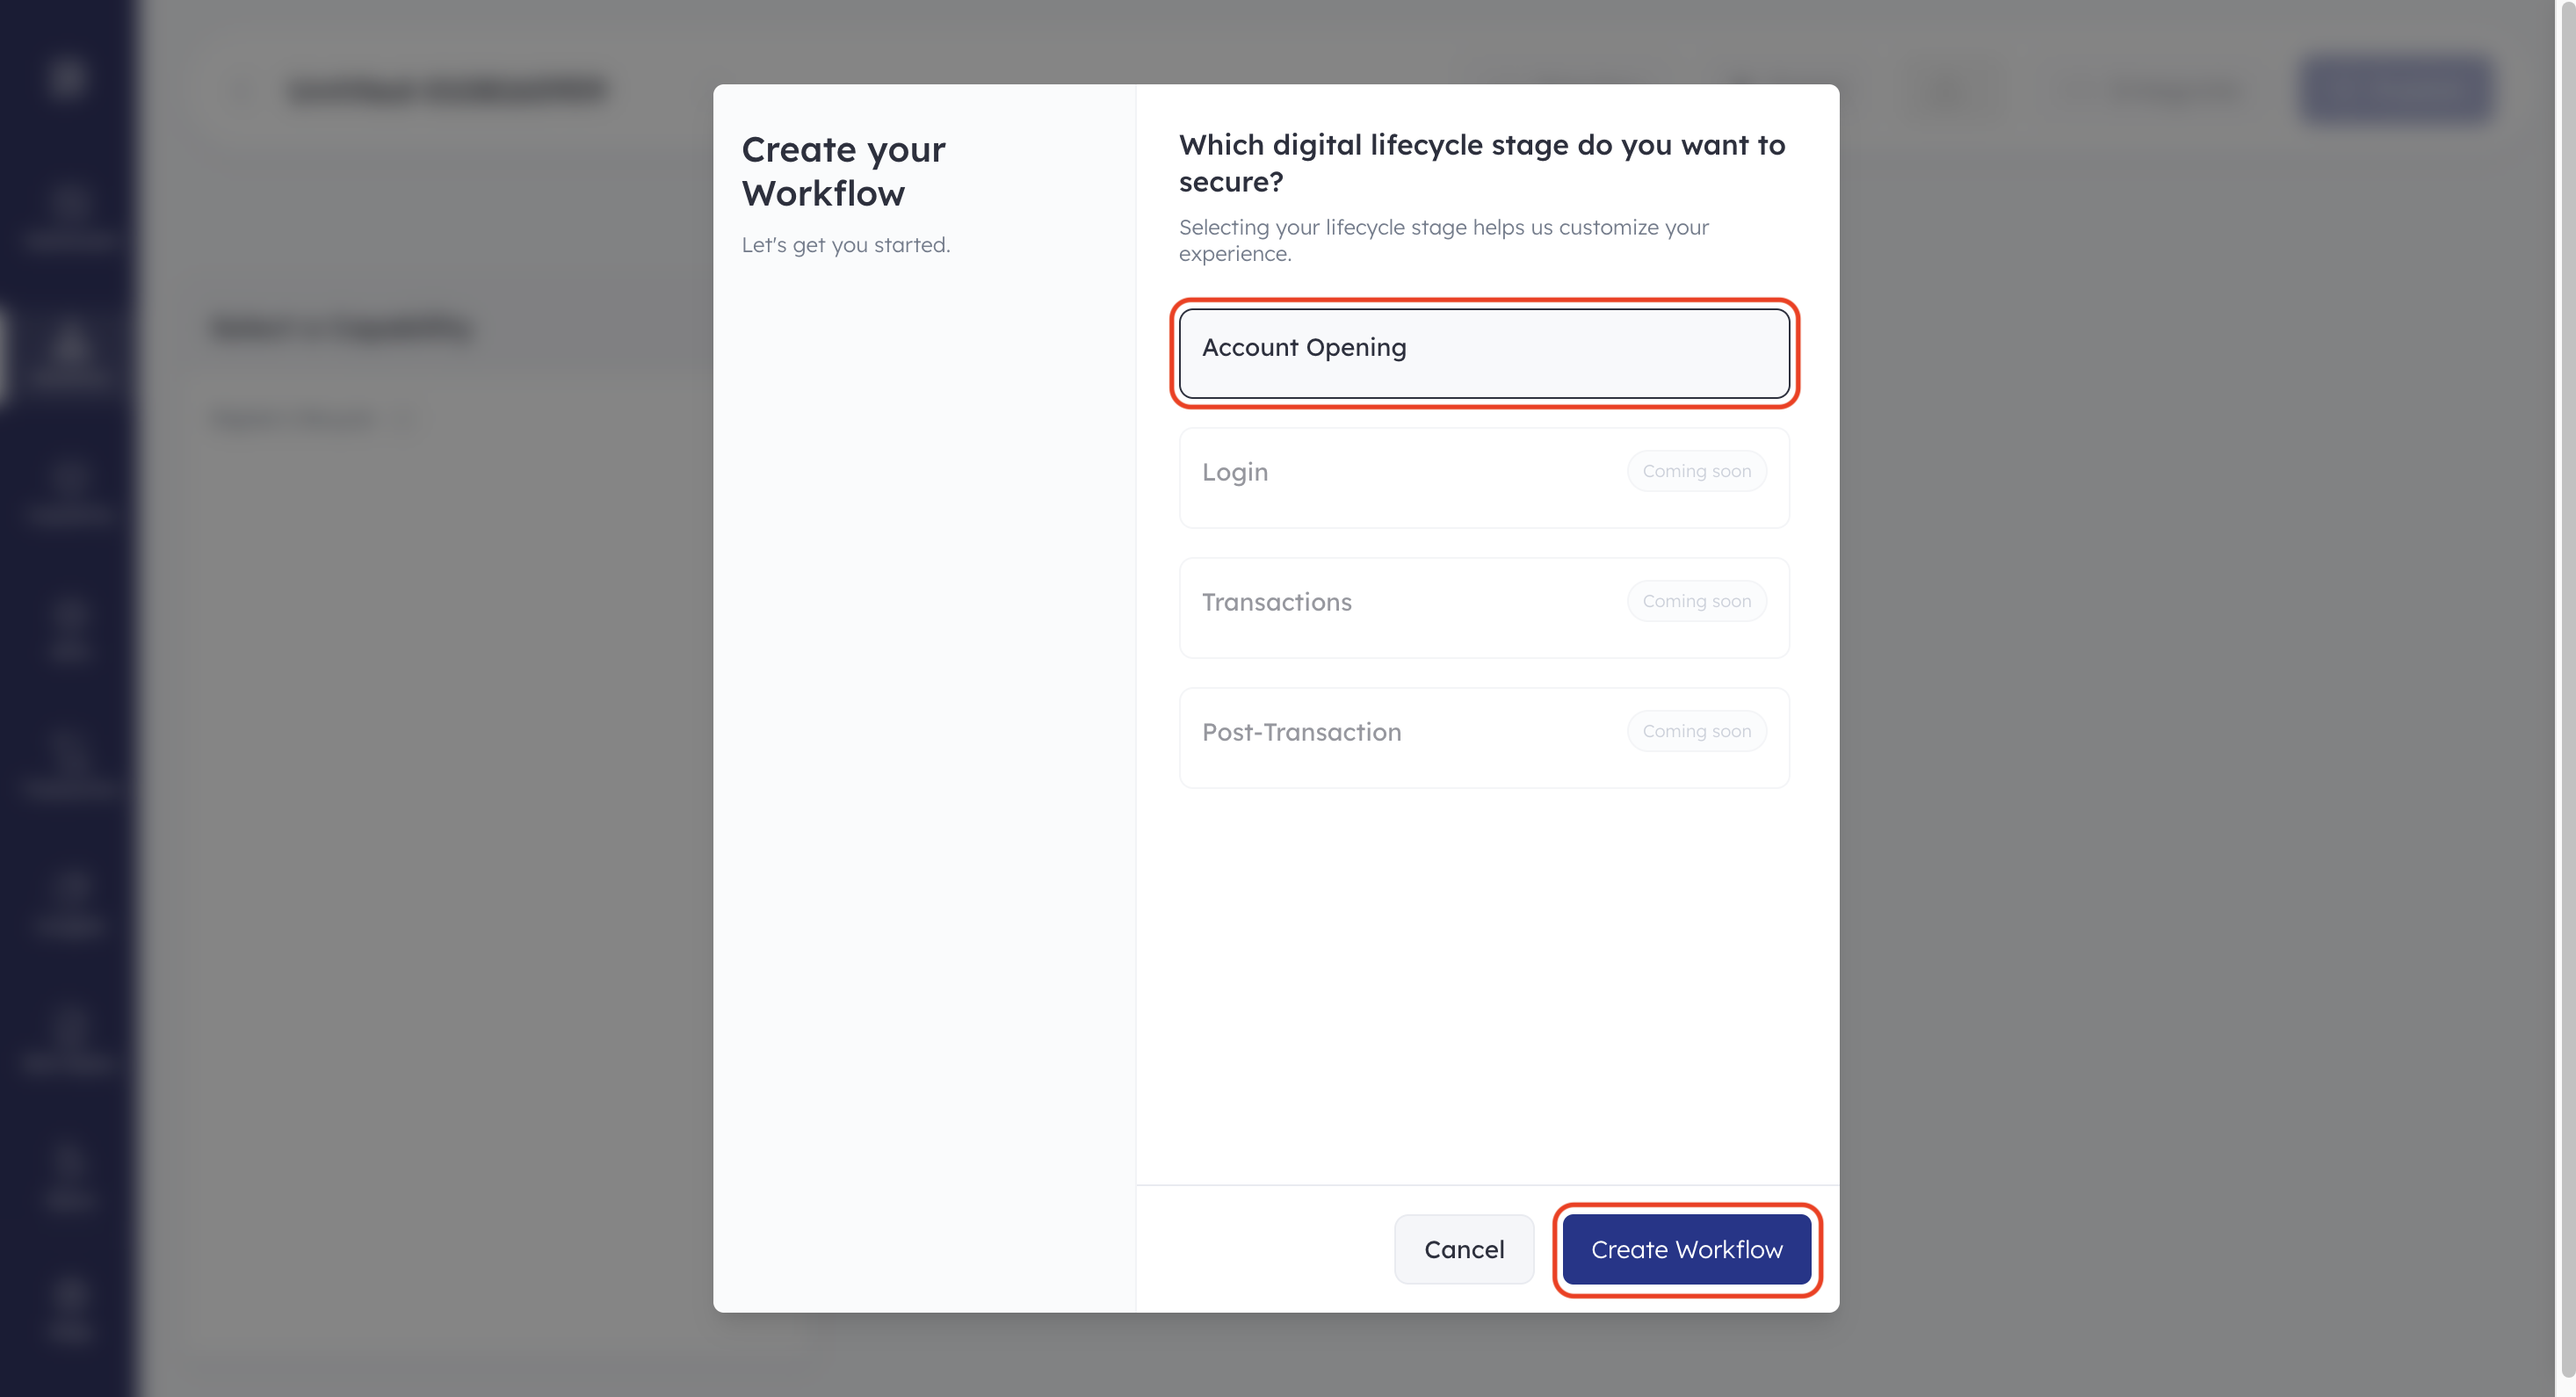
- Select the purpose for creating the workflow and then click Create Workflow. The available capabilities will depend on the chosen purpose.
- Name the workflow. This makes it easy to identify and search on the Workflow page. Let us name the workflow Identity Verification Using PAN Basic.
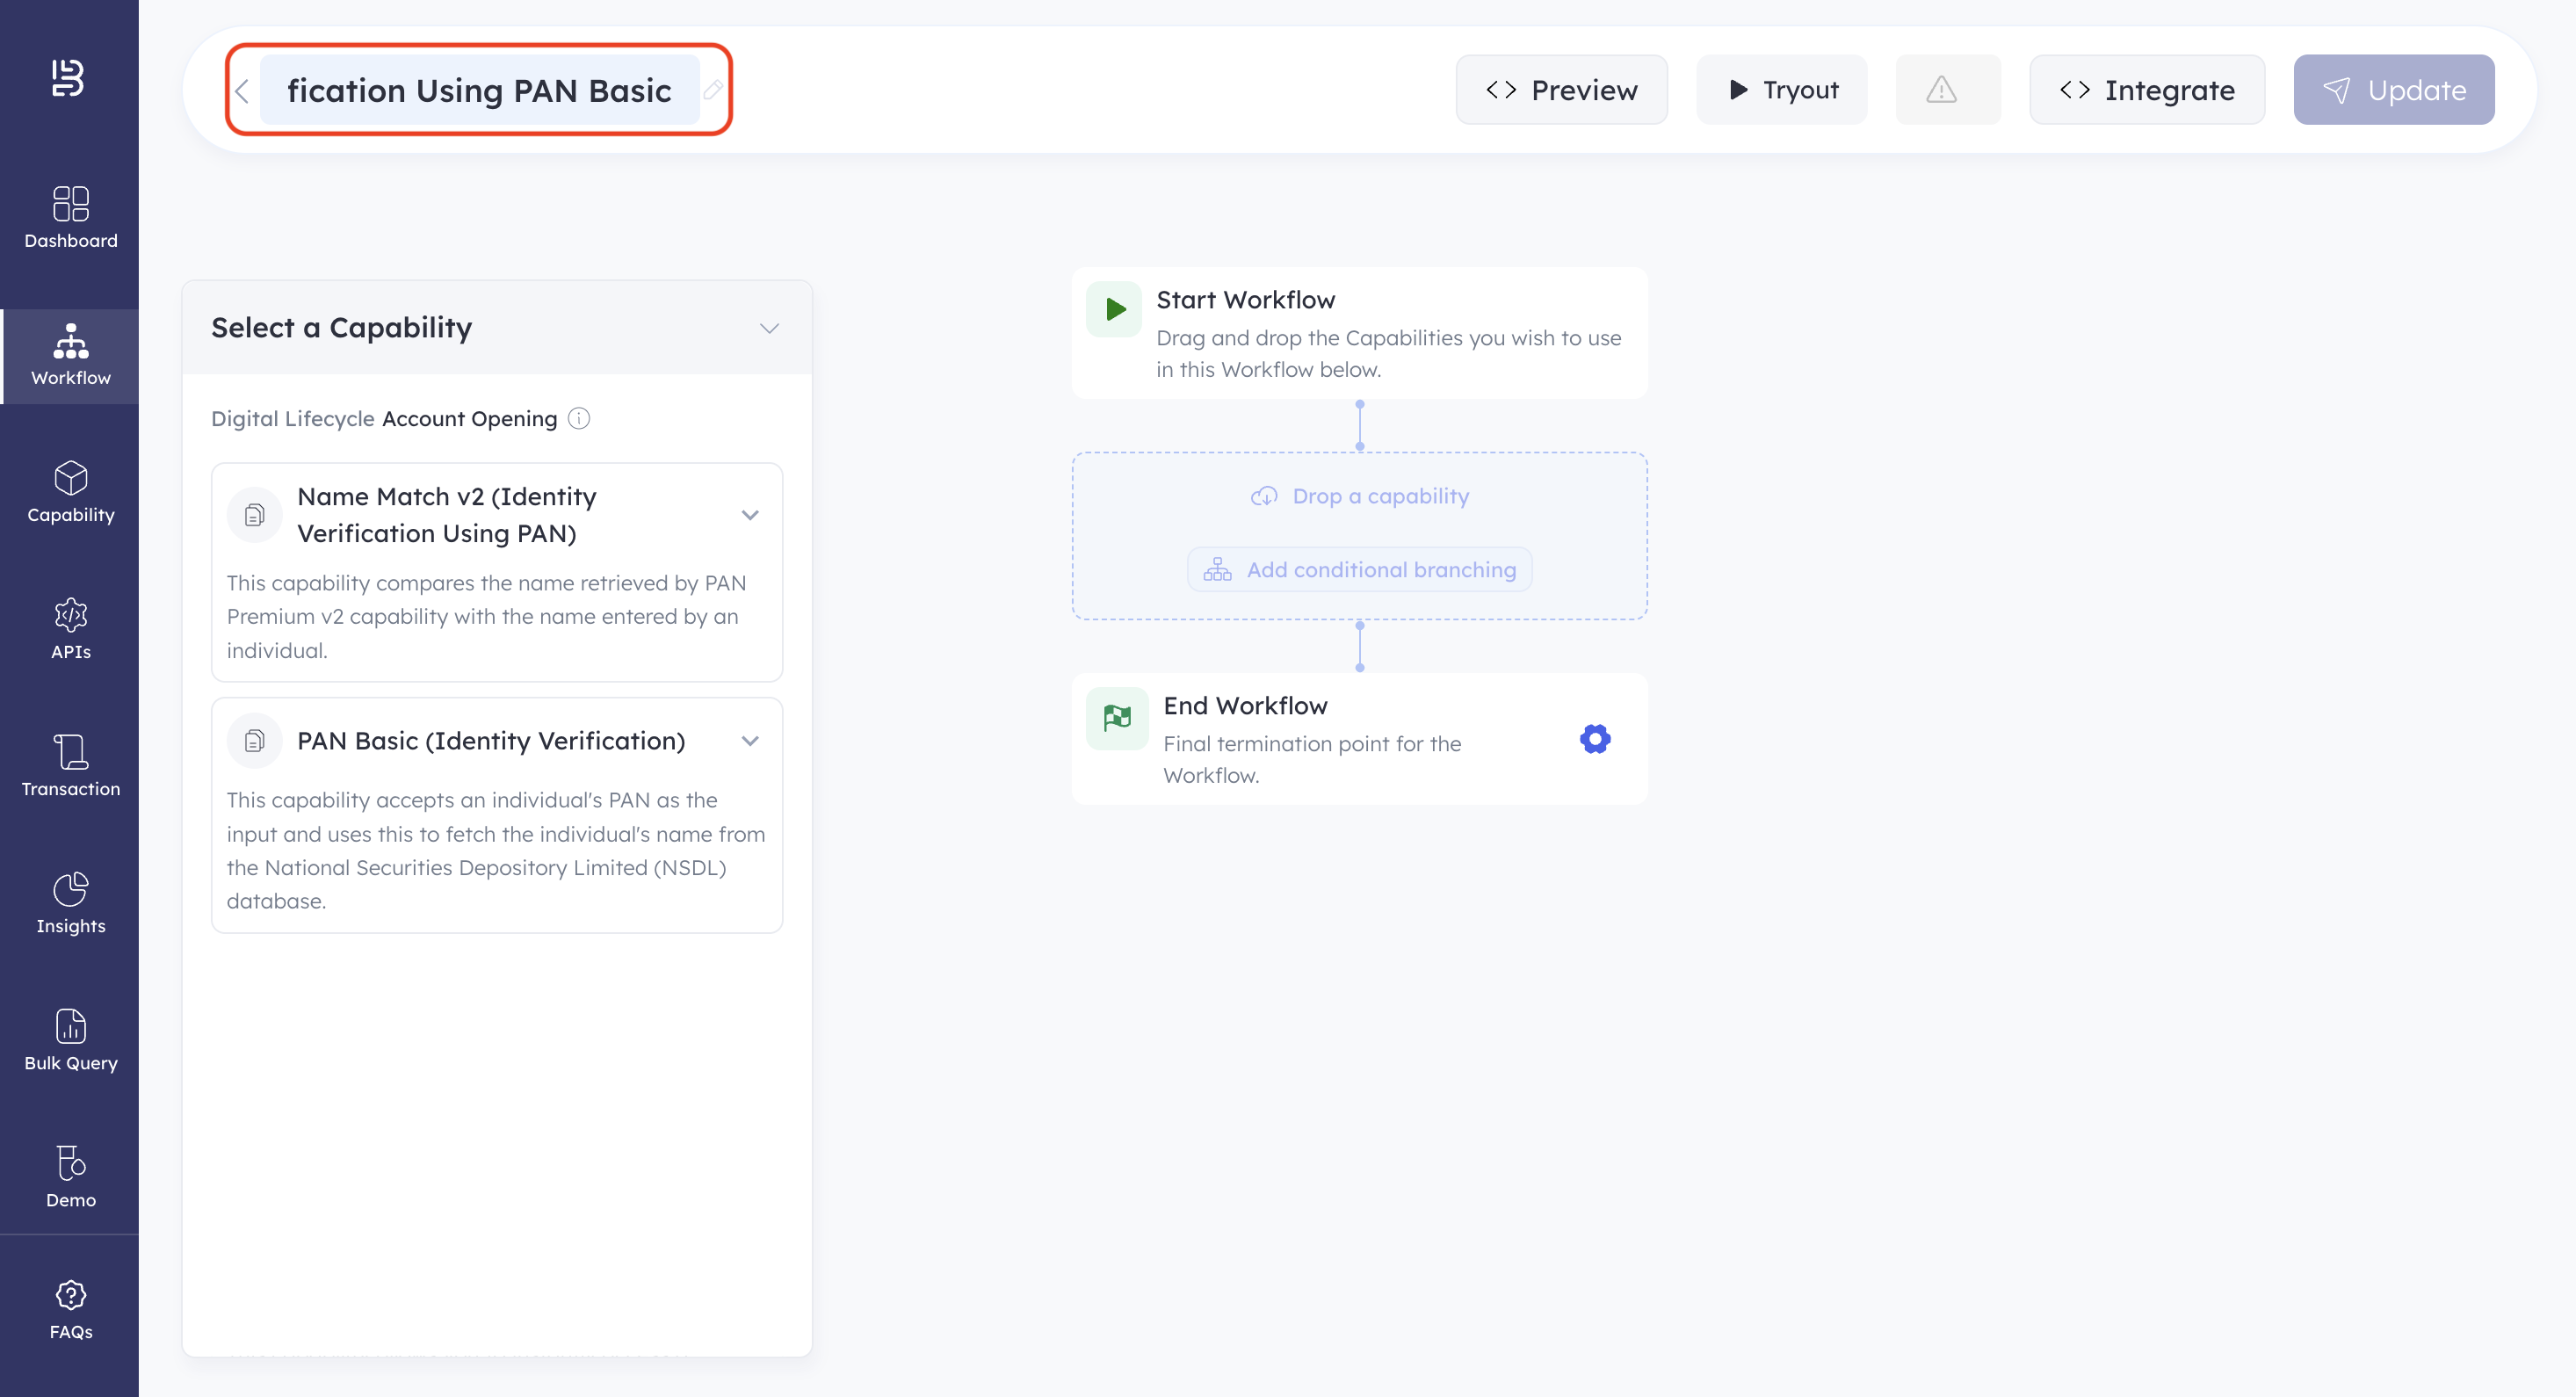
- Drag the PAN Basic capability from the Select a Capability window and drop it just below Start Workflow in the workflow builder area. This is the workflow to execute this capability first.
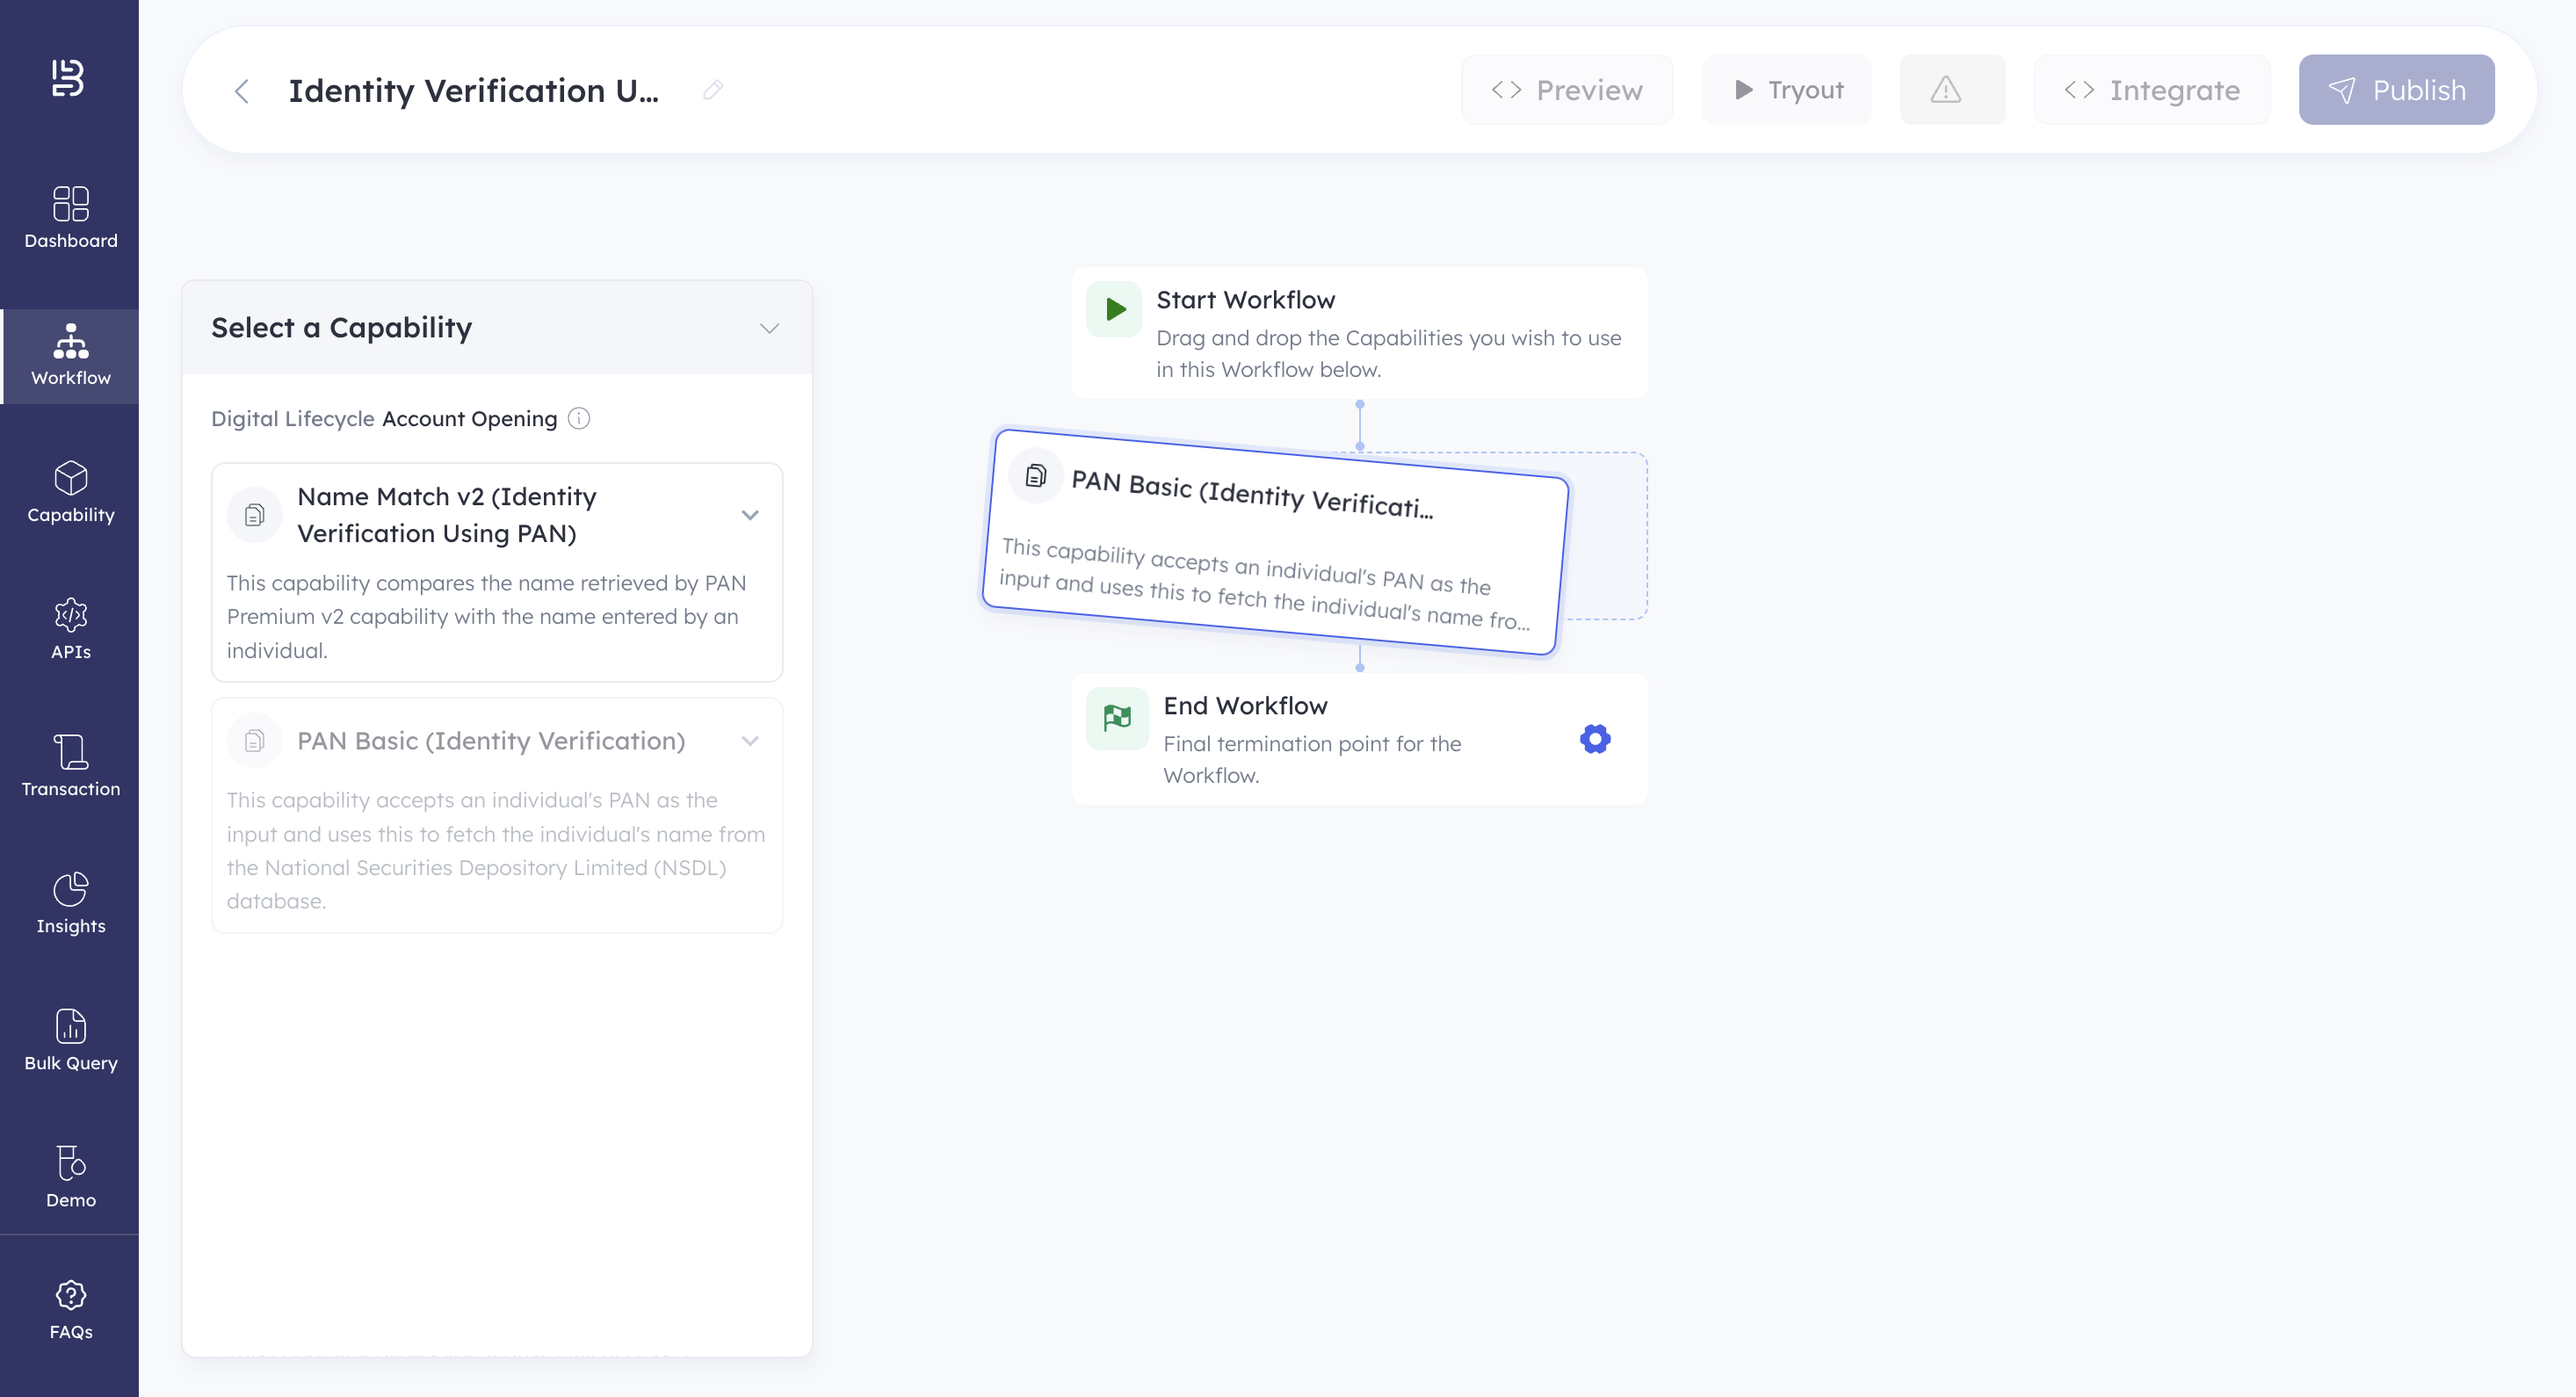
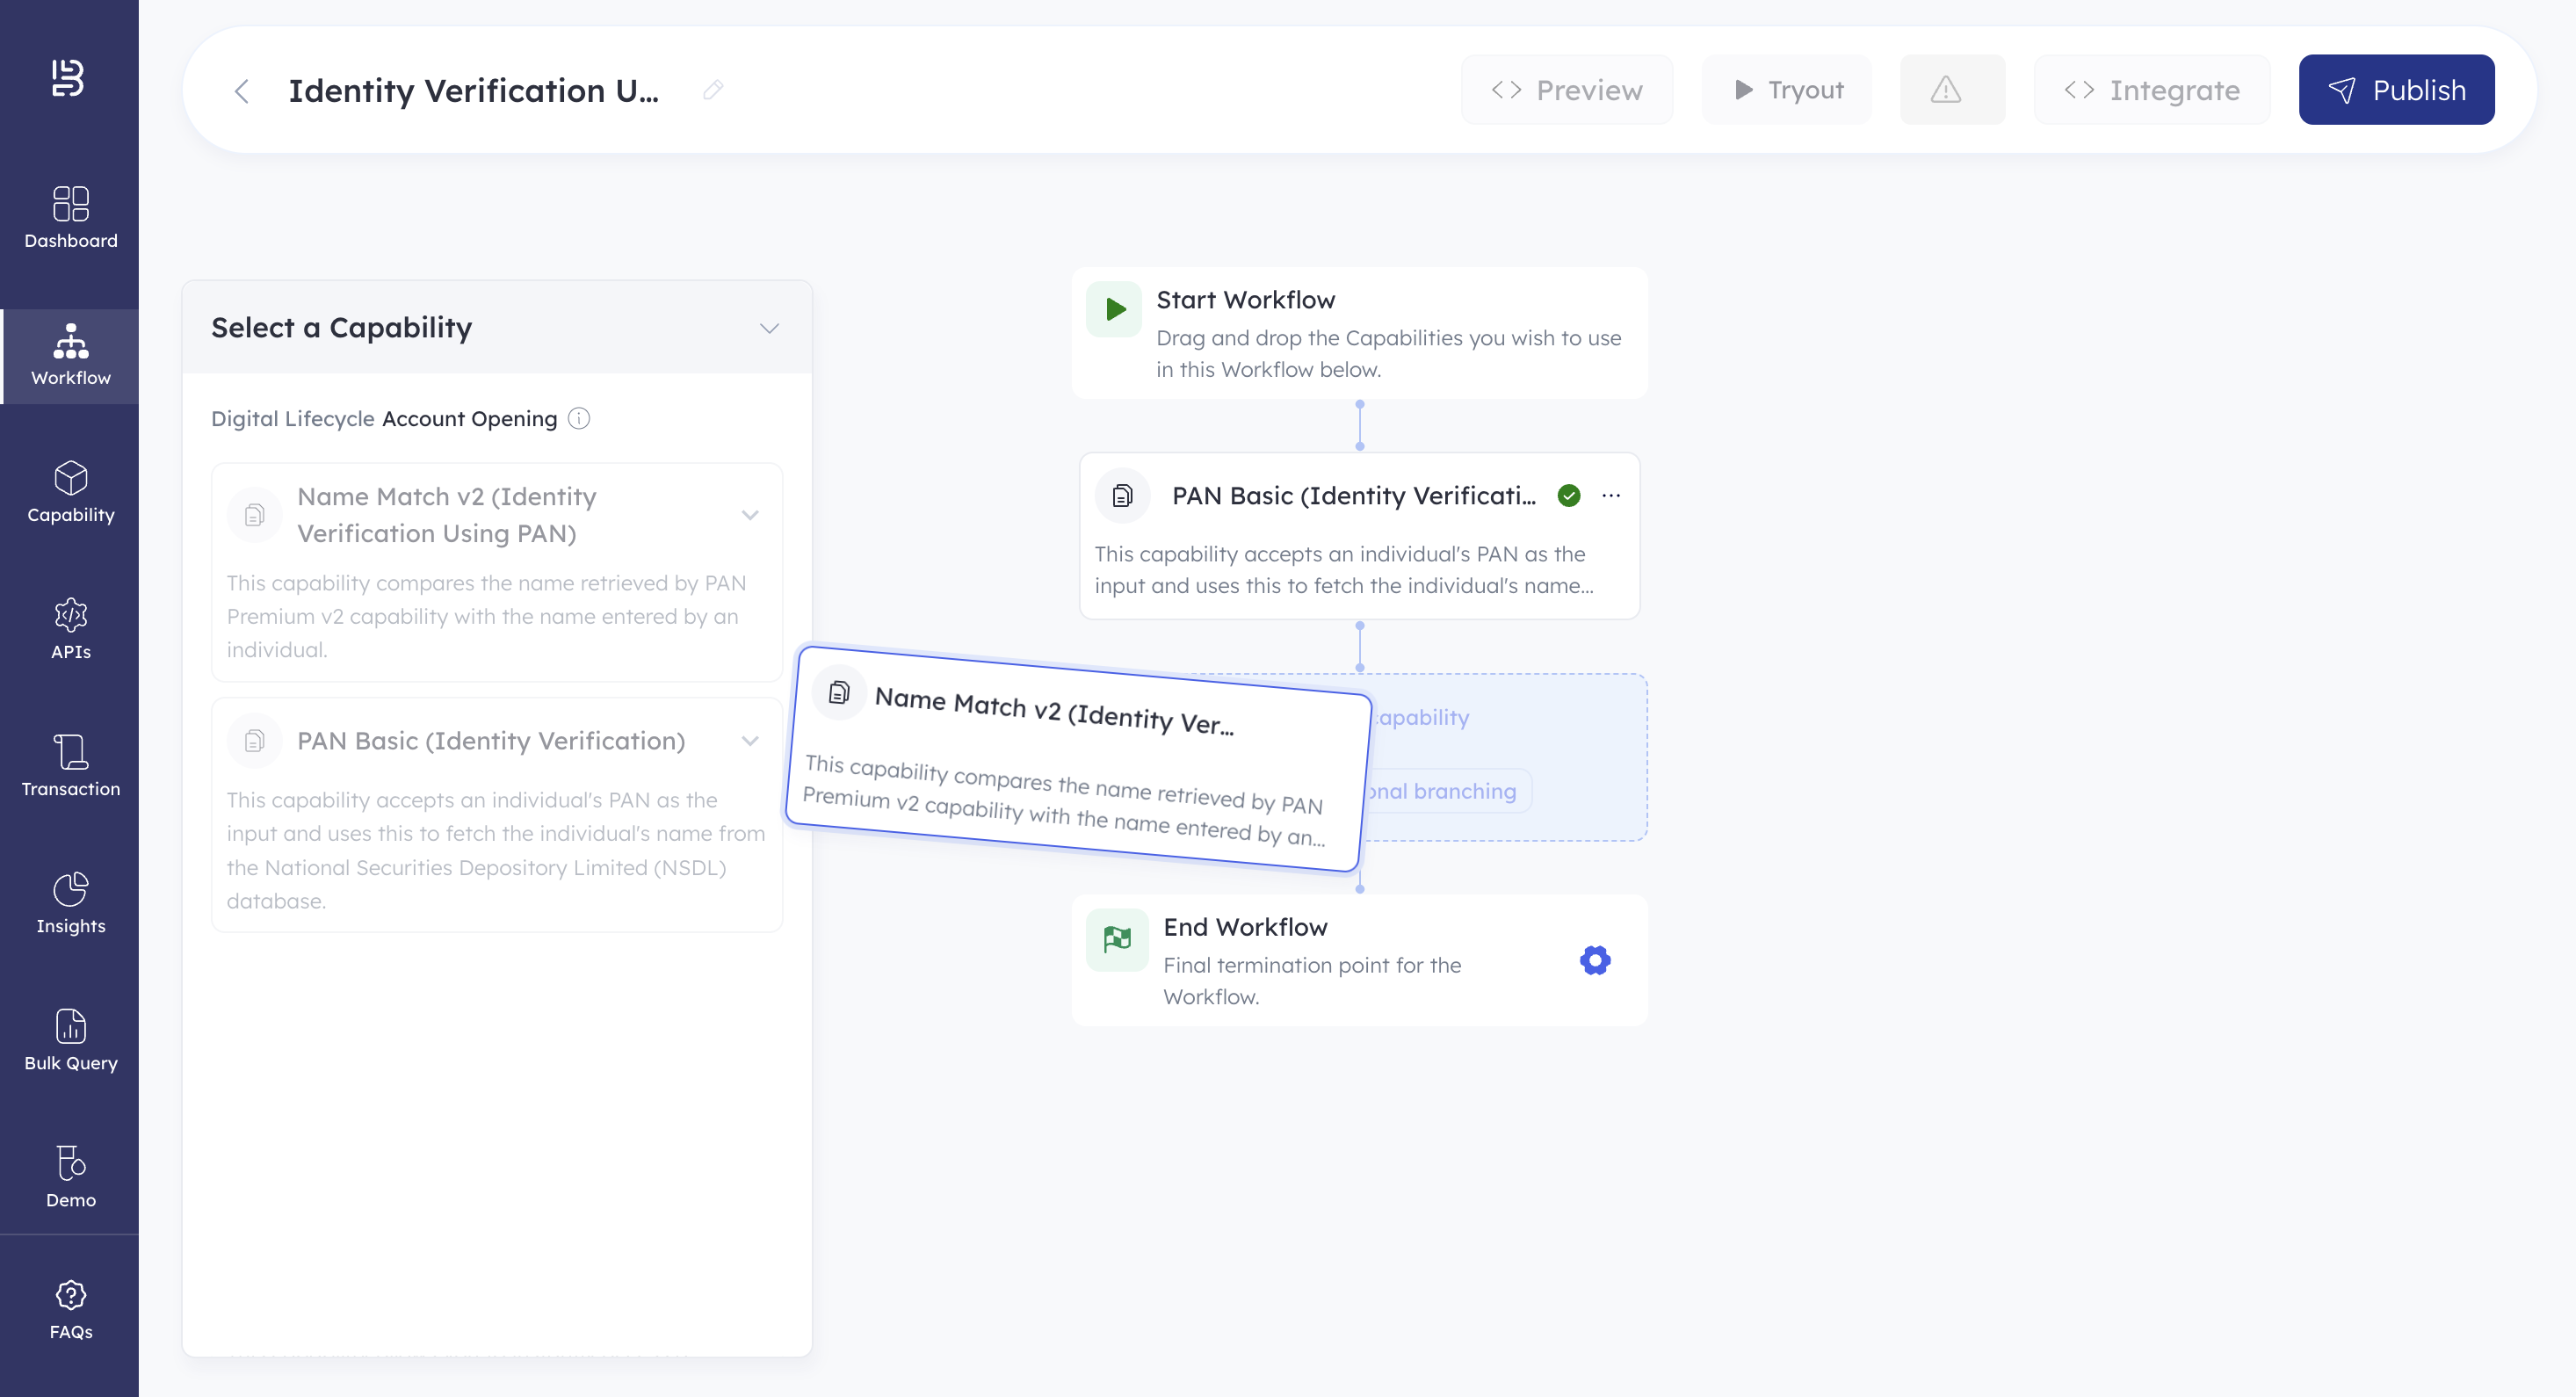
- Drag the Name Match v2 capability from the Select a Capability window and drop it just below the PAN Basic capability in the workflow builder area. We want the workflow to execute this capability after executing the PAN Basic capability.
You've added the necessary capabilities. Next, let's configure them to define their actions and parameters.
2. Configure Capabilities
After adding the necessary capabilities, configure them to match your specific requirements. This involves defining data sources and setting parameters.
Follow the below steps to configure capabilities in the workflow.
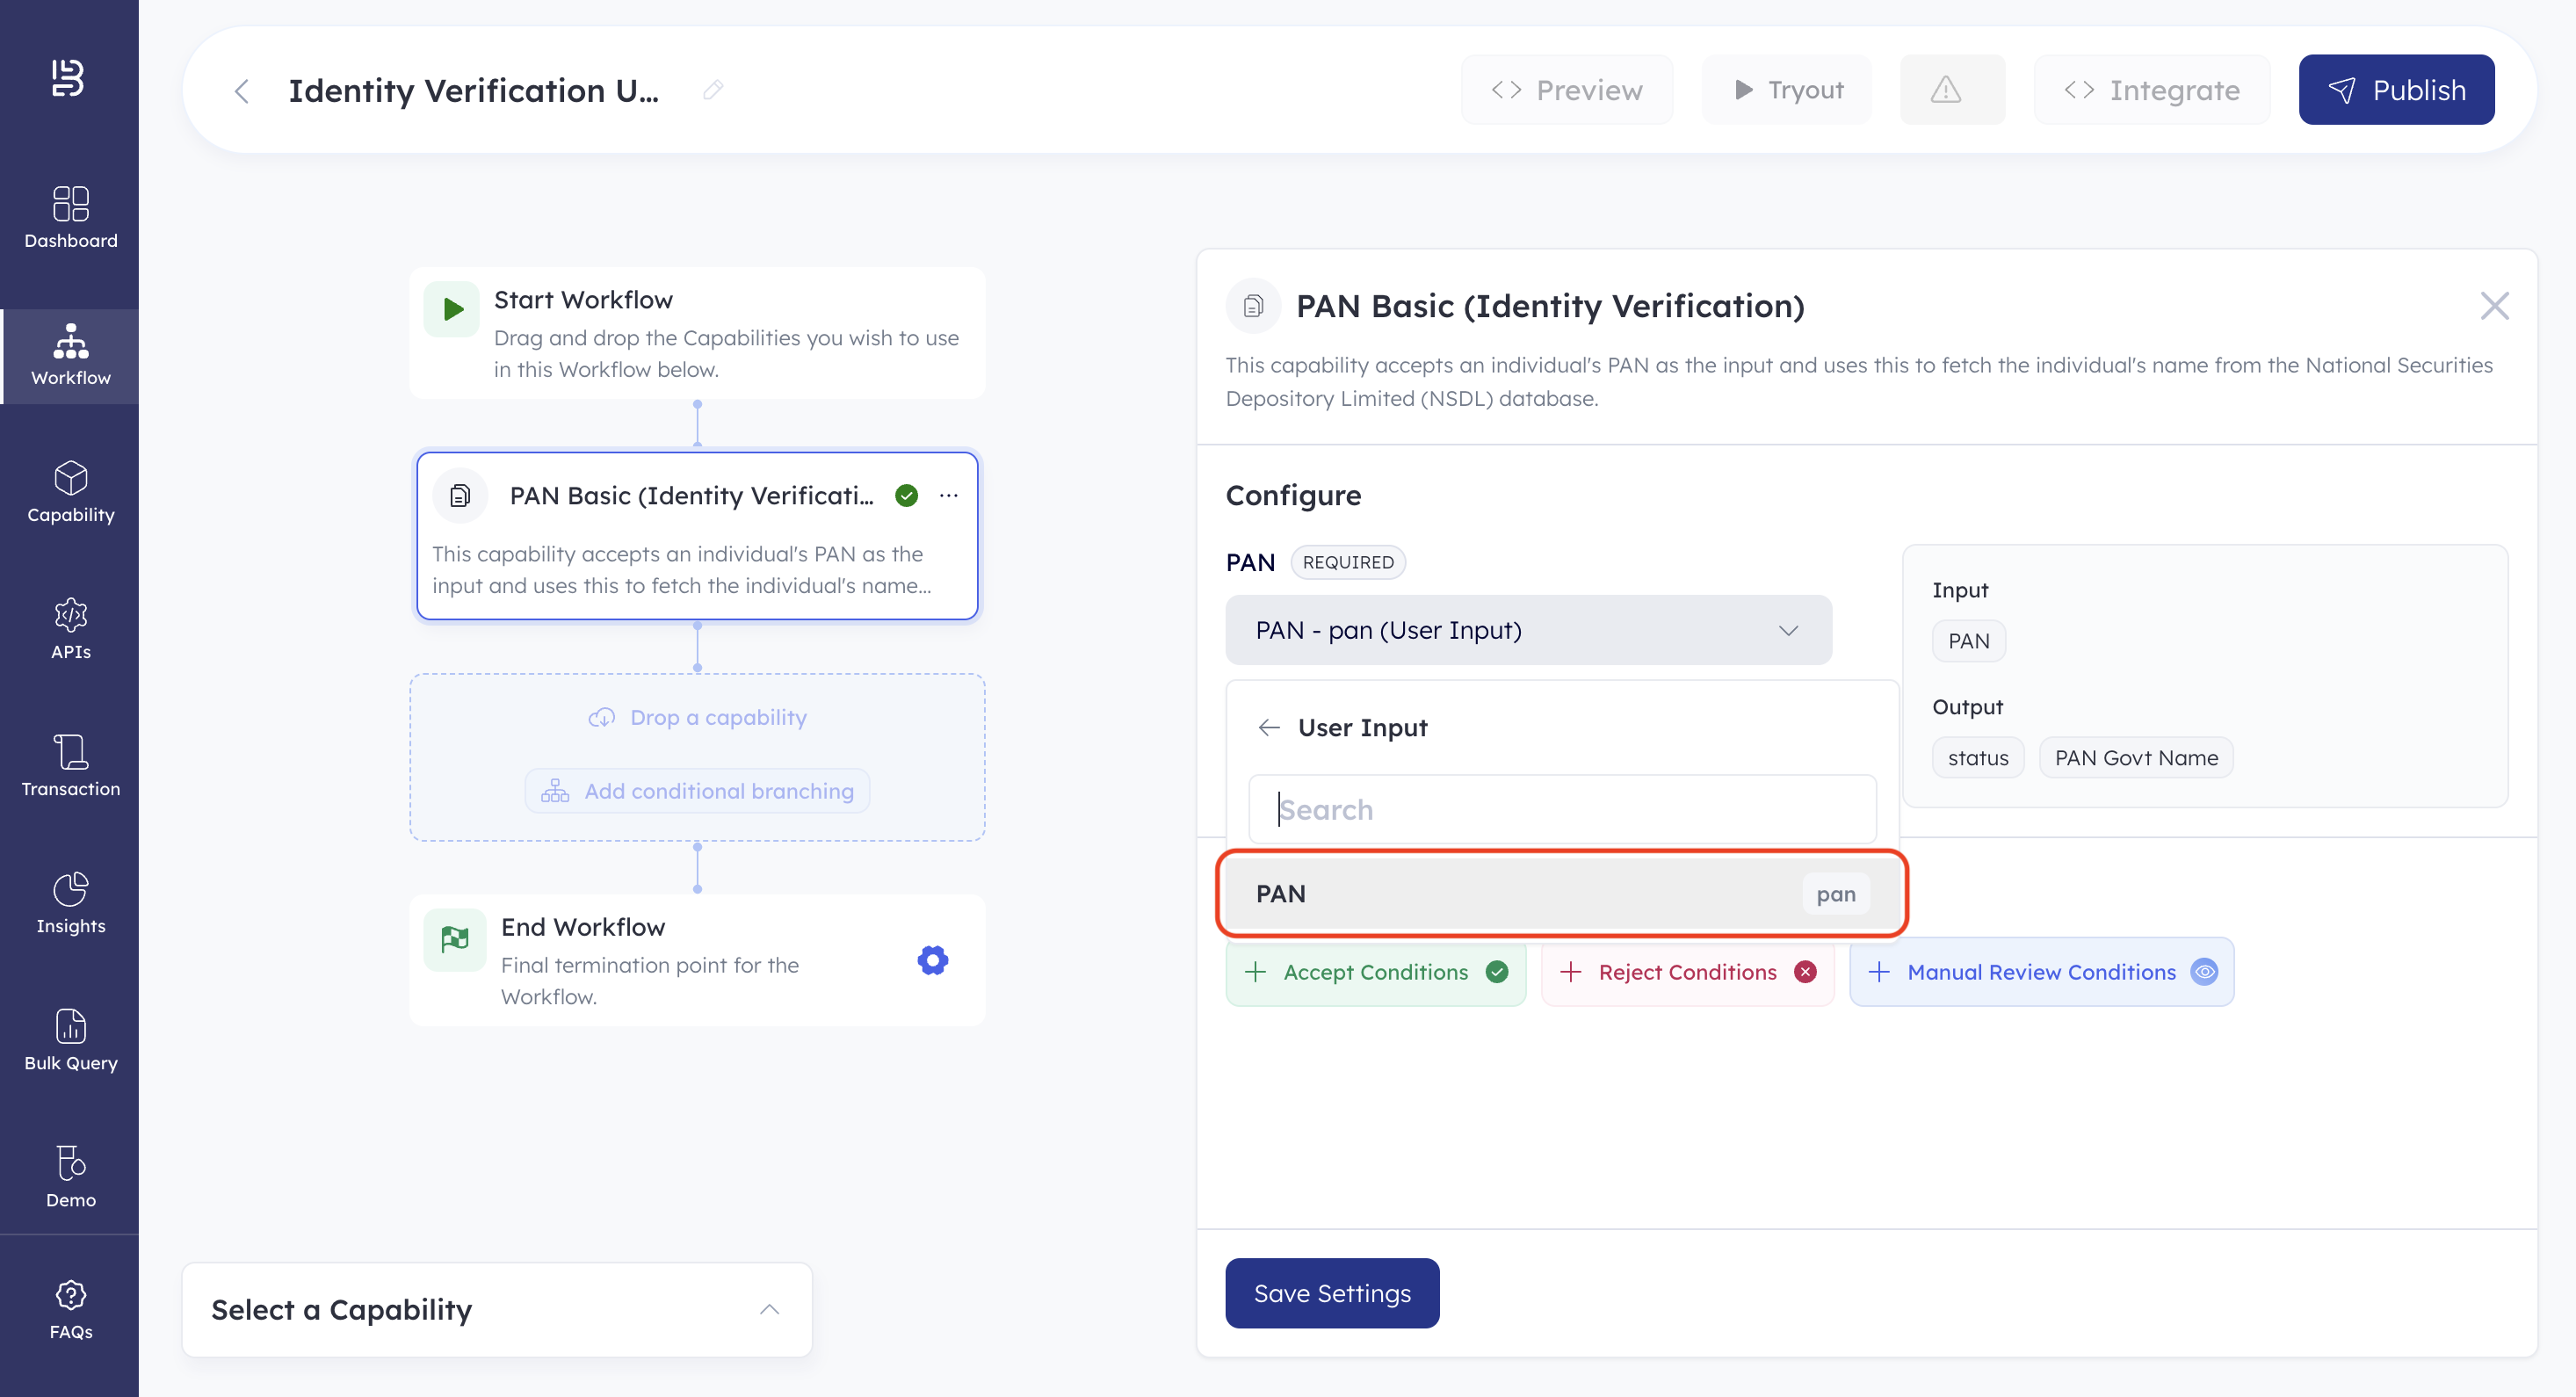
- Click the PAN Basic capability. This lets you define how the capability receives inputs.
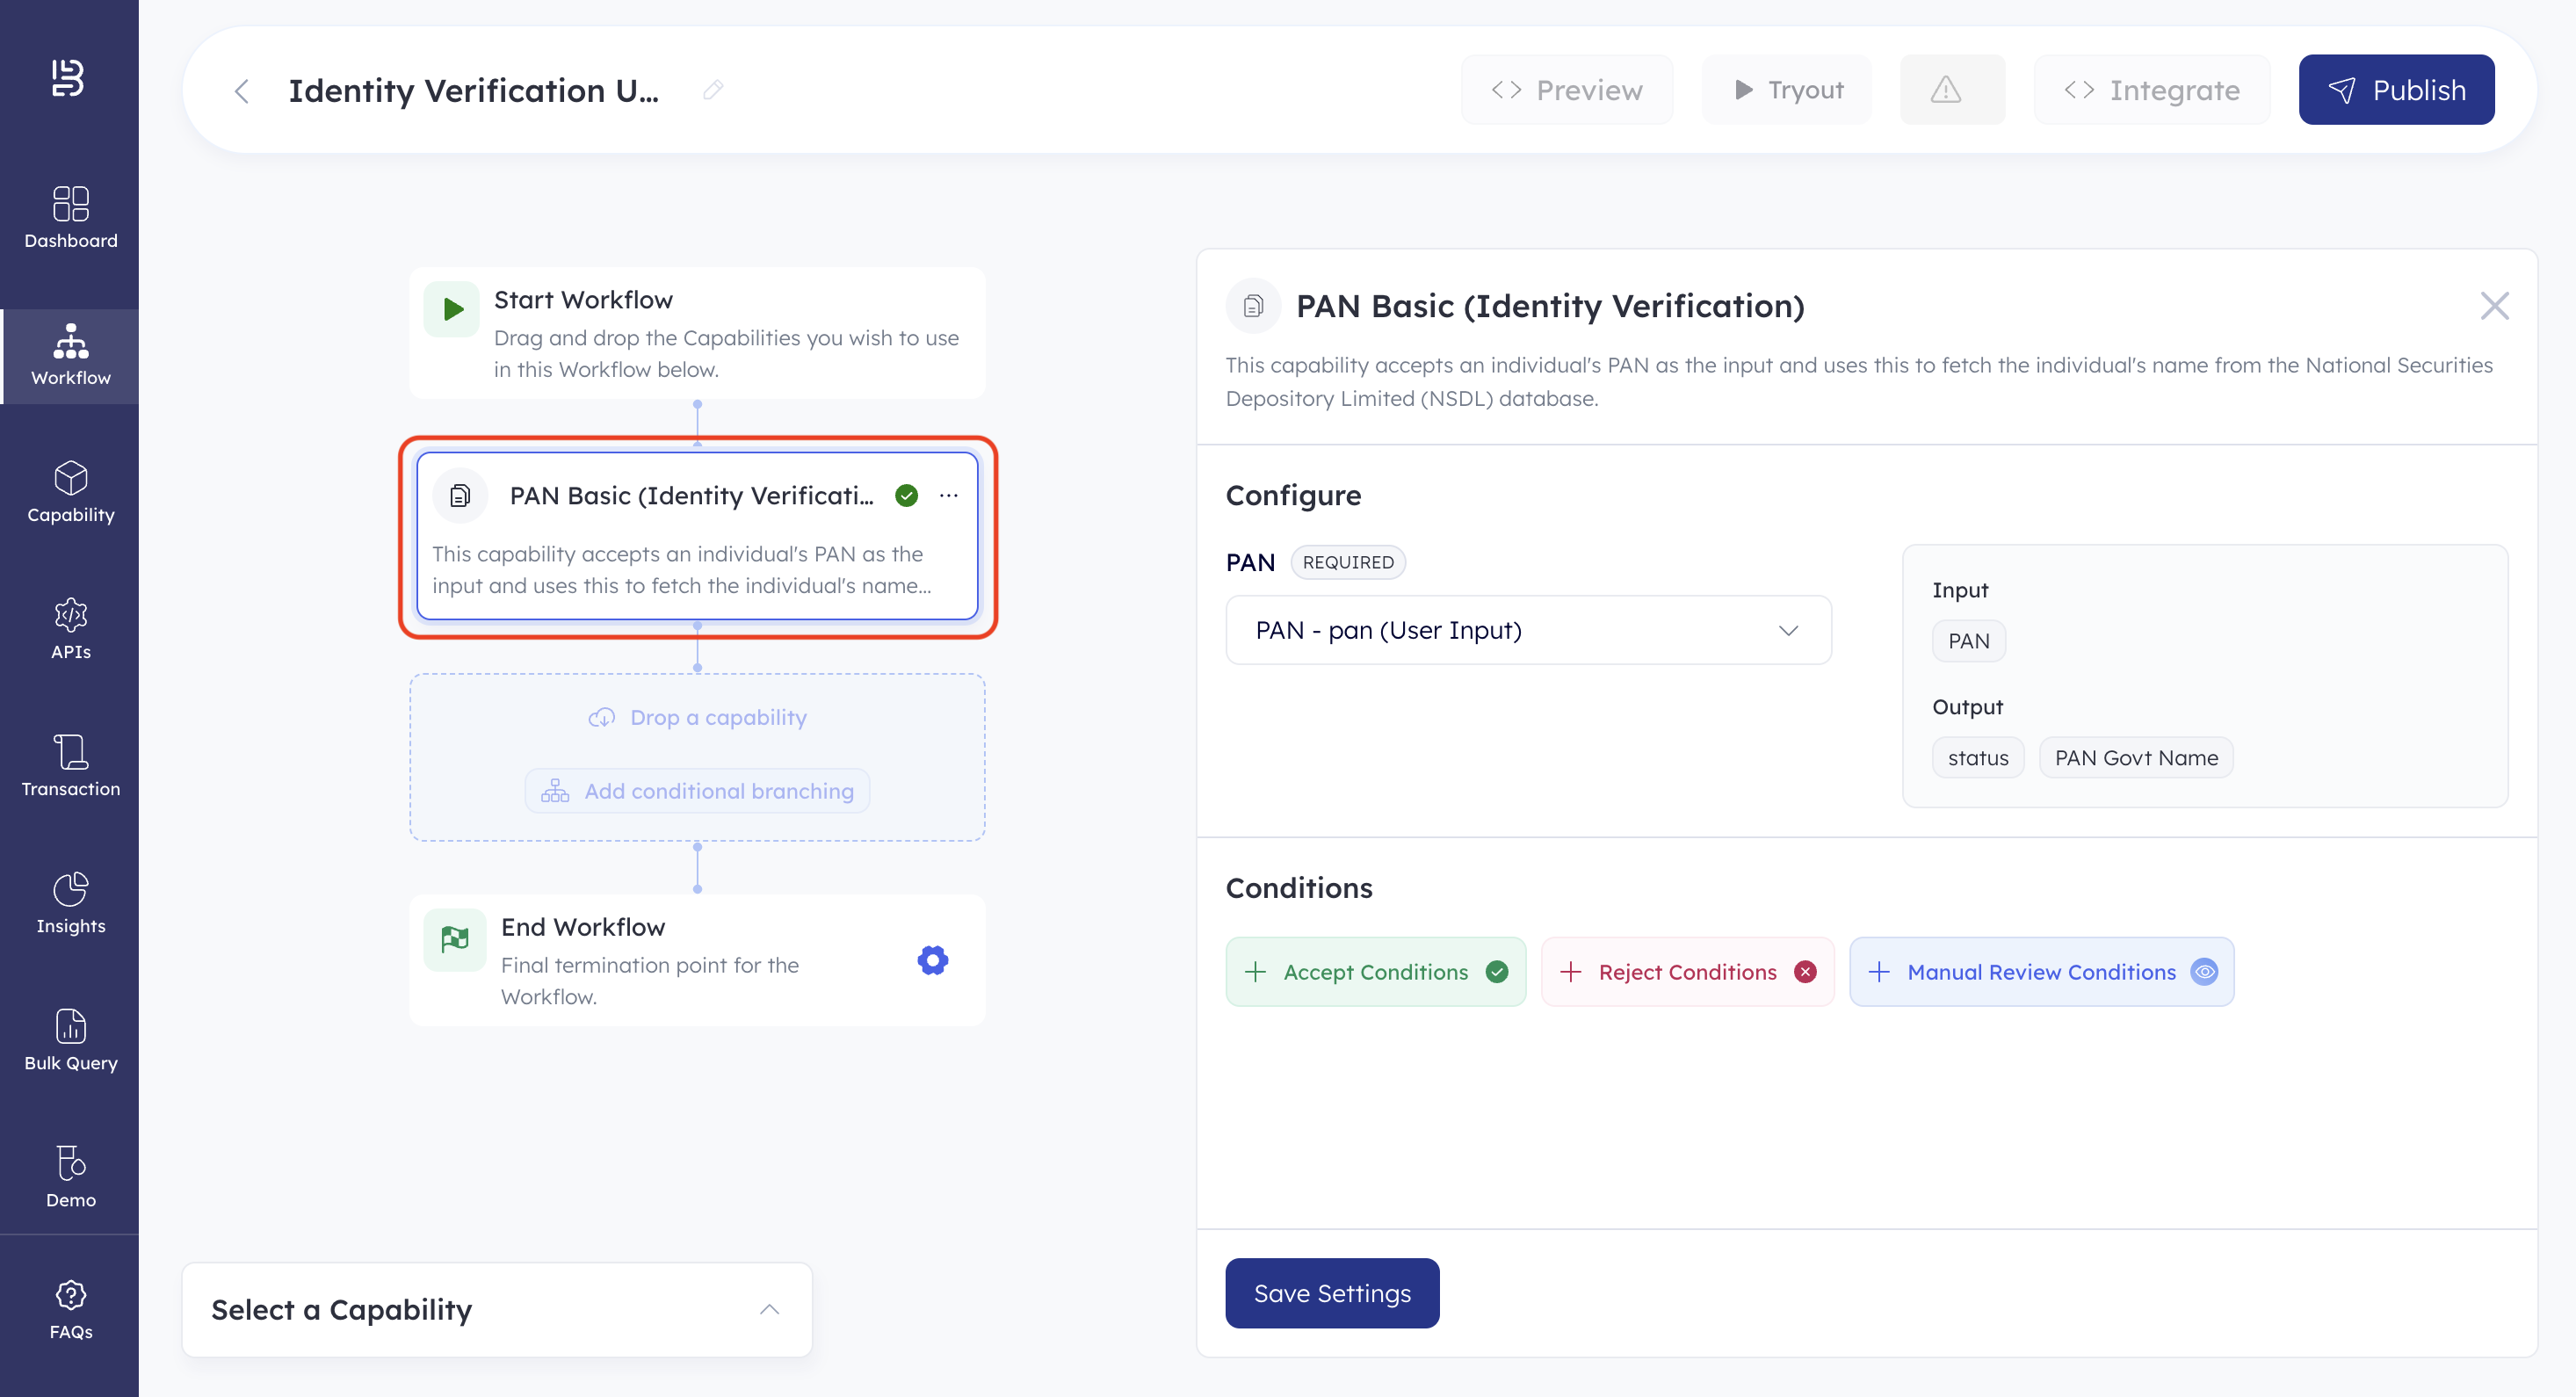
- Click the PAN - pan (User Input) dropdown under PAN in the Configure section.
- Click User Input.
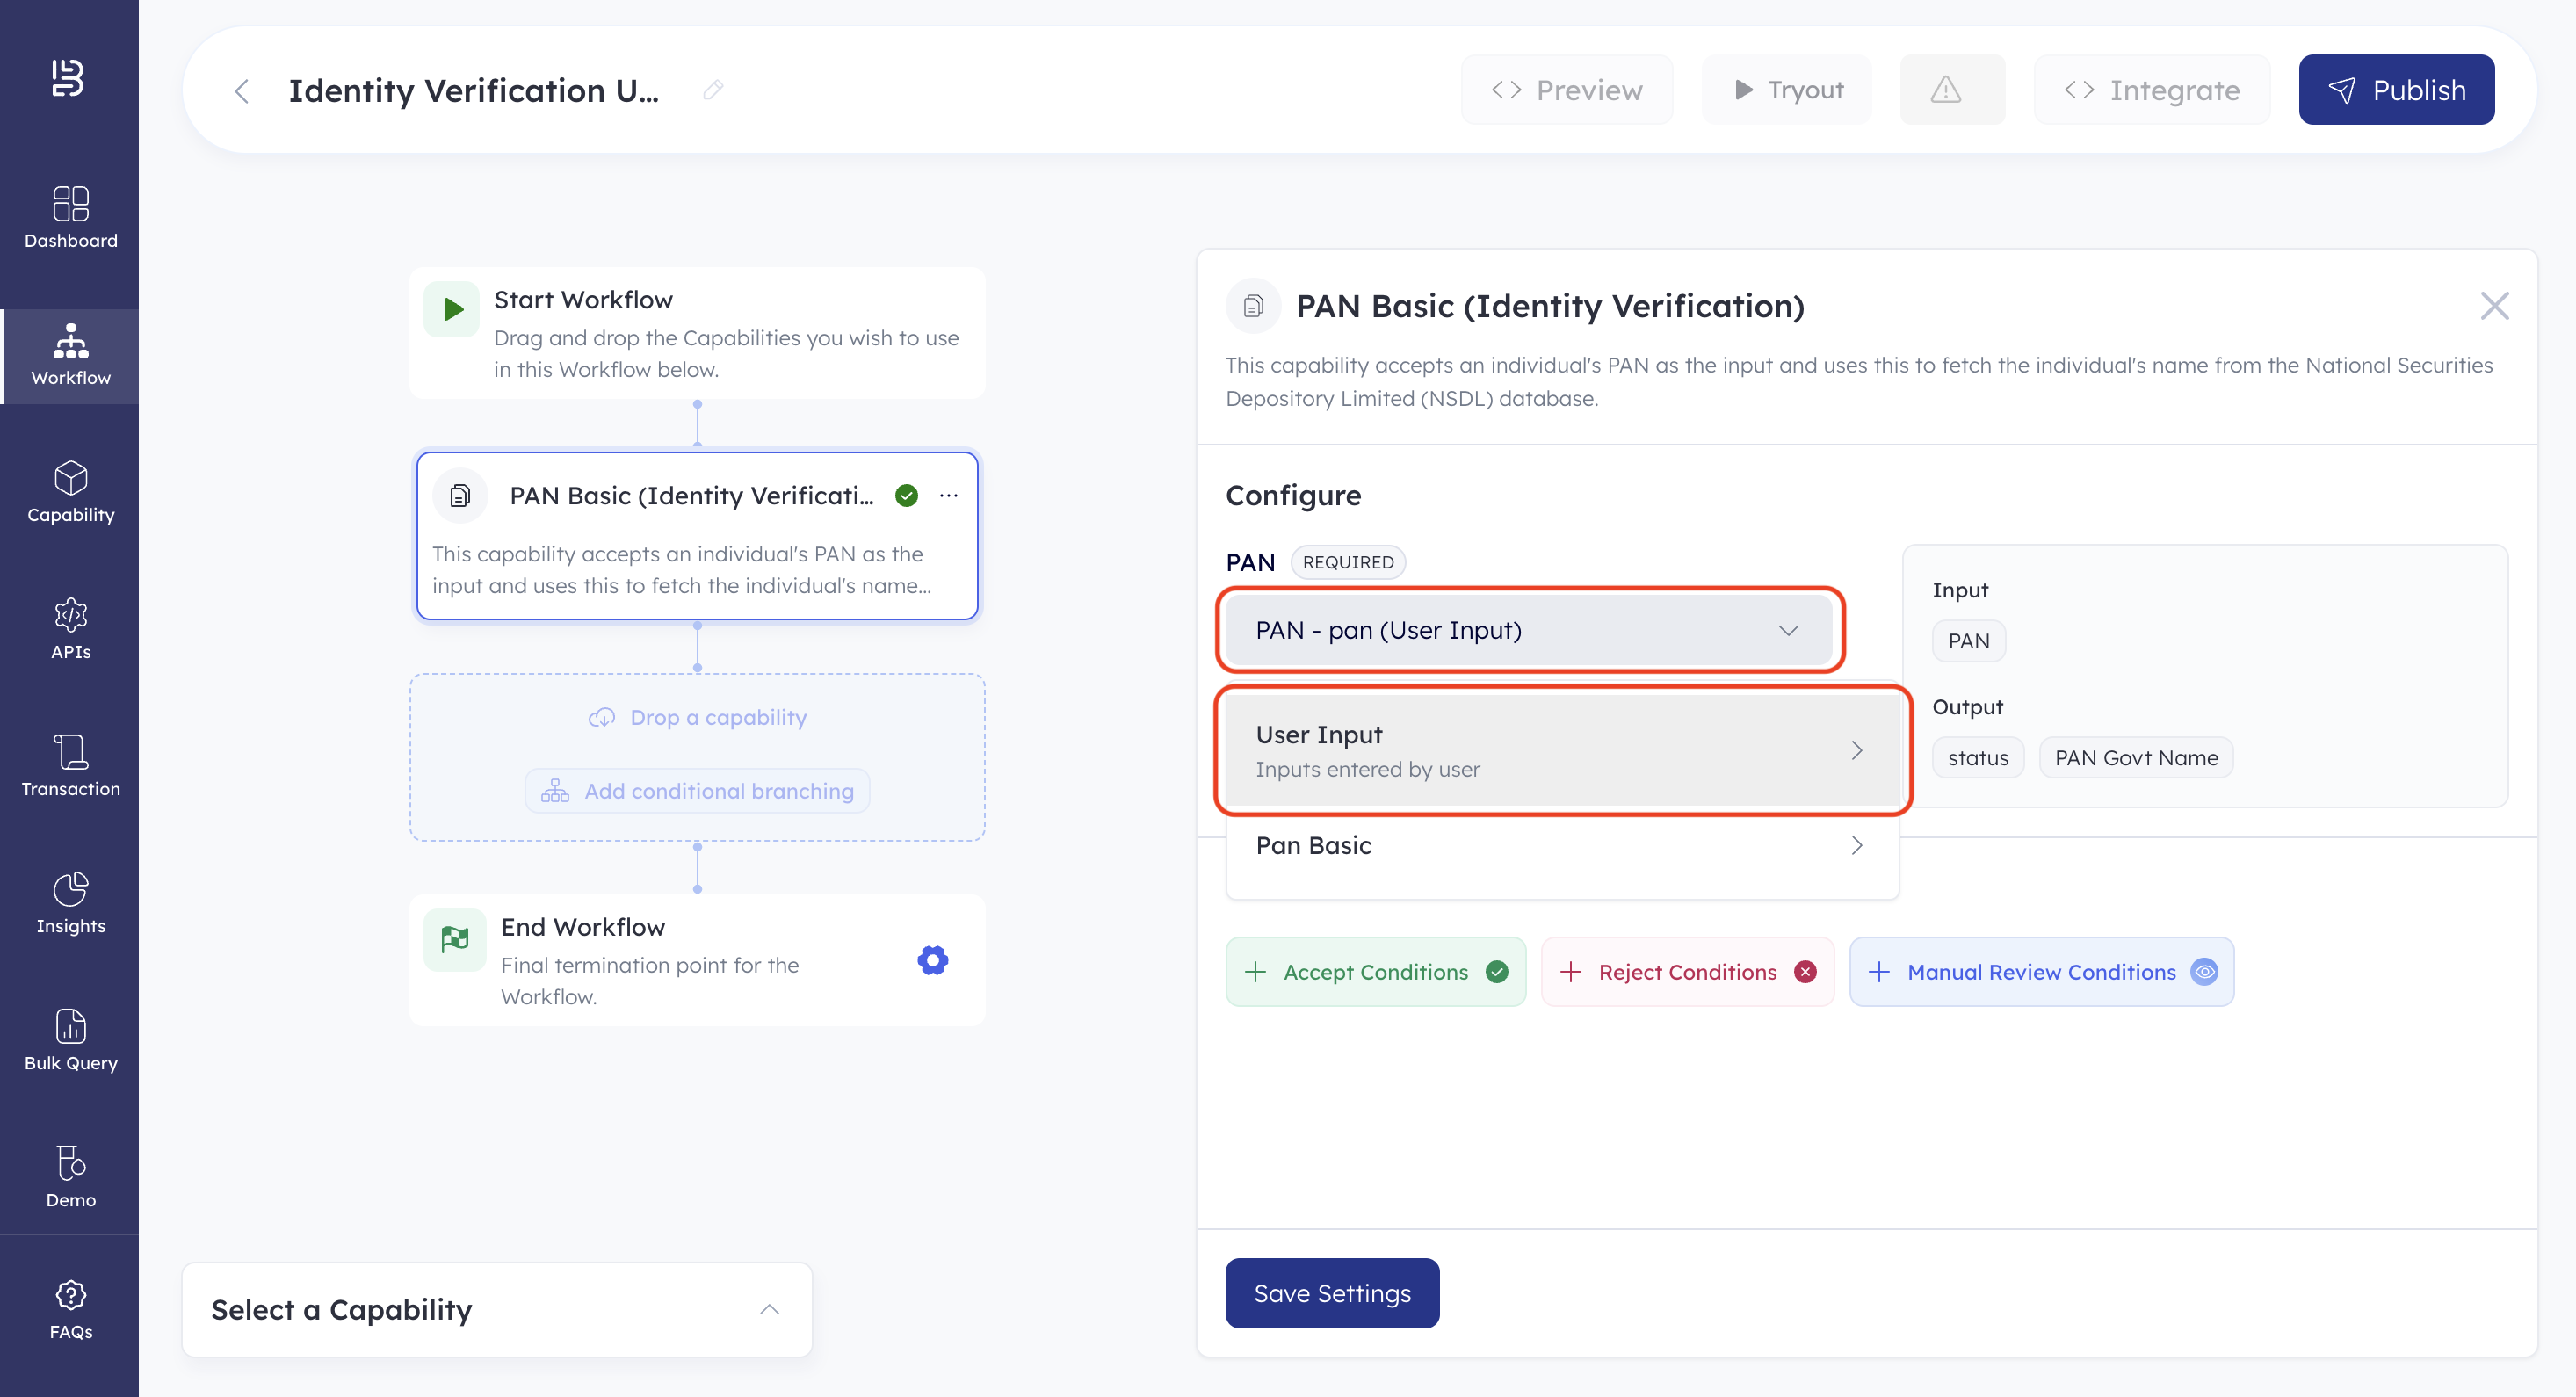
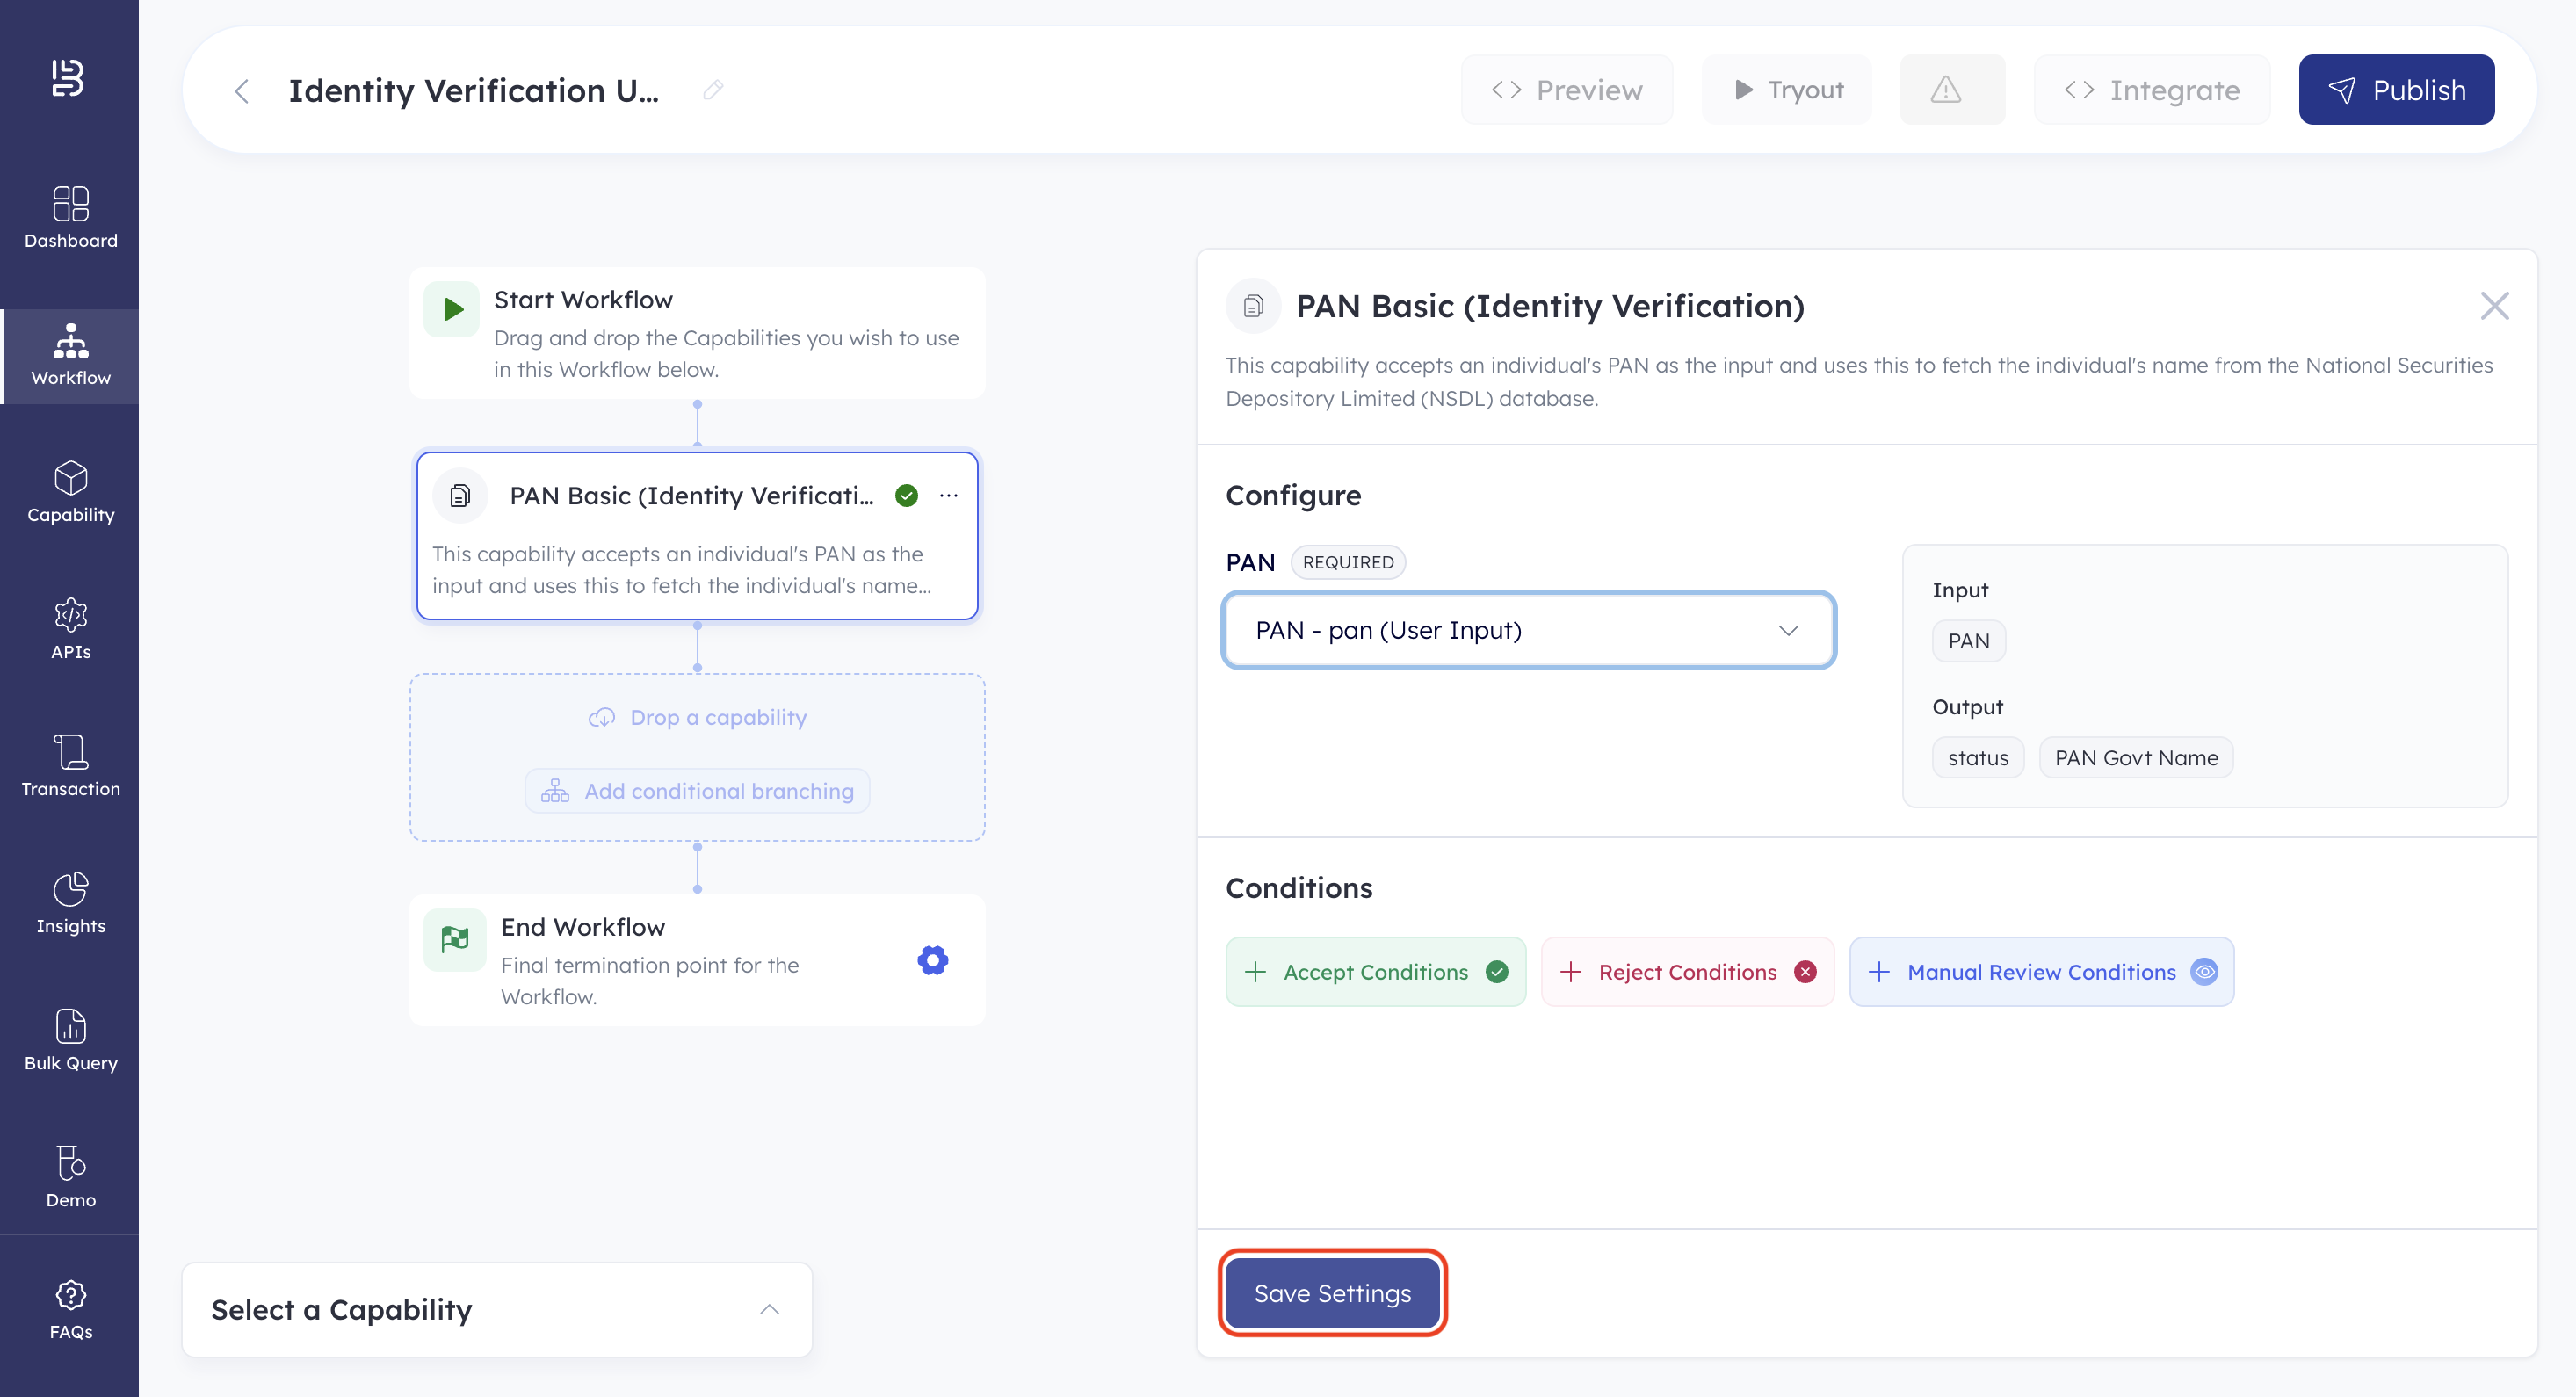
- Select PAN from the dropdown. This configures the workflow to accept PAN as an external input and use it for the next steps.
- Click Save. The PAN Basic capability is configured.
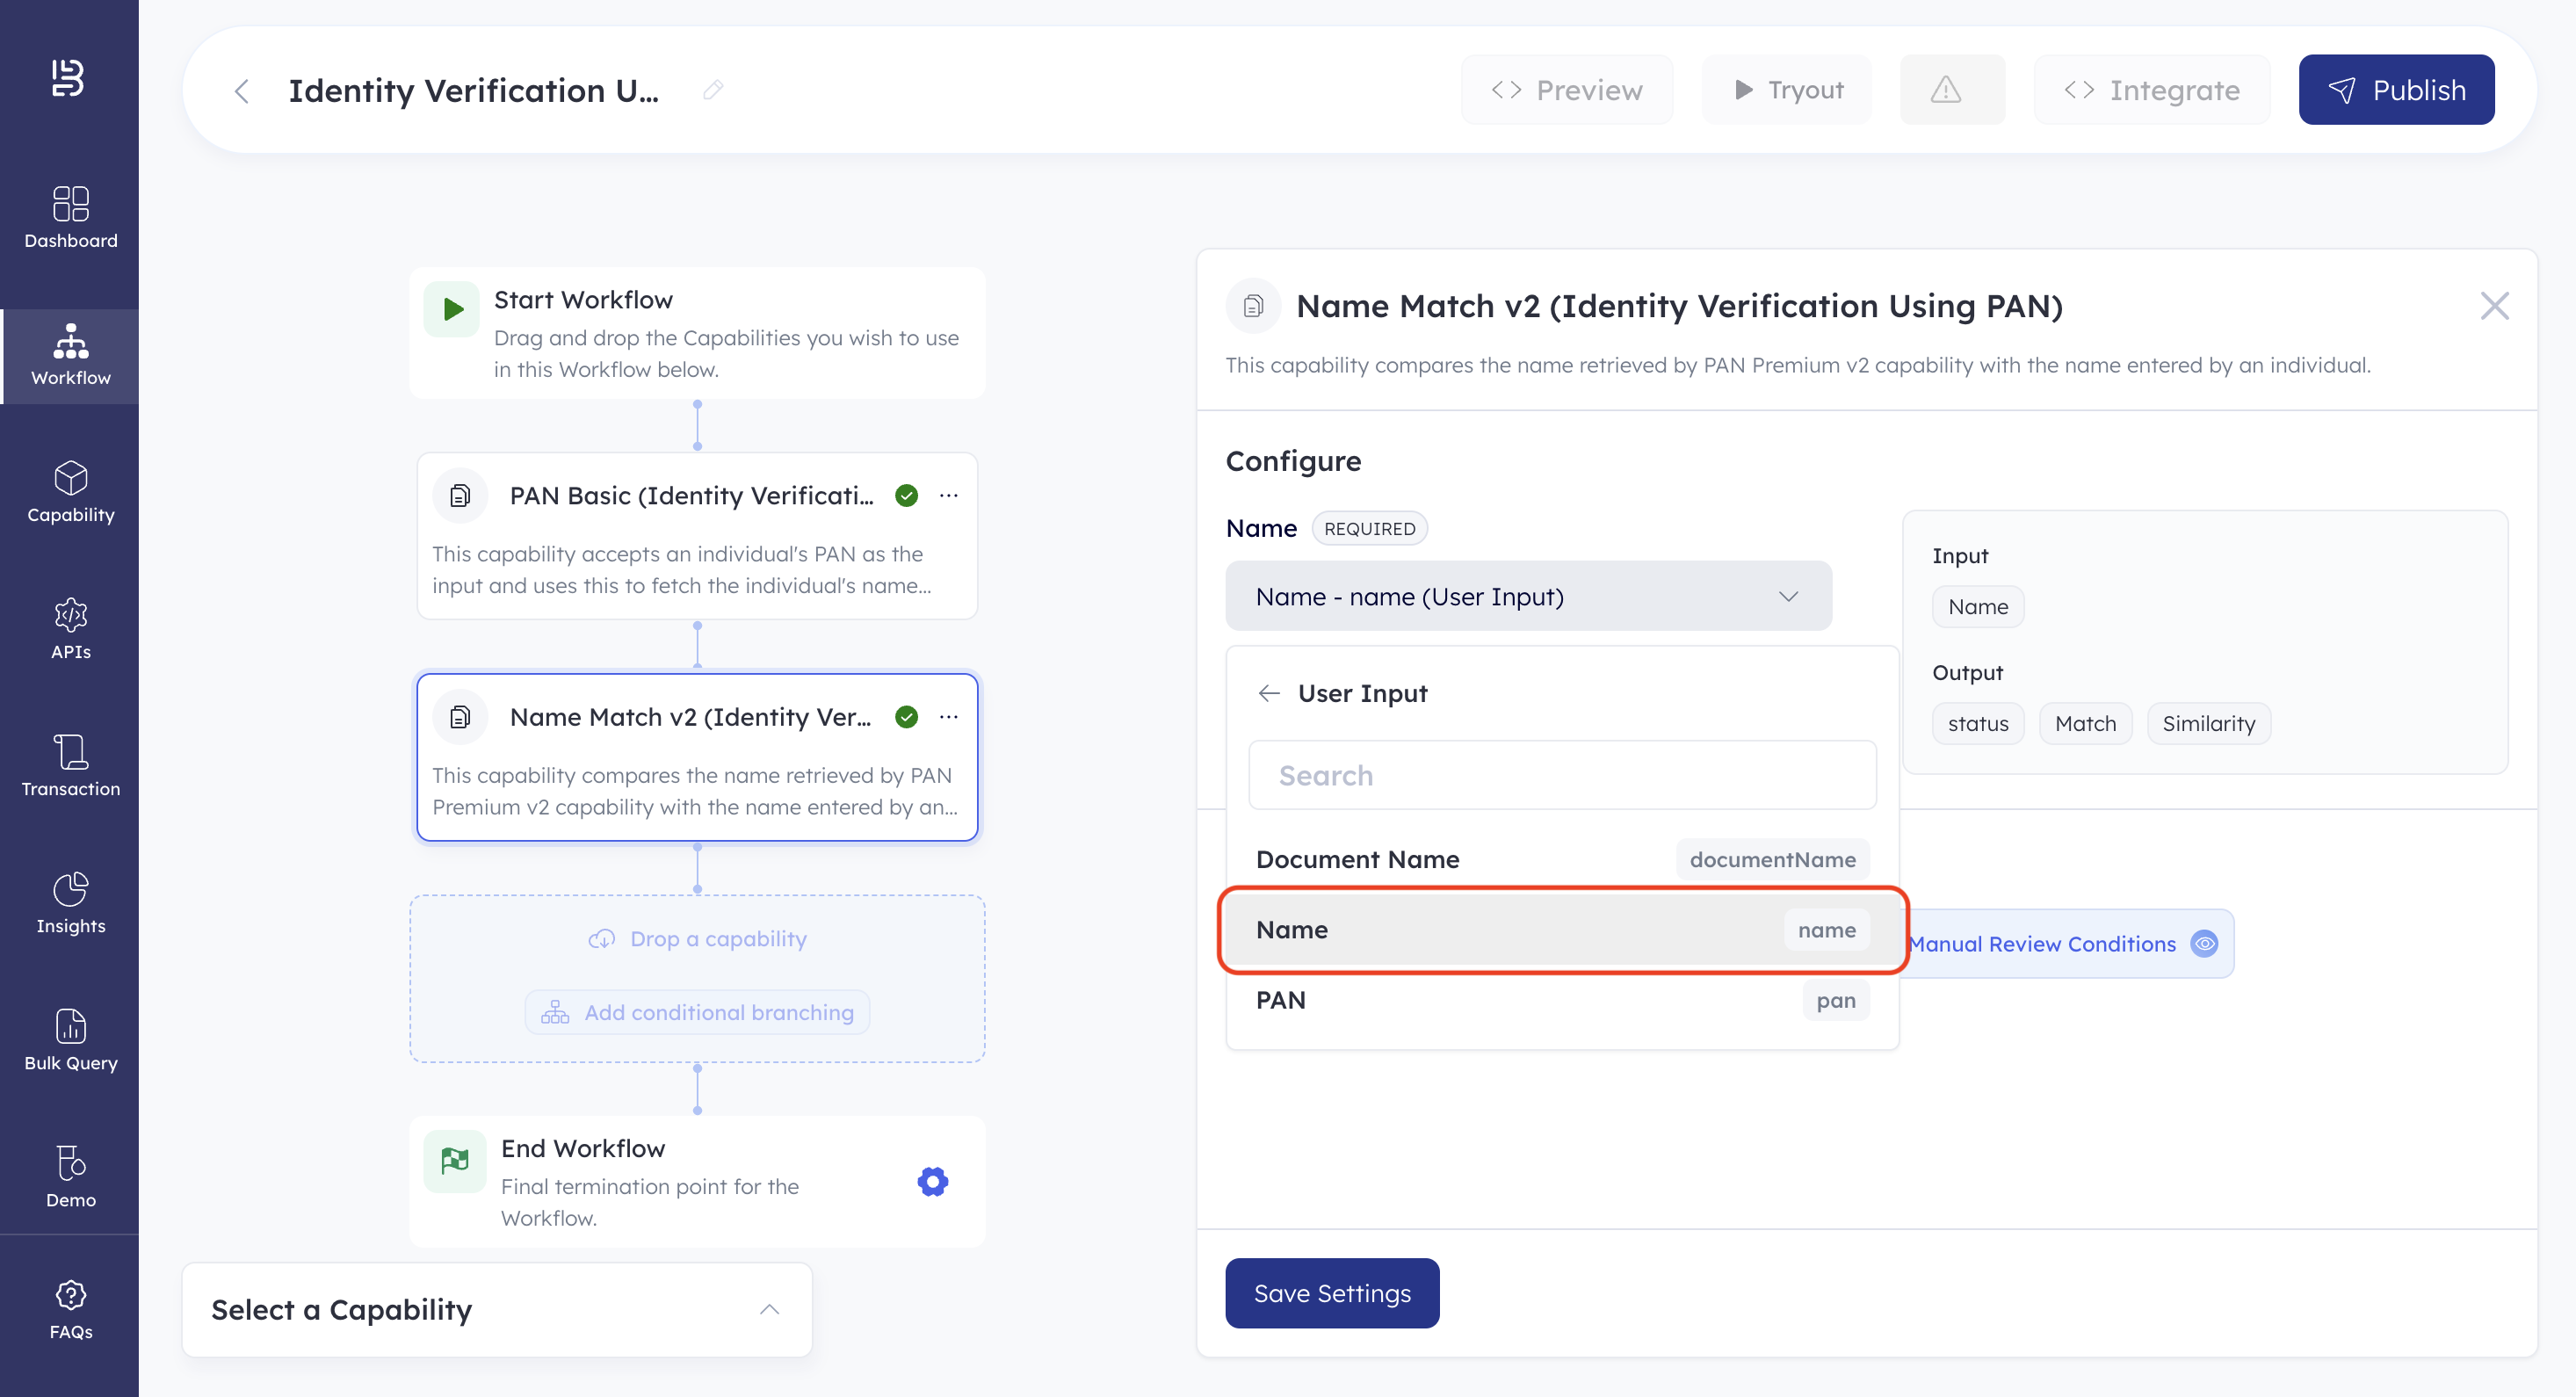
- Click the Name Match v2 capability. This lets you define how the capability accepts inputs.
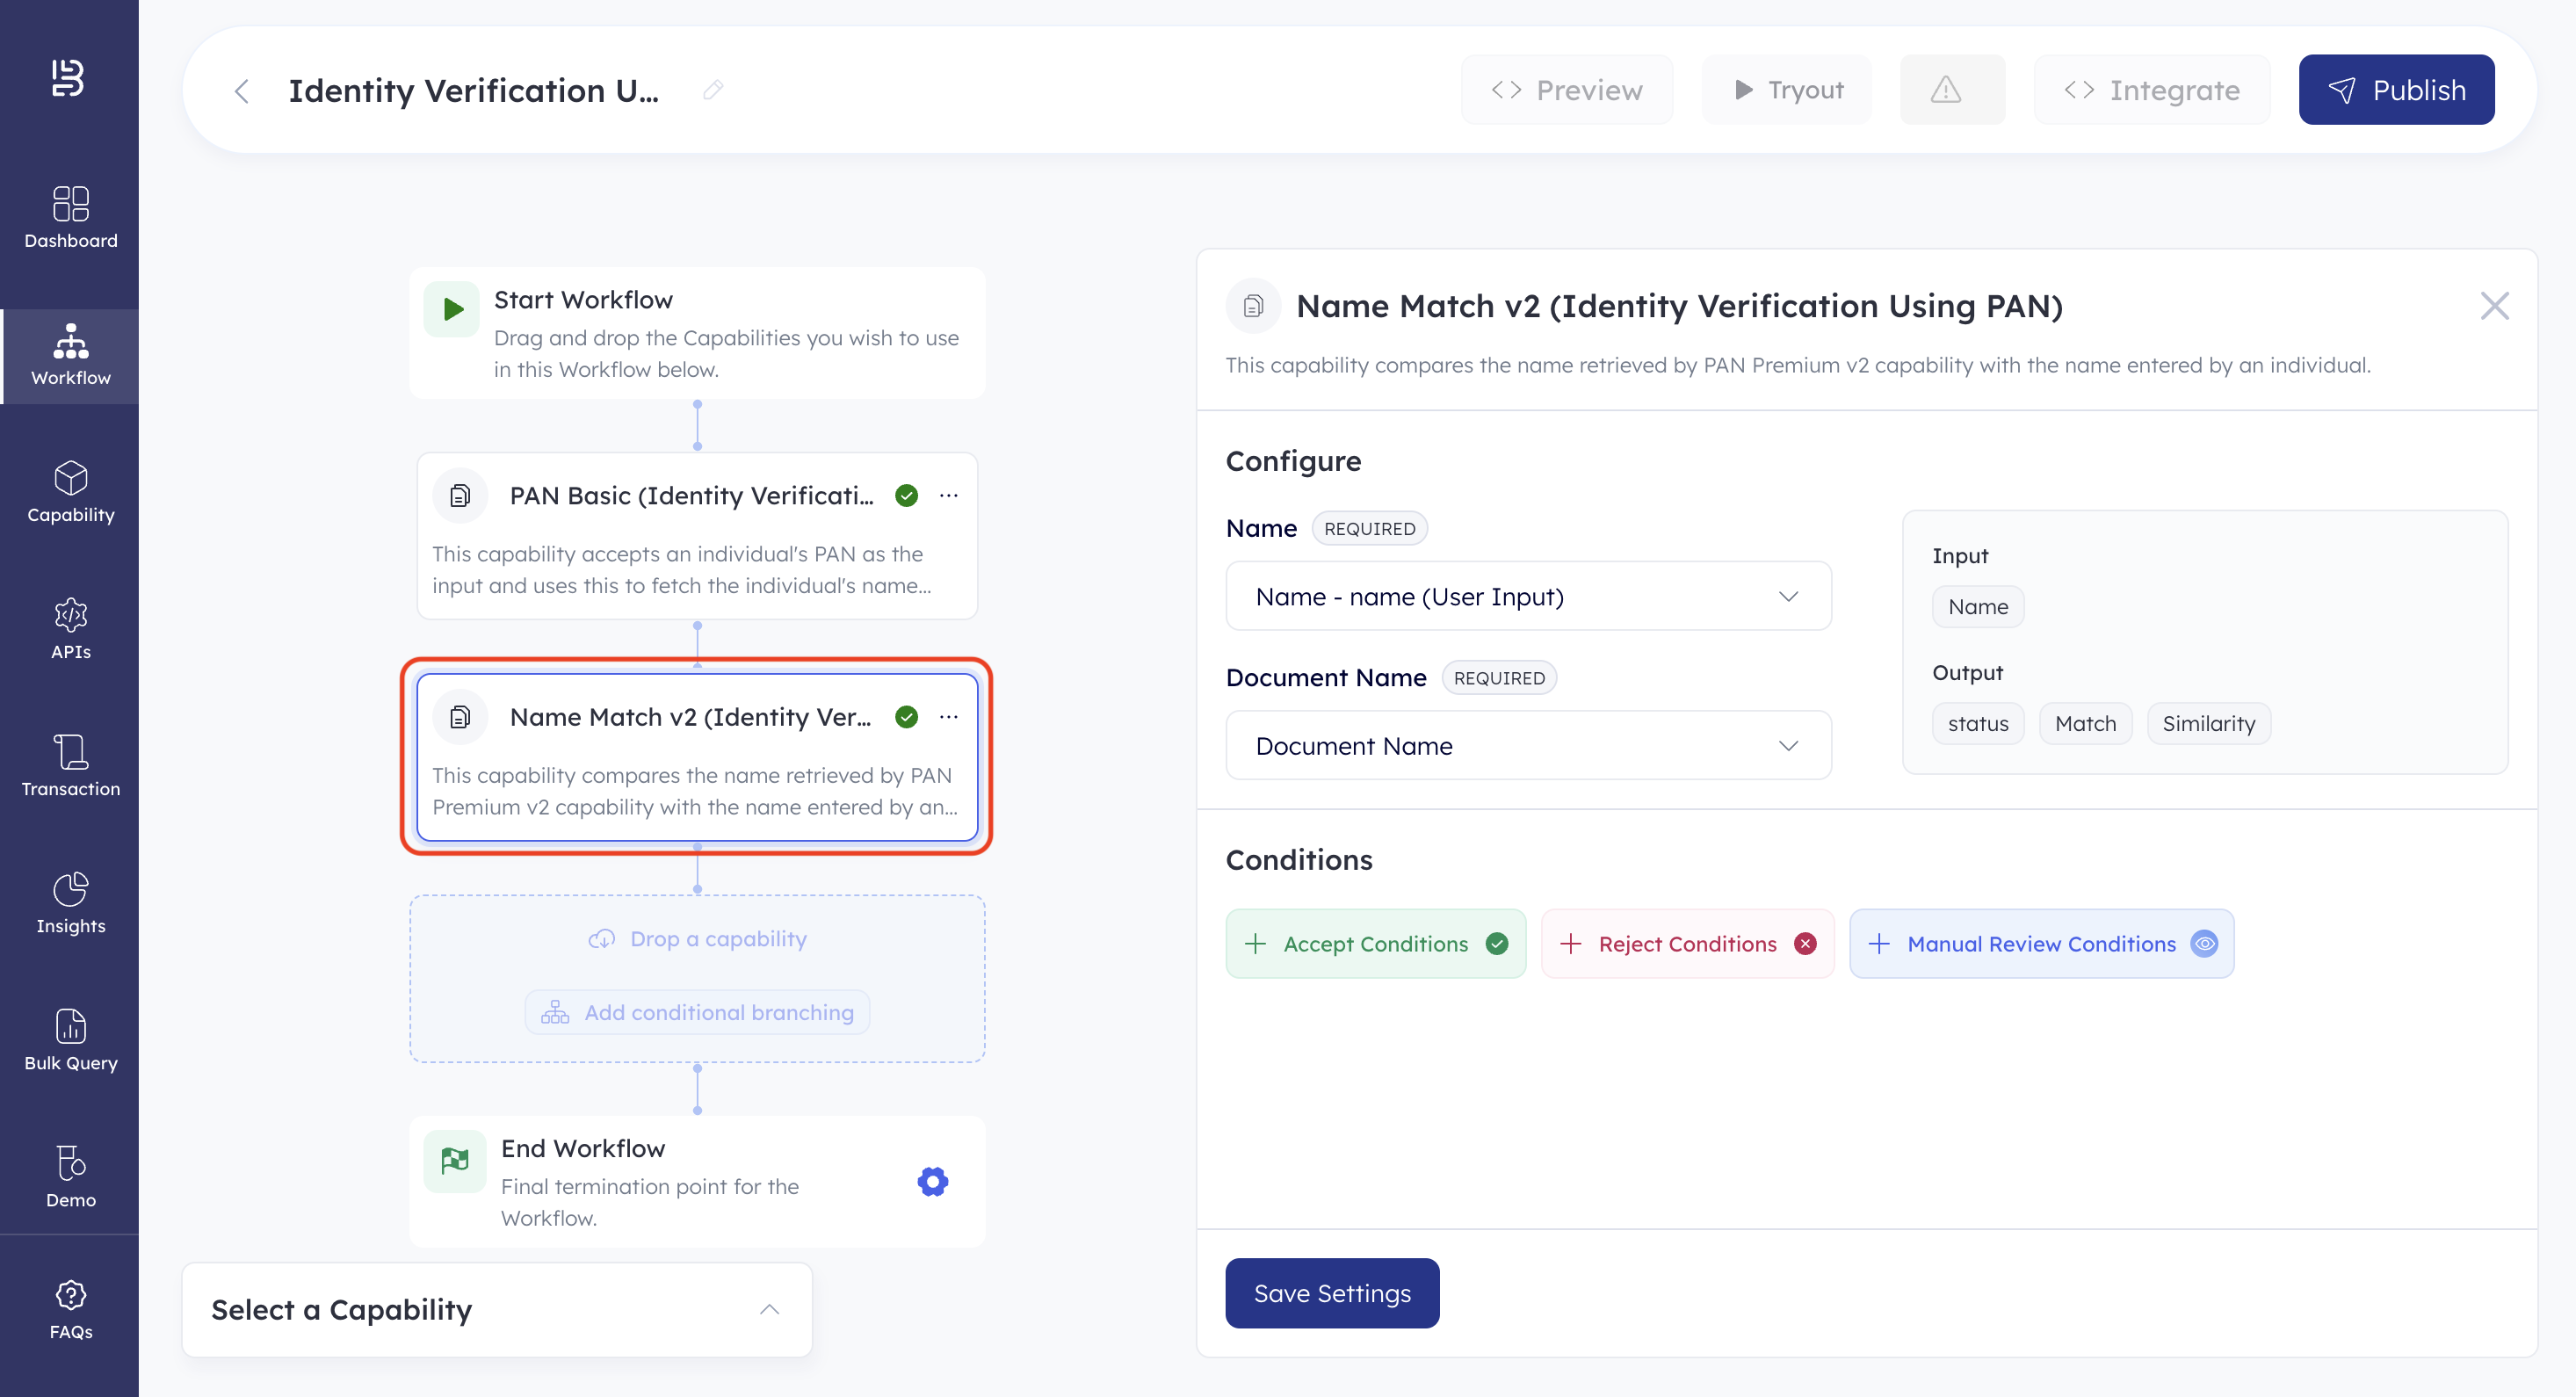
- Click Name - fullName (User Input) dropdown under Name in the Configure section.
- Click User Input.
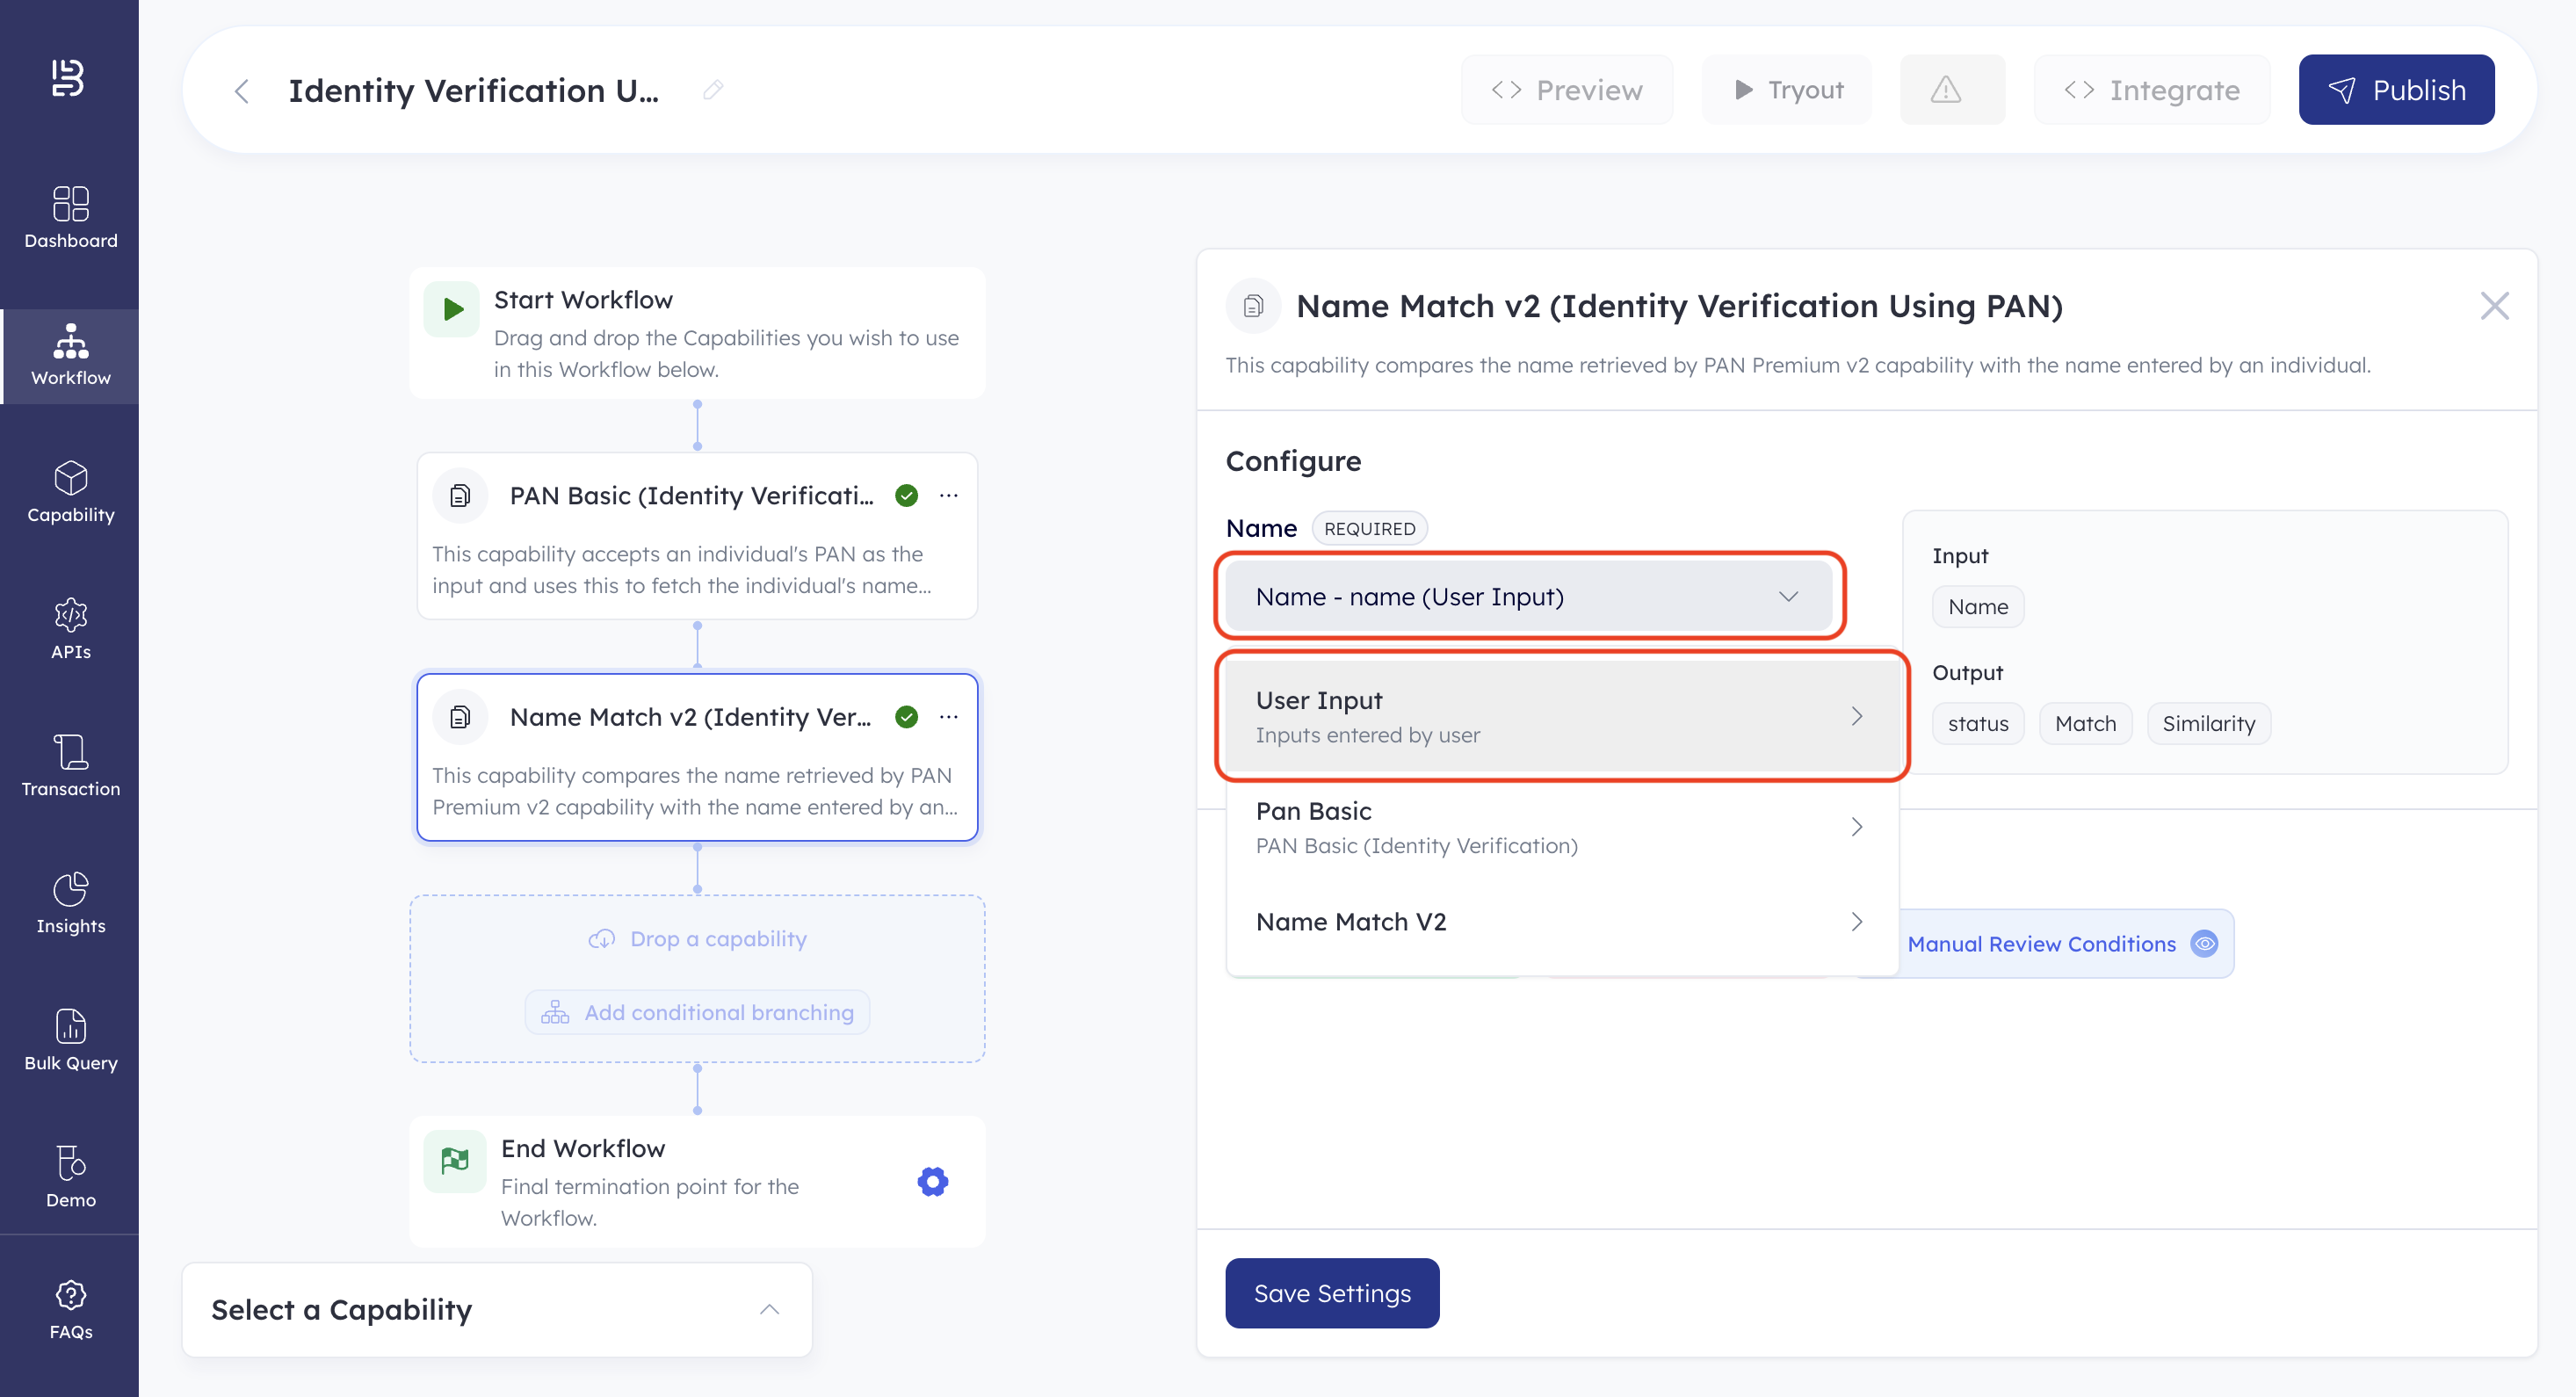
- Select Name from the dropdown. This configures the workflow to accept name as an external input and use it for the next steps.
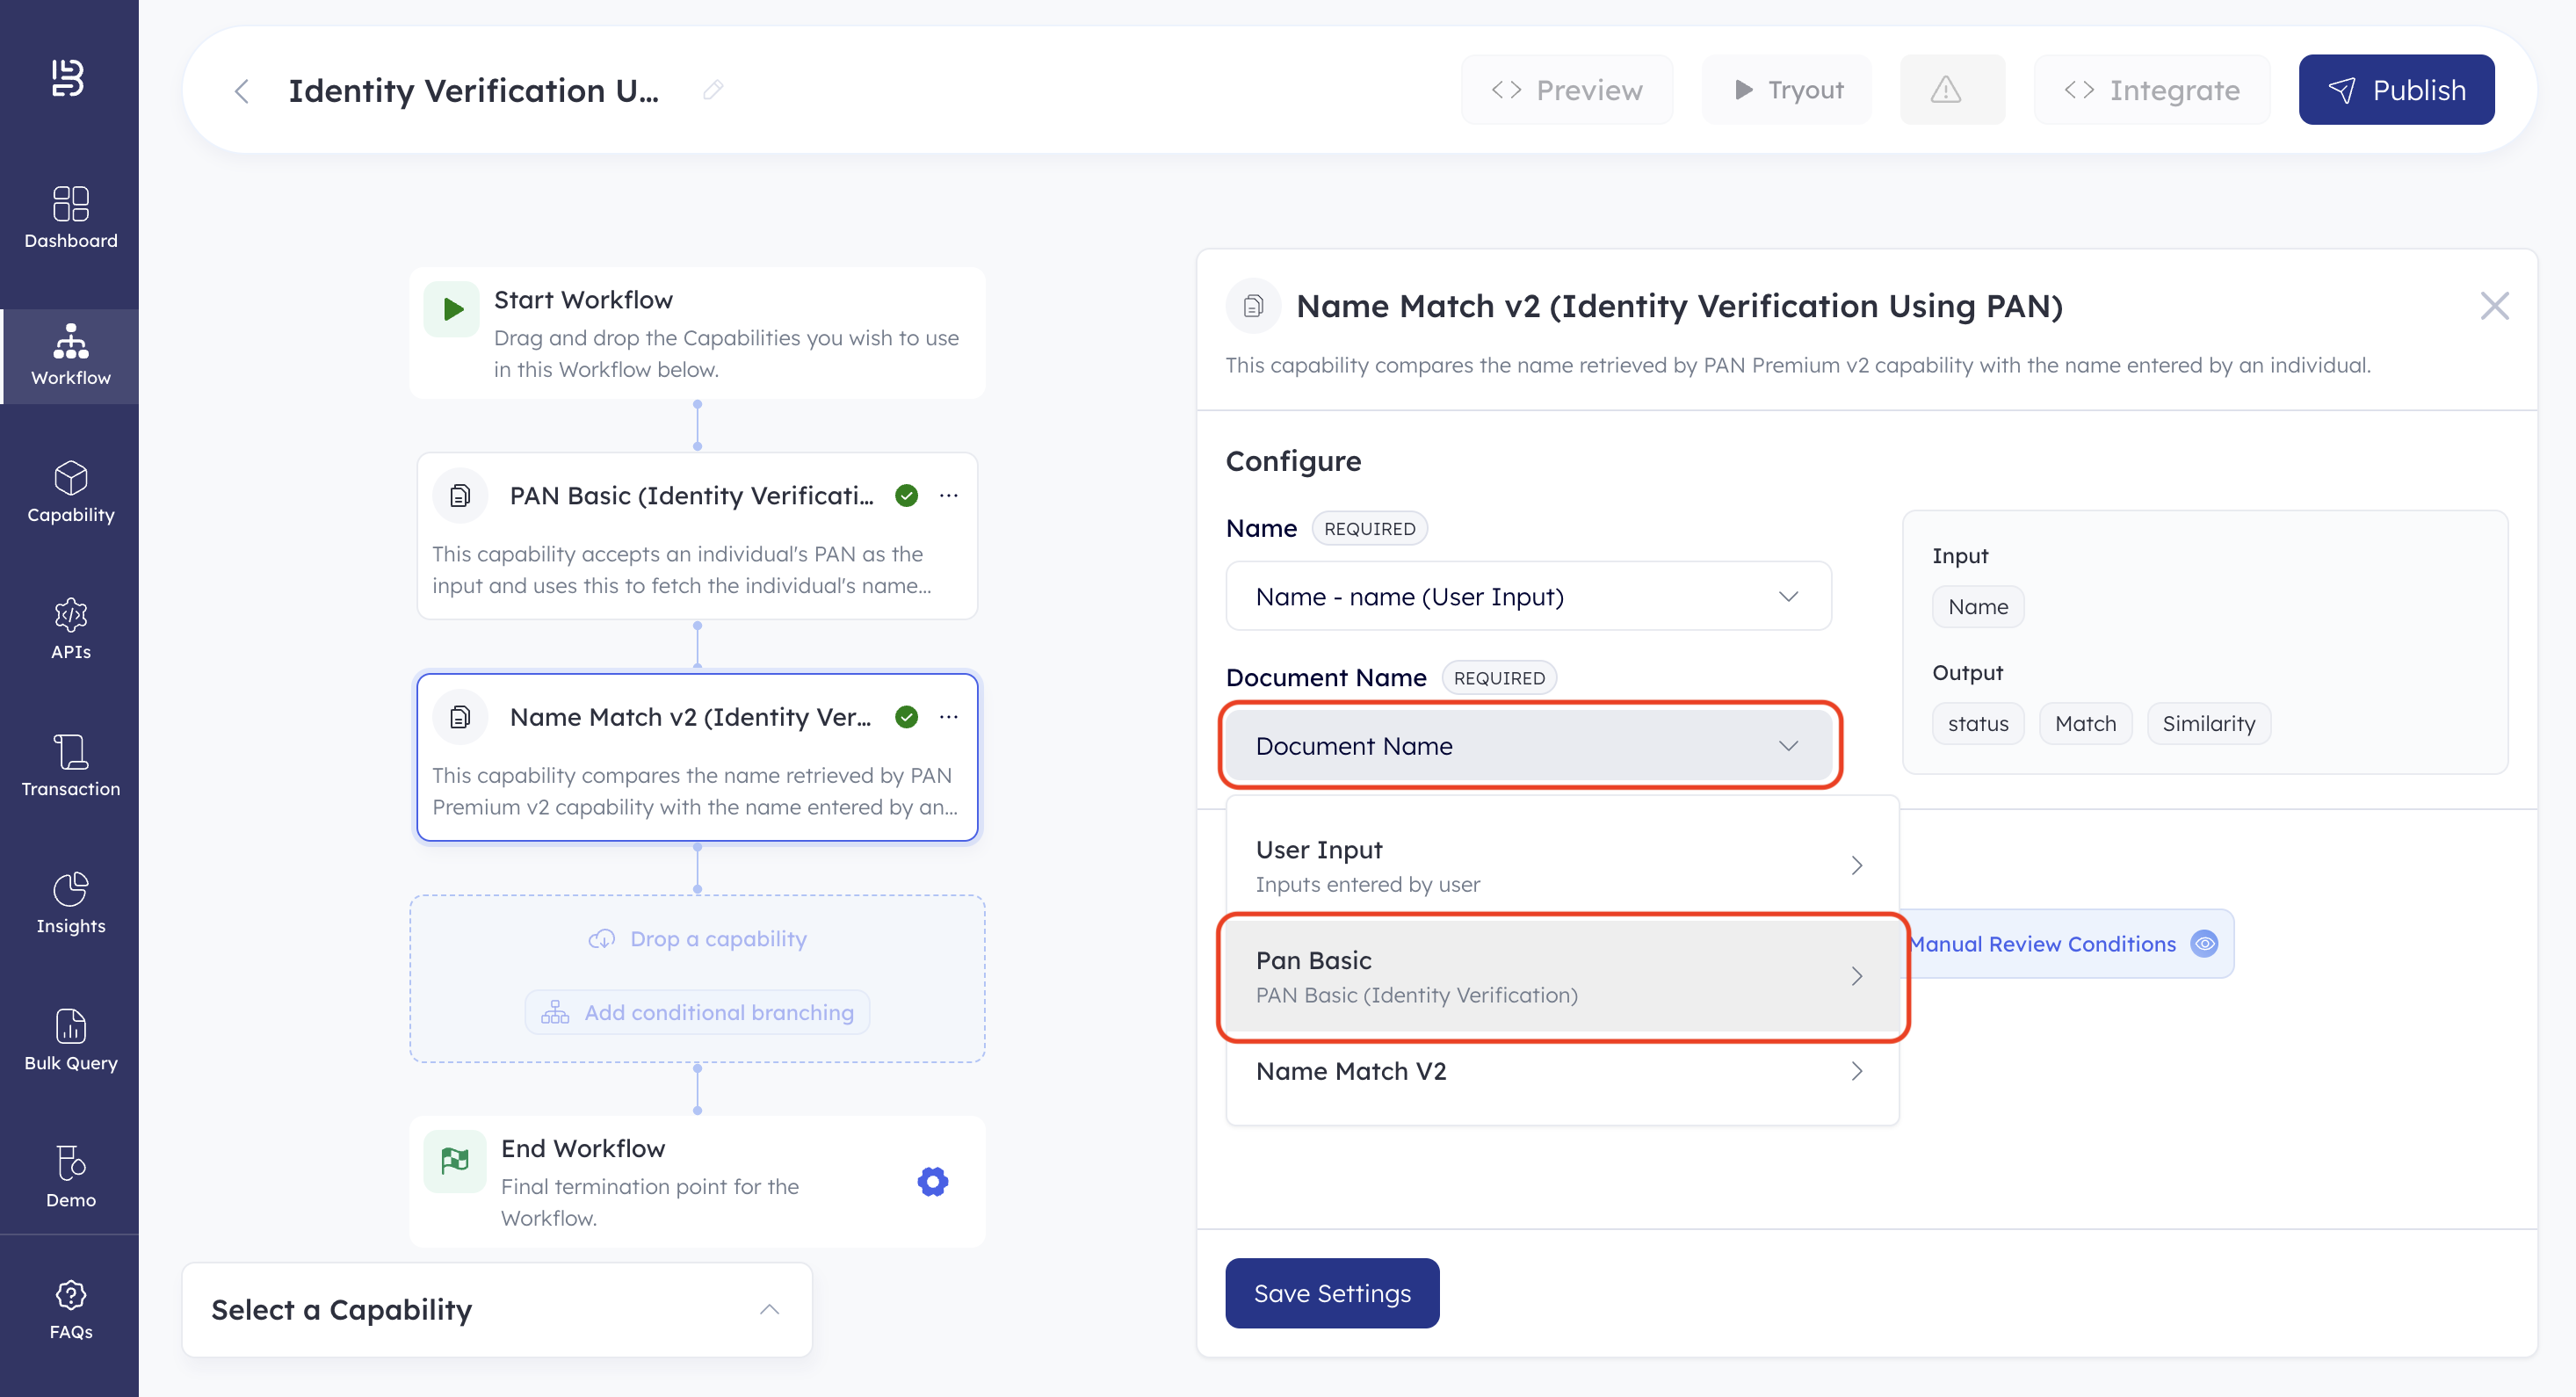
- Click Document Name under Document Name in the Configure section.
- Click PAN Basic.
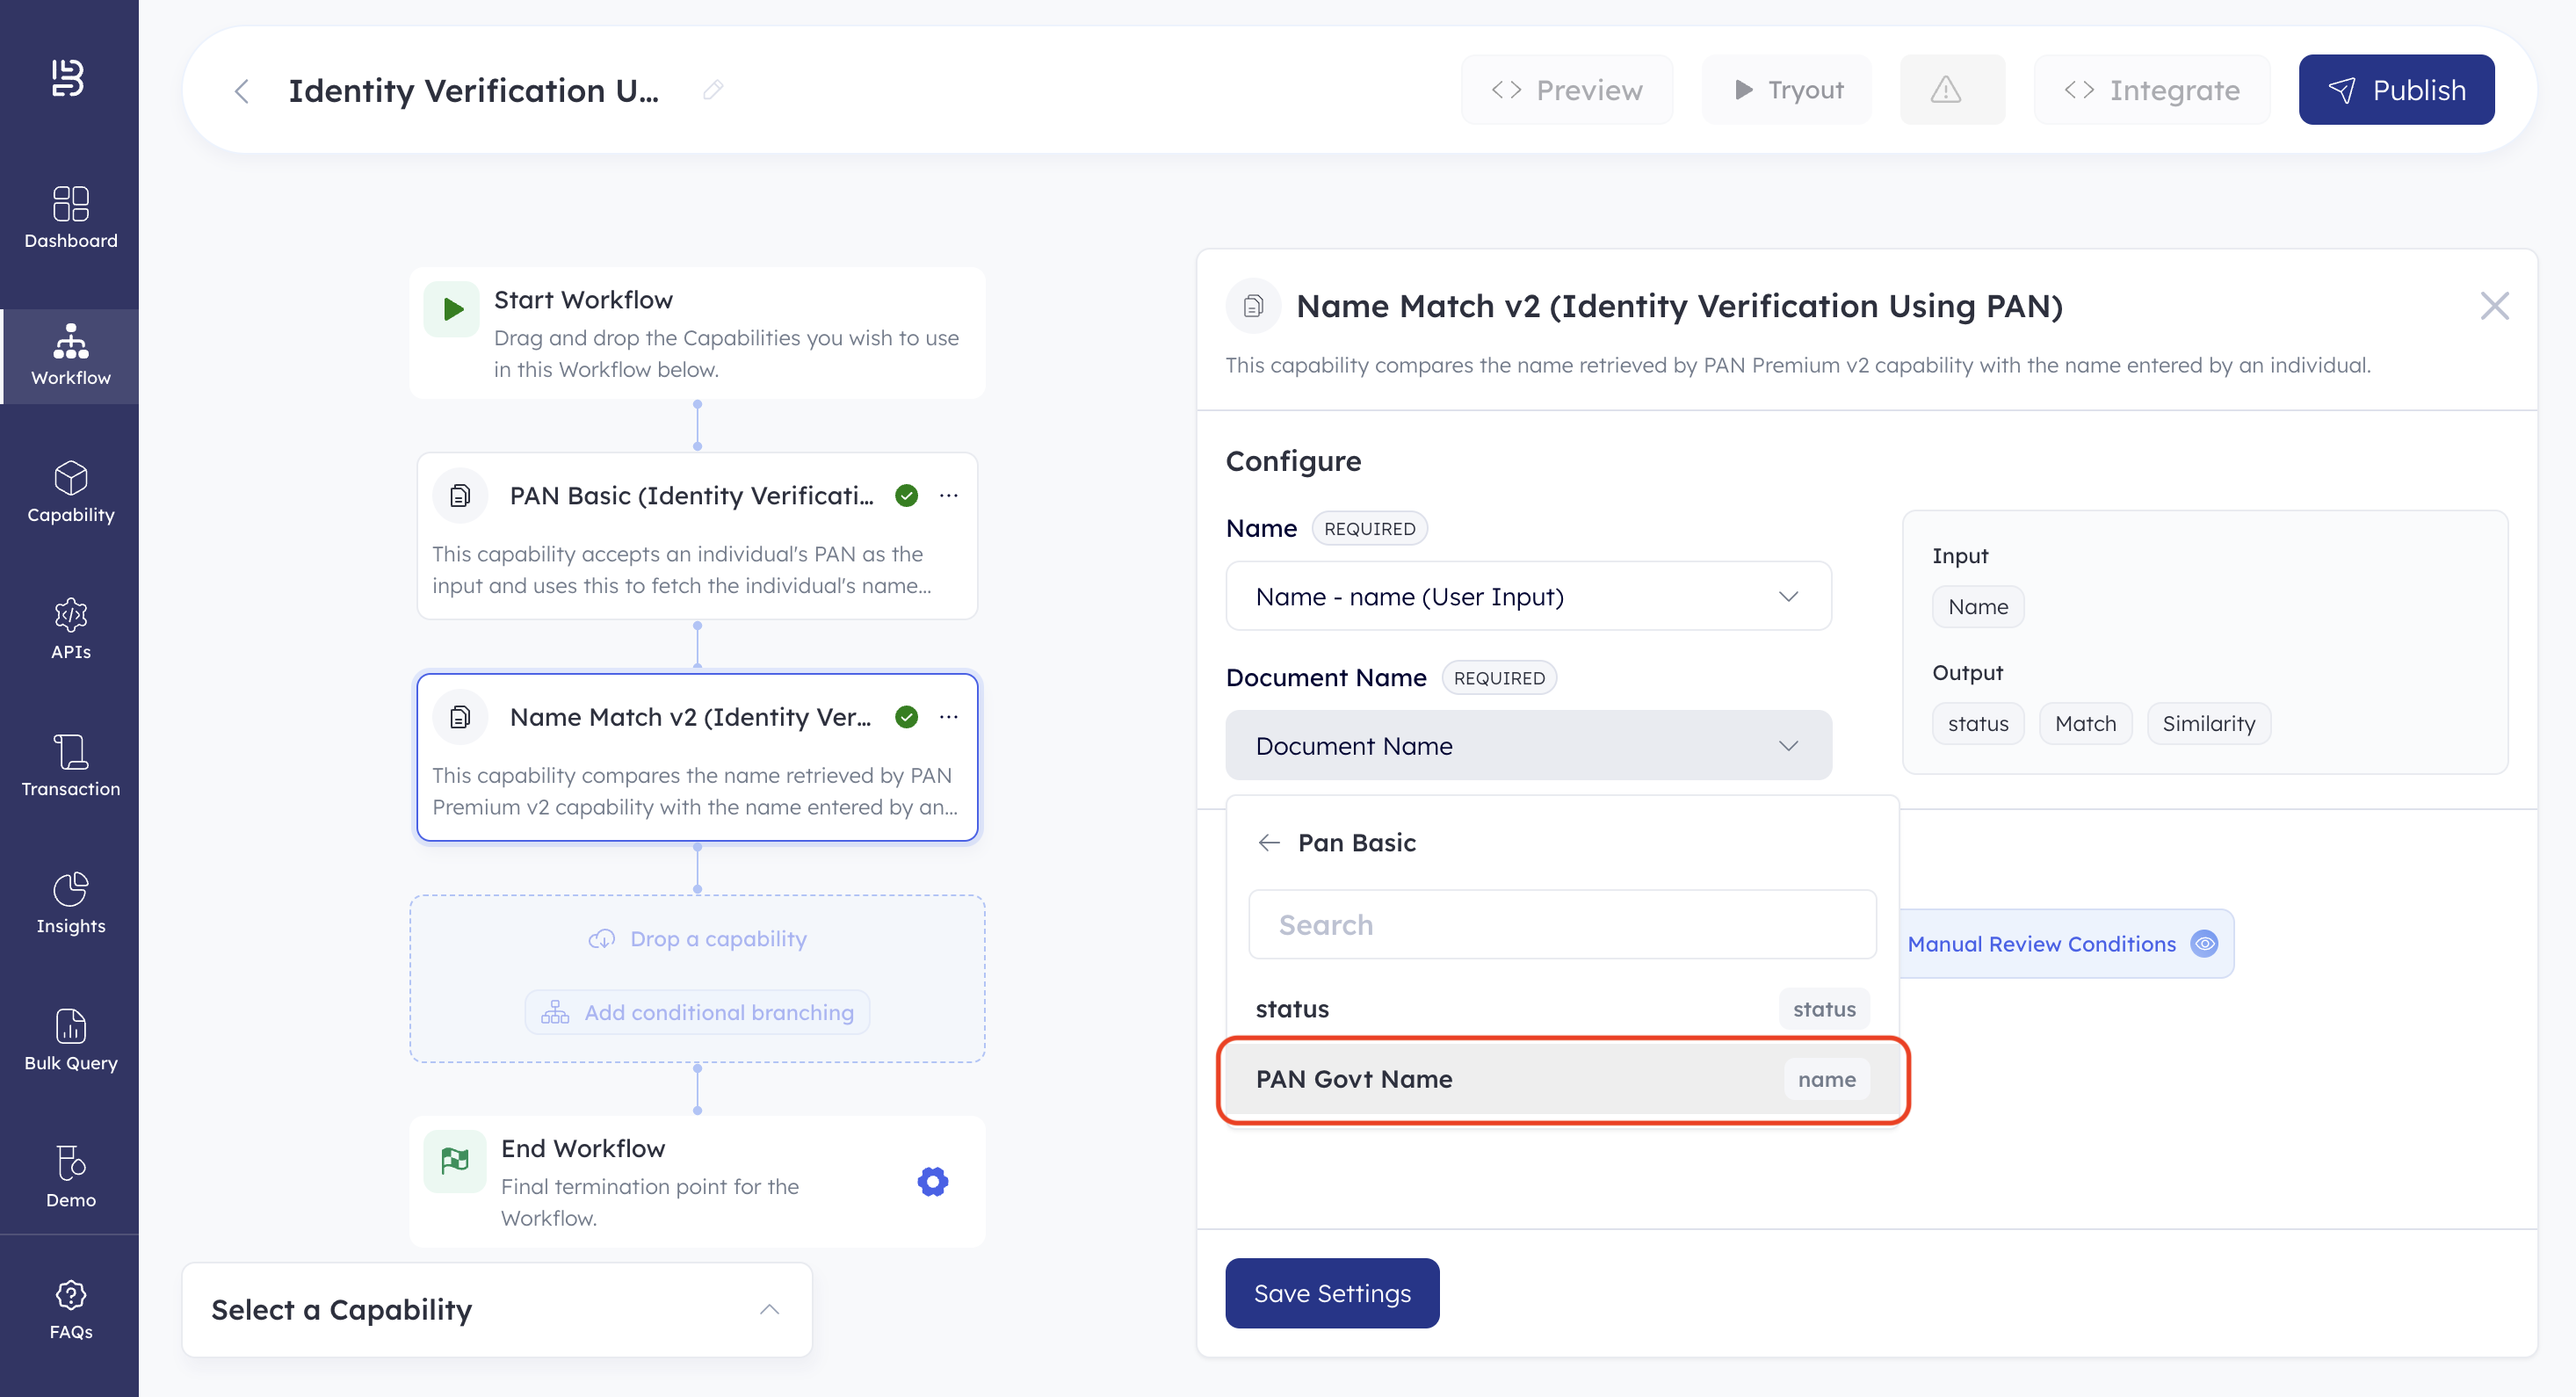
- Select PAN Govt Name from the dropdown. This configures the workflow to accept the full name returned by the PAN Basic capability as the input for the document name.
- Click Save. The Name Match v2 capability is configured.
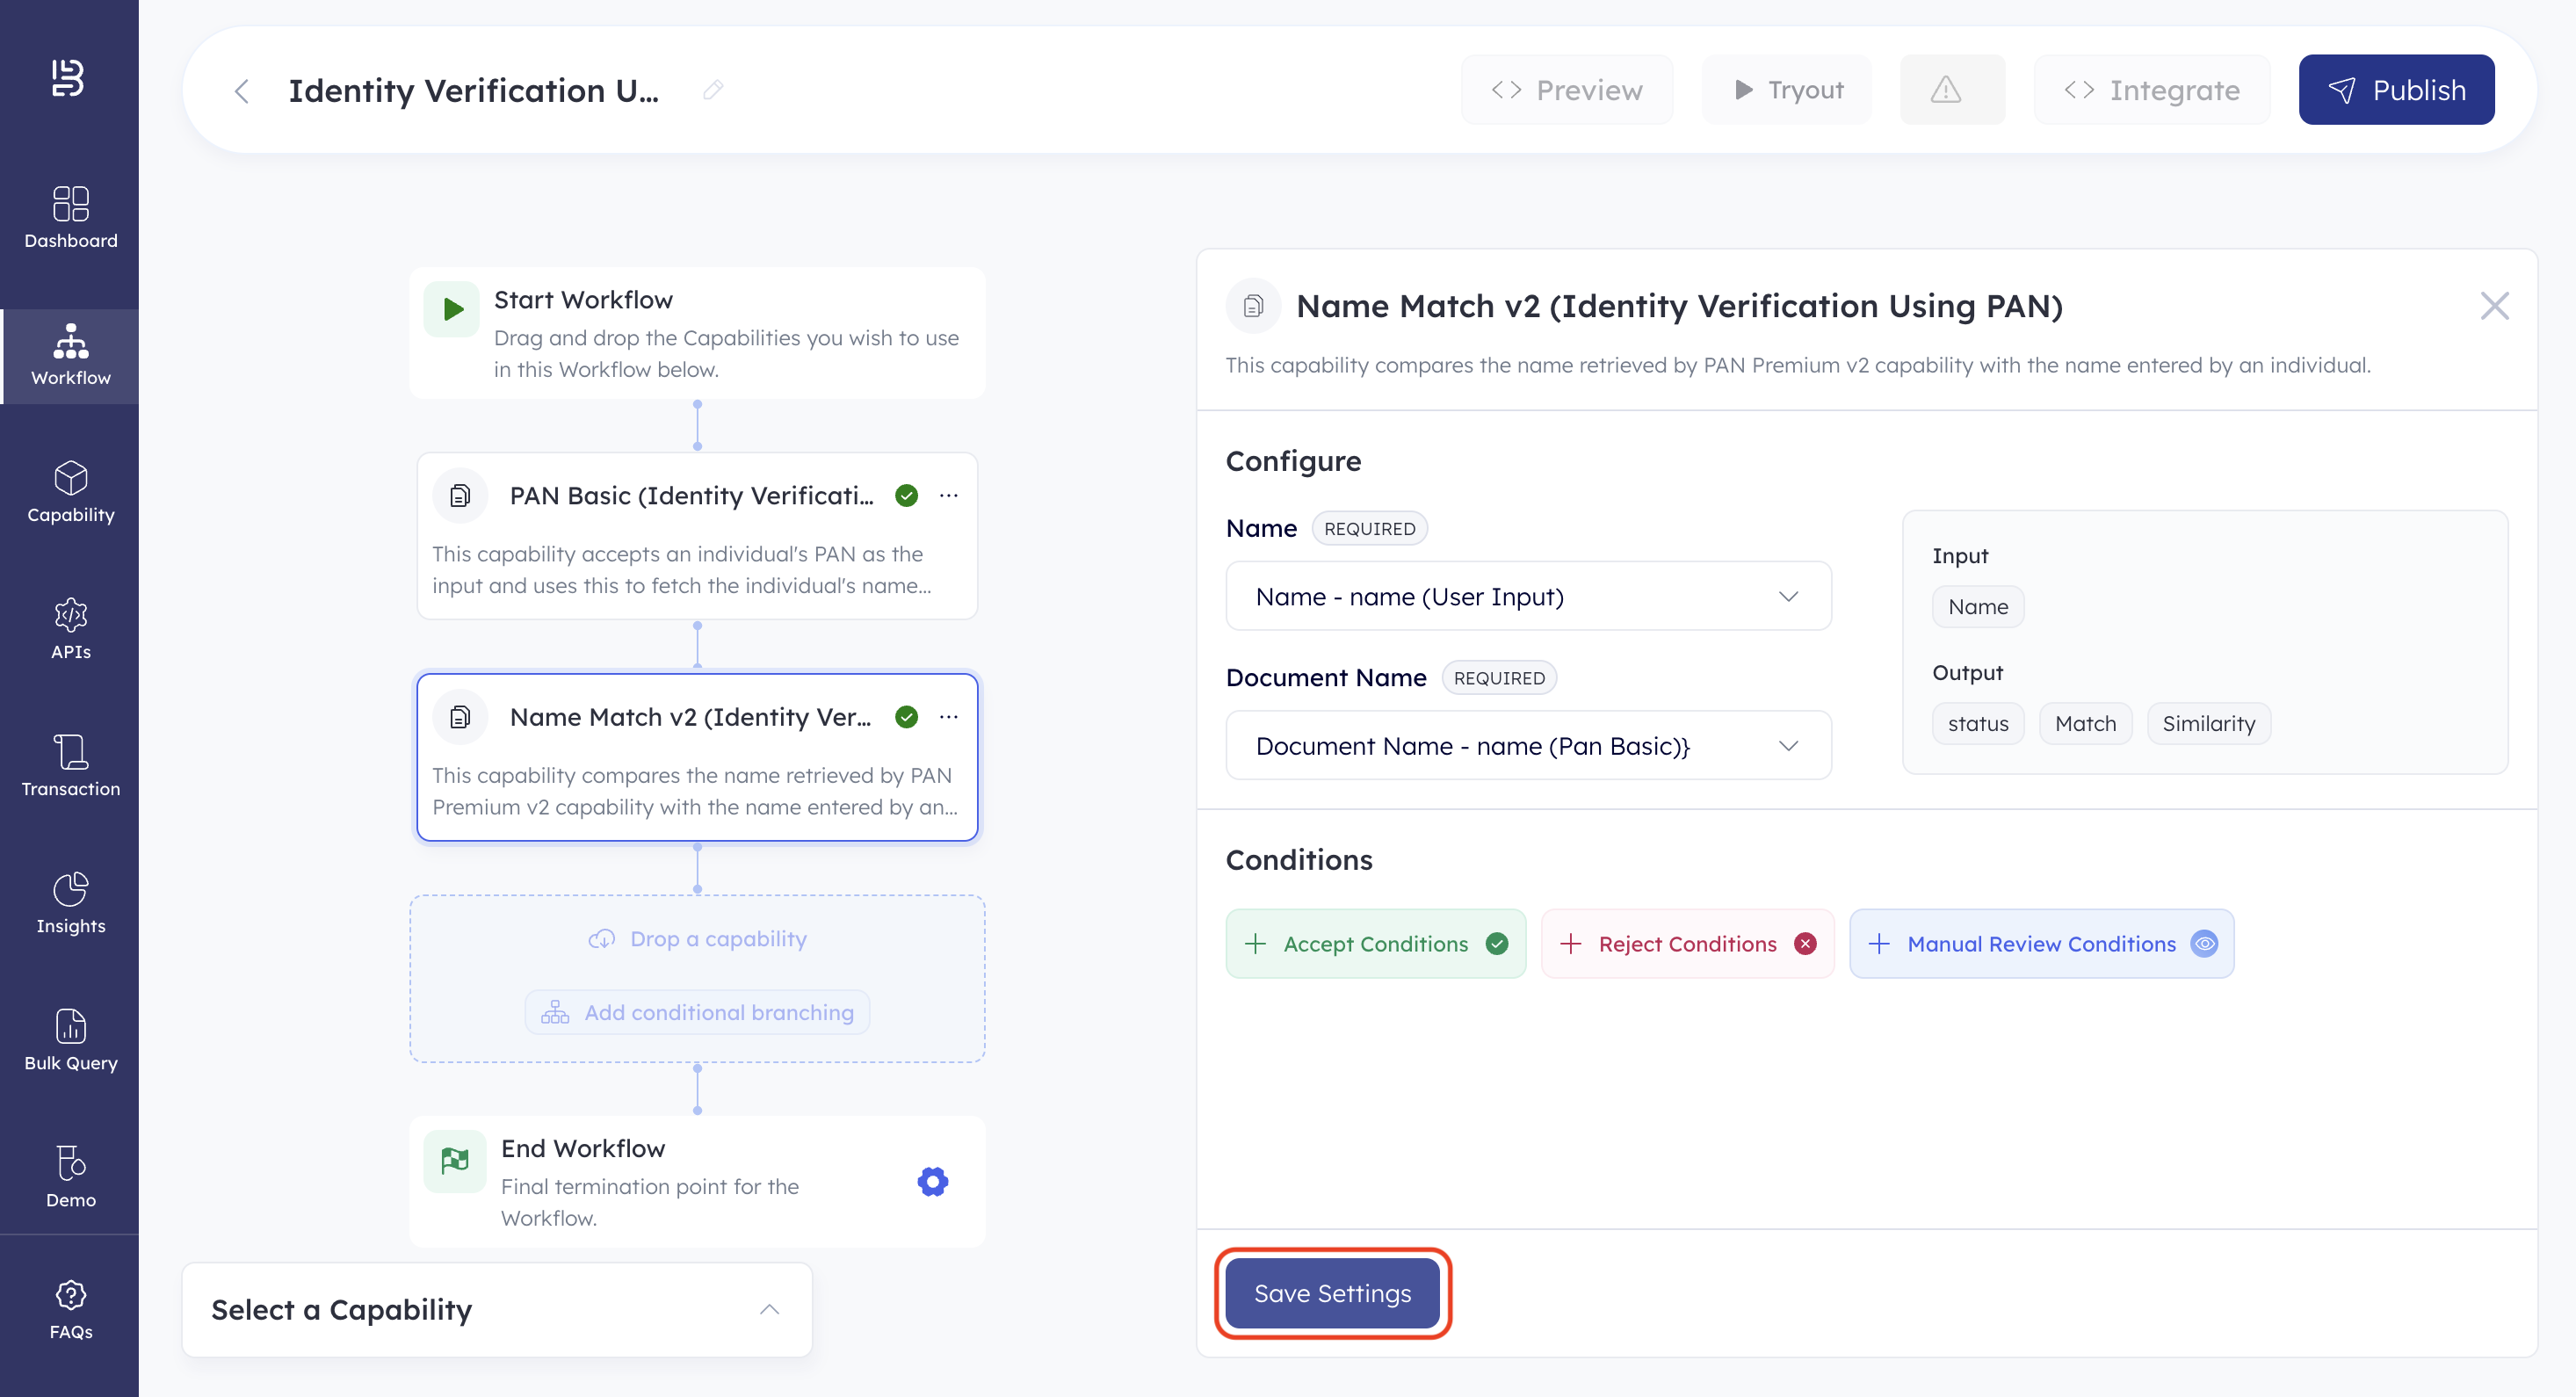
With the capabilities configured, you're ready to define the workflow conditions.
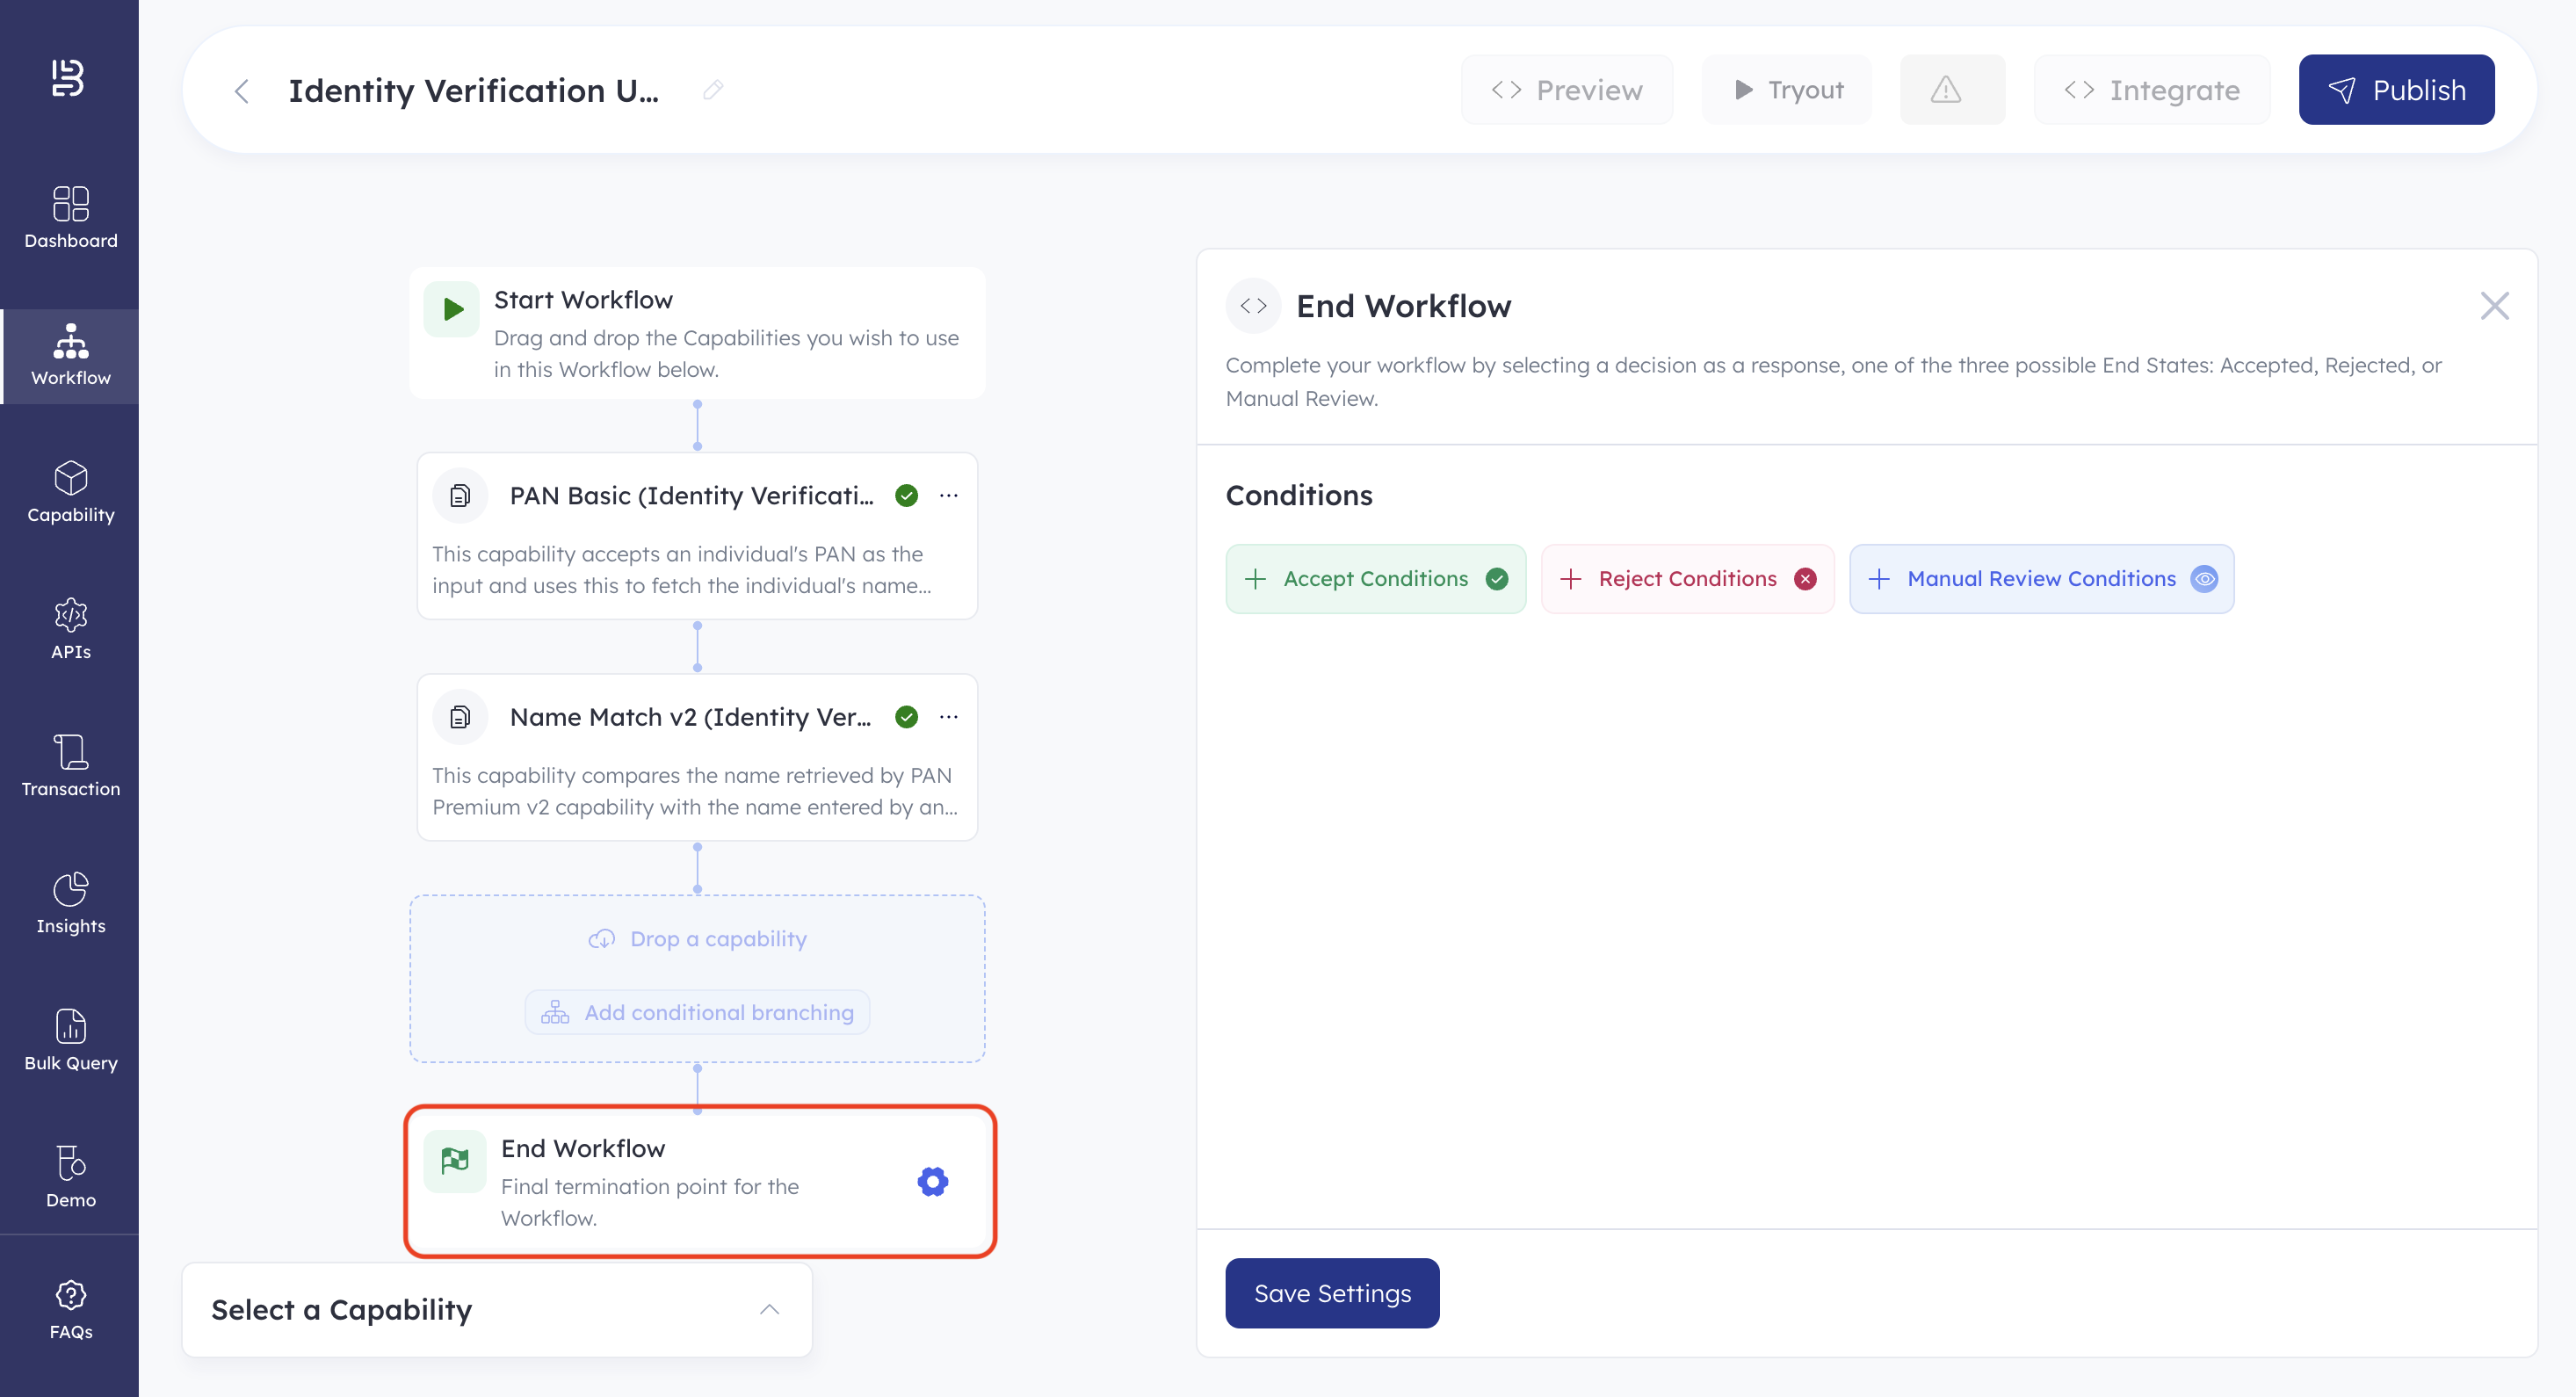
3. Define Workflow Conditions
After configuring capabilities, define the conditions that determine the workflow's outcome.
Note
The capabilities used in this workflow do not come with predefined end (accept, reject, and manual review) conditions.
You will have to define all necessary end conditions yourself as per your business needs.
Follow the below steps to define the workflow conditions.
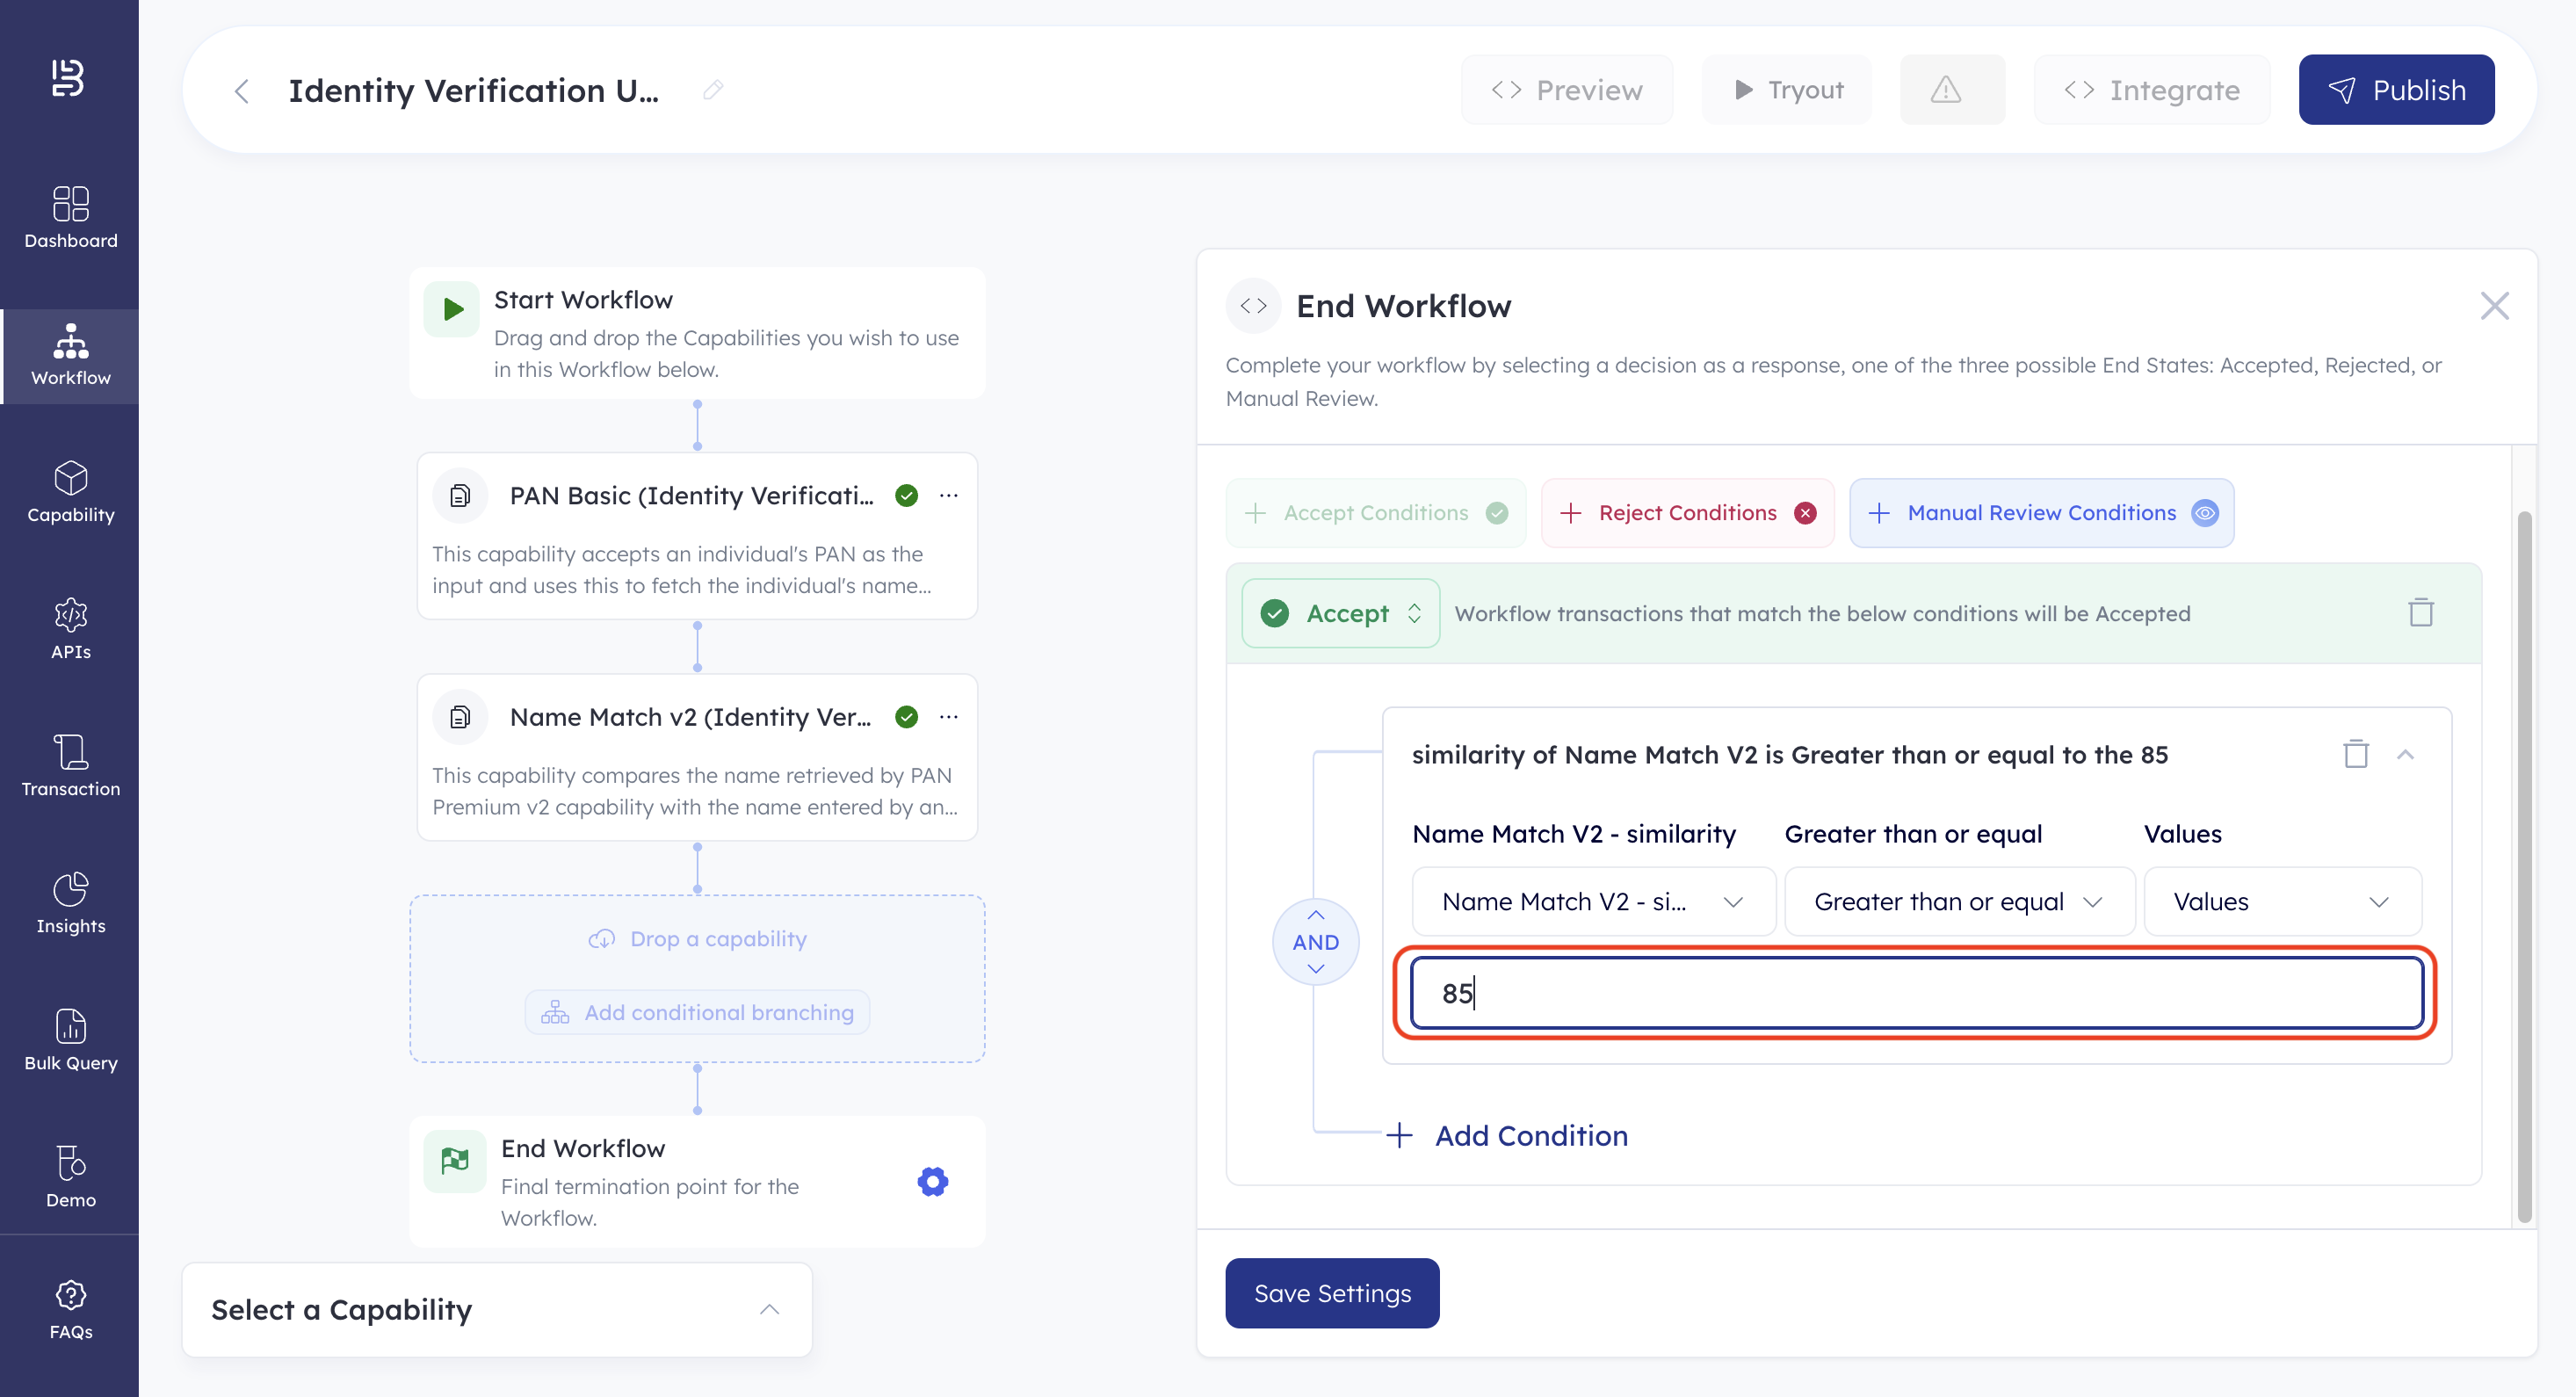
- Click End Workflow to define the accept, reject, and manual review conditions.
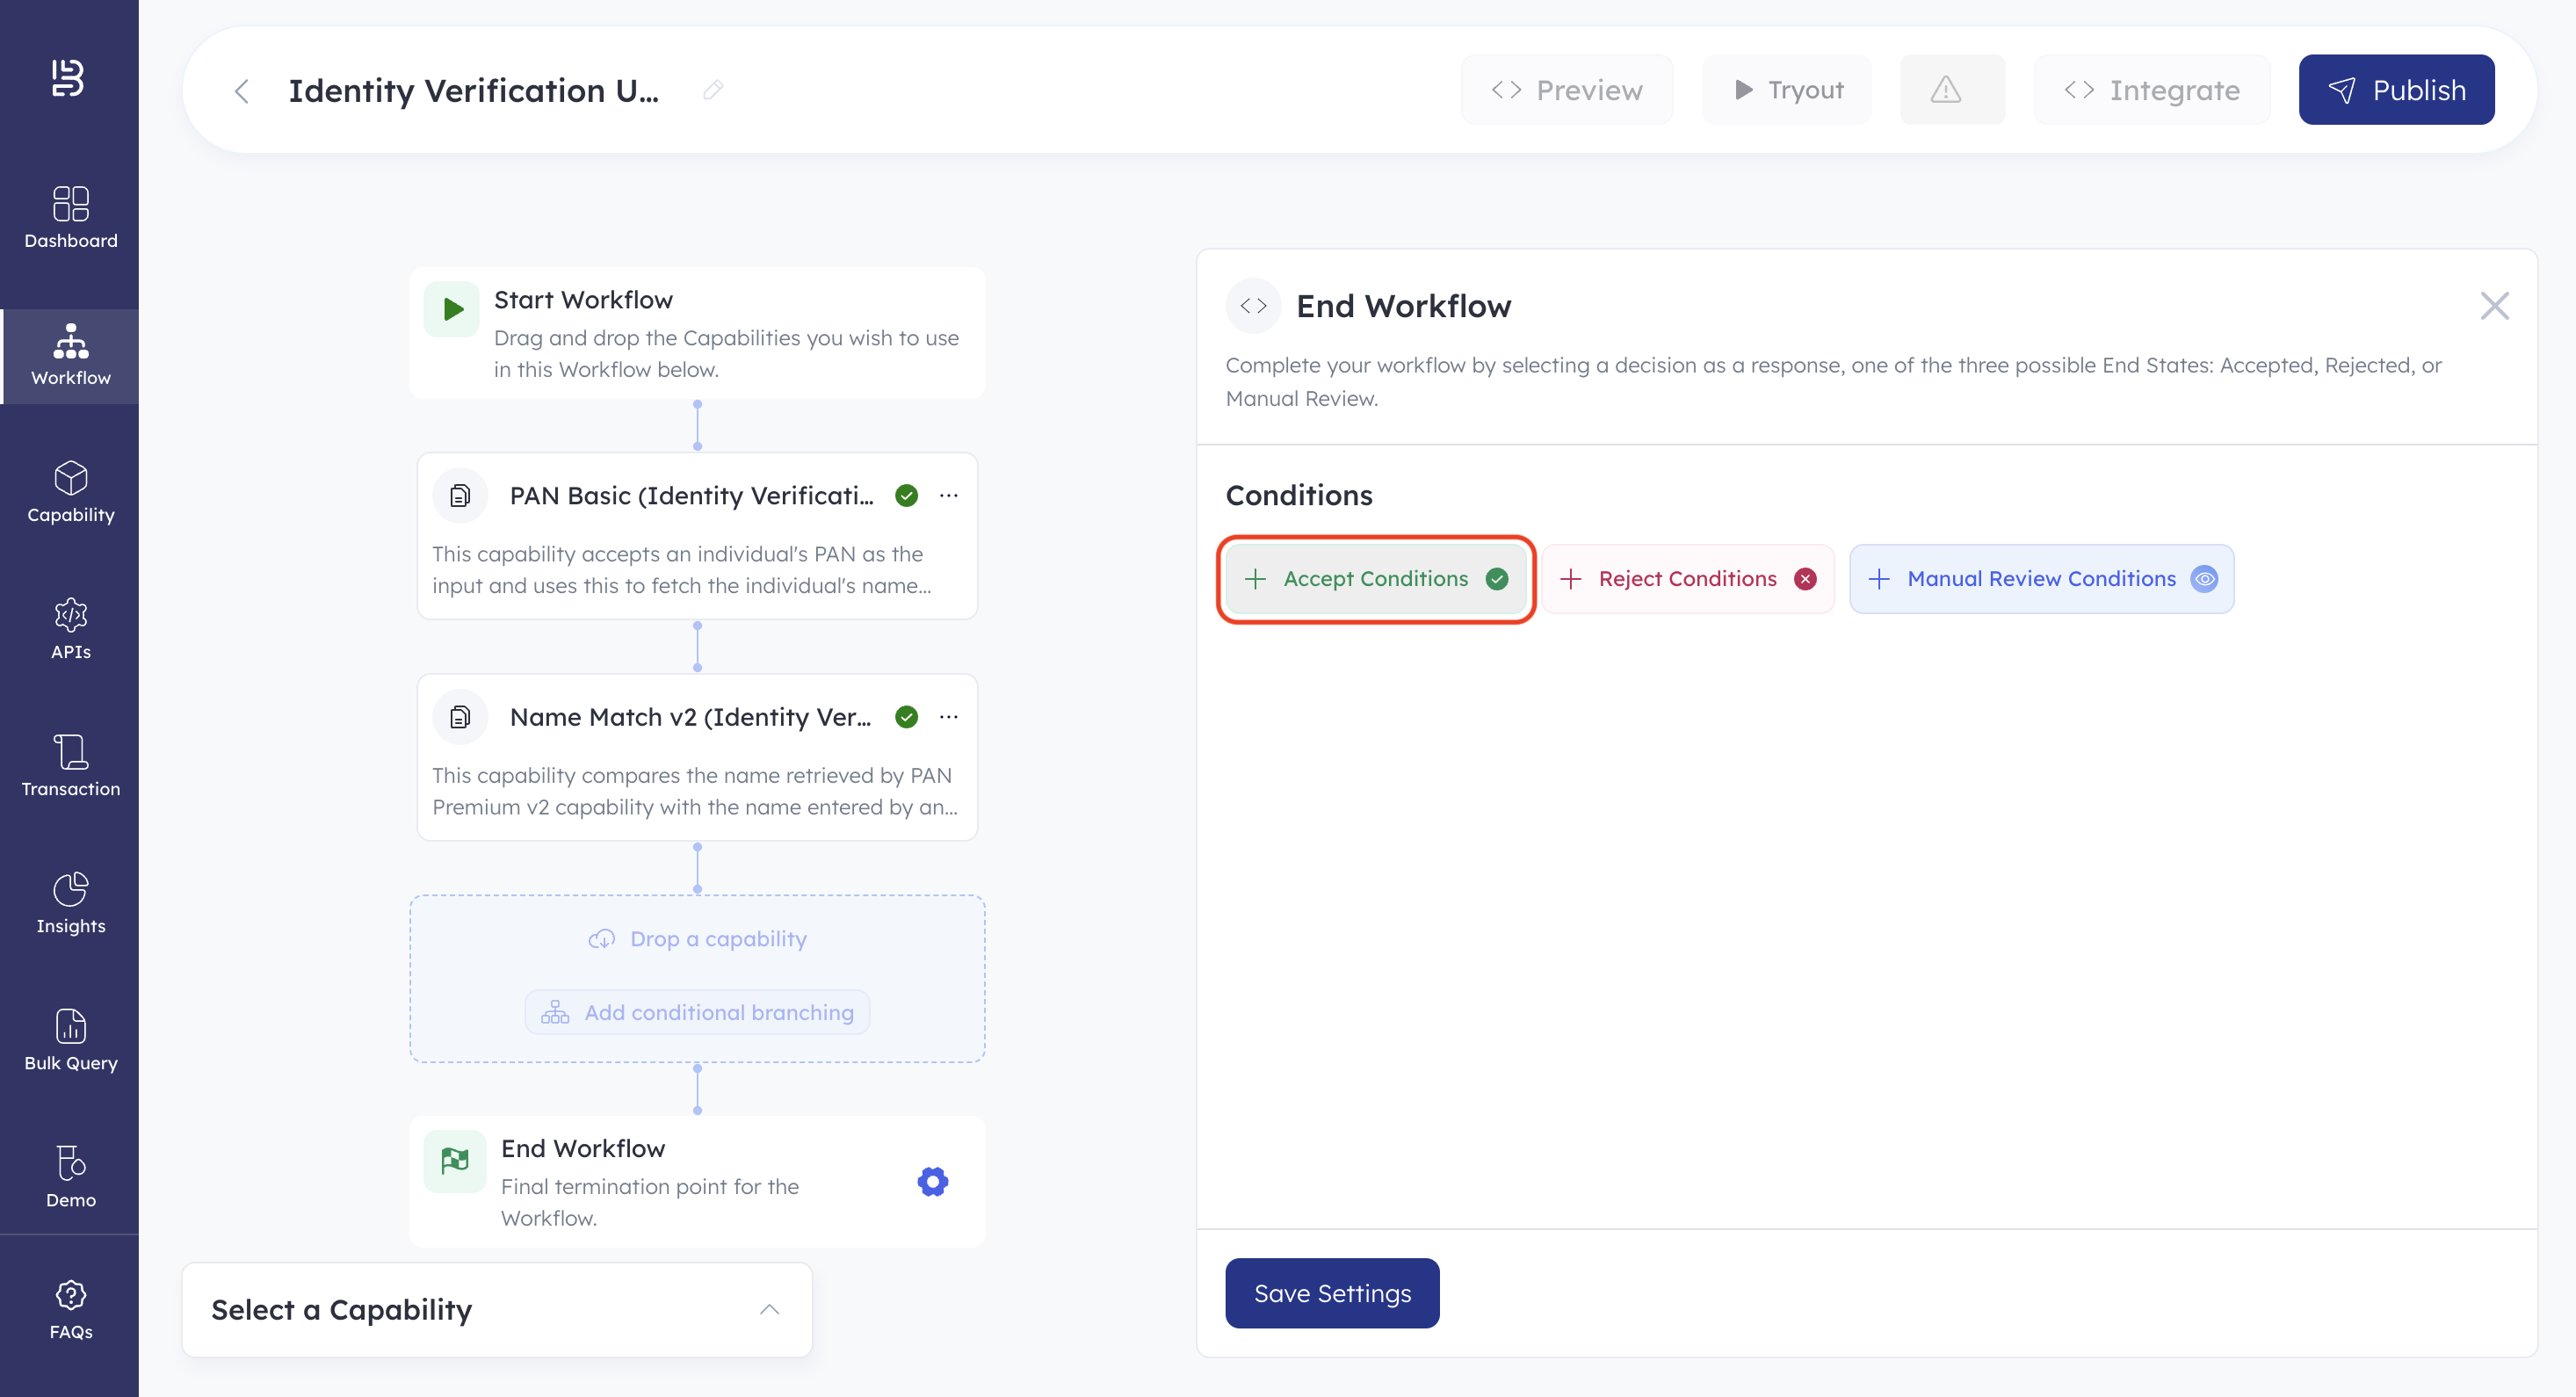
- Click + Accept Condition to define the accept criteria. Let us define the accept condition as a name similarity score greater than or equal to 85.
- Click the Condition dropdown.
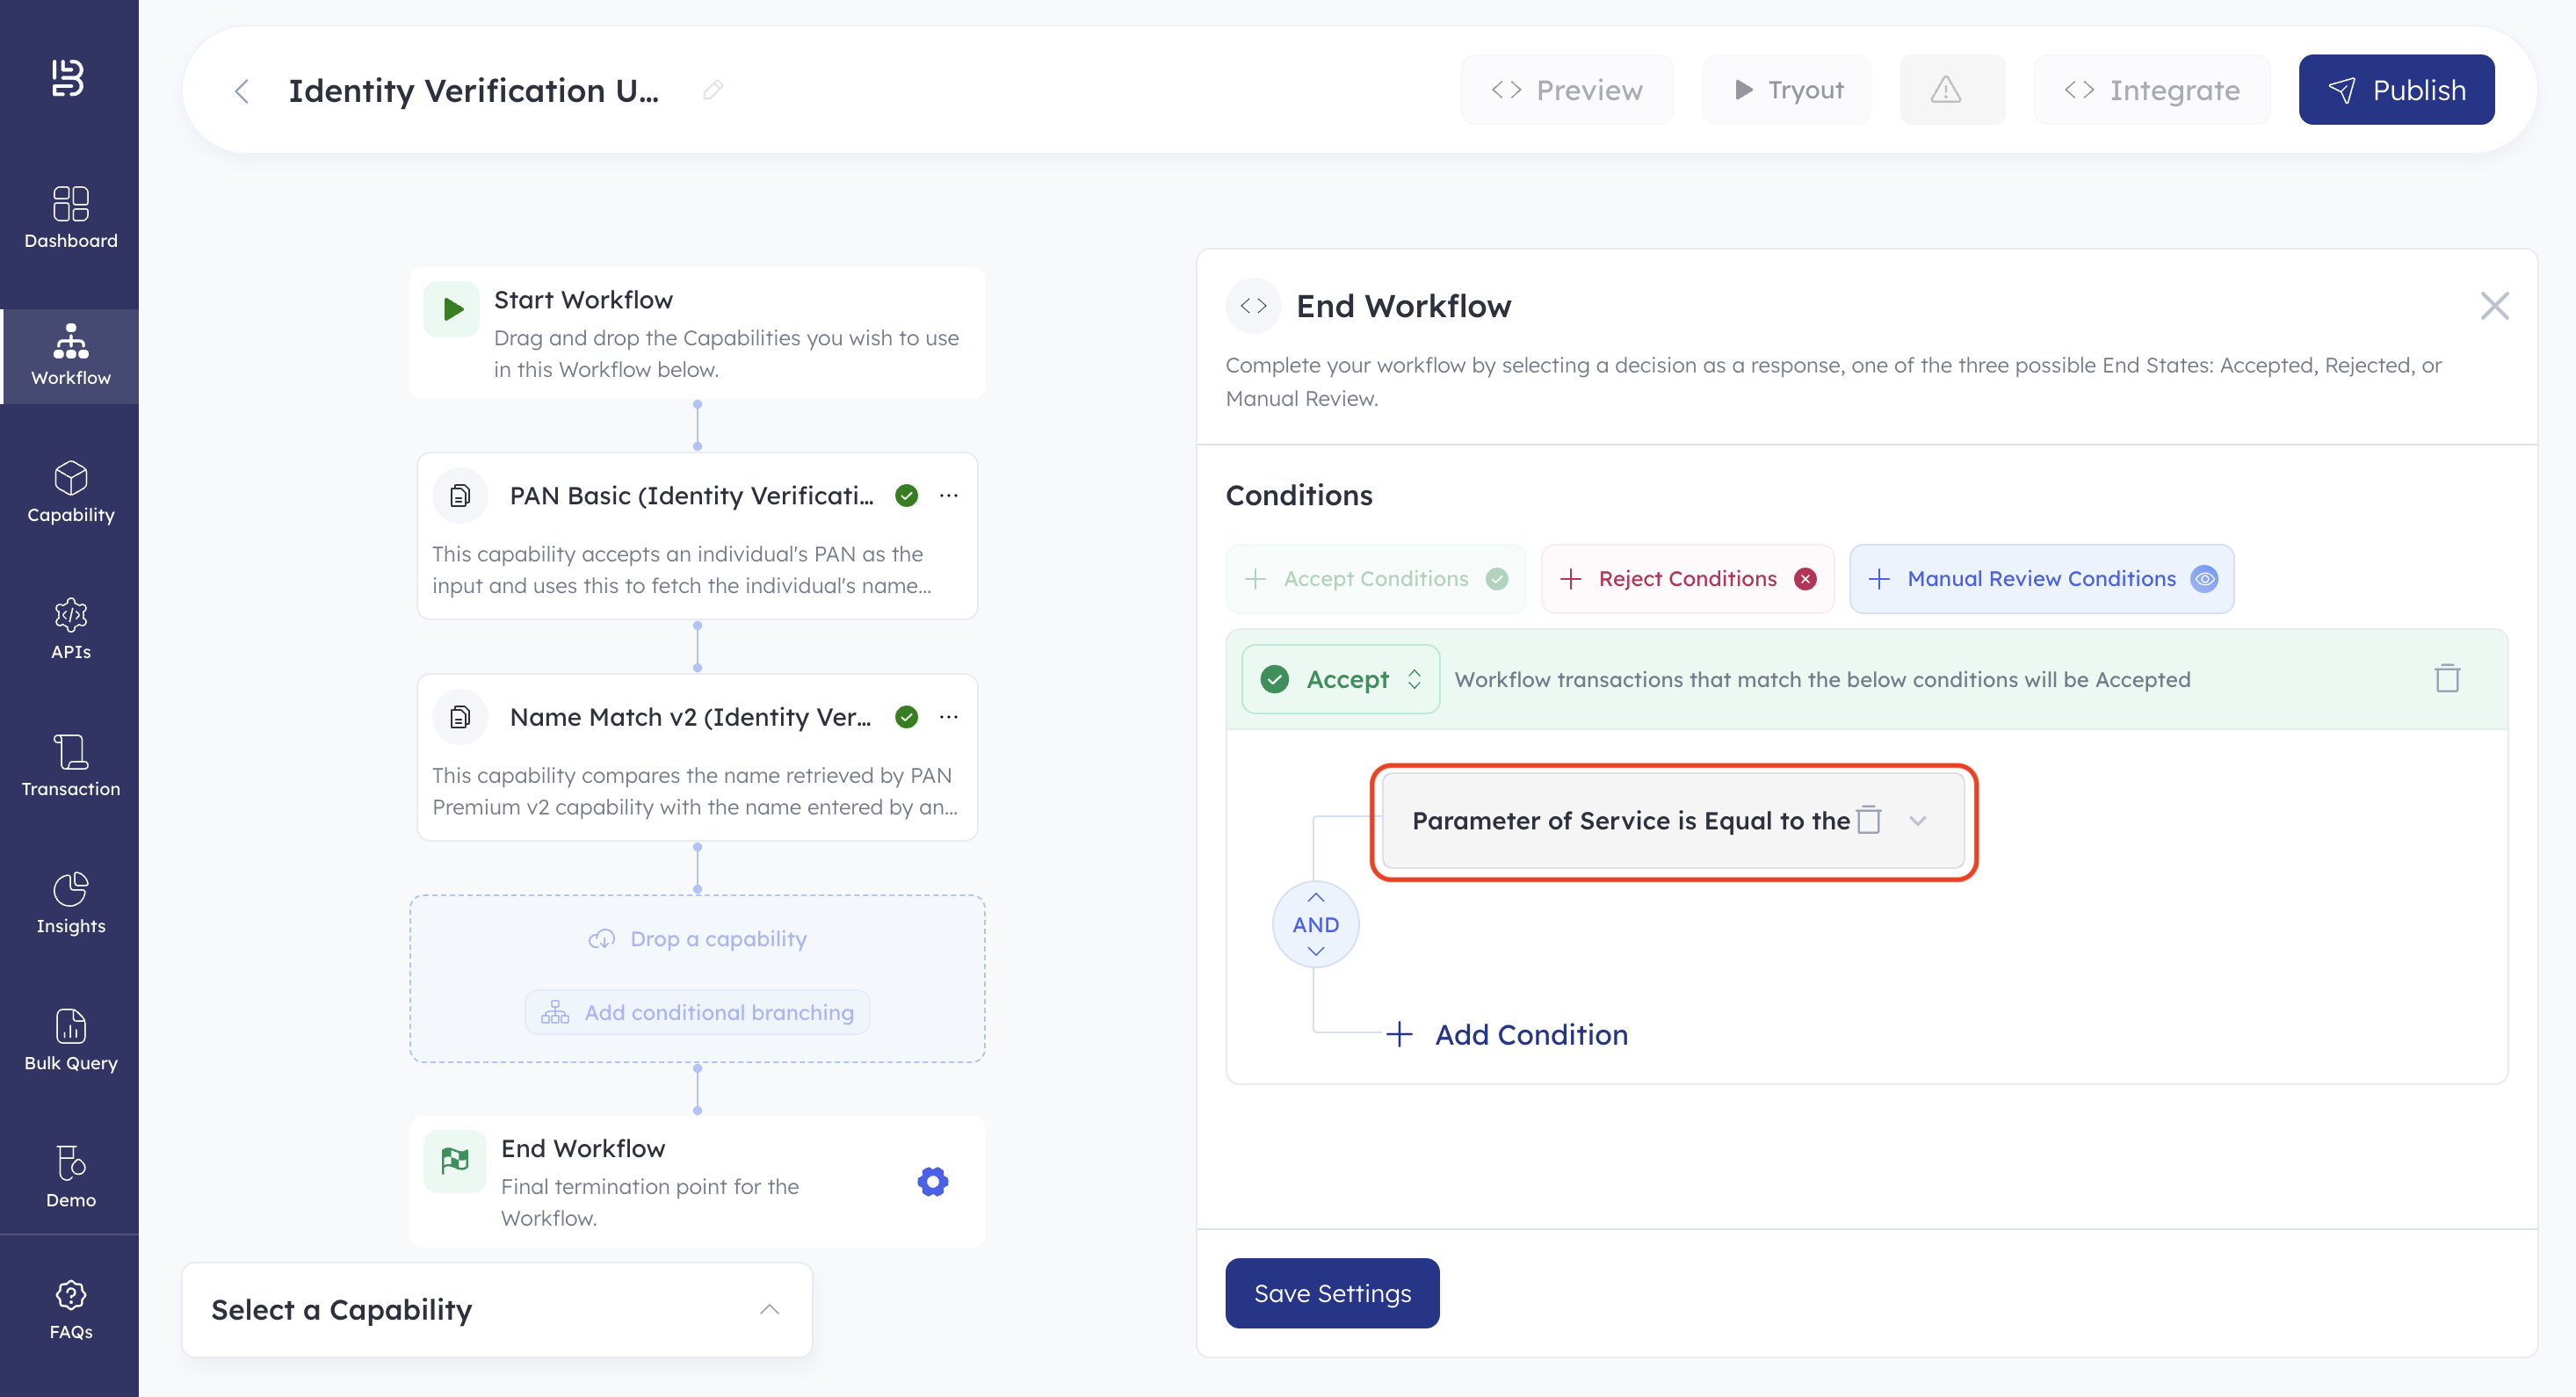
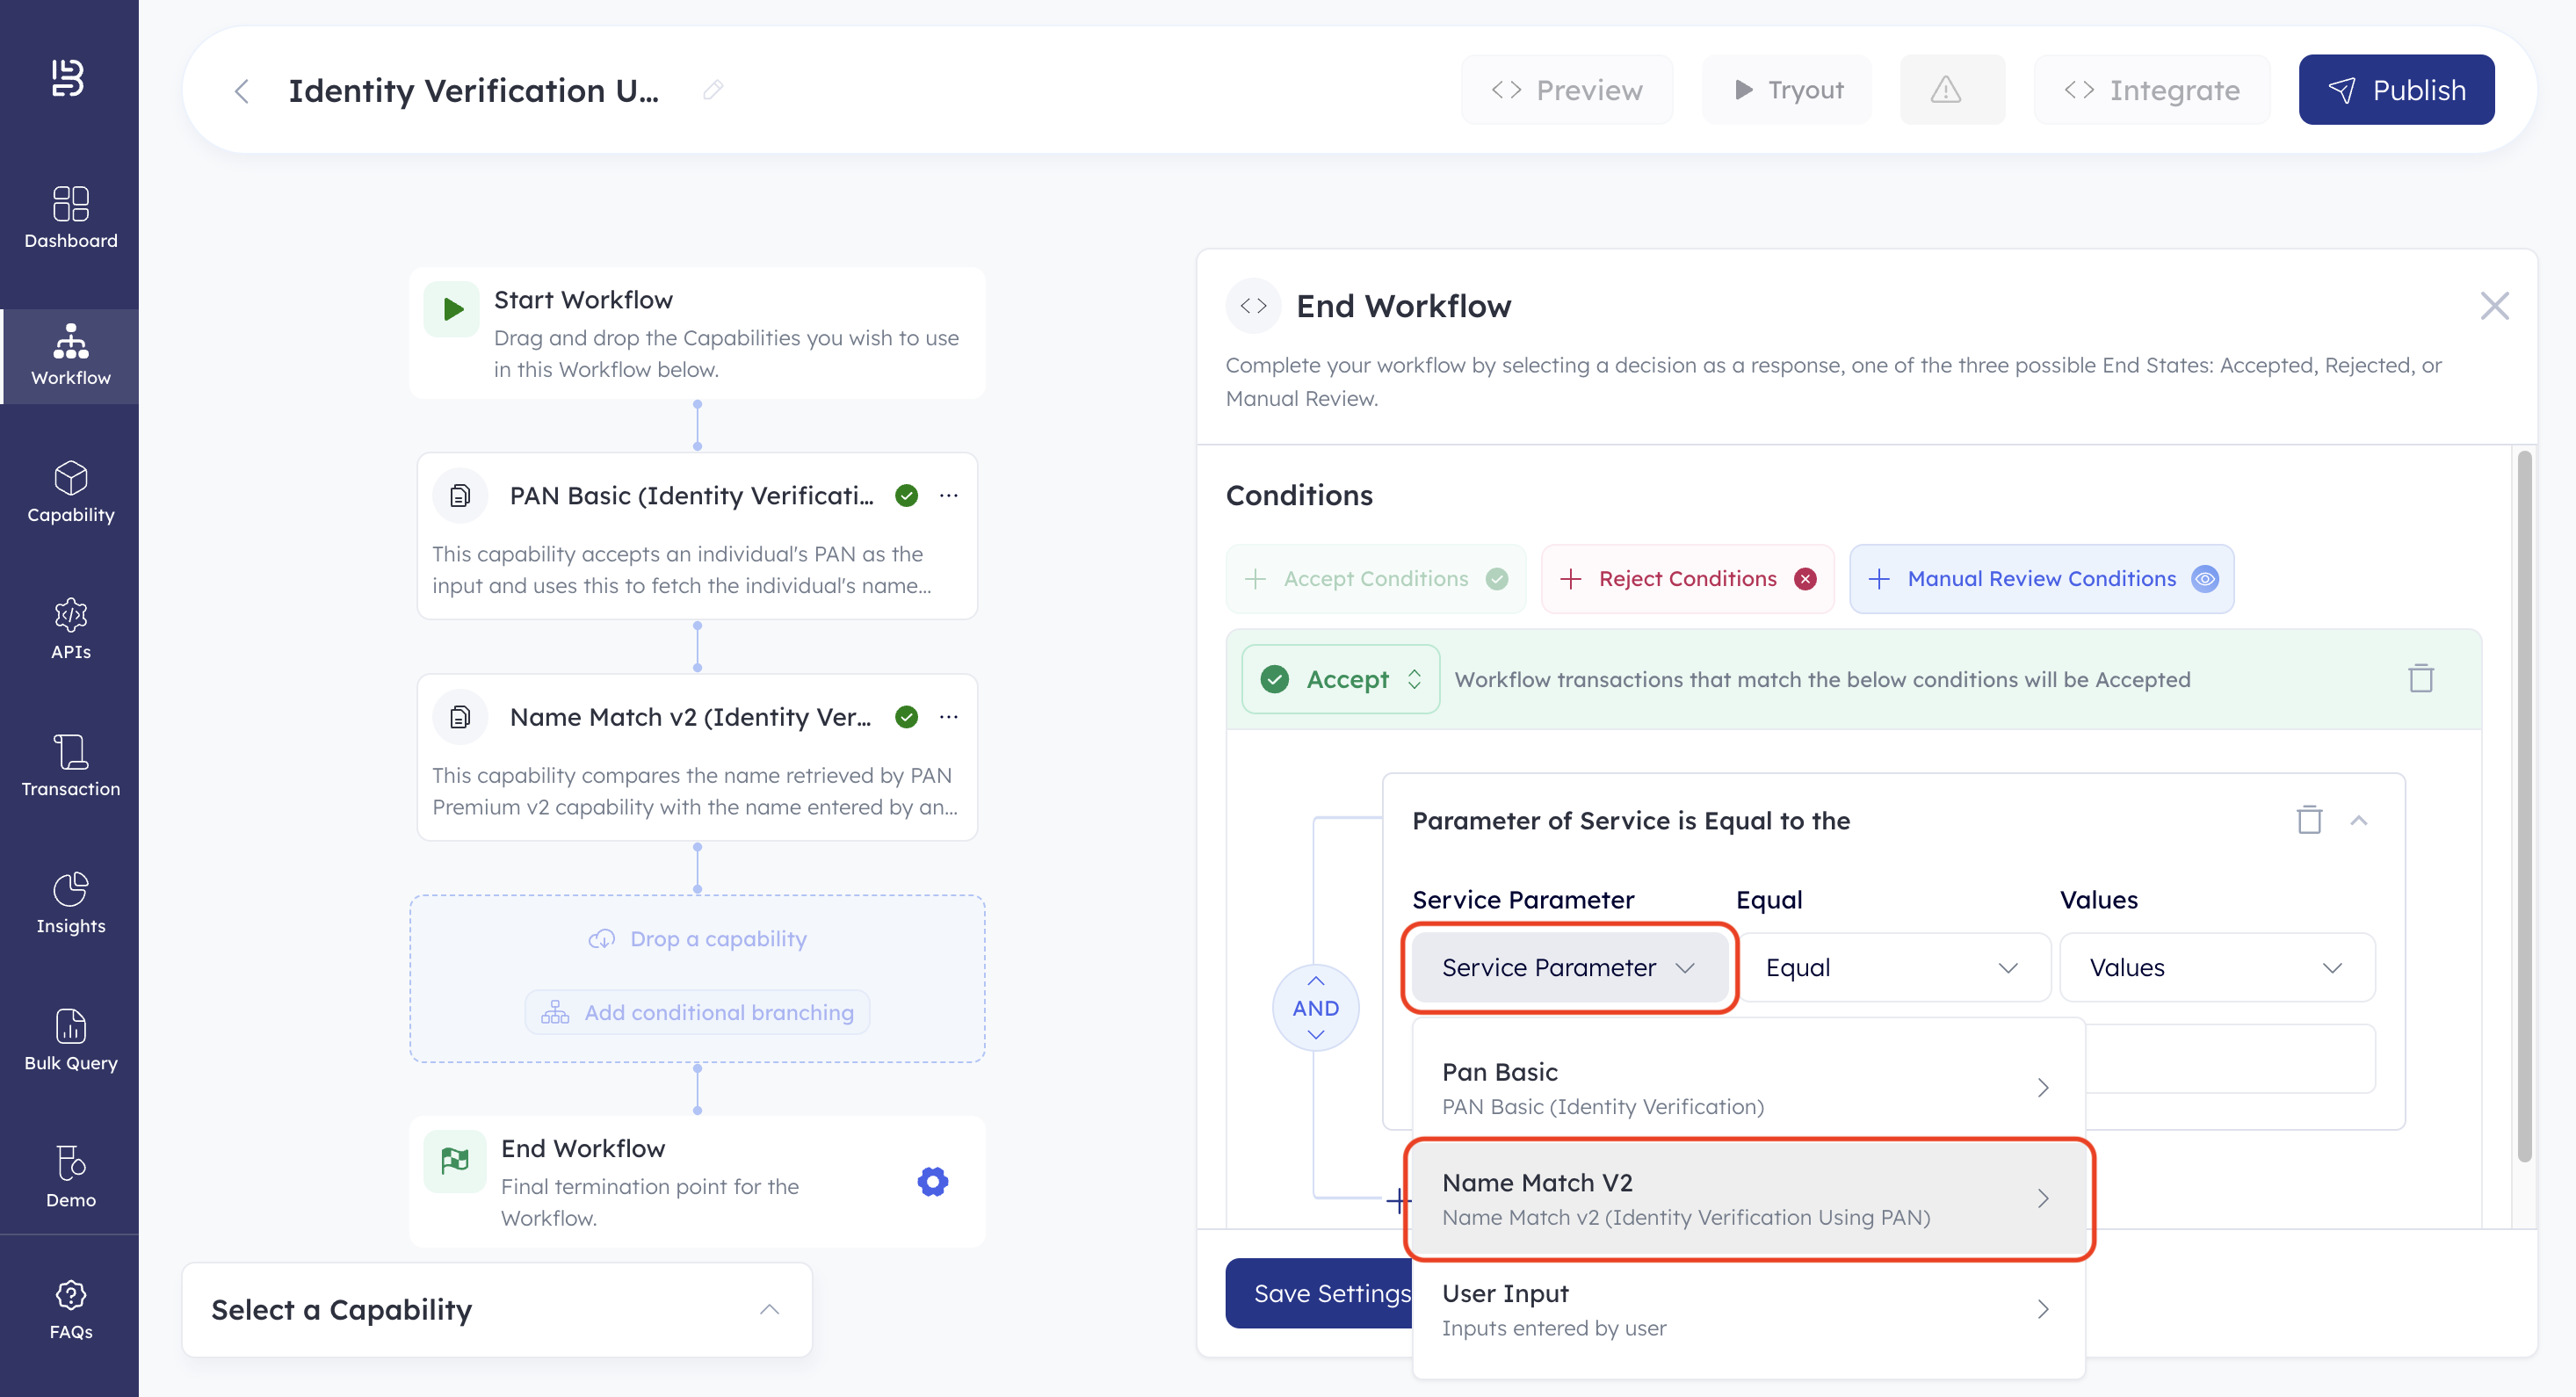
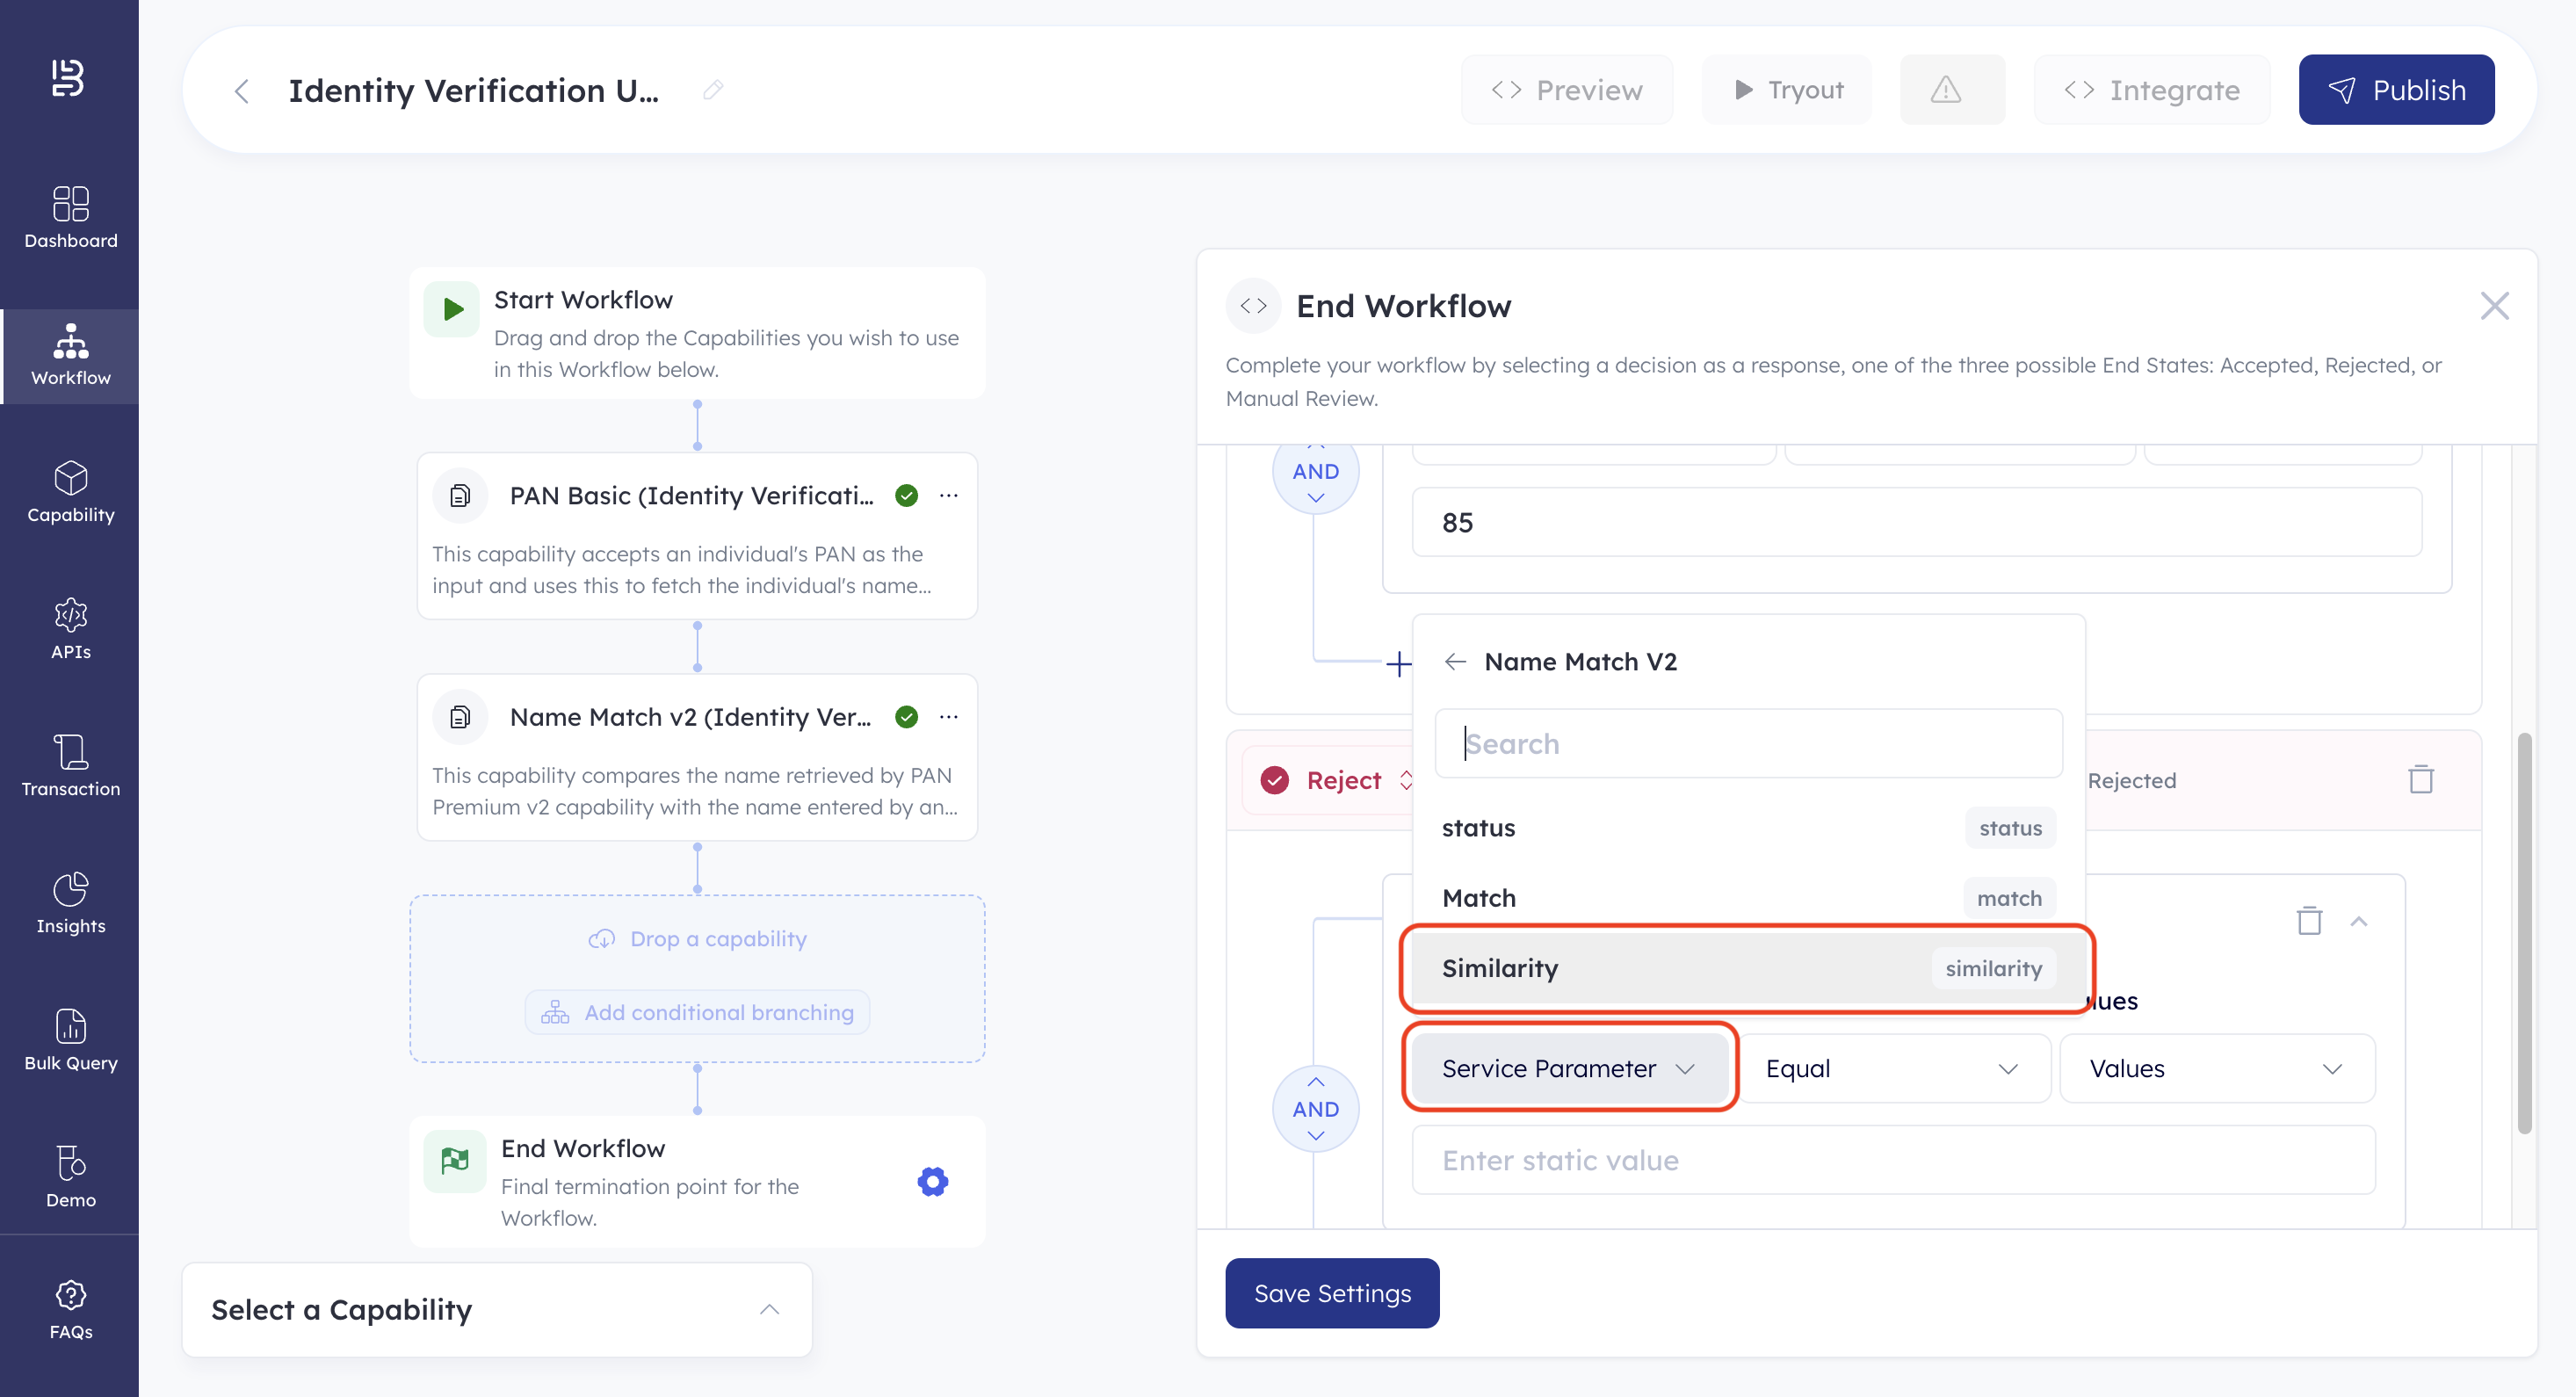
- Click the first dropdown on the left. This lets you select the capability to define the end conditions.
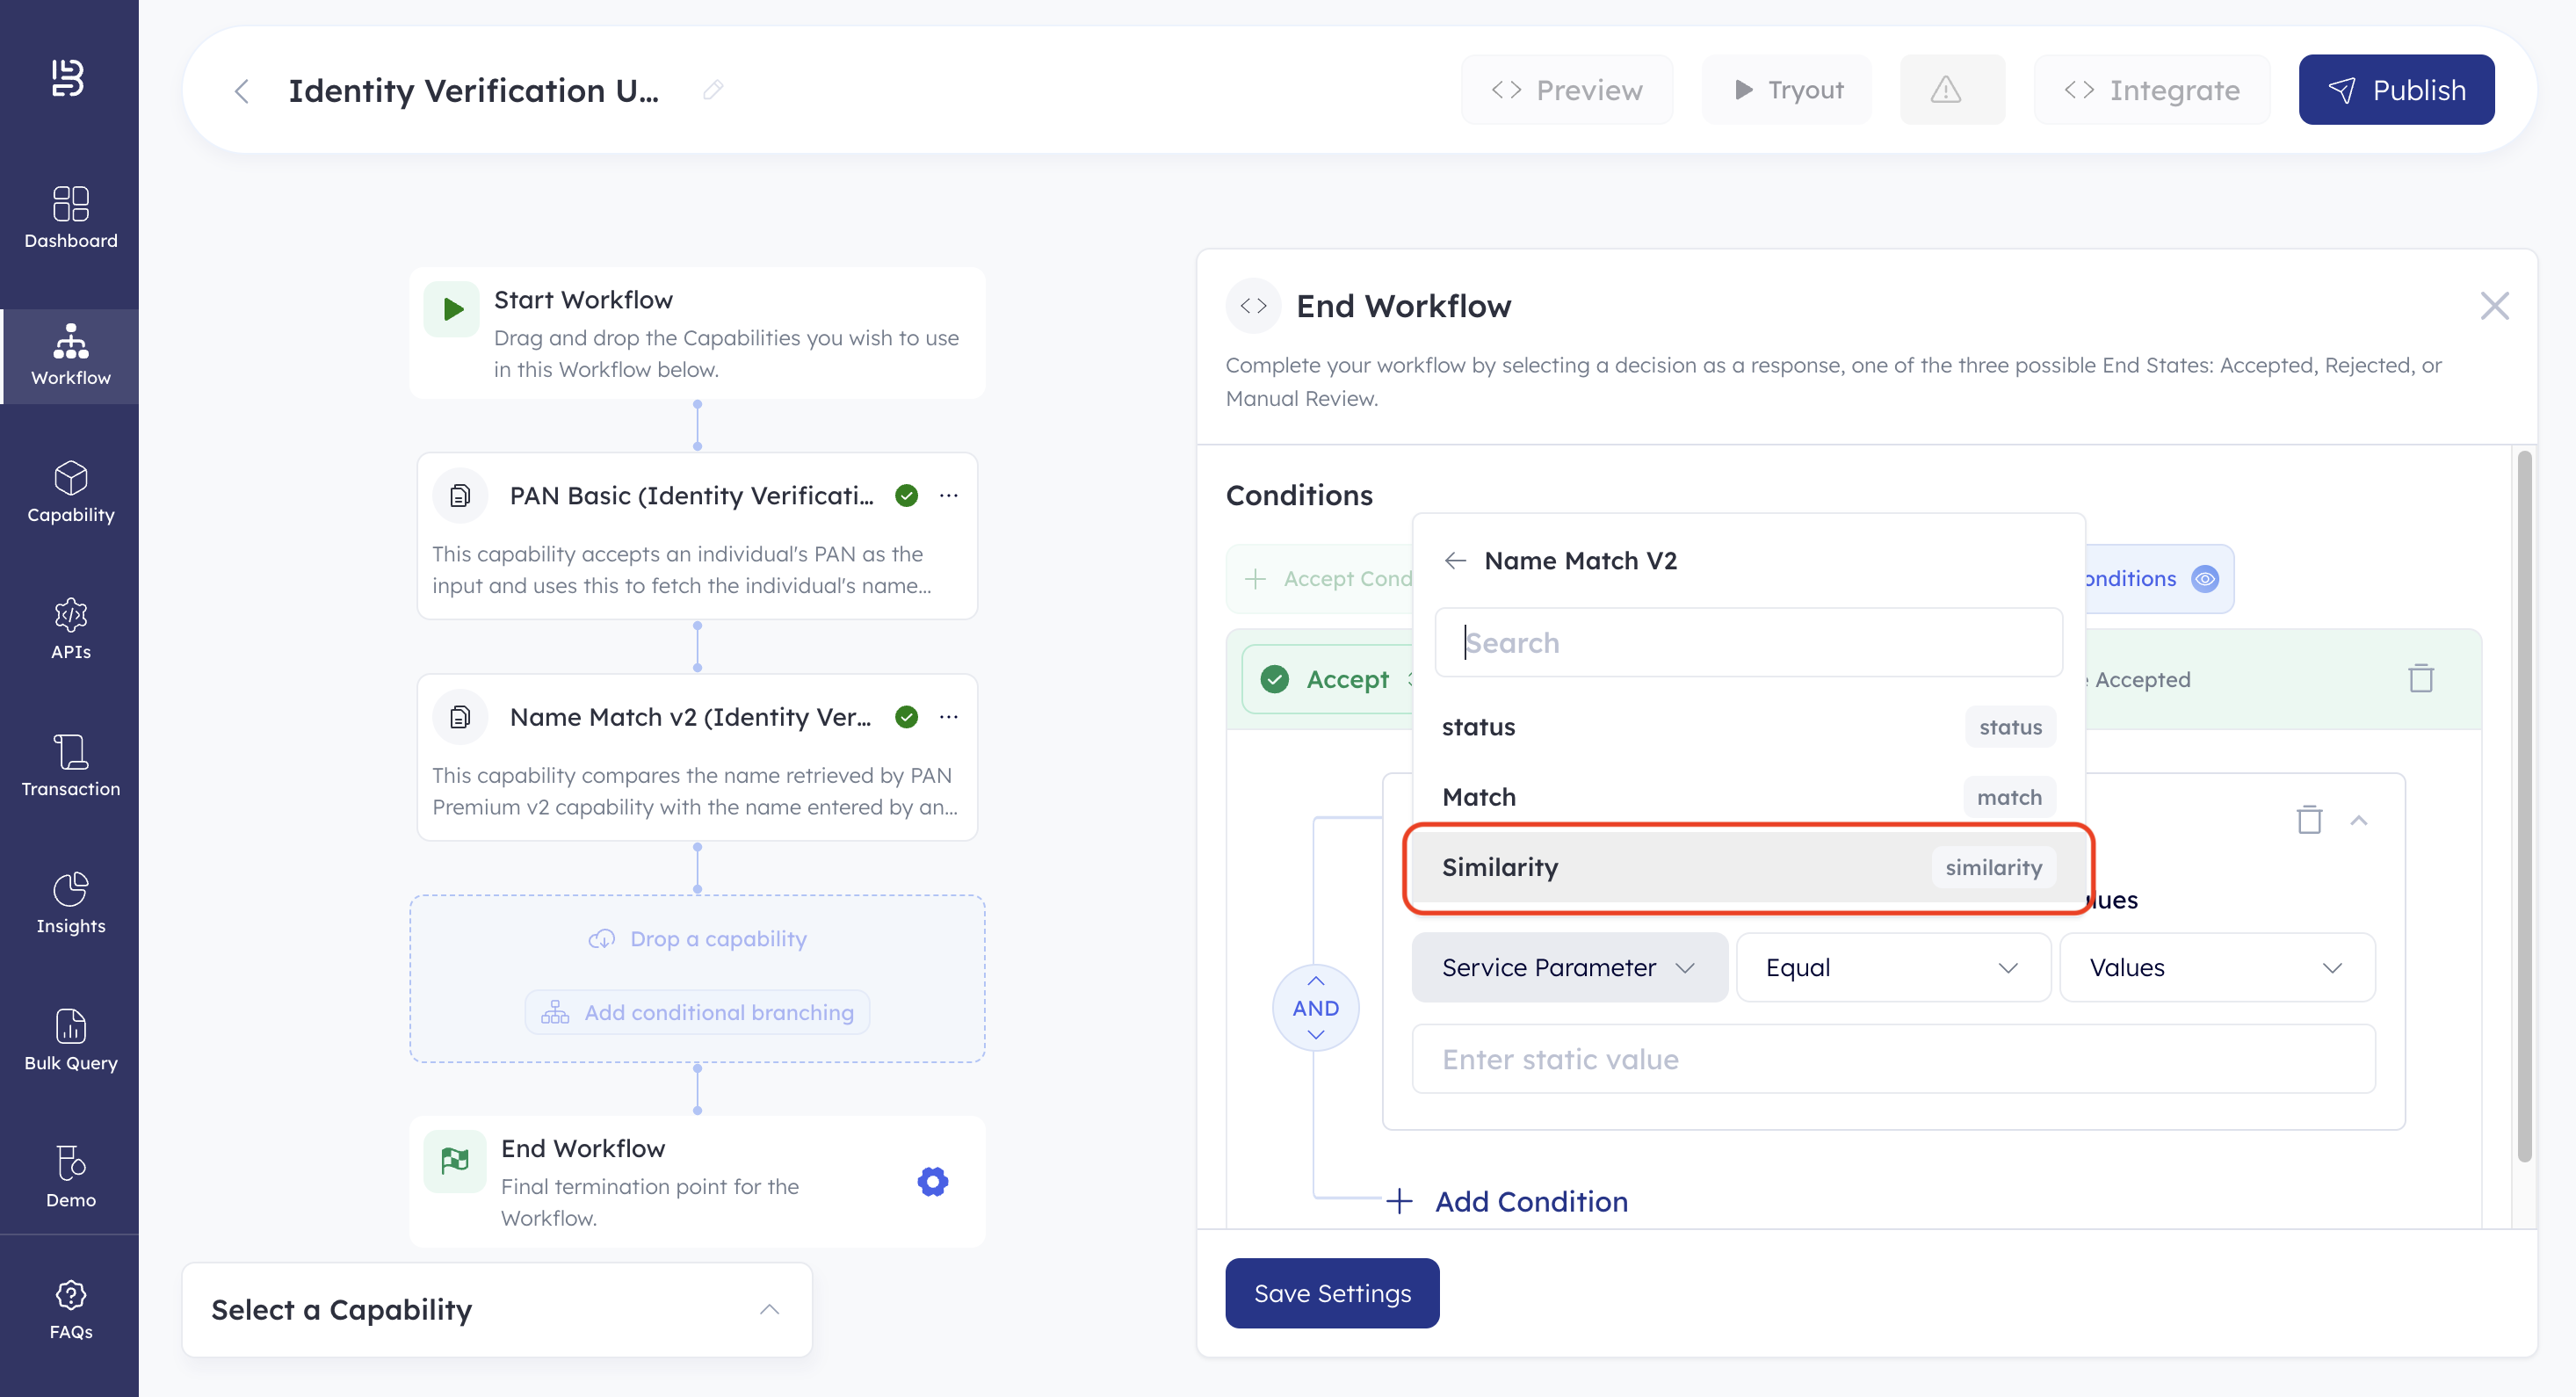
- Select Name Match V2. This shows you a list of all parameters that can be used to define end conditions.
- Select Similarity. This is the parameter used to define end conditions.
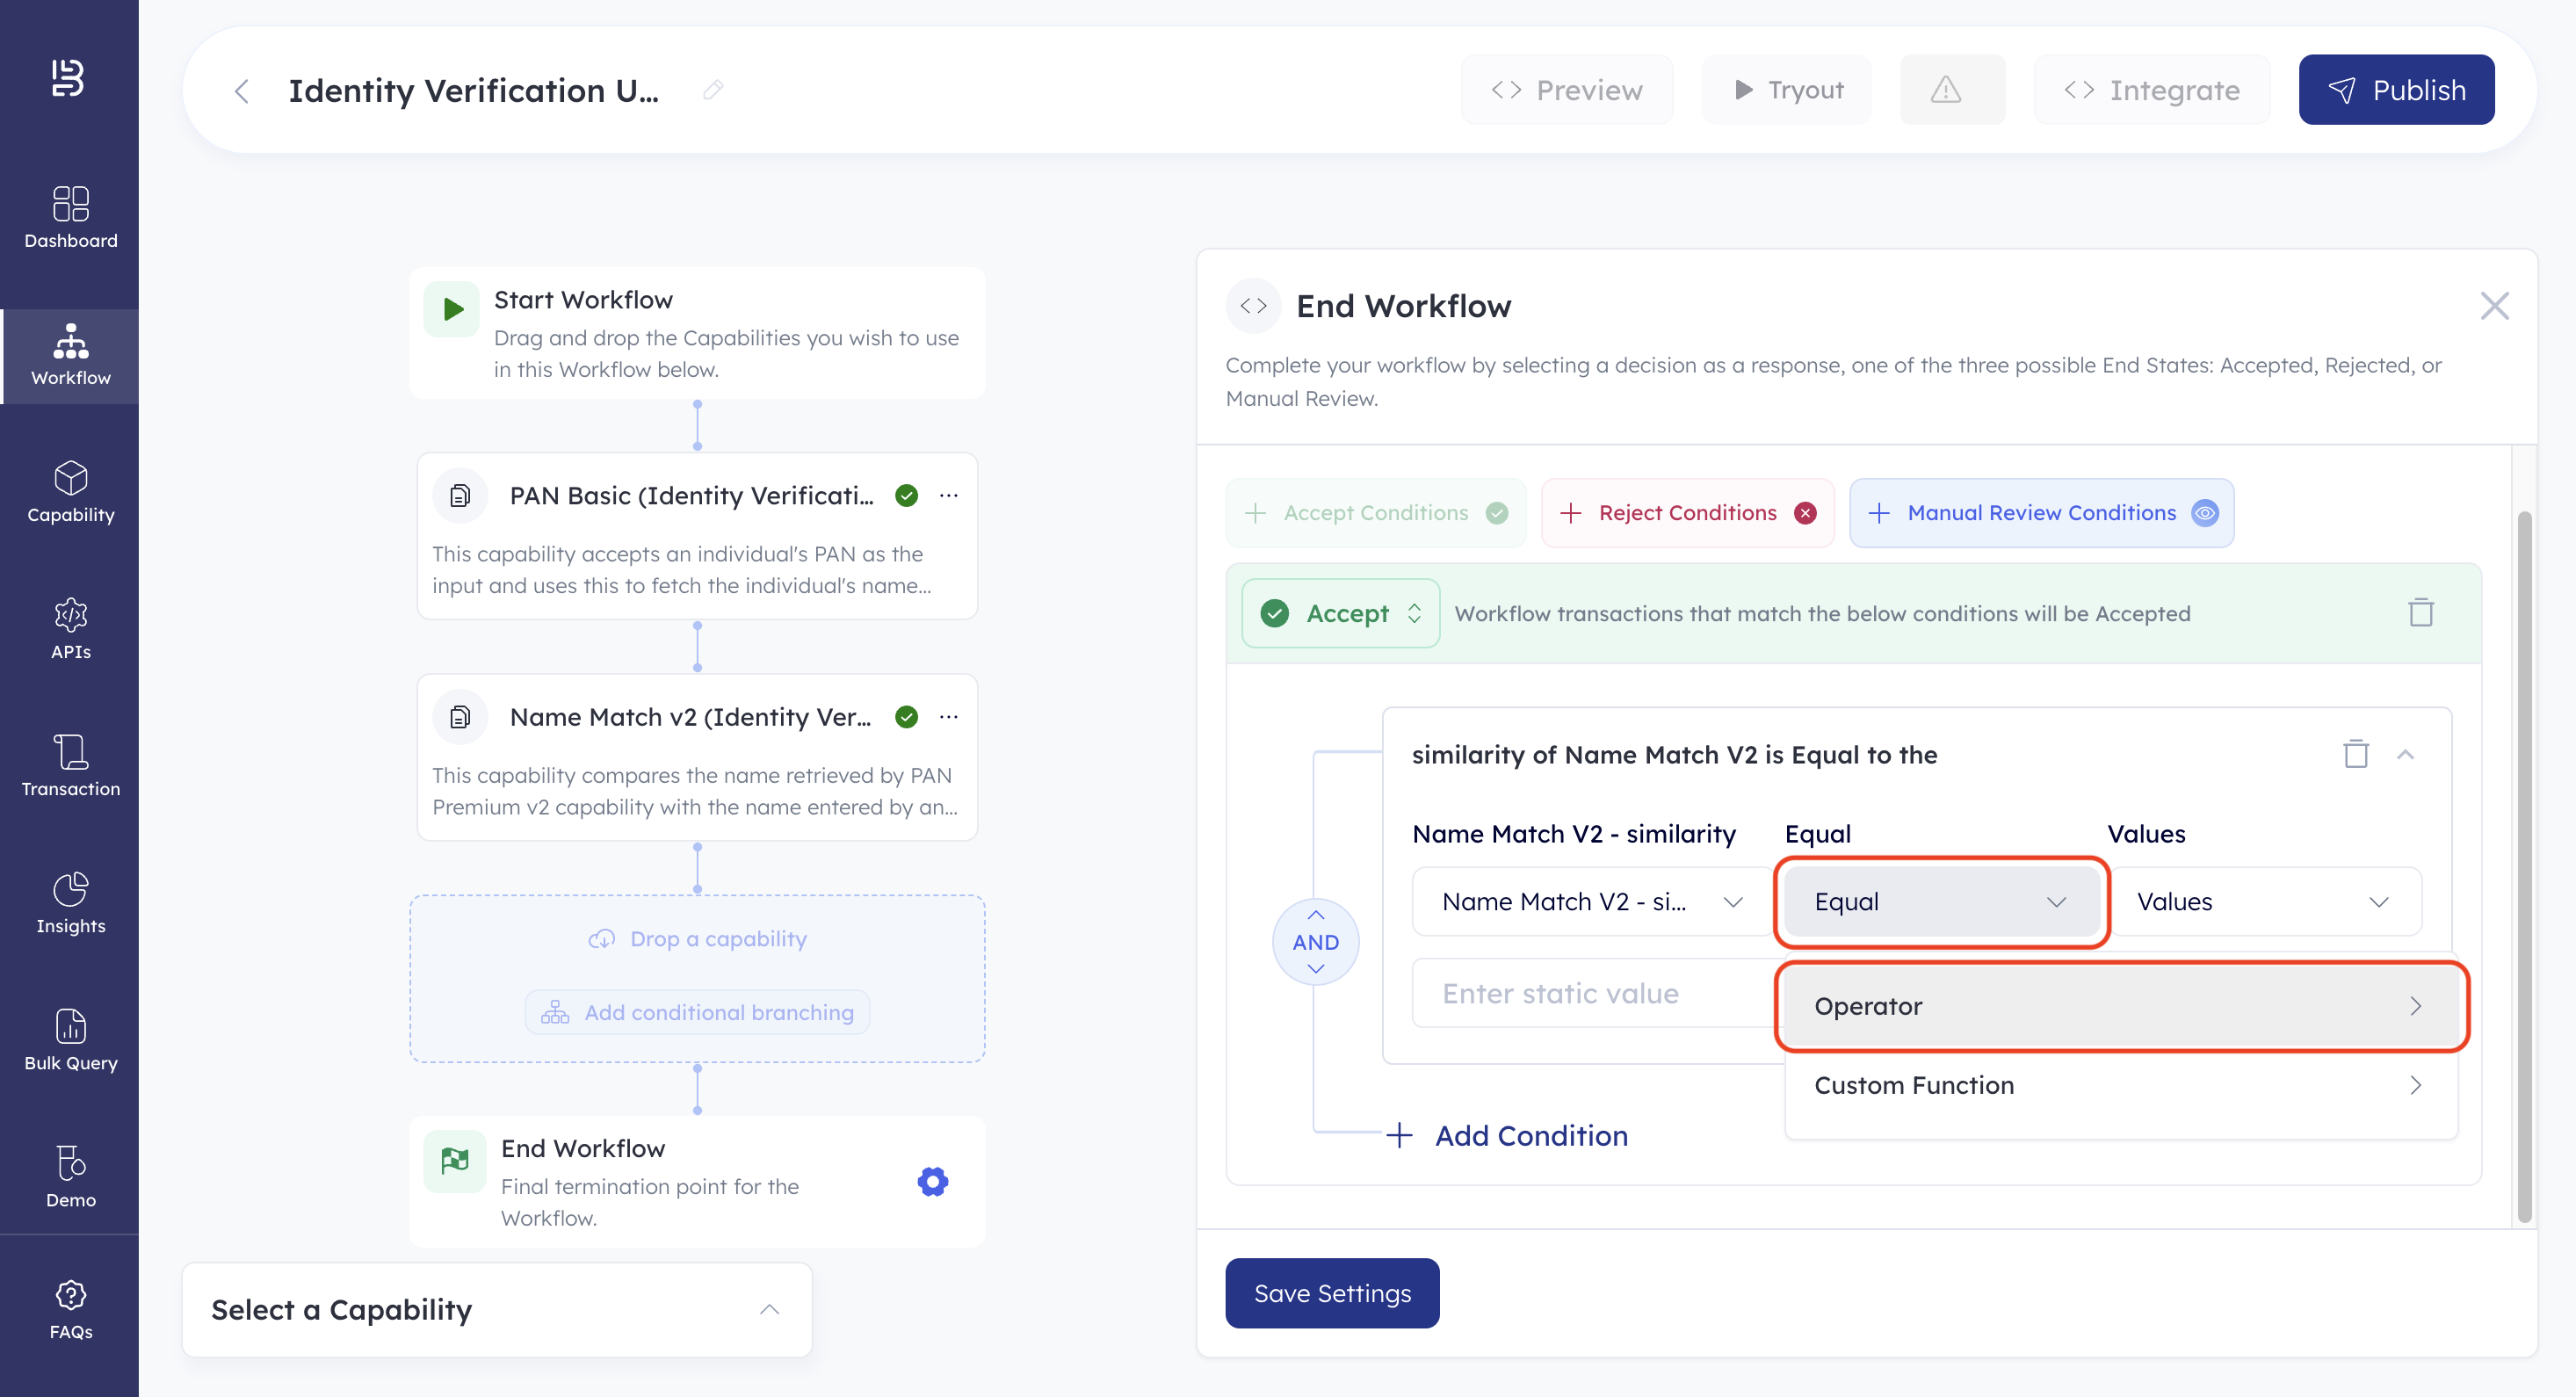
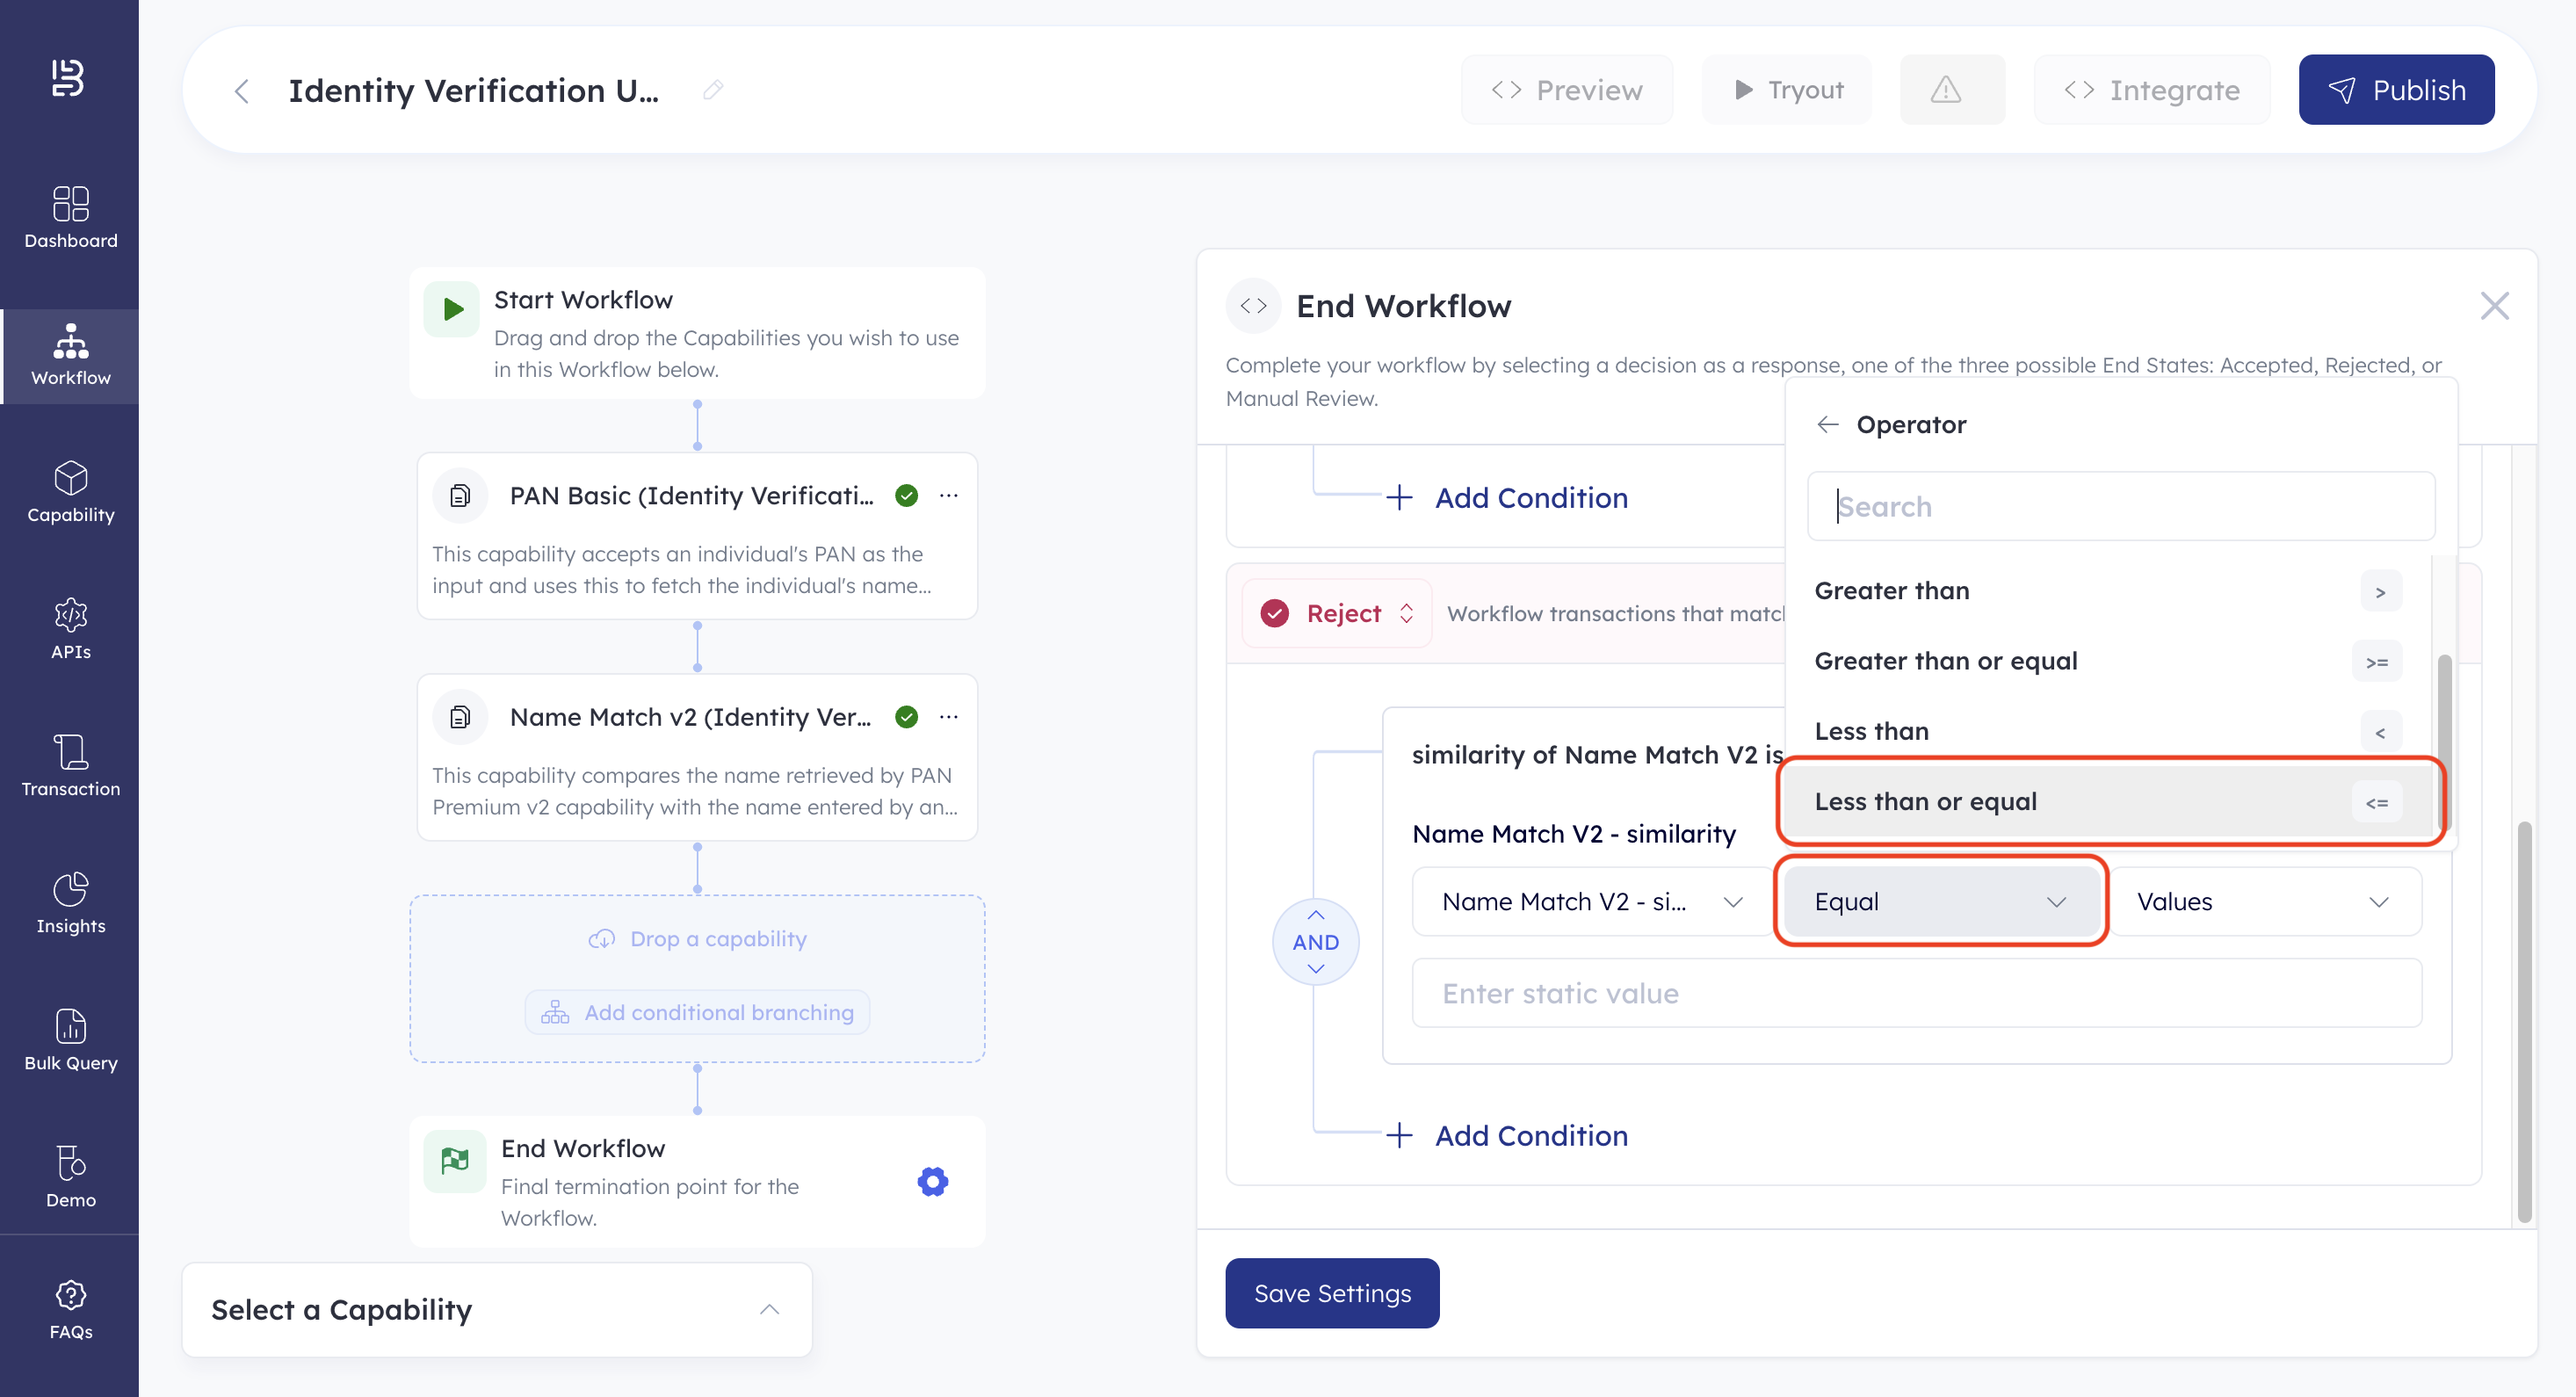
- Click the middle dropdown. This lets you select the logical condition to define end conditions.
- Select Operator.
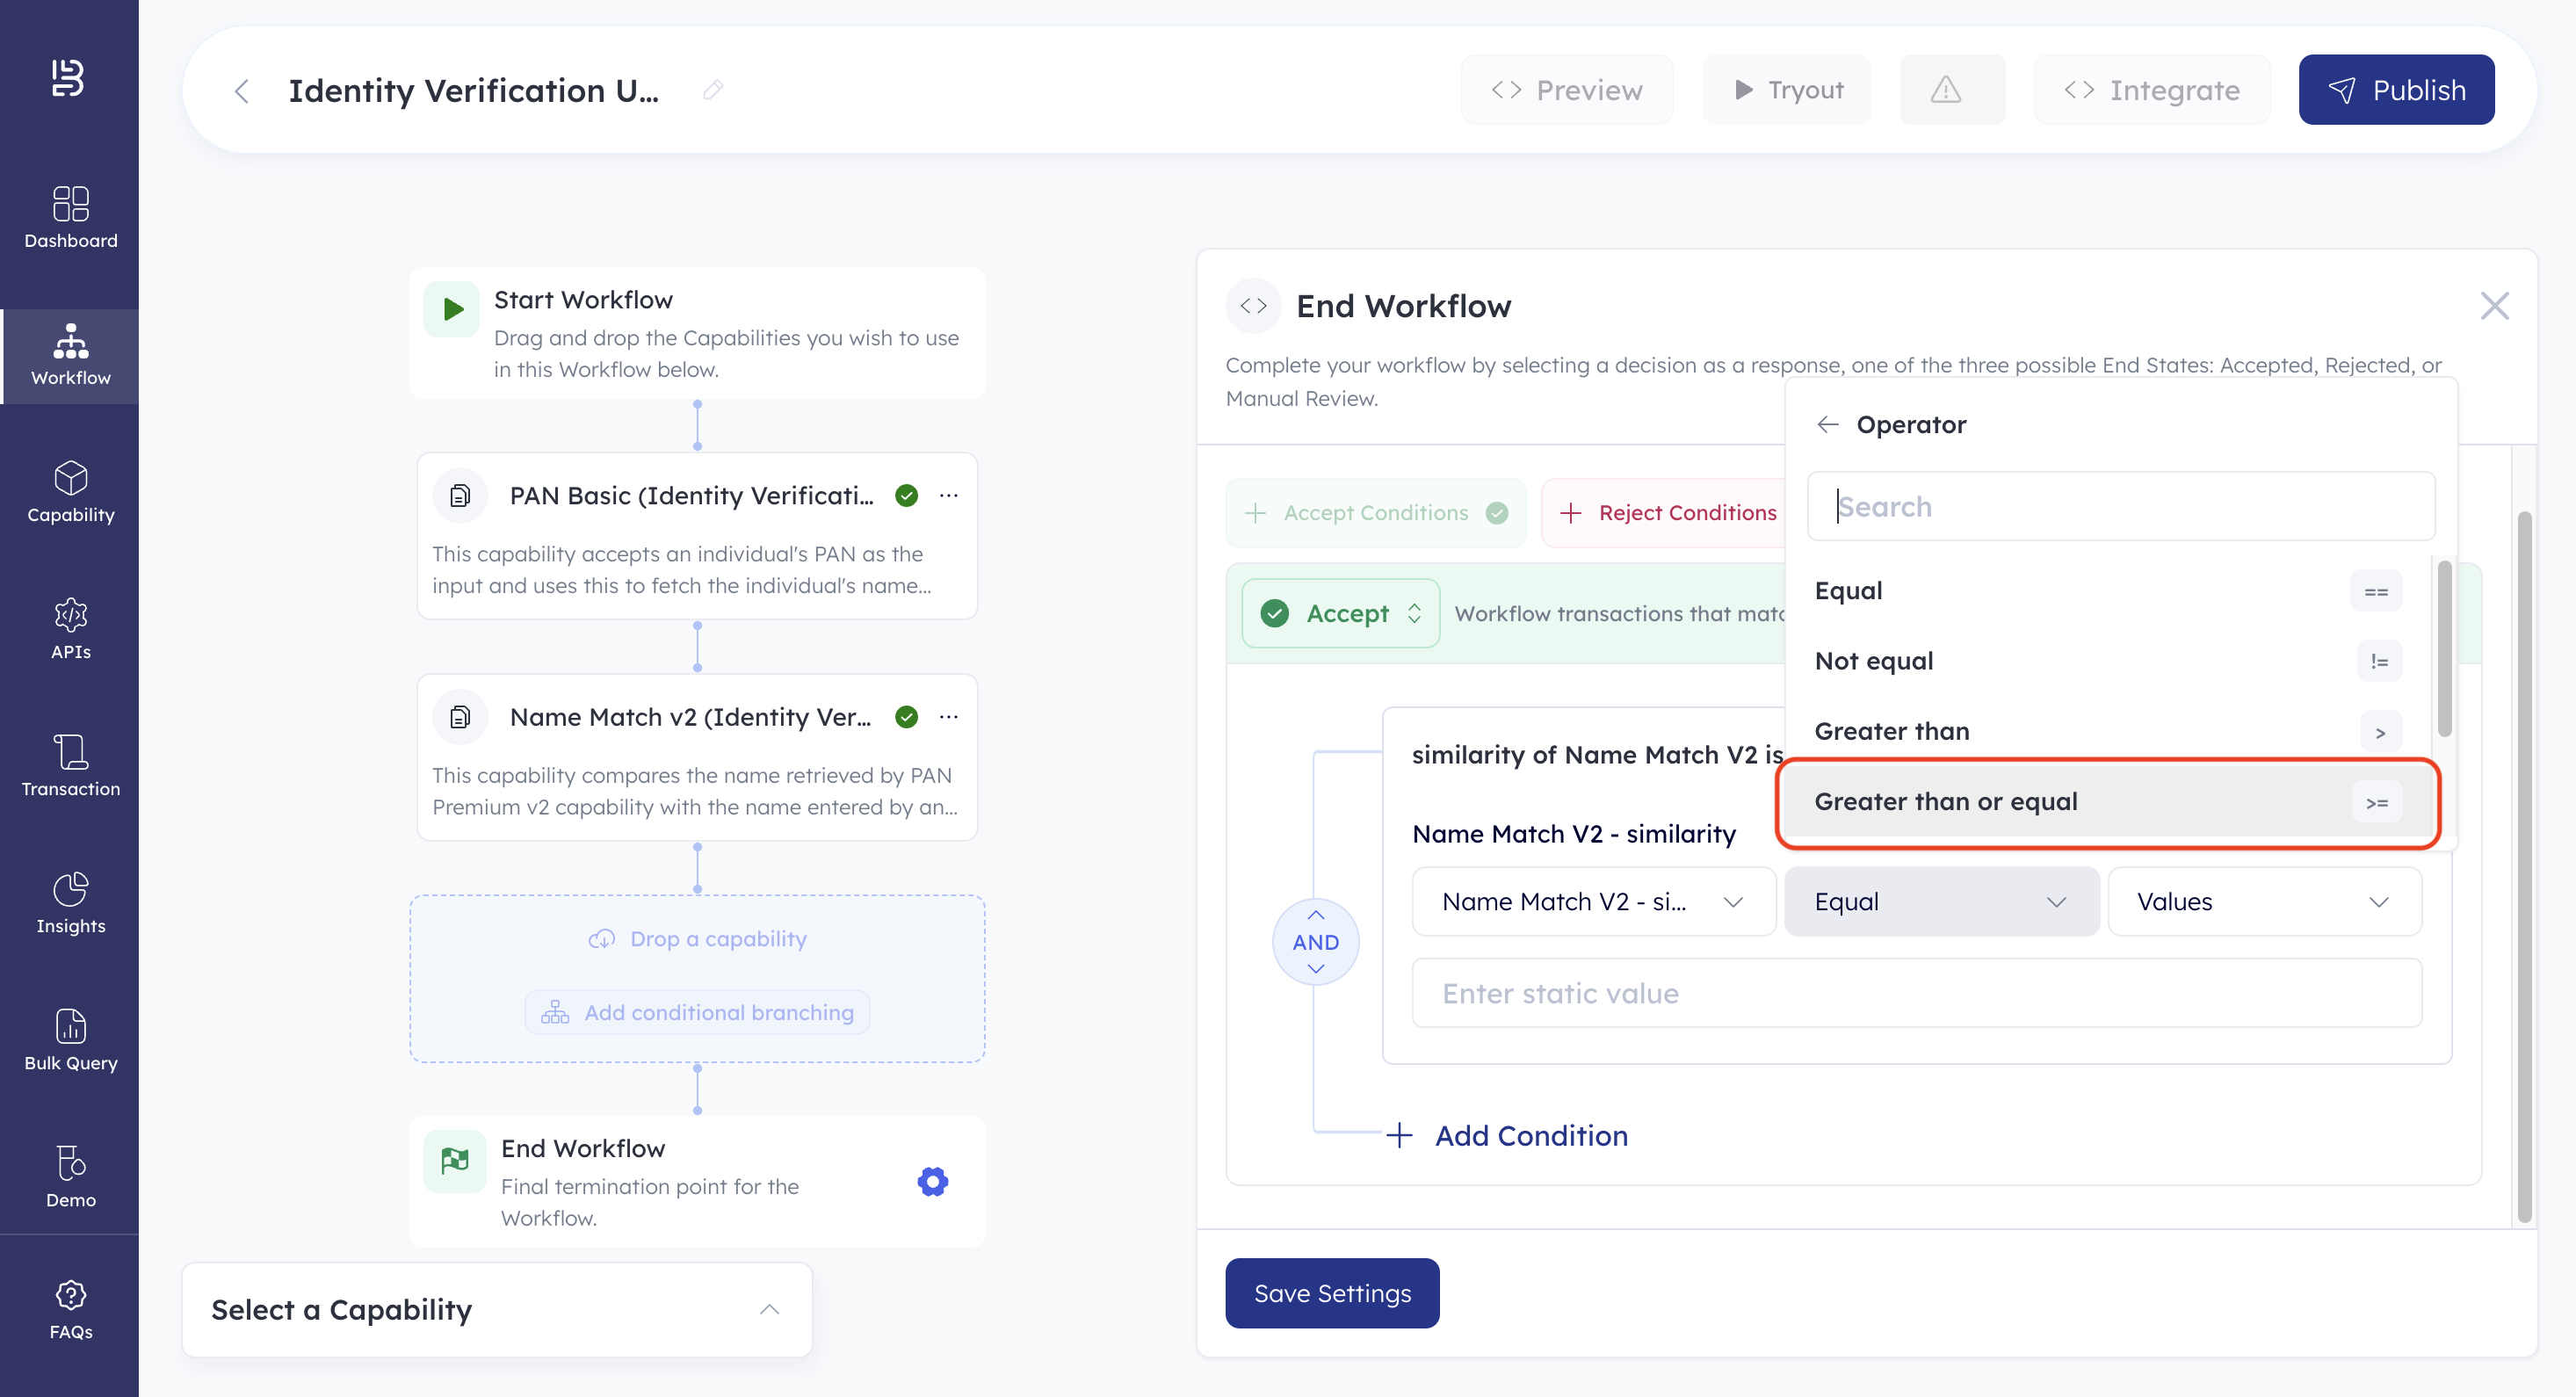
- Select the Greater than or equal logical operator.
- Click the right-most dropdown. This lets you select the value to define end conditions.
- Select Static Value.
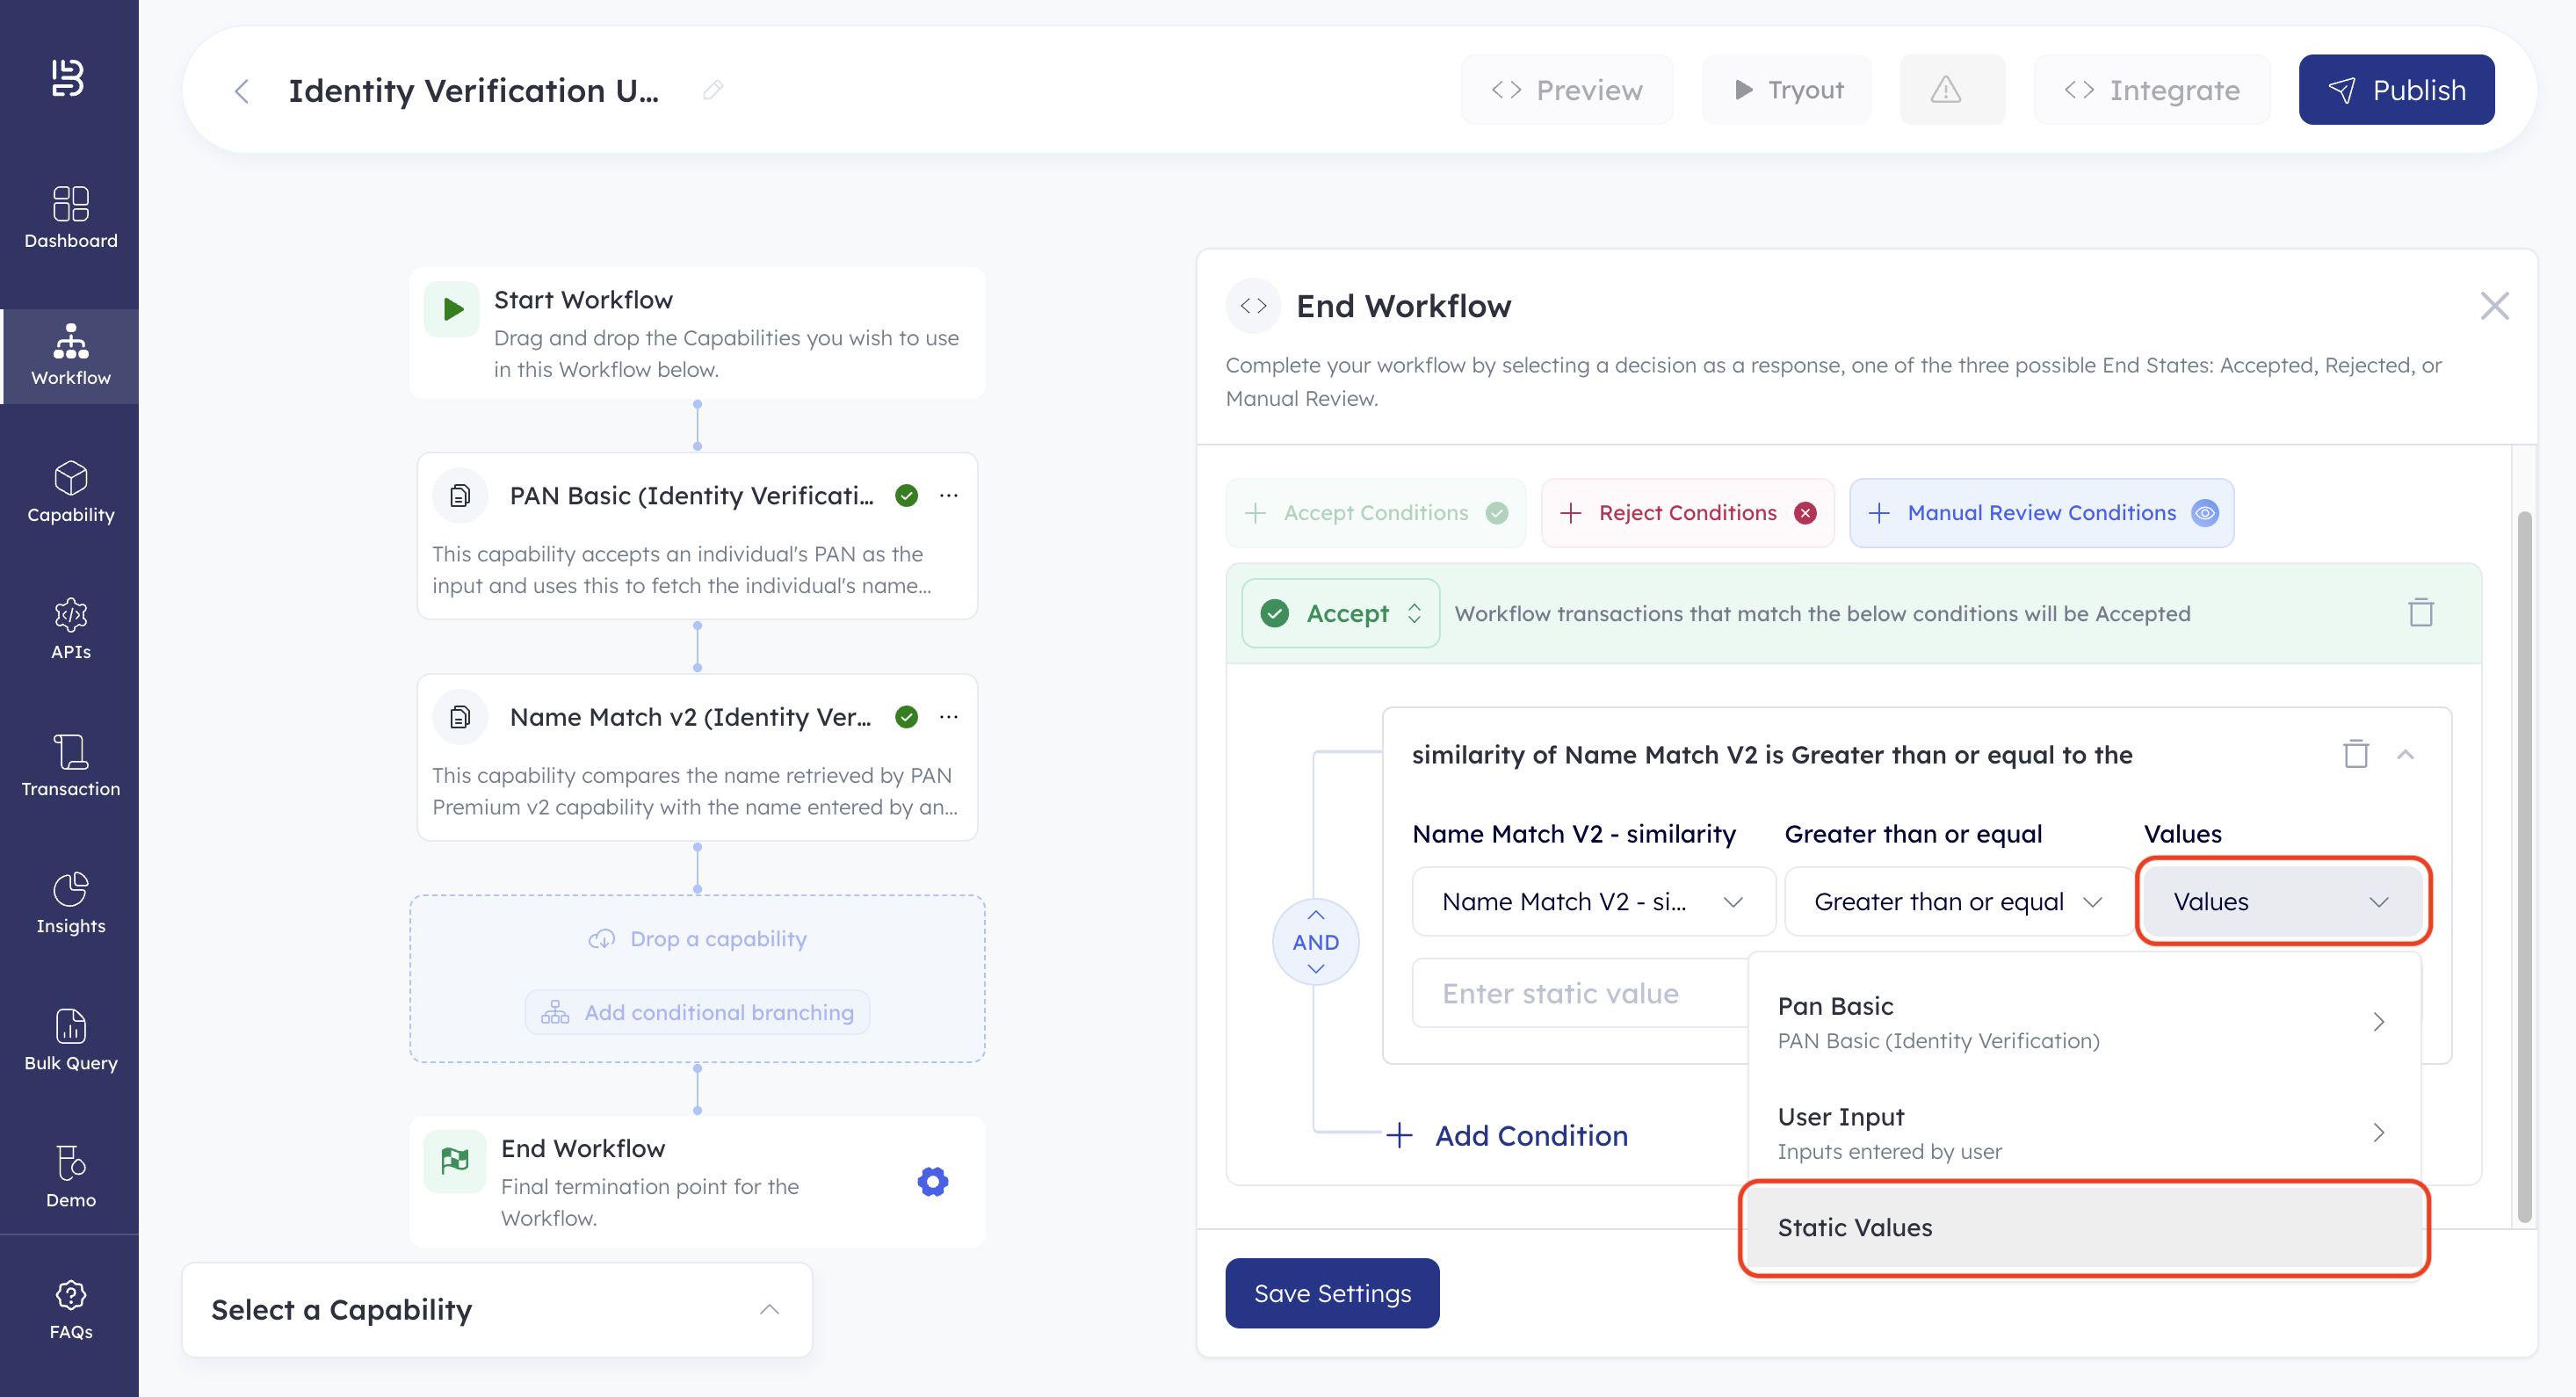
- Enter 85 as the static value in the field below the dropdowns. This defines the accept condition as a name similarity score greater than or equal to 85.
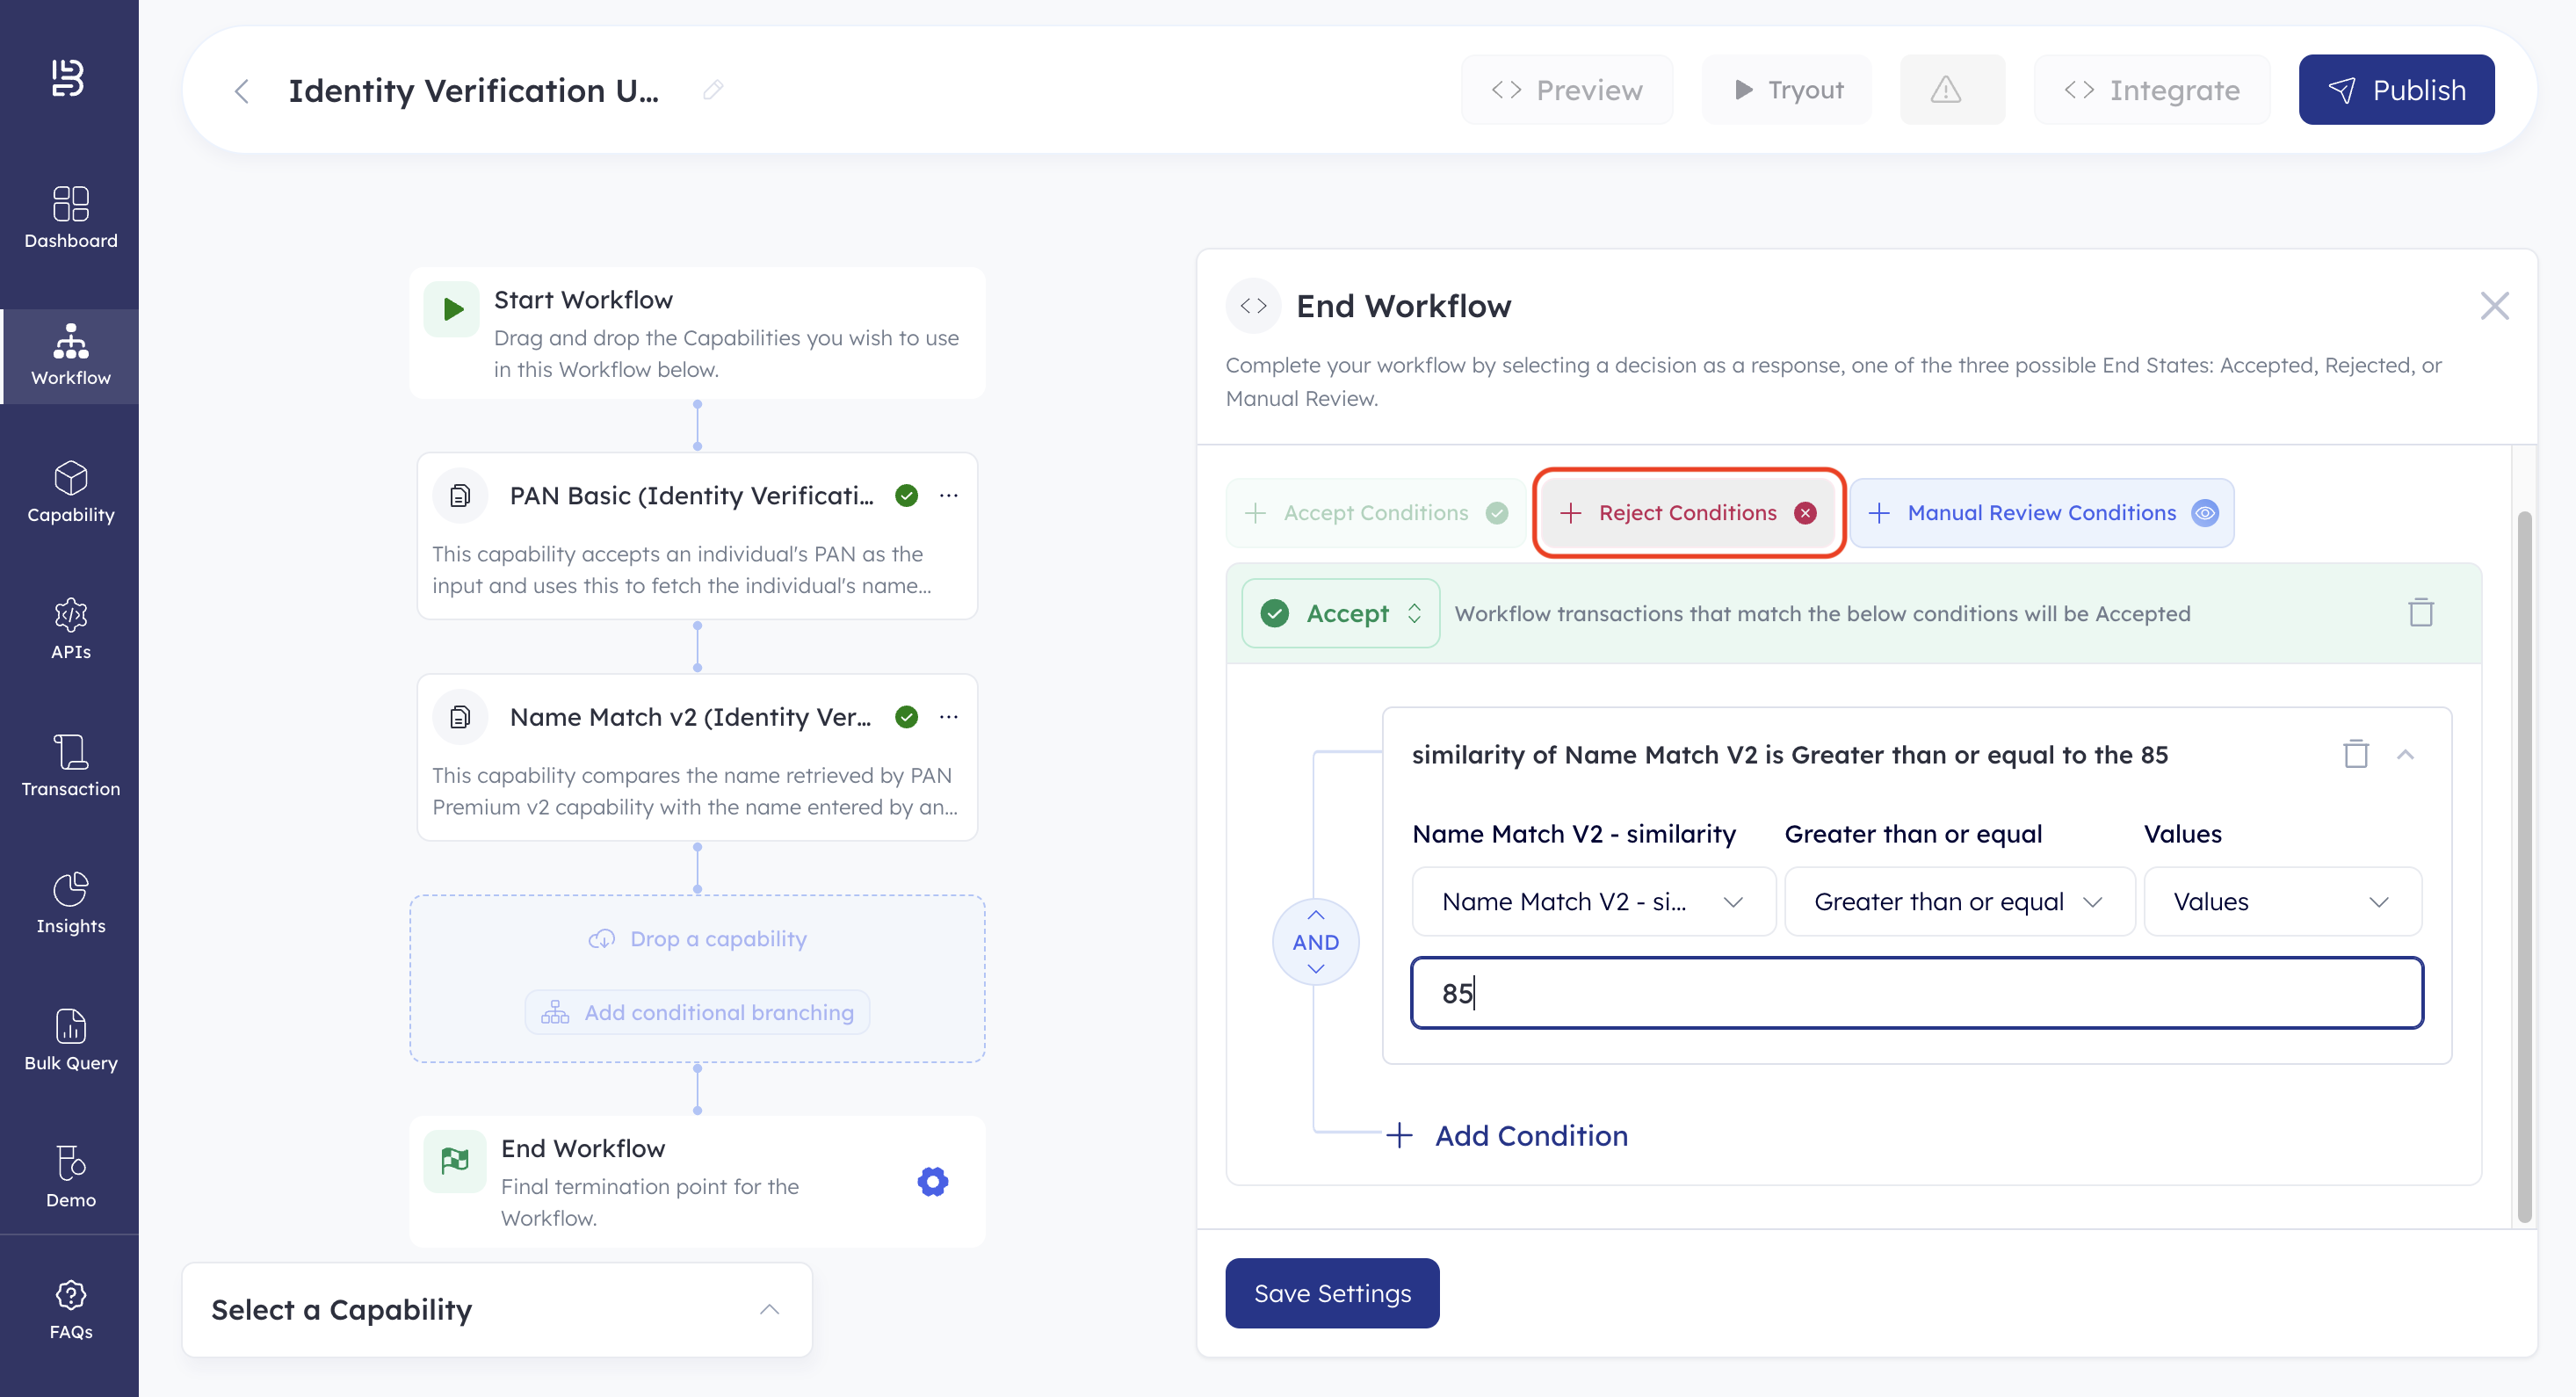
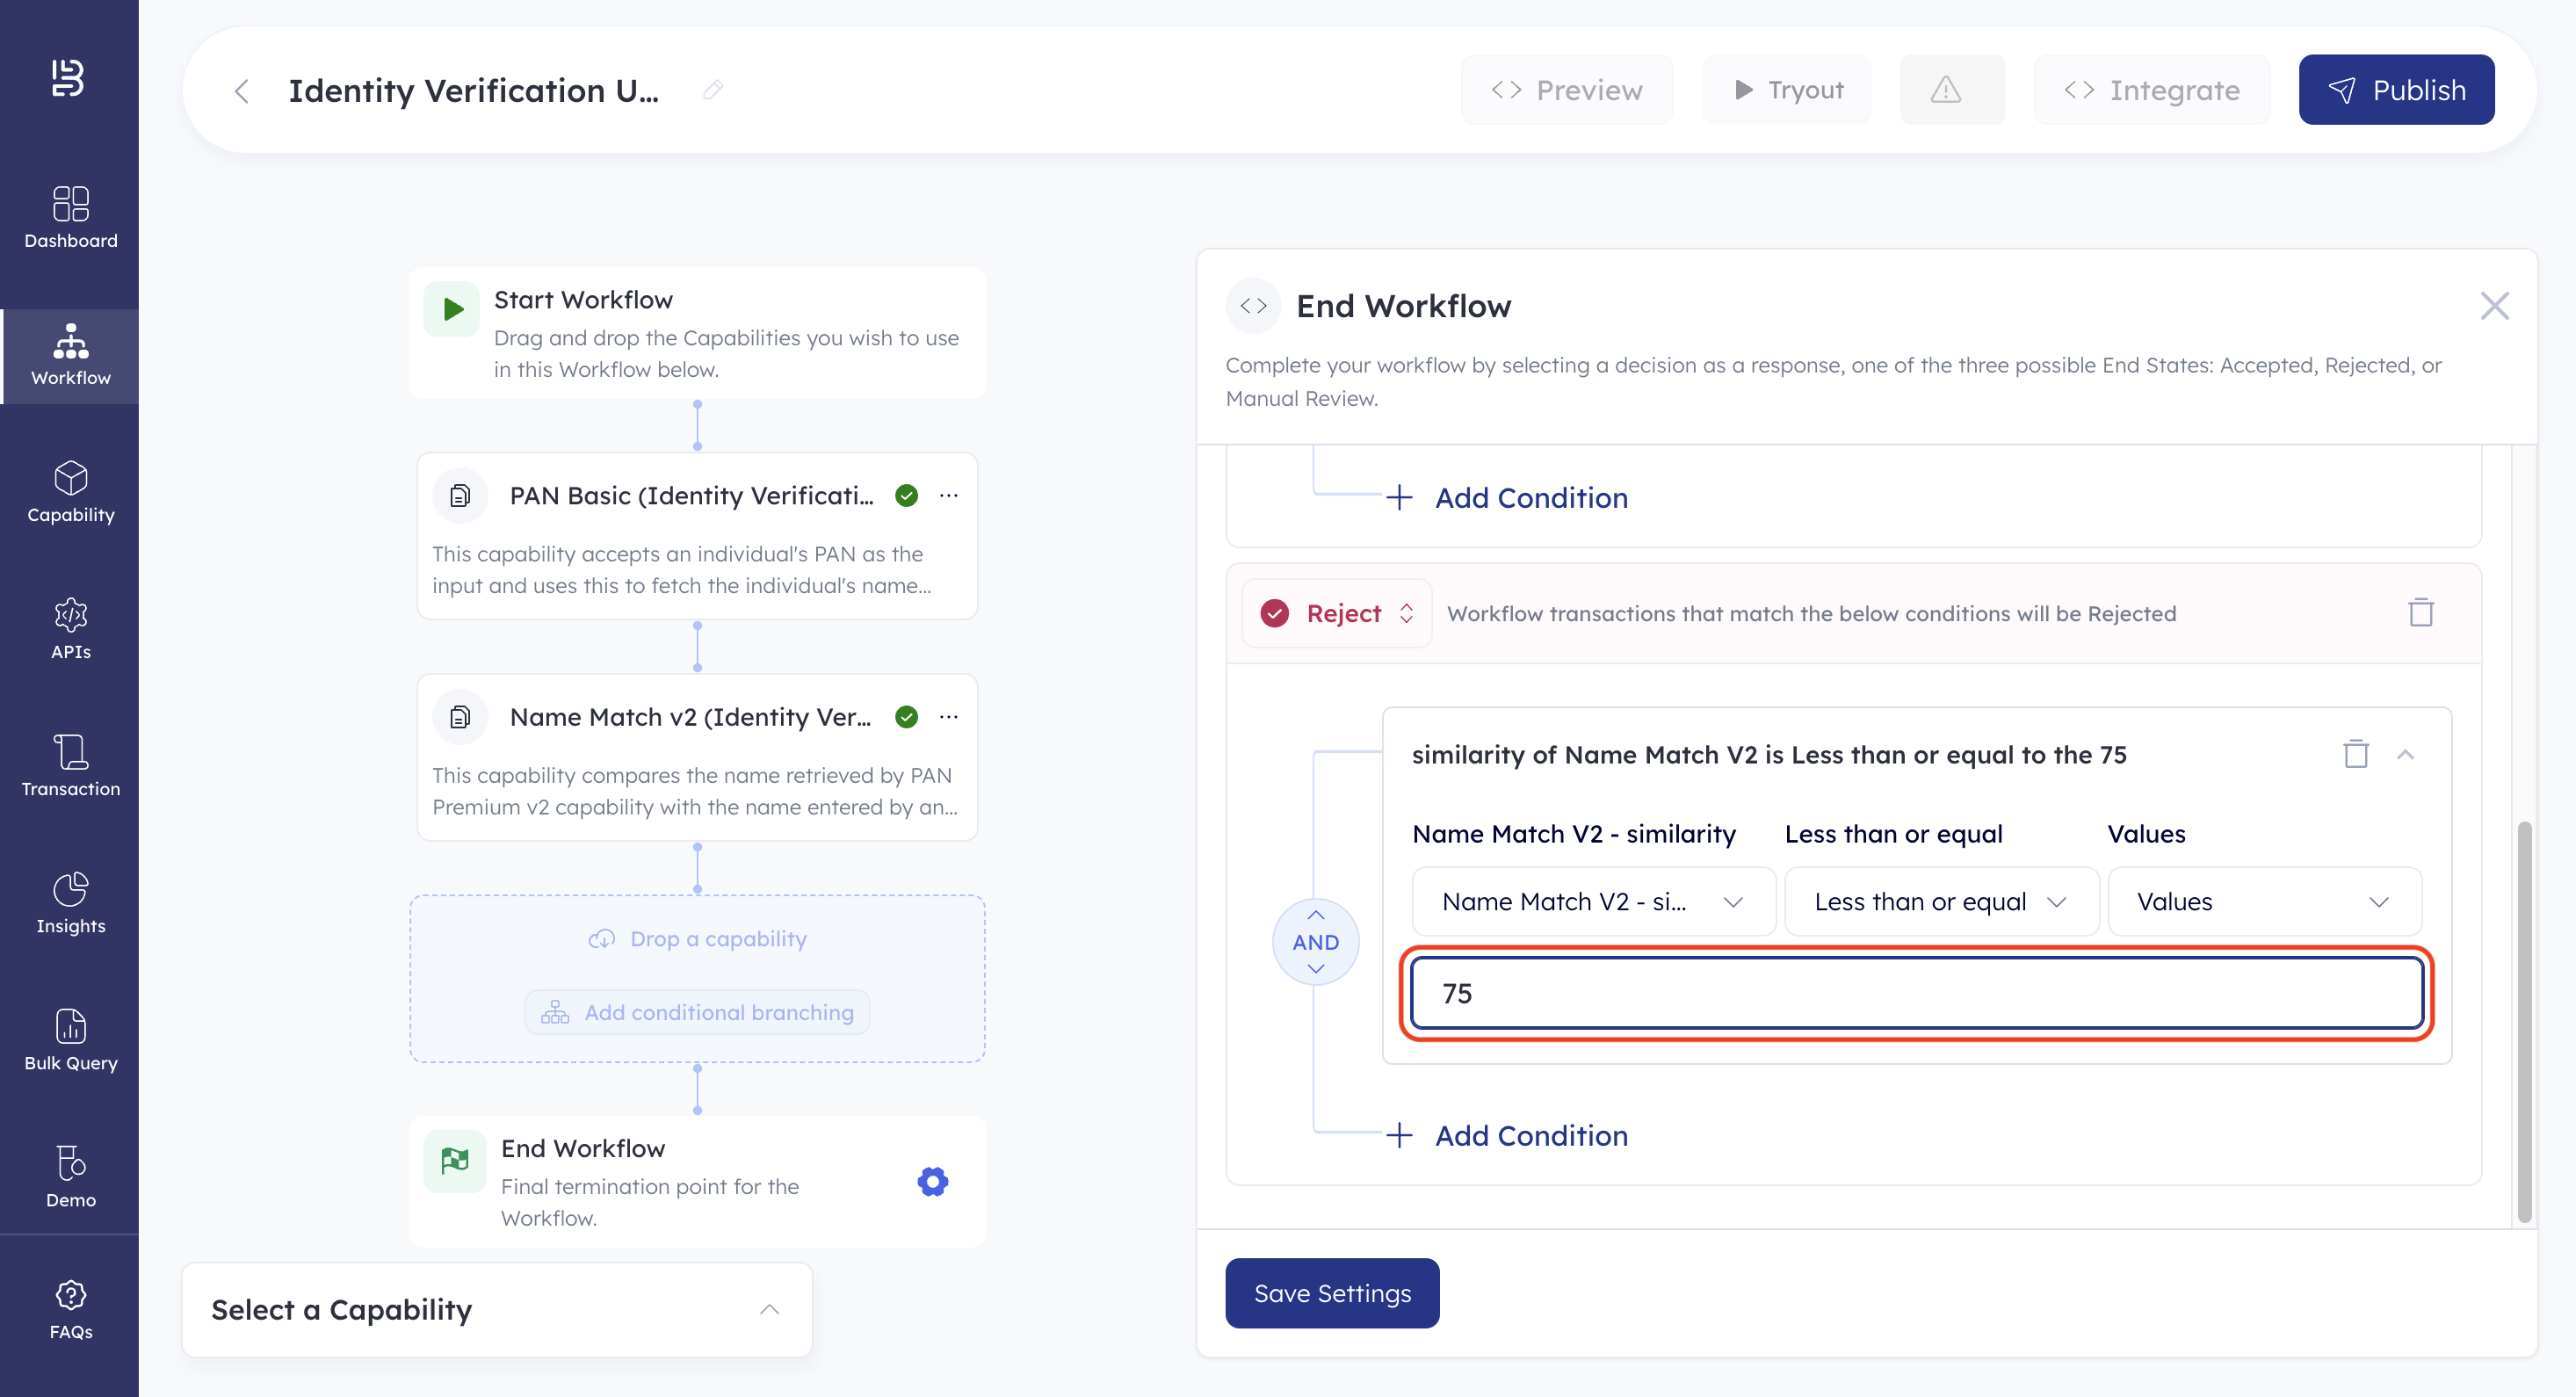
- Click + Reject Condition to define the reject conditions. Let us define the reject condition as a name similarity score lesser than or equal to 75.
- Click the condition dropdown.
- Click the first dropdown on the left. This lets you select the capability to define the end conditions.
- Select Name Match V2. This shows you a list of all parameters that can be used to define end conditions.
- Select Similarity. This is the parameter used to define end conditions.
- Click the middle dropdown. This lets you select the logical condition to define end conditions.
- Select Operator.
- Select the Less than or equal logical operator.
- Click the right-most dropdown. This lets you select the value to define end conditions.
- Select Static Value.
- Enter 75 as the static value in the field below the dropdowns. This defines the reject condition as a name similarity score less than or equal to 75.
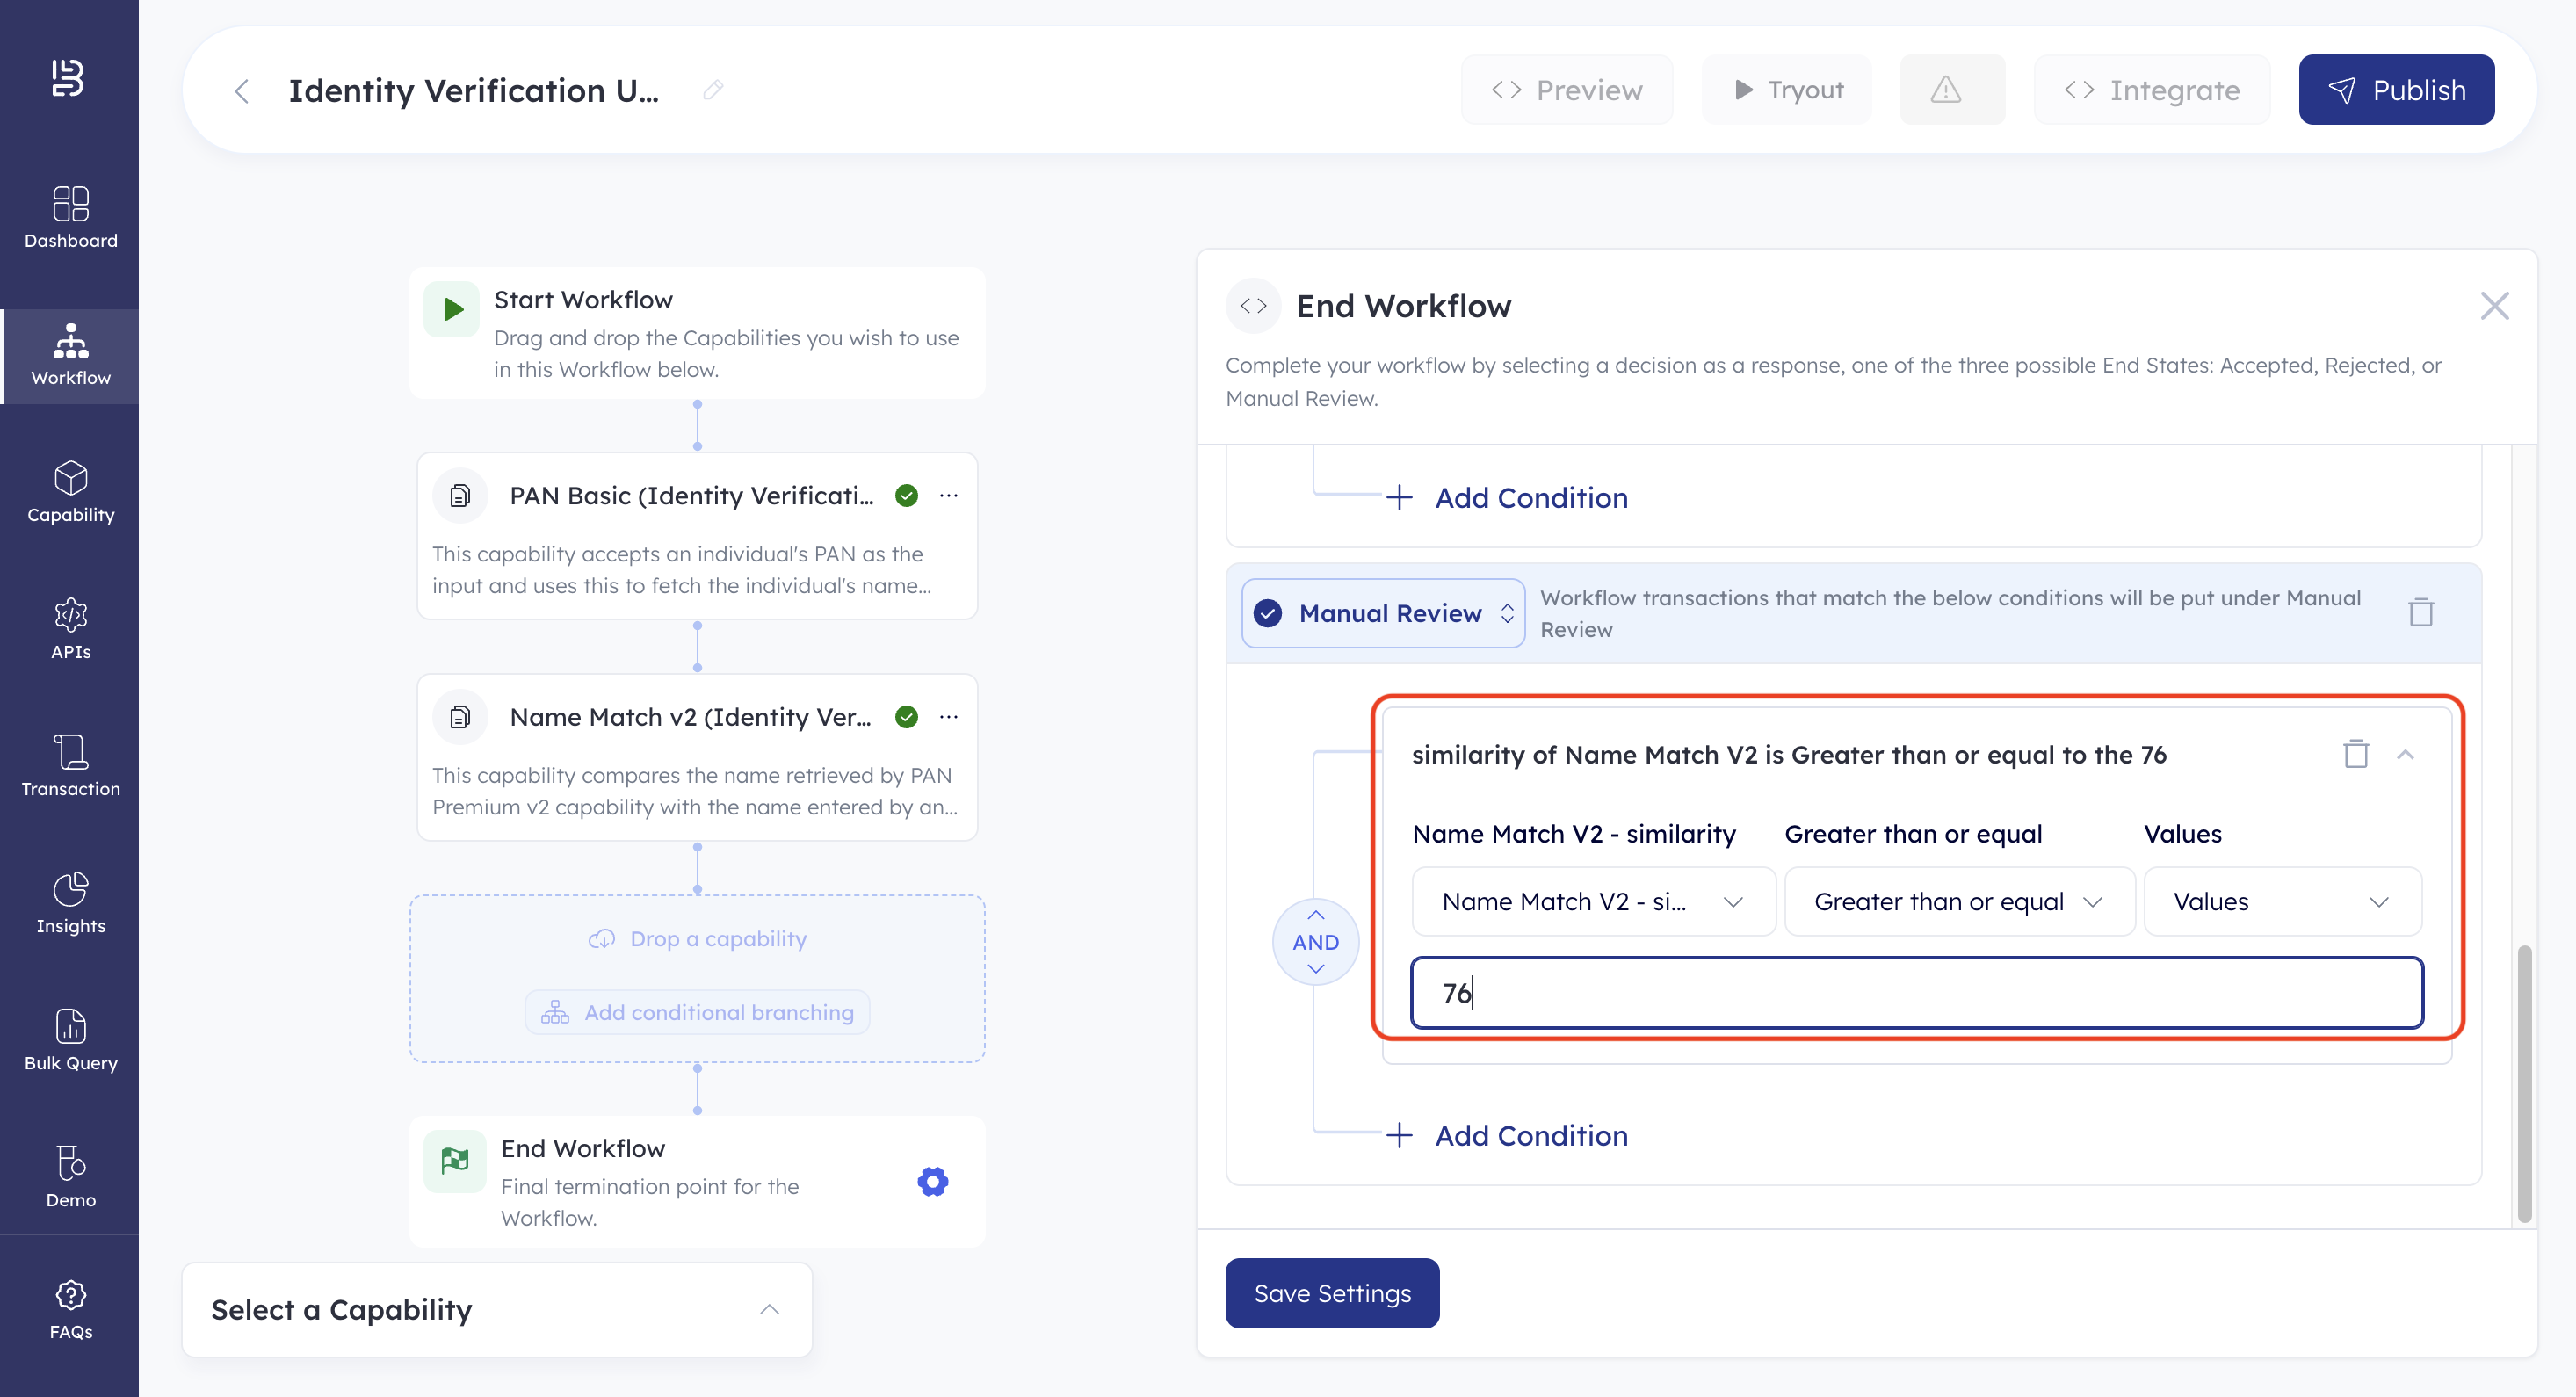
- Click + Manual Review Condition to define the manual review conditions. Let us define the manual review condition as a name similarity score greater than or equal to 76 and less than or equal to 84.

- Click the condition dropdown.
- Click the first dropdown on the left. This lets you select the capability to define the end conditions.
- Select Name Match V2. This shows you a list of all parameters that can be used to define end conditions.
- Select Similarity. This is the parameter used to define end conditions.
- Click the middle dropdown. This lets you select the logical condition to define end conditions.
- Select Operator.
- Select Greater than or equal logical operator.
- Click the right-most dropdown. This lets you select the value to define end conditions.
- Select Static Value.
- Enter 76 as the static value in the field below the dropdowns.
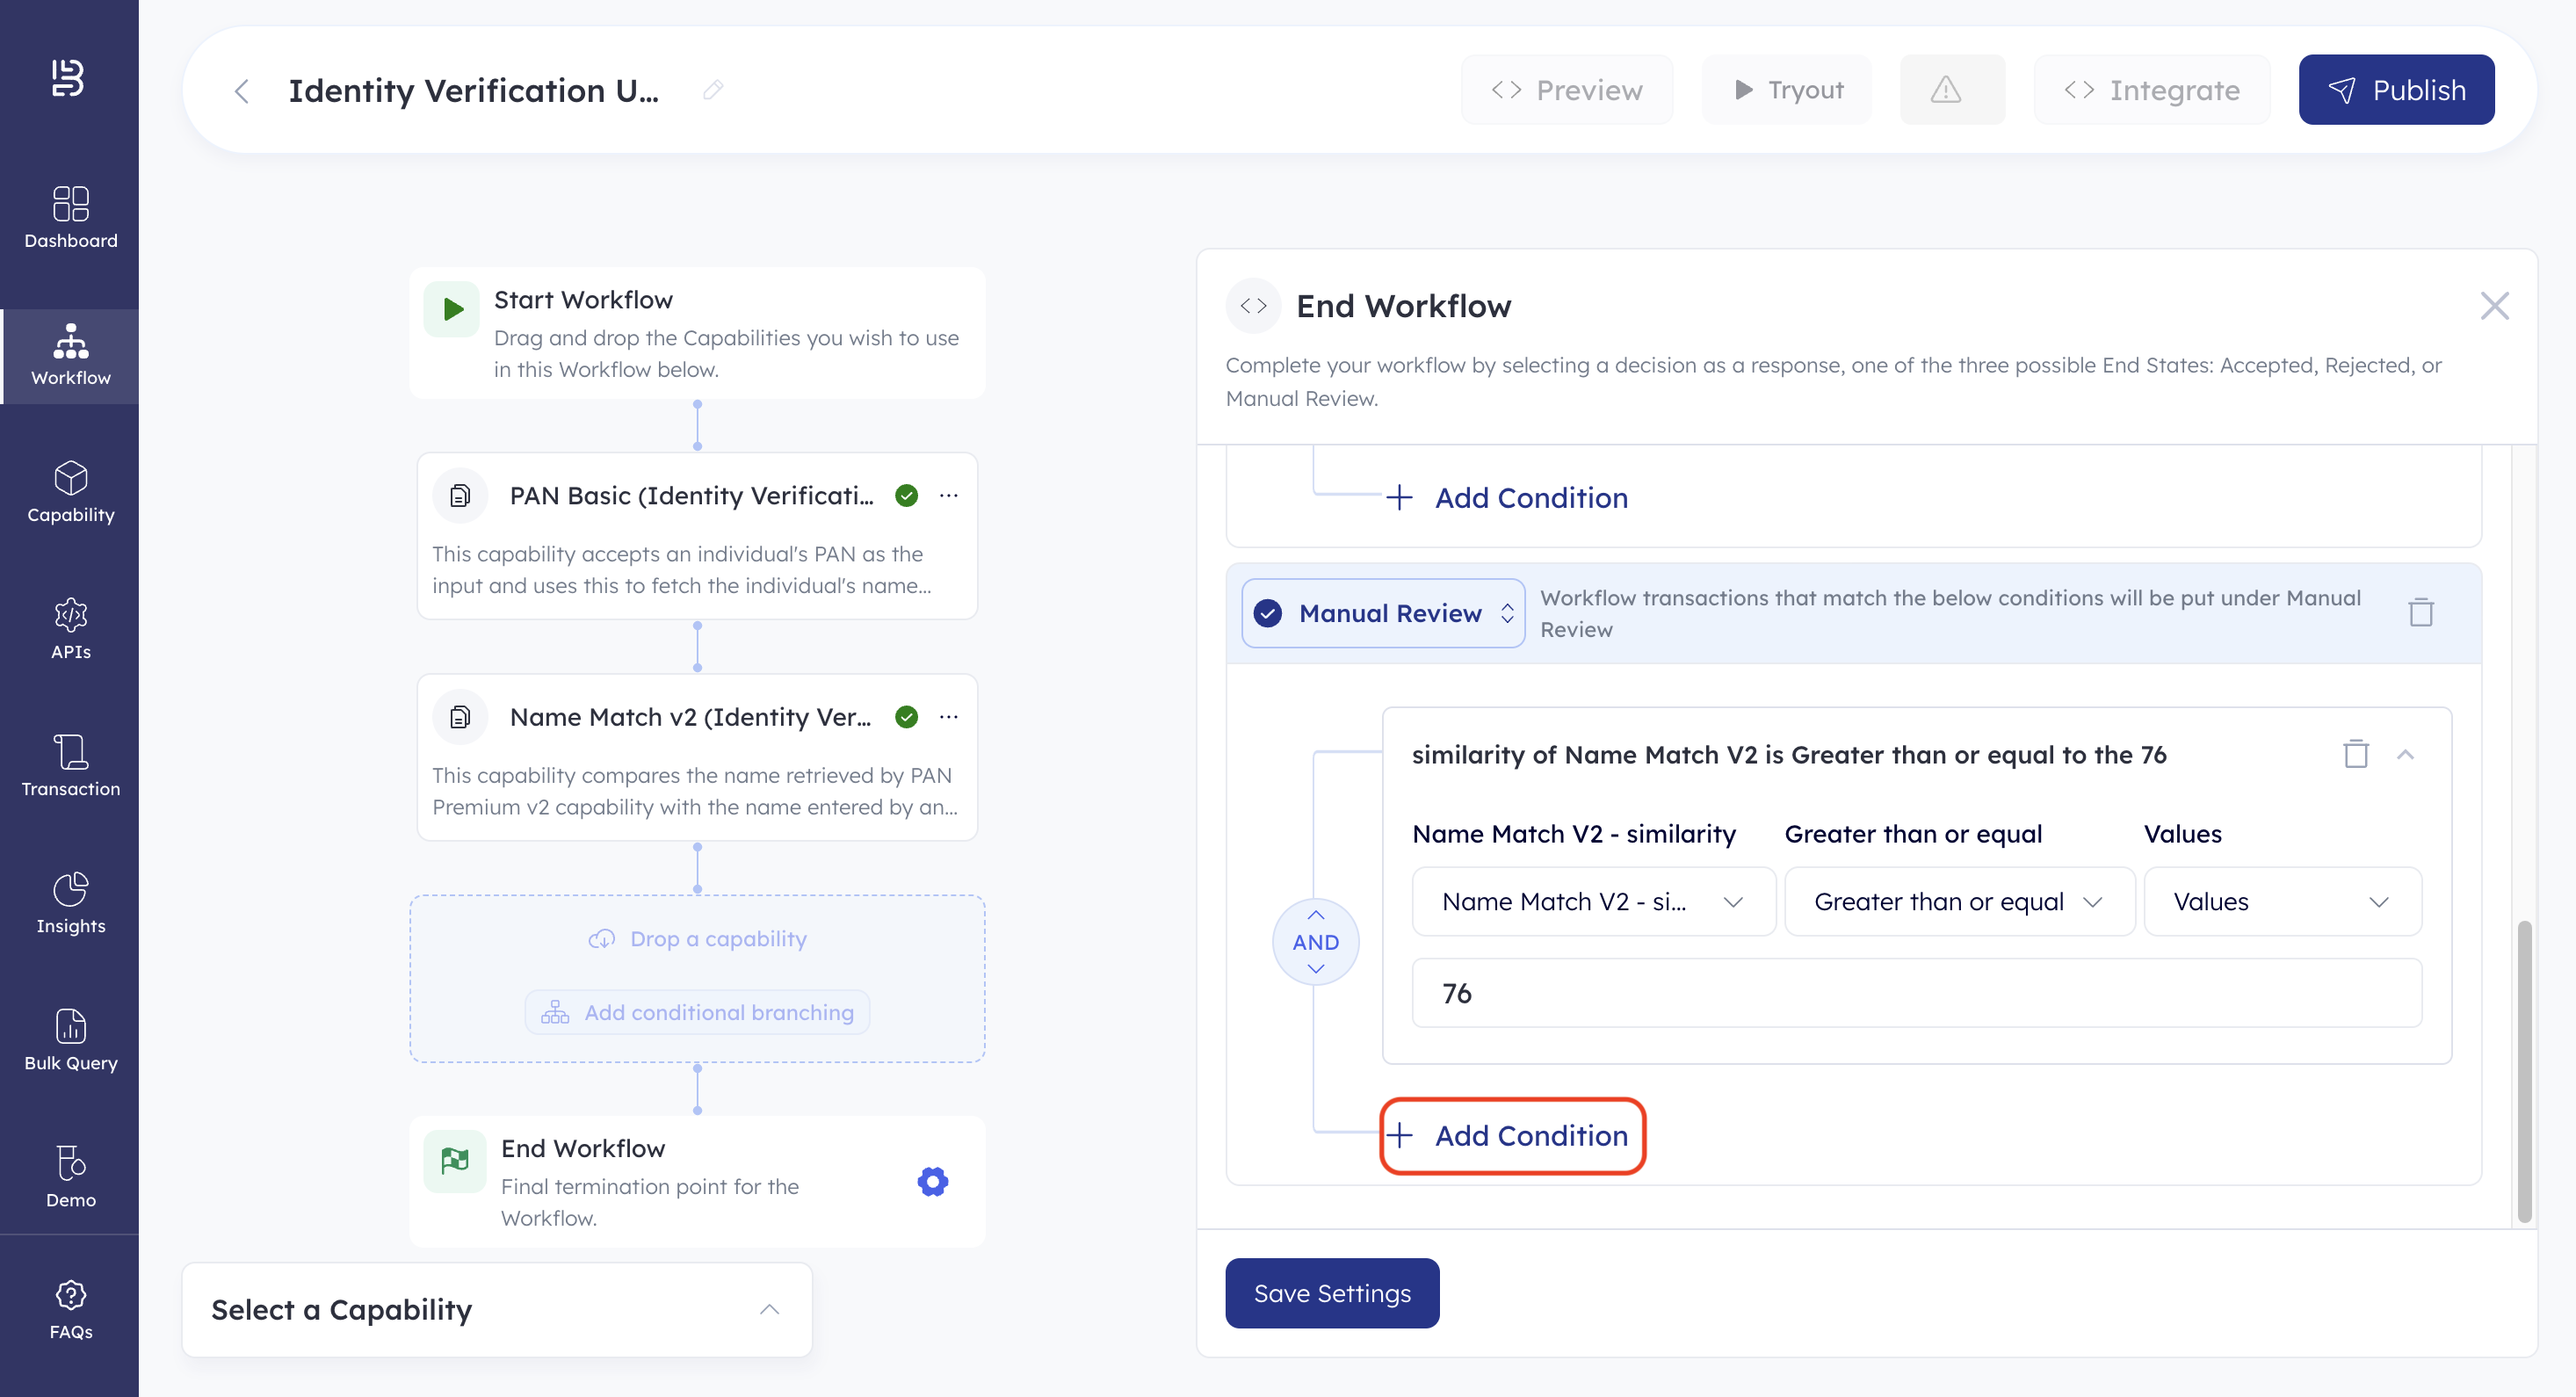
- Click + Add Condition. This allows you to define additional end conditions. These can either be other single conditions or a group of conditions.
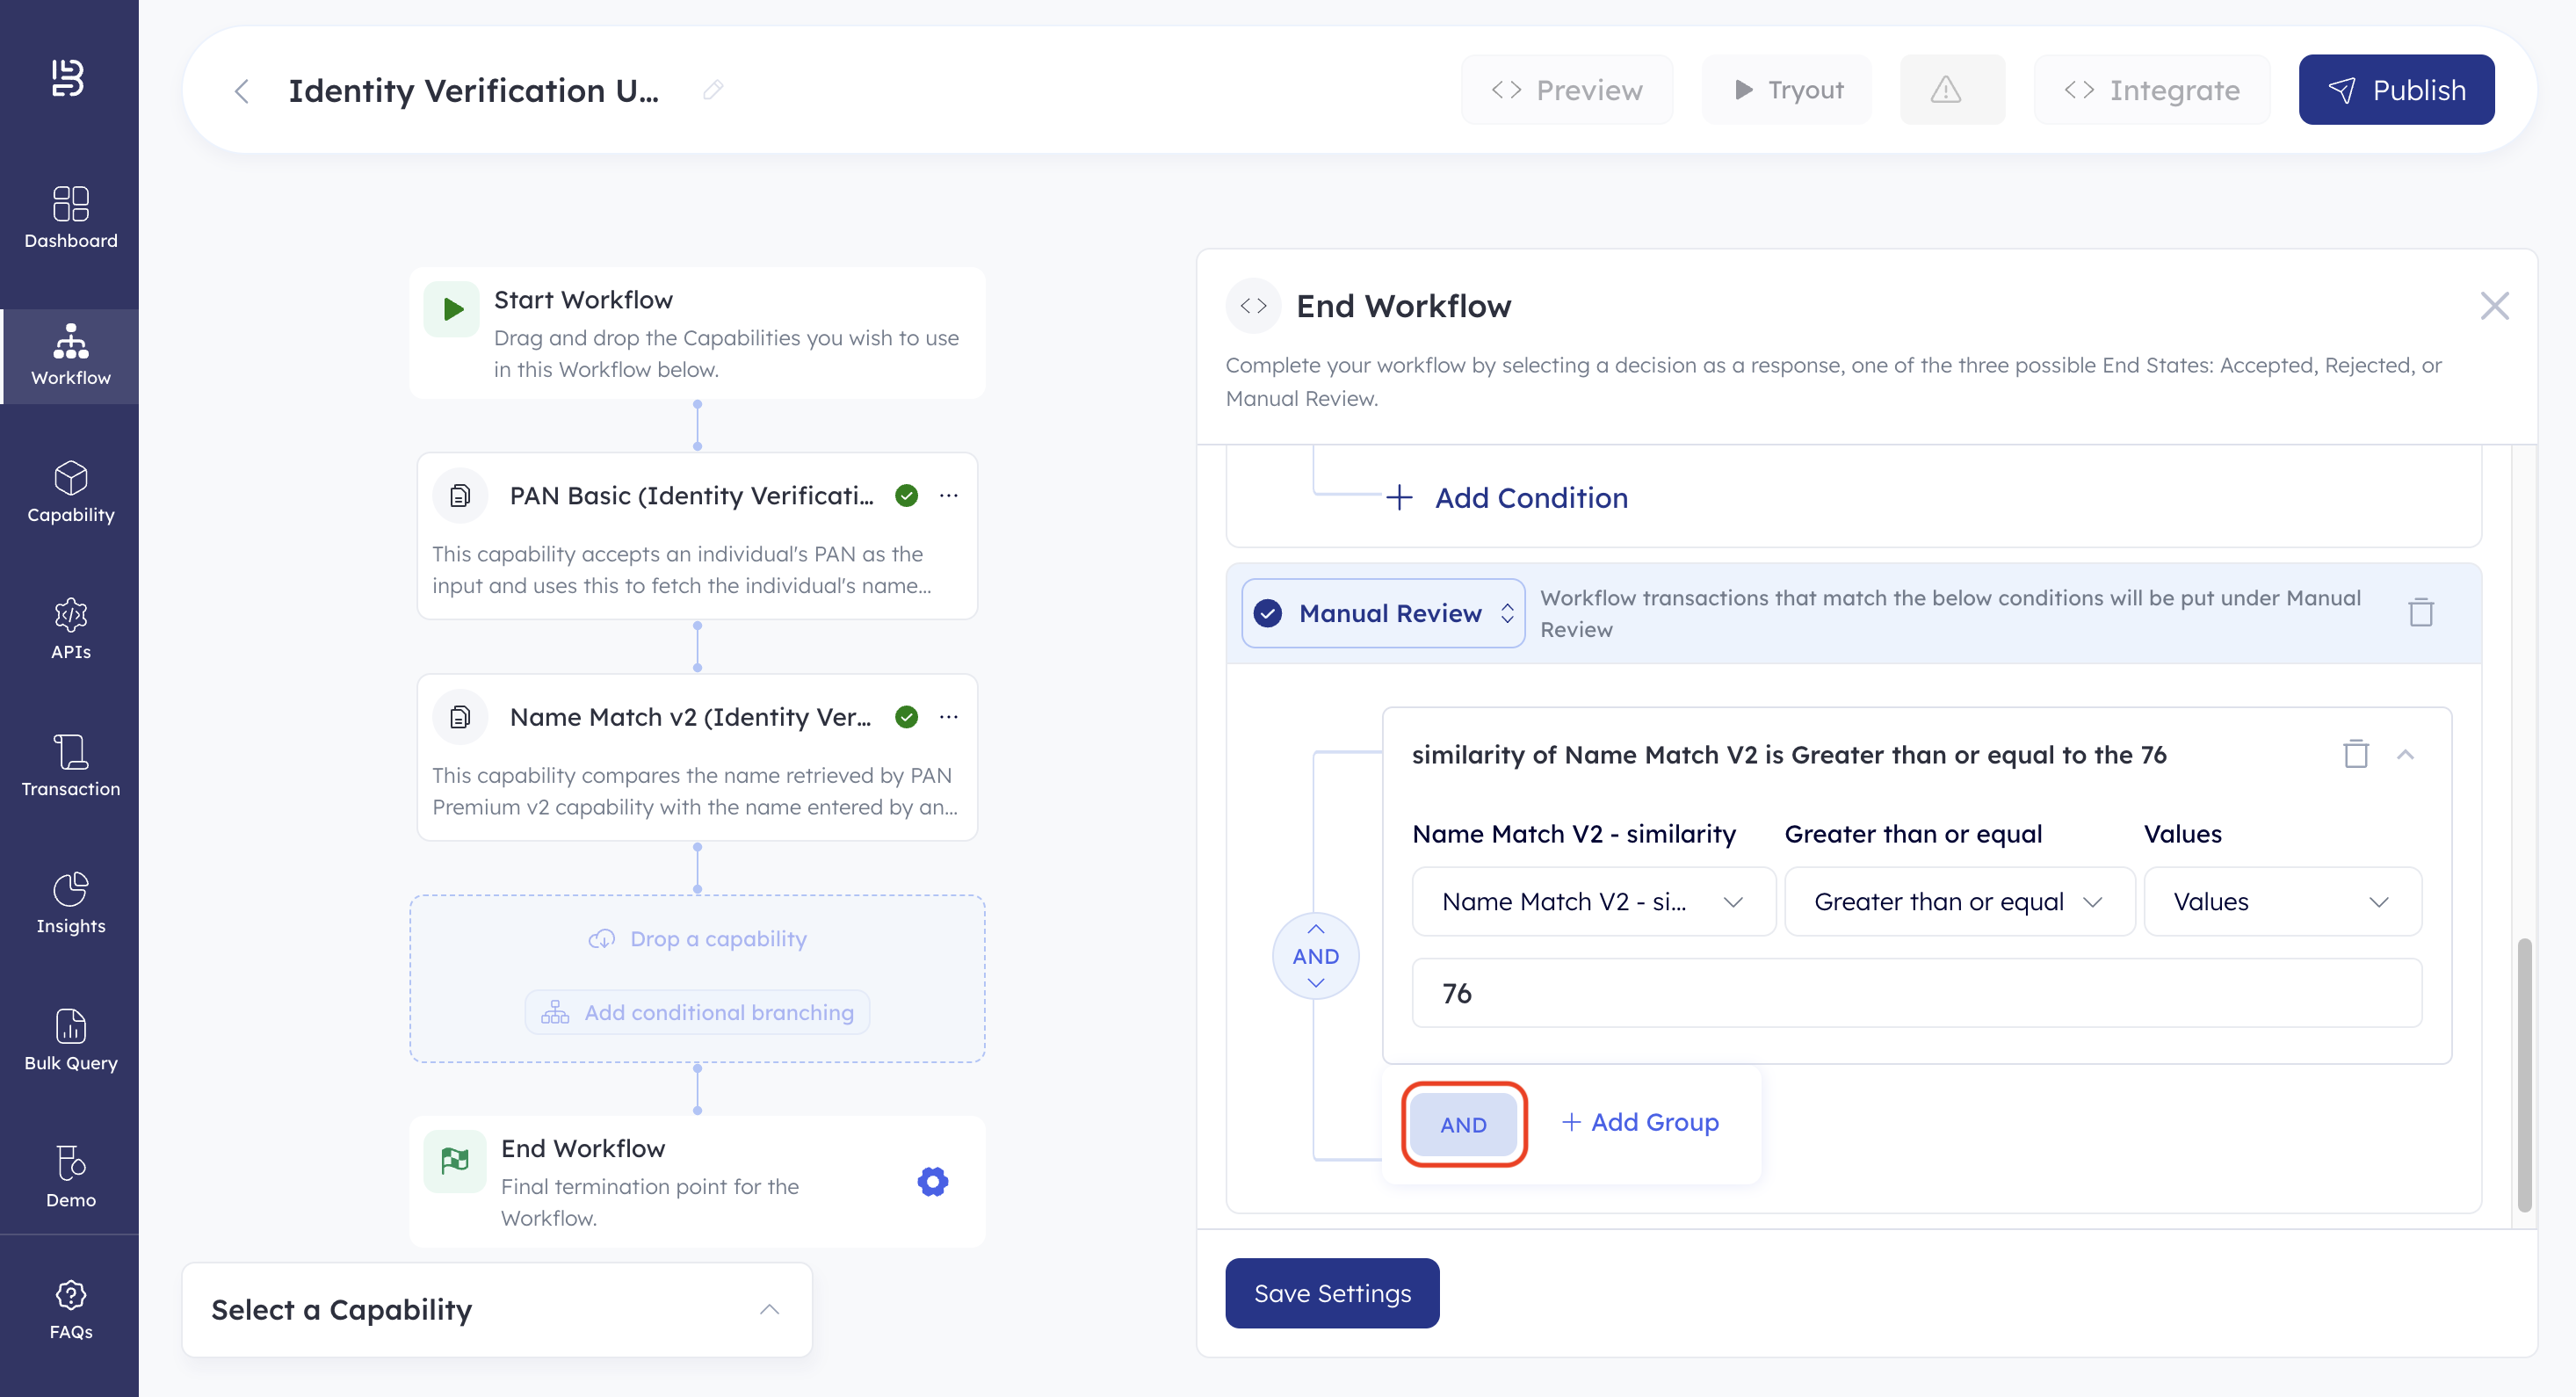
- Click AND. This lets you define additional end conditions.
- Click the condition dropdown.
- Click the first dropdown on the left. This lets you select the capability to define the end conditions.
- Select Name Match V2. This shows you a list of all parameters that can be used to define end conditions.
- Select Similarity. This is the parameter used to define end conditions.
- Click the middle dropdown. This lets you select the logical condition to define end conditions.
- Select Operator.
- Select Less than or equal logical operator.
- Click the right-most dropdown. This lets you select the value to define aend conditions.
- Select Static Value.
- Enter 84 as the static value in the field below the dropdowns. This defines the manual review condition as grater than or equal to 76 and less than or equal to 84.
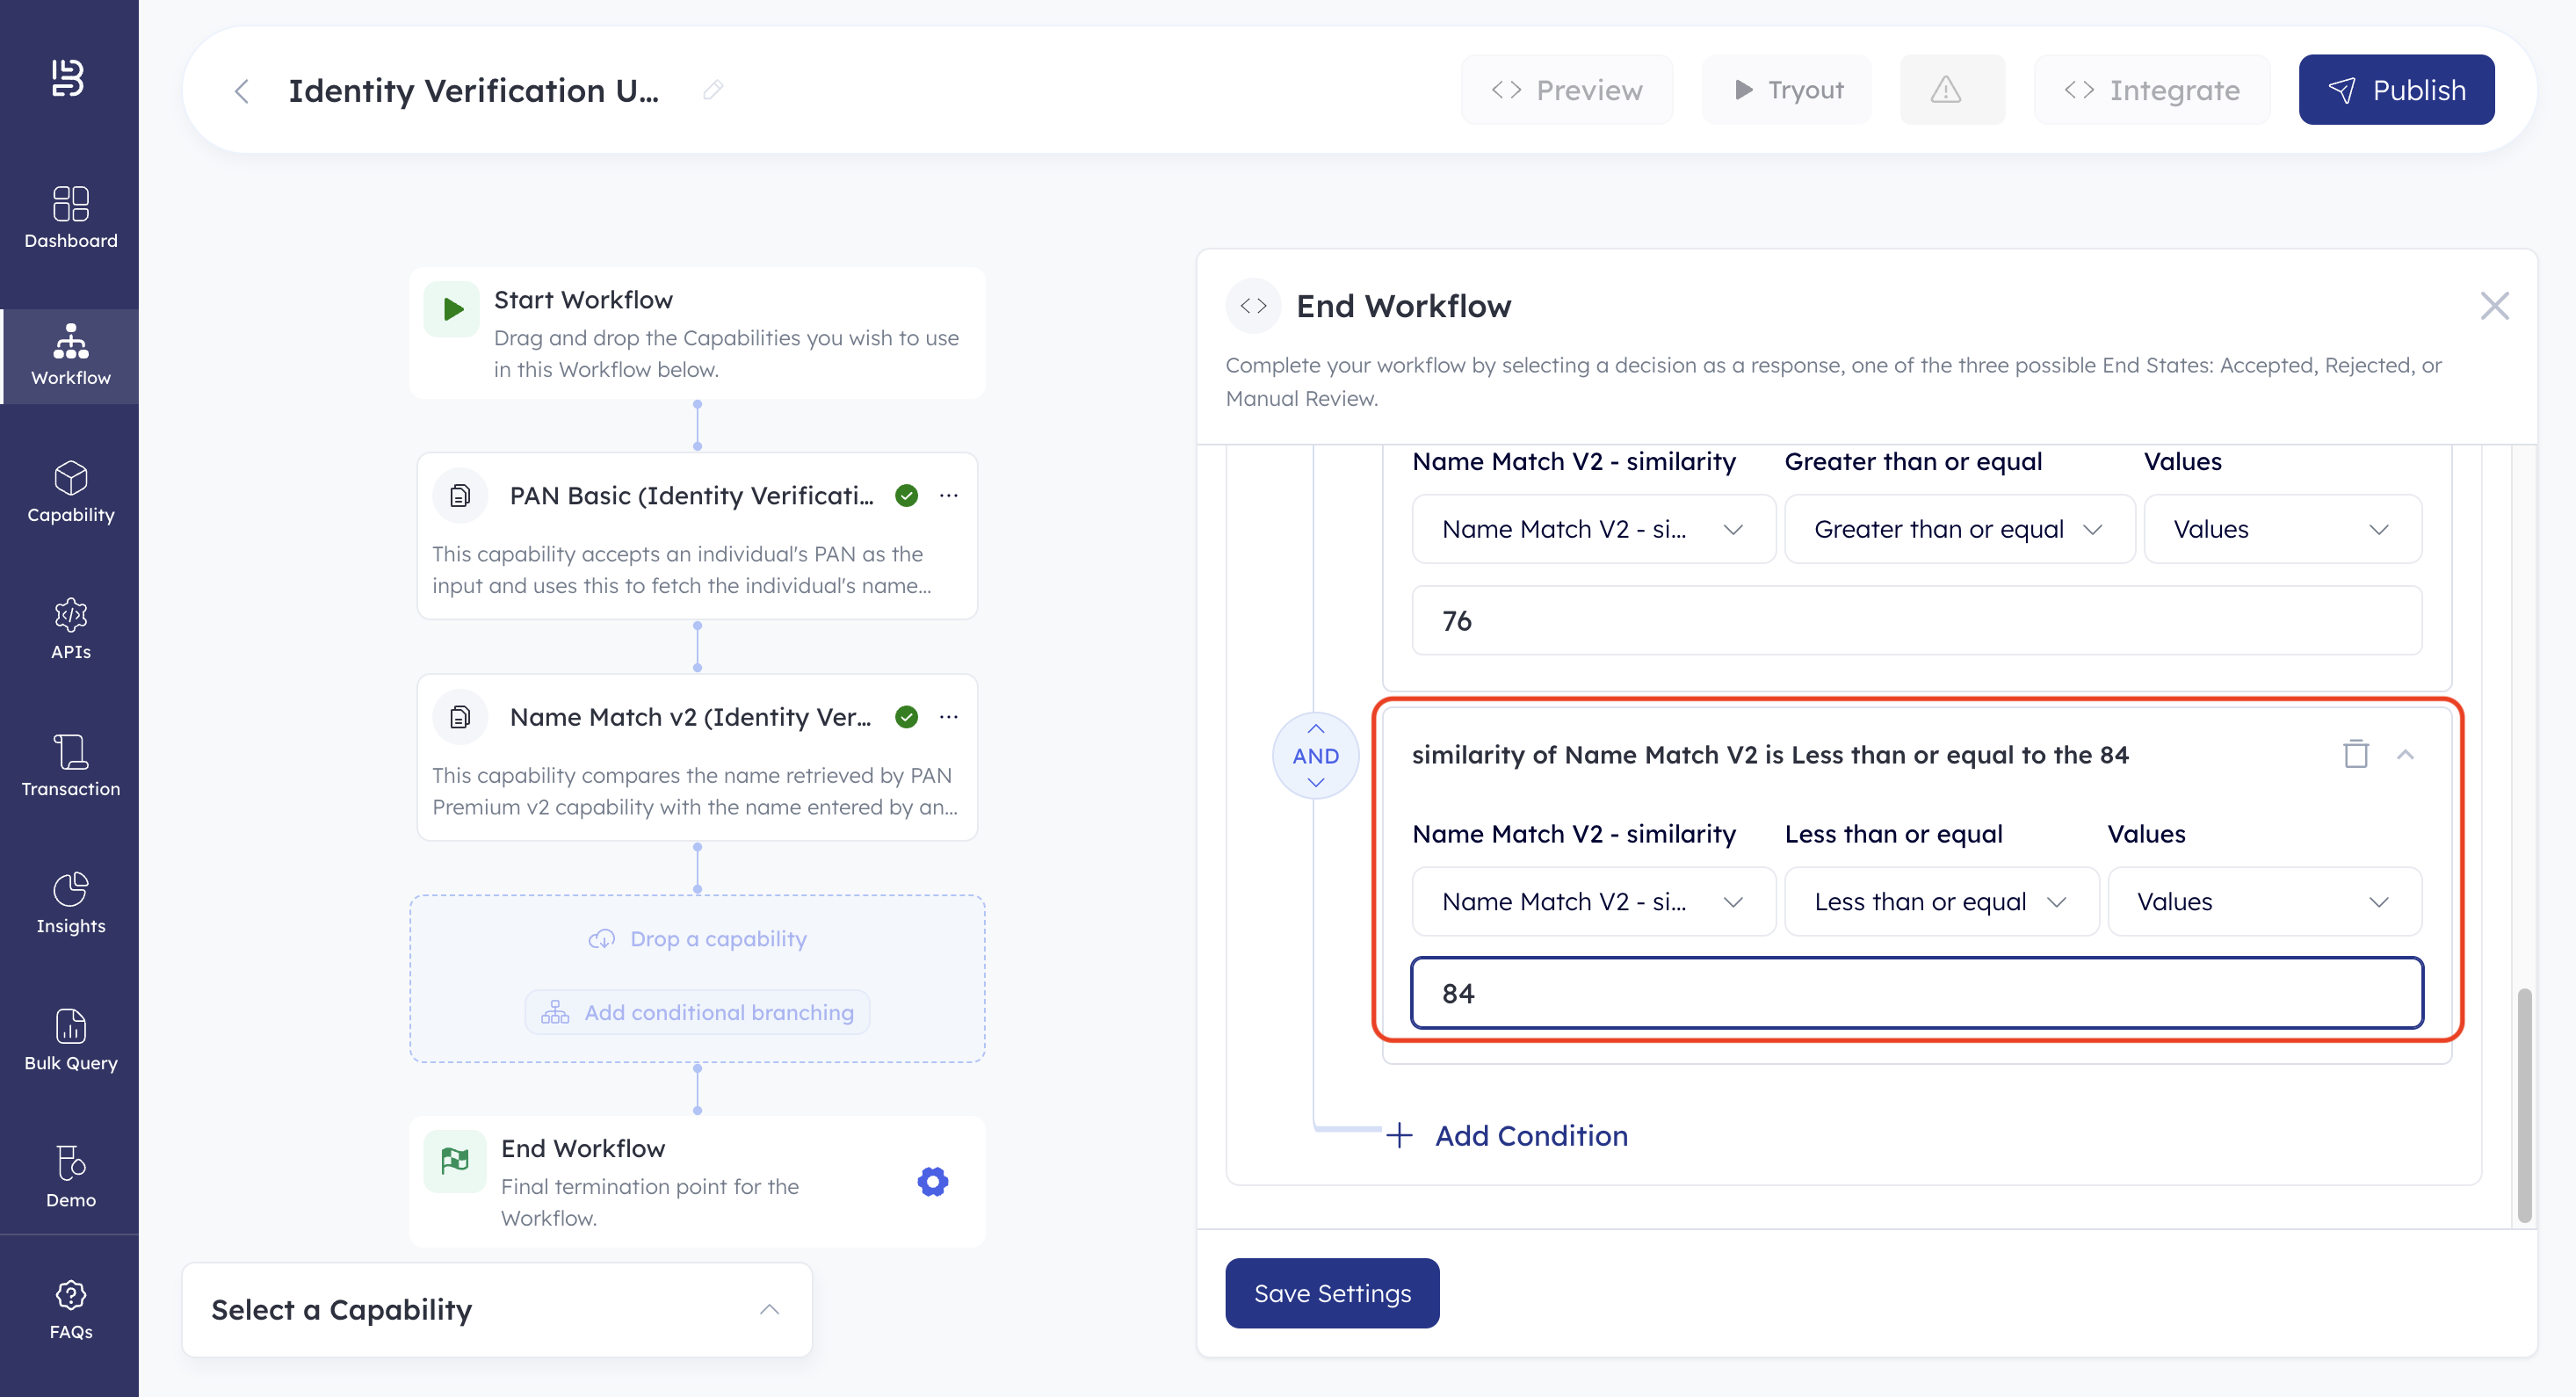
- Click Save. This saves the defined conditions.
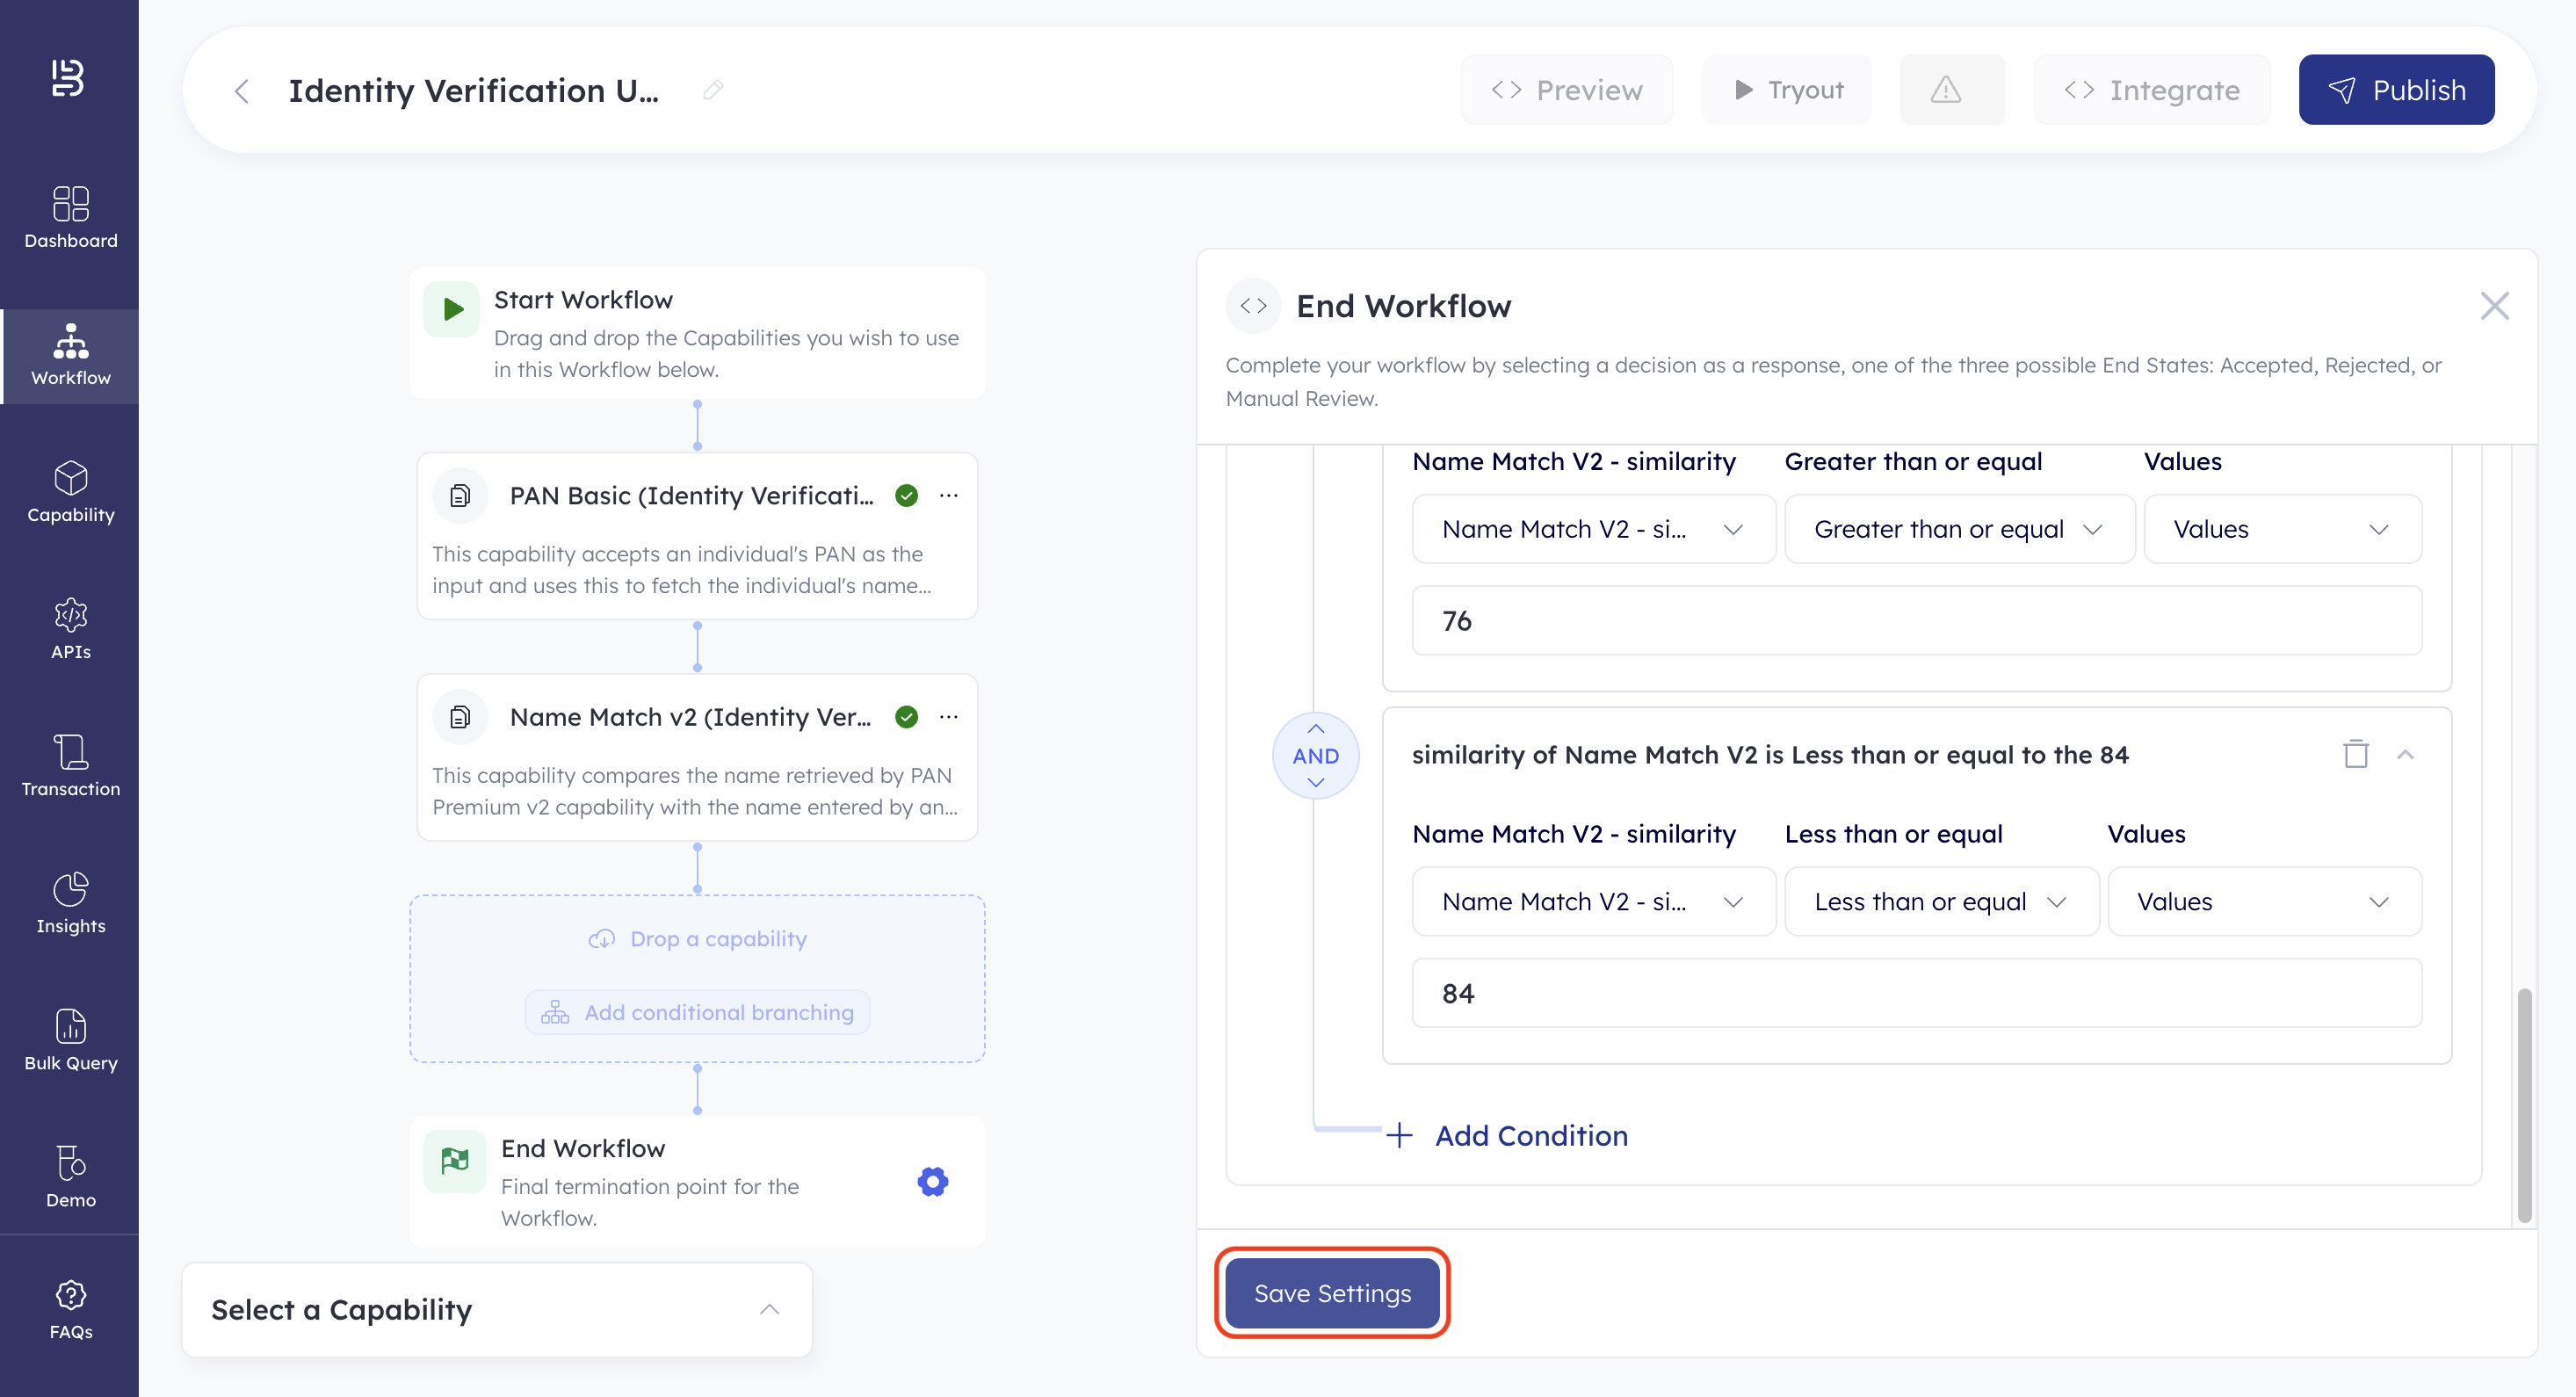
You've successfully defined the workflow conditions. Next, let us publish and test the workflow.
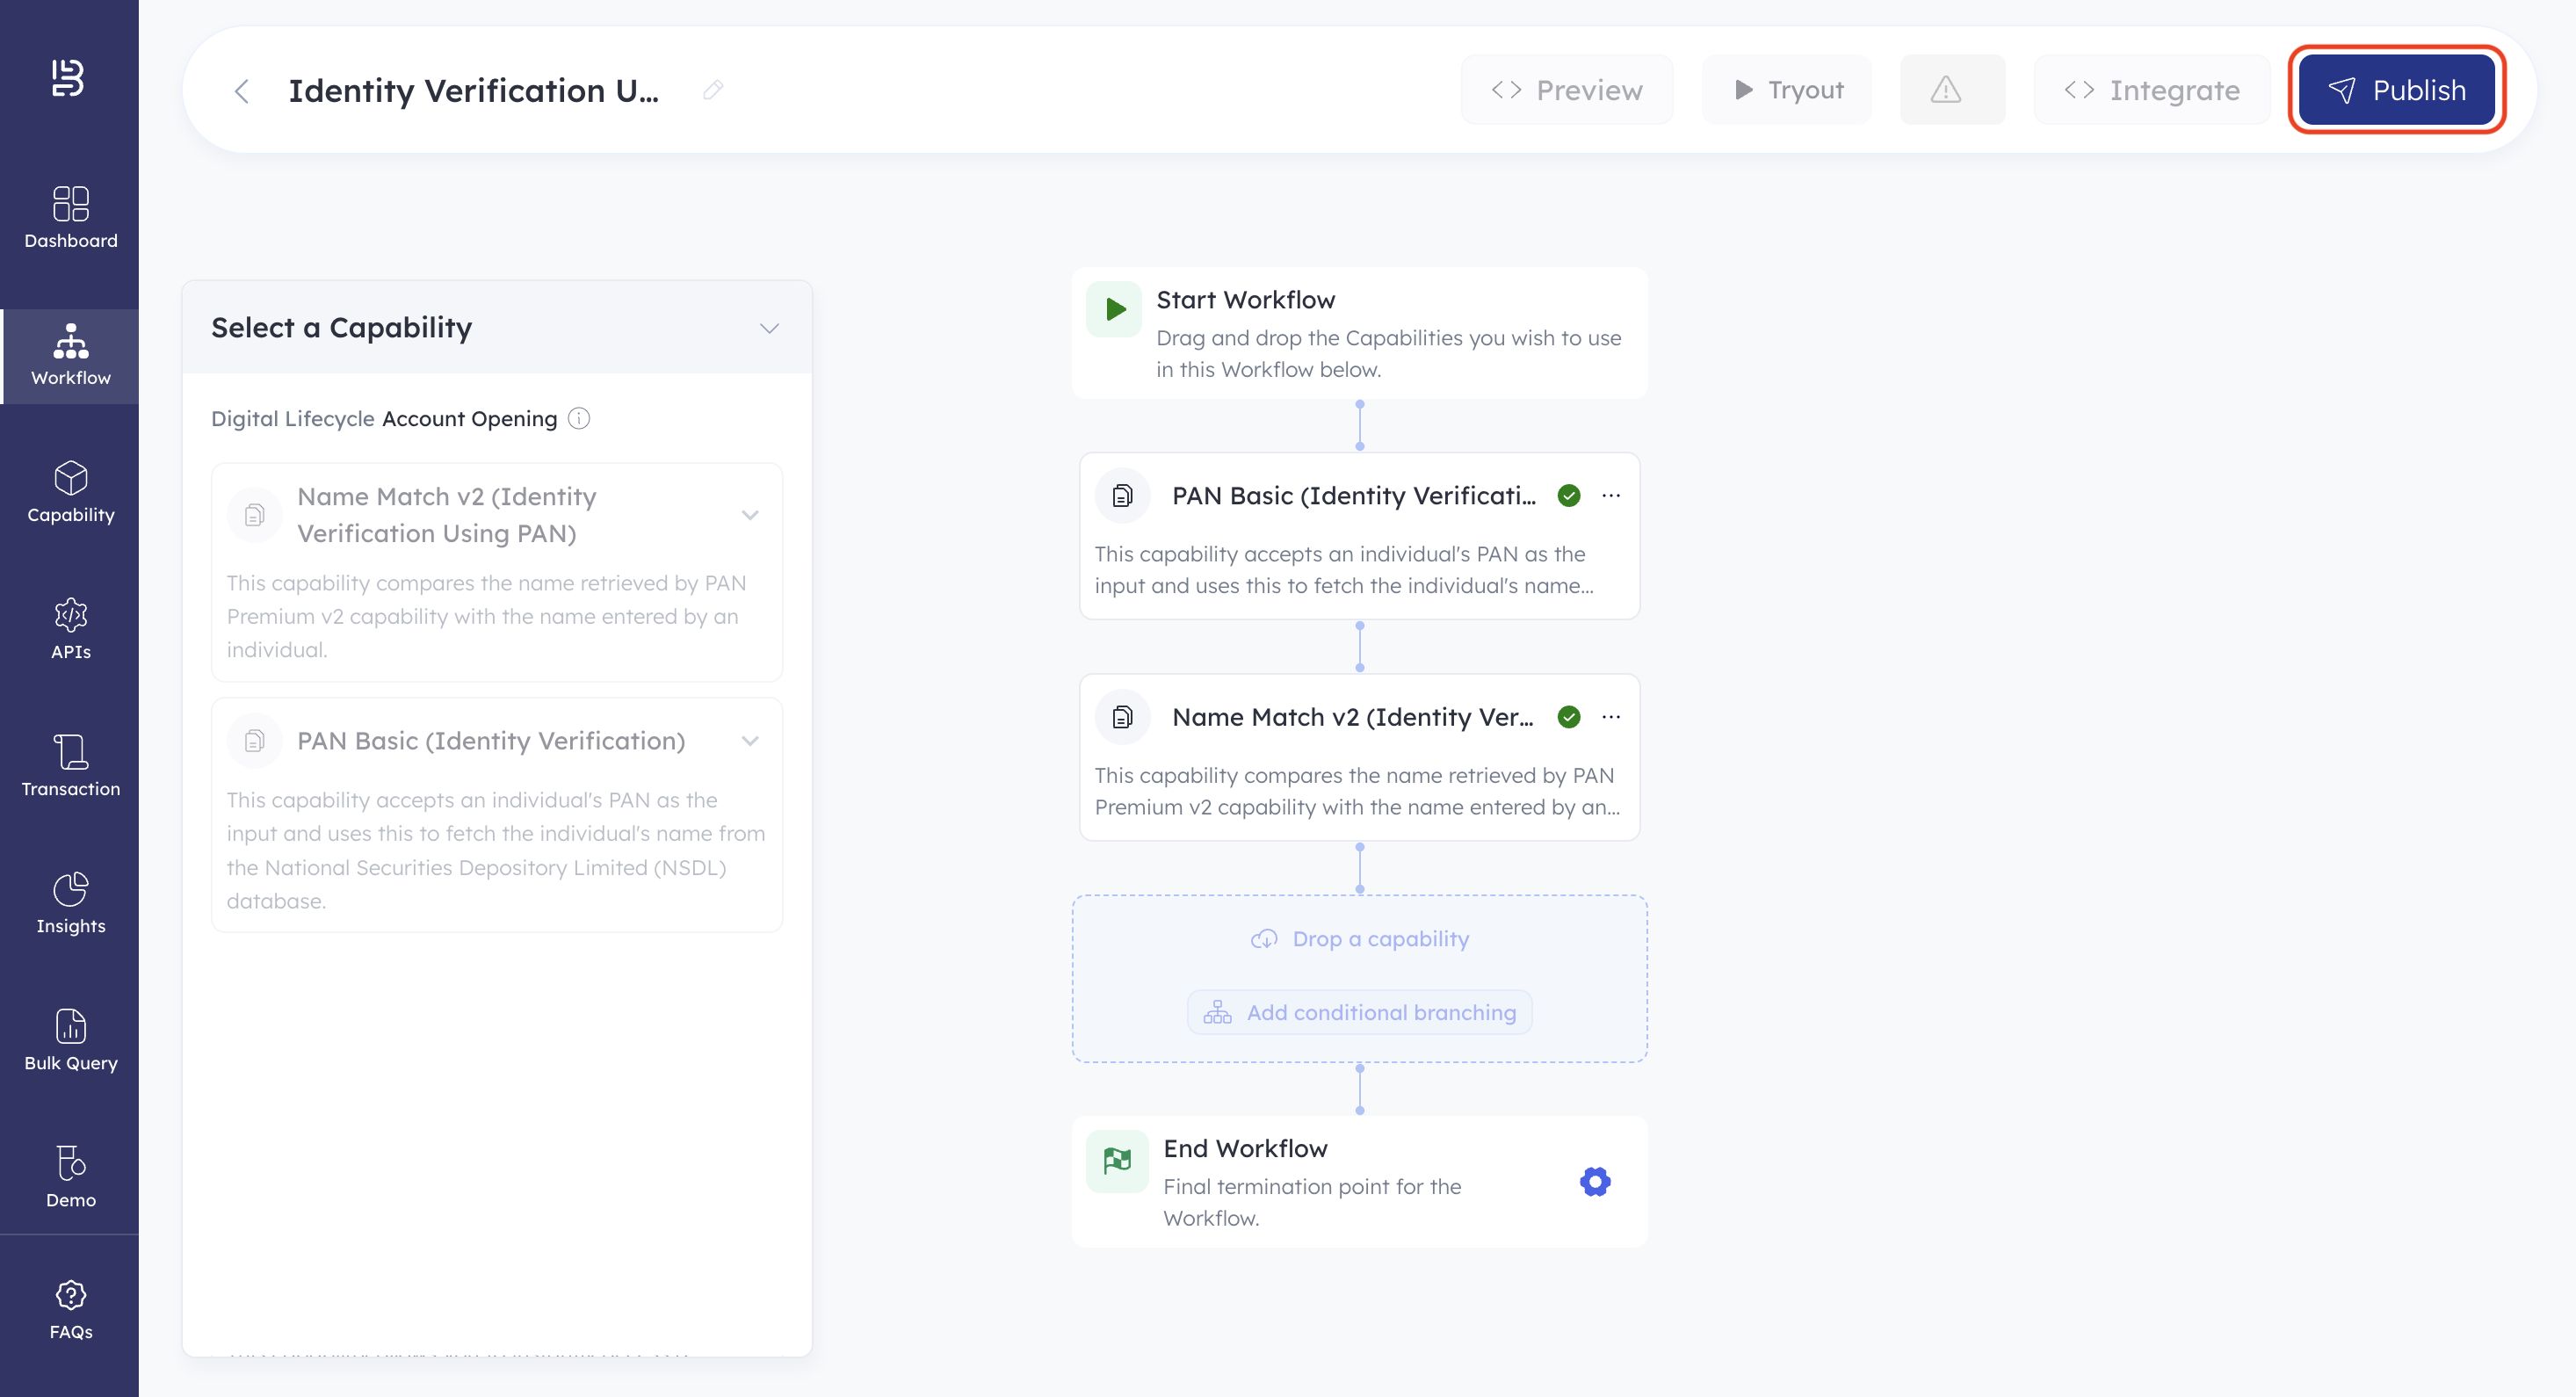
Publish the Workflow
Click Publish. The workflow is published and is ready to be used.
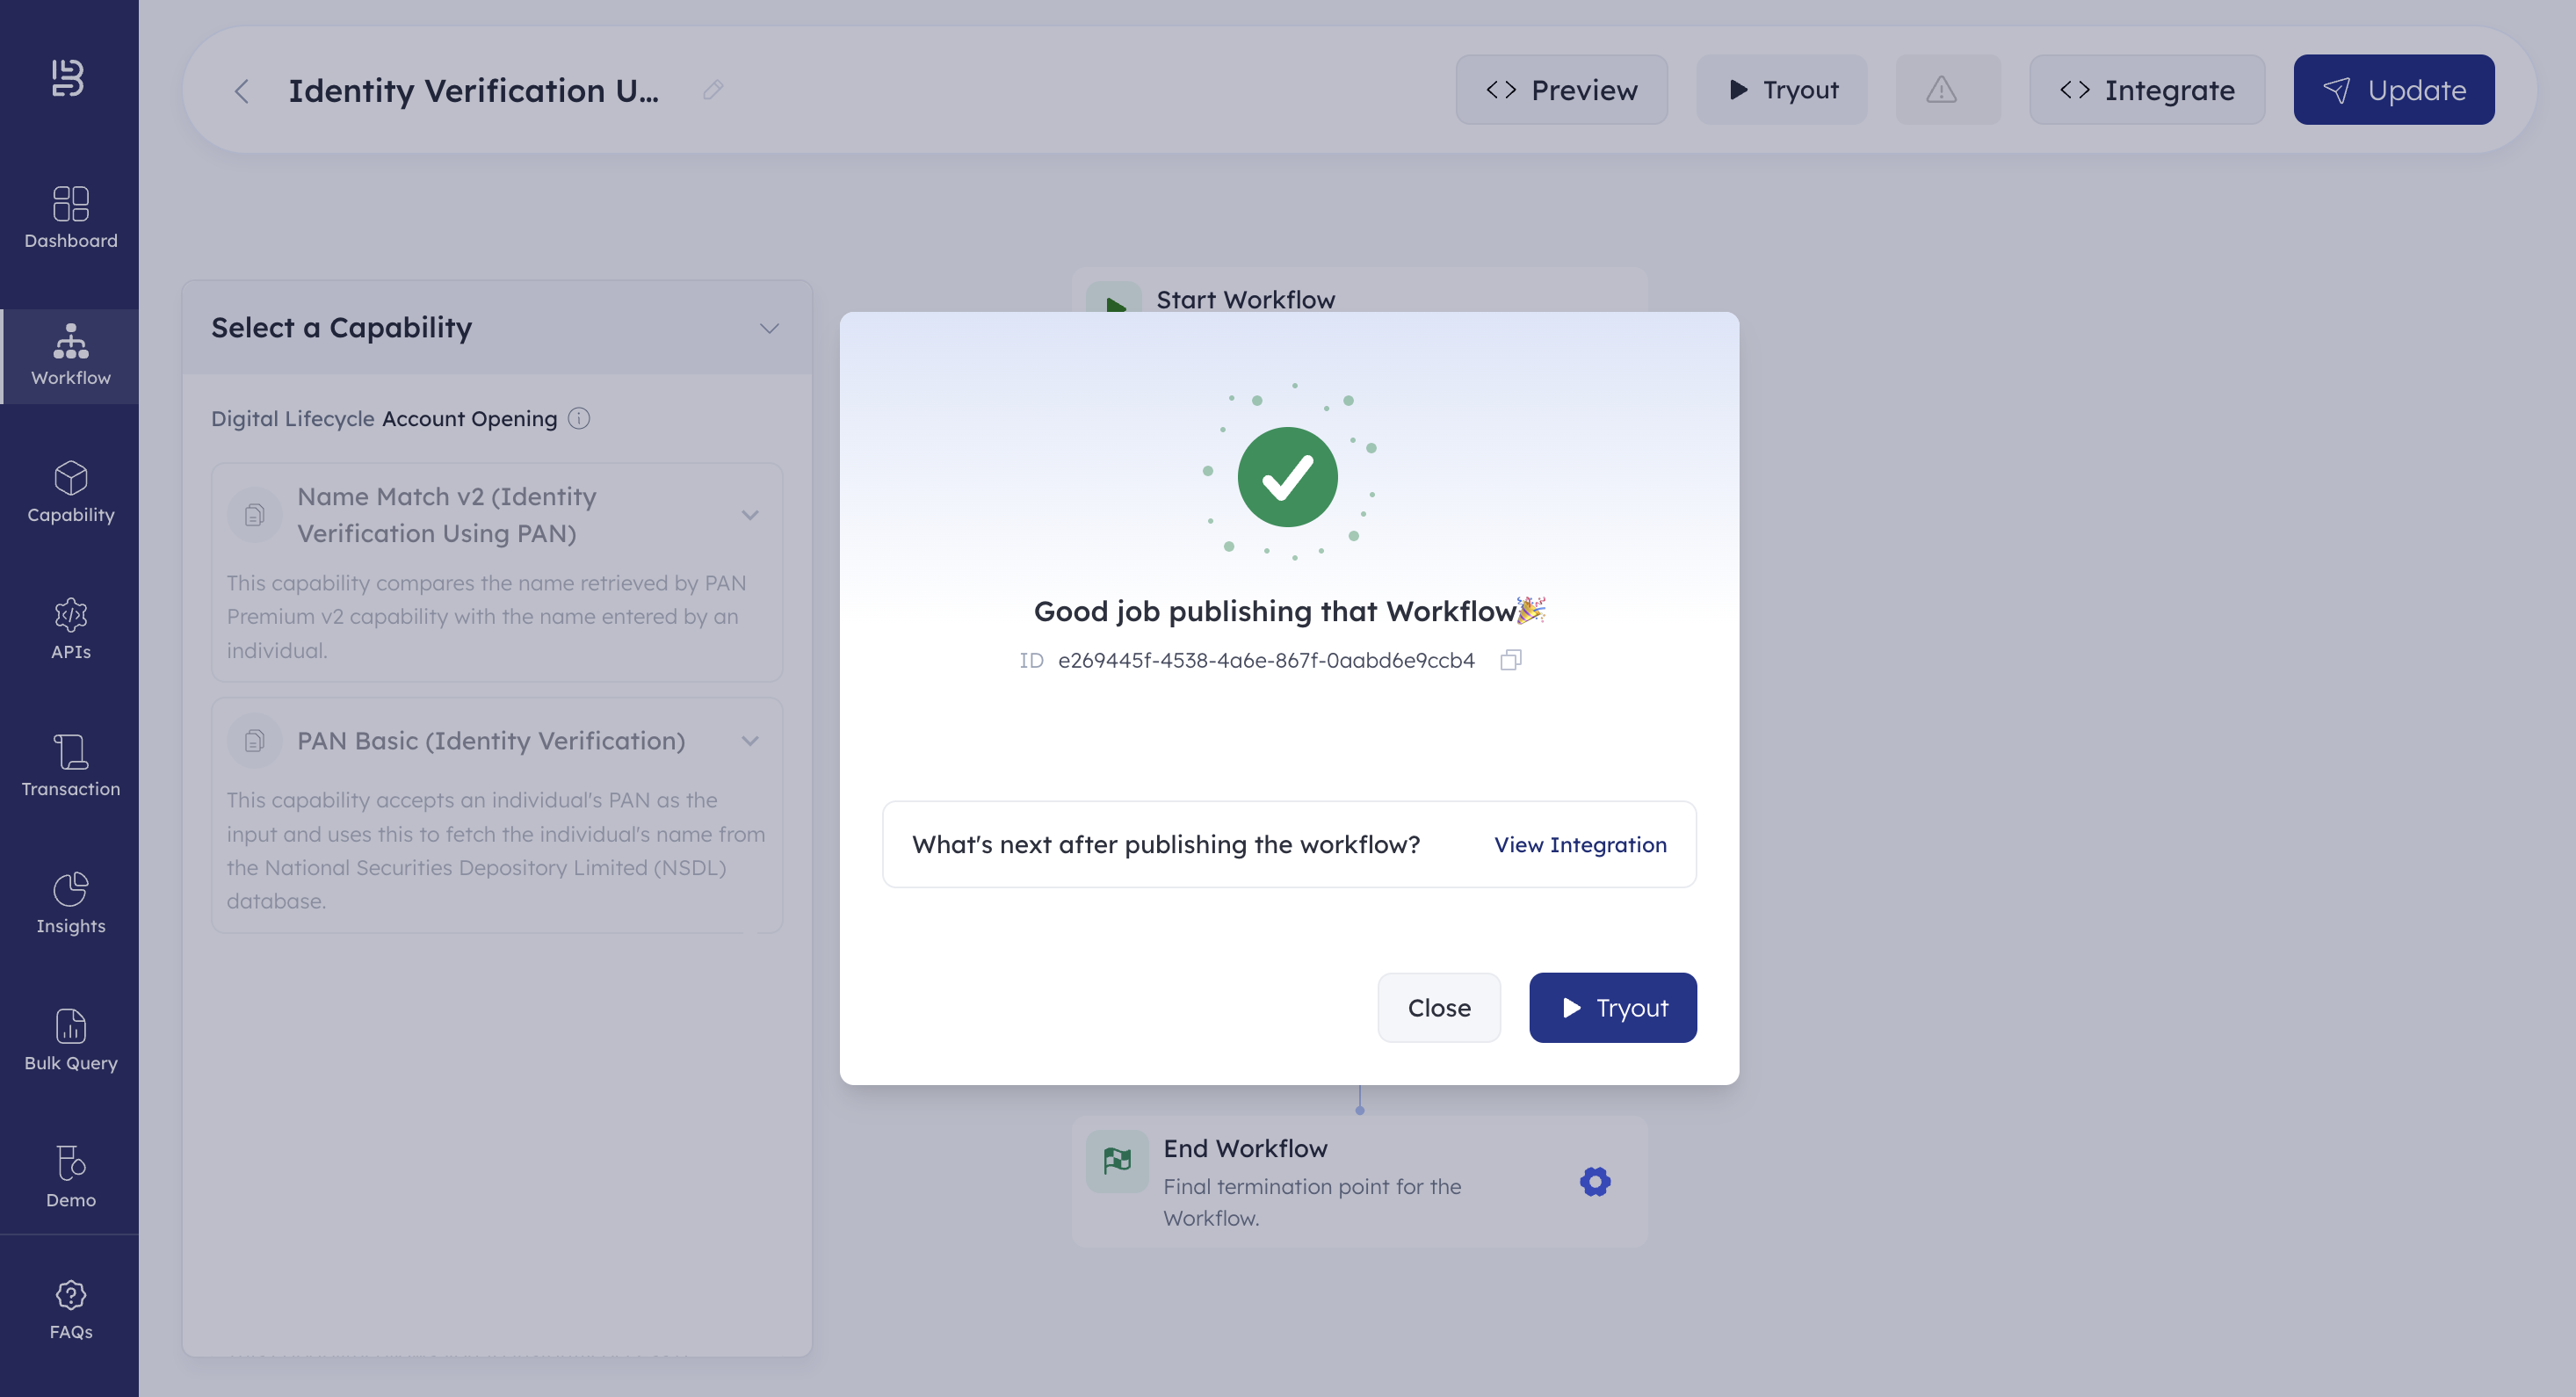
Test Workflow
You can test workflows either from the Dashboard or using Postman. Refer to the Test Workflow page for more details.
Updated 10 days ago